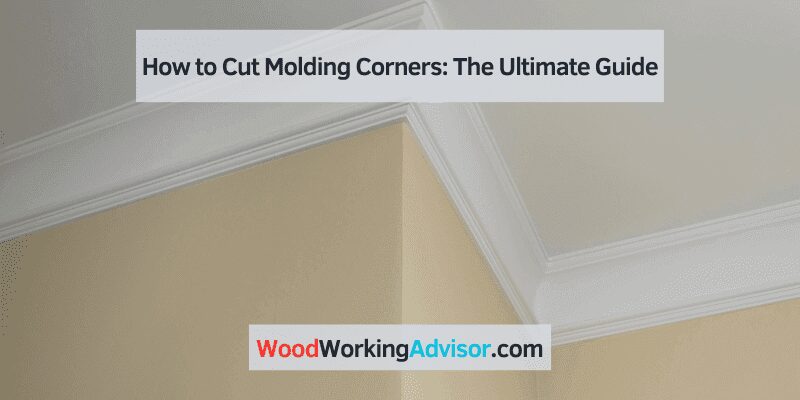
How to Cut Molding Corners: Crown Molding Inside & Outside Corner Guide
Cutting molding corners cleanly means setting a 45° miter for outside corners, then coping — not mitering — the inside corners so seasonal wood movement doesn’t open a gap. Get the angle or cope wrong and you’re left with a visible seam that no amount of caulk can hide. Below is the exact miter and cope technique for crown molding and baseboard, step by step — see our guide to woodworking tools, saws & cutting techniques for the right saw setup.
To cut molding corners: set your miter saw to 45° for outside corners and cope or miter at 45° for inside corners. For crown molding, tilt the molding upside-down against the fence (spring angle method) — this avoids setting a compound angle. Inside corners: cut one piece square, cope the second piece to fit over it. Outside corners: cut both pieces at matching 45° miters so they meet at the corner point.
Choosing The Right Molding For Your Project
Learn how to cut molding corners for your project with these expert tips. Discover the right techniques and tools to achieve seamless results for a professional finish.
Whether you’re renovating your home or working on a new construction project, choosing the right molding is essential for achieving a polished and finished look. The right molding can add character and elegance to any space, enhancing the overall aesthetic appeal.
But with so many options available, how do you know which molding is the right fit for your project? In this section, we will explore the factors to consider when selecting molding, the different types of molding available, and how to match molding to your existing decor.
Factors To Consider When Selecting Molding:
When choosing molding for your project, it’s important to consider several factors to ensure the perfect fit. Here are some key considerations to keep in mind:
- Style: The style of your space plays a crucial role in selecting the right molding. Whether your decor is traditional, contemporary, or somewhere in between, you’ll want to choose molding that complements the overall style.
- Size: Molding comes in various sizes, so it’s important to consider the scale of your room. Smaller rooms may benefit from thinner and more delicate moldings, while larger spaces can handle larger and more ornate profiles.
- Functionality: Think about the purpose of the room and the functionality of the molding. For example, if you’re installing crown molding, consider whether you want it to serve as a decorative element or hide wiring or lighting.
- Durability: Depending on the location of the molding, you’ll want to choose a material that can withstand wear and tear. Consider factors such as moisture resistance, impact resistance, and ease of maintenance.
- Budget: Molding comes in a range of materials and price points. Set a budget early on to help narrow down the options and ensure you find molding that fits within your financial constraints.
Different Types Of Molding Available:
Molding comes in various shapes, profiles, and materials, each serving a different purpose. Here are some common types of molding you might encounter:
- Crown molding: Crown molding adds a touch of elegance and sophistication to any room. It can be used at the junction of walls and ceilings or as a decorative element on built-in furniture.
- Baseboard molding: Baseboard molding, also known as skirting board, is used where walls meet the floor to provide a finished look. It can also help protect the wall from scuffs and damage.
- Chair rail molding: Chair rail molding is typically installed along the walls at chair height and serves both a functional and decorative purpose. It helps protect the walls from furniture damage while adding visual interest to the room.
- Decorative molding: Decorative molding encompasses a wide range of styles and profiles, including panel molding, picture rail molding, and more. These moldings are often used to add architectural interest and detail to walls and ceilings.
How To Match Molding To Your Existing Decor:
When incorporating molding into your space, it’s important to ensure that it complements your existing decor. Here are some tips for matching molding to your decor:
- Consider the architectural style: If your home has a specific architectural style, such as Victorian or Craftsman, consider selecting molding that aligns with that particular style to maintain consistency throughout.
- Take cues from existing trim: Look at the trim and molding already present in your space. Consider matching the style, profile, and color of the new molding to create a cohesive look.
- Coordinate with color scheme: Pay attention to the color scheme of your room. Choose a molding color that either complements or contrasts with the walls and other elements in the space.
- Balance proportion: Ensure the size and scale of the molding align with the overall proportions of the room. Avoid selecting molding that is too large or too small for the space.
By carefully considering the factors mentioned above and exploring the different types of molding available, you’ll be able to choose the perfect molding for your project. Matching the molding to your existing decor will help create a harmonious and visually appealing space that you can be proud of.

Understanding The Different Types Of Corners
Learn how to cut molding corners like a pro with our comprehensive guide on understanding the different types of corners. Master the techniques and create seamless corners for a polished finish to your home decor projects.
When it comes to cutting molding corners, it’s essential to understand the different types of corners you may encounter. Two primary types are inside corners and outside corners. Additionally, there are two common techniques for cutting corners: coping and mitering.
Each technique has its own benefits and limitations. Let’s explore each type of corner and the corresponding cutting technique in more detail:
Inside Corners Vs. Outside Corners:
Inside corners:
- Inside corners are formed when two walls meet at an angle, creating an inward-facing corner.
- These corners can be found in rooms with two intersecting walls or where a wall meets a ceiling.
- Inside corners require careful cutting to achieve a seamless fit.
Outside corners:
- Outside corners are formed when two walls meet at an angle, creating an outward-facing corner.
- These corners can be found where walls meet on the exterior of a building or in decorative trim work.
- Cutting outside corners requires careful measurement and precision to ensure a clean appearance.
Coping Vs. Mitering Corners:
Coping corners:
- Coping is a technique used for cutting inside corners.
- It involves shaping the end of one molding piece to fit the profile of the intersecting molding piece.
- Coping is an effective method when dealing with uneven walls or imperfect angles.
- This technique provides a snug and seamless fit between the two molding pieces.
Mitering corners:
- Mitering is a technique used for cutting both inside and outside corners.
- It involves cutting each molding piece at a 45-degree angle to form a precise joint at the corner.
- Mitered corners create a clean and sharp look, especially when the molding has a consistent profile.
- This technique is ideal for corners that meet at perfect 90-degree angles.
Benefits And Limitations Of Each Technique:
Coping corners:
Benefits:
- Allows for a seamless fit in cases where walls are not perfectly straight or angles are not exact.
- Provides flexibility to accommodate any discrepancies in wall surfaces or angles.
- Can be easily corrected if mistakes occur during the cutting process.
Limitations:
- Requires skill and practice to ensure accurate coping cuts.
- Can be time-consuming, especially for intricate or complex moldings.
- May not be suitable for moldings with intricate profiles that are difficult to replicate.
Mitering corners:
Benefits:
- Provides a precise and clean joint, especially for moldings with consistent profiles.
- Creates a professional and polished appearance in both inside and outside corners.
- Relatively quicker to execute once the proper measurements and angles are determined.
Limitations:
- Requires precise measurement and cutting to ensure accurate corner joints.
- May not work well with uneven walls or imperfect angles.
- Mistakes in cutting cannot be easily corrected and may require additional material.
Understanding the different types of corners and the associated cutting techniques is crucial for successfully cutting molding corners. Whether you choose coping or mitering, each technique has its own advantages and limitations. Consider the specifics of your project and the desired outcome to determine the most suitable technique for achieving the desired results.
| Technique | Best For | Difficulty | Tools Needed | Gap Risk |
|---|---|---|---|---|
| Coping (inside corners) | Inside corners, painted molding, uneven walls | Moderate | coping saw, miter saw | Low — adjusts to wall angle |
| Mitering (inside corners) | Clean walls, stained wood, tight fits | Easy | Miter saw only | Medium — gaps if walls not 90° |
| Mitering (outside corners) | Crown molding, baseboard outside corners | Easy–Moderate | Miter saw | Medium — needs tight fit |
| Scarf joint | Joining two pieces on long runs | Easy | Miter saw | Low with proper overlap |
| Butt joint + caulk | Quick installs, painted trim | Easy | Hand saw or miter saw | Covered by caulk |

Cutting Crown Molding Corners: Step-by-Step
Cutting crown molding corners trips up most beginners because crown sits at a spring angle — it rests against both the wall and ceiling at the same time. Getting this right requires either a compound miter saw setup or the flat-on-the-table method. The easiest approach for DIYers is the upside-down on the fence method: tilt the crown so it leans against the miter saw fence exactly as it leans against the wall, then cut at a simple 45° miter.
Inside Crown Molding Corners (Coped Joint)
- Cut the first piece square at 90° — it runs wall-to-wall and butts into the corner.
- Cut the second piece with the miter saw at 45°, face up, to expose the profile.
- Use a coping saw to cut along the exposed profile line, undercutting slightly (5–10°) so only the face edge contacts the first piece.
- Test fit, pare with a utility knife if needed, then nail into place.
Outside Crown Molding Corners (Miter Joint)
- Set miter saw to 45° left for one piece and 45° right for the other.
- Both pieces must be cut with the crown held upside-down against the fence at the same spring angle.
- Dry-fit both pieces — the miter points should meet exactly at the outside corner tip.
- Glue the miter joint before nailing to prevent the joint from opening as wood moves seasonally.
How to Cut Crown Molding Corners the Easy Way (Flat Method)
If your saw supports compound angles, lay the crown flat on the saw table and set both a miter angle and a bevel angle based on your spring angle (most common: 38° spring = 33.9° miter + 31.6° bevel). This is harder to set up but faster for production cuts on long runs.
Recommended: Compound Miter Saw for Crown Molding
A sliding compound miter saw lets you cut crown molding flat on the table using compound angles — faster and more accurate than the fence method for production work.
| Check current price on Amazon |
As an Amazon Associate we earn from qualifying purchases.
Tools And Materials Needed For Cutting Molding Corners
To cut molding corners effectively, you’ll need a few essential tools and materials, including a miter saw, measuring tape, pencil, coping saw, and safety goggles. Ensure accurate measurements and take proper safety precautions for precise and clean results.
Cutting molding corners can be a bit tricky, but with the right tools, materials, and safety precautions, you can achieve accurate cuts and smooth finishes. In this section, we will explore the essential tools needed for accurate cuts, recommended materials for smooth finishes, and safety precautions to keep in mind while working with molding.
Essential Tools For Accurate Cuts:
- Miter saw: A miter saw is a must-have tool for cutting molding corners with precision. It allows you to make angled cuts easily and accurately.
- Coping saw: A coping saw is handy when it comes to intricate cuts for molding corners. It allows you to cut curves and create a snug fit for moldings that meet at different angles.
- Measuring tape: Accurate measurements are crucial for cutting molding corners perfectly, so a reliable measuring tape is essential.
- Carpenter’s pencil: A carpenter’s pencil with a sharp point will help you mark the cut lines accurately on the molding.
- Combination square: A combination square helps ensure that your cuts are square by providing a 90-degree angle reference.
Recommended Materials For Smooth Finishes:
- Wood filler: When cutting molding corners, there might be small gaps or imperfections. A quality wood filler helps fill in these gaps and provides a smooth, seamless finish.
- Sandpaper: Sandpaper is necessary for smoothing rough edges and achieving a polished look on the molding. Choose different grits, starting with rougher grits and gradually moving to finer grits for a silky-smooth finish.
- Paint or stain: Depending on your preference, you may want to paint or stain the molding. Choose high-quality paint or stain that complements your overall design and provides a durable and long-lasting finish.
Safety Precautions For Working With Molding:
- Wear safety goggles: Protect your eyes from any flying debris or dust particles that may be generated during the cutting process. Safety goggles will safeguard your vision against any potential accidents.
- Use a dust mask: Dust from cutting and sanding can be harmful when inhaled. Protect your respiratory system by wearing a dust mask to filter out these particles.
- Secure the molding: Ensure that the molding is securely clamped down or firmly held in place before making any cuts. This will prevent any movement or slipping, reducing the risk of accidents.
- Take breaks when needed: Cutting and working with molding can be physically demanding. Take regular breaks to avoid fatigue and maintain focus on accurate and safe cutting techniques.
Remember, investing in the right tools, using quality materials, and prioritizing safety measures are essential when cutting molding corners. By following these guidelines, you can achieve precise cuts and smooth finishes that will enhance the overall appearance of your project.
Happy molding cutting!
Compound Miter Saw for Molding Cuts
- Dual-bevel compound cuts — handles crown, base, and door casing molding
- Adjustable miter detents at common angles (22.5°, 45°, 52.86°) for quick crown setups
- 10-inch blade cuts through thick hardwood and composite molding cleanly
| Check current price on Amazon |
As an Amazon Associate we earn from qualifying purchases.

Cutting Inside Corner With Coping Technique
Learn how to cut molding corners using the coping technique, a precise method that ensures a seamless finish. With these easy-to-follow steps, you can achieve professional-looking inside corners for your home improvement projects.
Measuring and marking the molding:
- Measure the length of the wall where the molding will be installed.
- Mark the measurements on the molding using a pencil.
- Double-check the measurements to ensure accuracy.
Cutting the first mitered joint:
- Set the miter saw to a 45-degree angle, ensuring it is adjusted for an inside corner.
- Place the molding inside the miter saw, aligning the marked measurement to the blade.
- Make the cut, ensuring the angle is accurate.
Coping the second piece of molding:
- Use a coping saw to cut along the profile of the first piece of molding.
- Start by making a 45-degree cut, following the contour of the profile.
- Continue cutting along the profile until the excess material is removed.
Fitting and adjusting the coped piece:
- Place the coped piece onto the wall, aligning it with the first mitered joint.
- Make any necessary adjustments by filing or sanding the coped edge until it fits snugly with the first piece.
- Check the alignment and adjust as needed before nailing or gluing the molding in place.
Cutting molding corners can be a daunting task, especially when it comes to inside corners. However, with the coping technique, you can achieve a seamless and professional finish. By following these steps and using the proper tools, you’ll be able to cut inside corners with ease.
Remember, accurate measurements and precise cuts are key to a successful project. Take your time and ensure that each step is done carefully. With practice, you’ll become more proficient in cutting molding corners and achieve flawless results. So, let’s dive into the process and learn how to cut inside corners using the coping technique.
Cutting Inside Corner With Mitered Technique
Discover the mitered technique for cutting inside corners on molding. Learn how to expertly cut and install molding corners with this step-by-step guide.
Measuring And Marking The Molding:
- Start by measuring the length of the wall where the molding will be installed.
- Use a tape measure to get an accurate measurement, and write it down.
- Next, mark the halfway point of the wall and make a small pencil mark.
- This mark will serve as the starting point for cutting the inside corner of the molding.
- Measure and mark the same distance from the corner on the adjacent wall.
- Use a straightedge to connect the two marks with a straight line.
- This line will act as a guide when cutting the inside corner of the molding.
- Double-check your measurements and marks to ensure accuracy before proceeding.
Setting Up The Miter Saw For Accurate Cuts:
- Place the molding on the miter saw table, with the back of the molding against the fence.
- Adjust the angle of the miter saw to 45 degrees, as this is the standard angle for cutting inside corners.
- Make sure the molding is aligned with the line you marked earlier.
- Hold the molding firmly against the fence and table to prevent it from shifting during the cut.
- Take a moment to ensure the miter saw is securely locked in place before proceeding.
Cutting The First Mitered Joint:
- Position the molding against the fence and table, with the inside edge against the fence.
- Carefully lower the miter saw blade and make the cut, following the marked line.
- Take your time and use a steady, controlled motion for a clean and accurate cut.
- Once the cut is made, lift the blade and wait for it to stop completely before moving the molding.
Fitting And Adjusting The Mitered Pieces:
- After cutting the first mitered joint, place the molding against the adjacent wall to check the fit.
- It may require some adjusting to achieve a seamless and tight joint.
- Use a coping saw or sandpaper to fine-tune the cut if necessary.
- If the fit is not satisfactory, make small adjustments by trimming or angling the cut until the joint is flush.
- Repeat the process for the second piece of molding, ensuring the angles are aligned correctly.
- Once both pieces fit perfectly, secure them in place using a brad nailer or adhesive.
Remember to take accurate measurements, set up your miter saw correctly, and cut with precision to achieve professional-looking inside corners for your molding. Take your time, make adjustments as needed, and ensure a seamless fit for a polished finish.
Molding Trim Angle Quick Reference
For flat trim (baseboard, chair rail, casing), set your miter saw to half the corner angle. For crown molding, use the compound settings in the section above.
| Corner Type | Actual Angle | Miter Saw Setting (each piece) |
|---|---|---|
| Standard inside/outside corner | 90° | 45° |
| Bay window inside corner | 135° | 22.5° |
| Acute inside corner | 60° | 30° |
| Obtuse outside corner | 120° | 60° |
| Crown molding 52/38 (flat method) | 90° | 31.6° miter + 33.9° bevel |
Pro tip: Never assume any corner is exactly 90°. Use a digital angle finder and divide the measured angle by 2 for your miter setting.
Cutting Outside Corner With Coping Technique
Learn how to cut molding corners using the coping technique, a handy method that ensures a seamless outside corner finish. Master this skill to achieve a professional look for your next molding project.
When it comes to cutting molding corners, the coping technique is essential for achieving seamless joints and a professional finish. This method is particularly useful when dealing with outside corners, as it allows you to create precise cuts that perfectly fit together.
In this section, we will guide you through the process of cutting an outside corner using the coping technique. Follow these steps to achieve a clean and flawless result:
Measuring And Marking The Molding:
- Start by measuring the length of the molding that will be used for the outside corner.
- Use a tape measure to mark the measurement on the molding, ensuring accurate placement of the cut.
- Make sure to mark the front face of the molding to determine the correct orientation for cutting.
Cutting The First Mitered Joint:
- Set your miter saw to a 45-degree angle, as this is the standard angle for most molding corners.
- Position the molding on the miter saw, aligning the mark with the saw’s cutting line.
- Carefully cut the molding at the 45-degree angle using a smooth and controlled motion.
- Repeat this process for the opposite end of the molding, ensuring that both cuts are identical.
Coping The Second Piece Of Molding:
- Take the second piece of molding that will be joined to the first cut piece.
- Using a coping saw, cut along the profile of the molding on the backside, following the contour of the first mitered cut.
- Make sure to remove any excess material, allowing the coped piece to fit snugly against the first piece.
- Take your time and work slowly to achieve a precise and clean coped cut.
Fitting And Adjusting The Coped Piece:
- Place the coped piece against the first mitered cut, fitting it tightly into place.
- Use a mallet or a hammer and a block of wood to ensure a secure and even fit.
- Make any necessary adjustments or fine-tuning by gently sanding or trimming the coped cut until it aligns perfectly with the first piece.
- Test the fit by temporarily placing the molding in position on the wall, ensuring that the joint is seamless and smooth.
By following these steps, you can easily cut an outside corner using the coping technique. Remember to measure accurately, use the appropriate cutting tools, and take your time to achieve a precise and professional-looking joint. With some practice, you’ll be able to master this technique and create flawless molding corners with ease.

Cutting Outside Corner With Mitered Technique
Learn how to cut molding corners with the mitered technique for a professional finish. This step-by-step guide will ensure precise cuts for a seamless outside corner.
Cutting outside corners with a mitered technique can add a professional and polished look to your molding project. This technique involves making precise angled cuts on the molding pieces to create a clean and seamless corner. In this section, we will discuss how to measure and mark the molding, set up the miter saw for accurate cuts, cut the first mitered joint, and fit and adjust the mitered pieces.
Measuring And Marking The Molding:
- Measure the length of the wall where the molding will be installed.
- Use a pencil to mark the measurement on the molding.
- Repeat the process for the adjacent wall, ensuring the measurements match up accurately.
- Connect the marks with a straight edge to create a cutting line.
Setting Up The Miter Saw For Accurate Cuts:
- Adjust the miter saw to a 45-degree angle, ensuring it is set for an outside corner cut.
- Secure the molding tightly against the fence and bed of the saw.
- Double-check the angle setting before making any cuts.
Cutting The First Mitered Joint:
- Position the molding on the miter saw with the marked cutting line aligned with the blade.
- Hold the molding firmly in place and make the cut.
- Repeat the process for the adjacent piece of molding, ensuring the opposite end is cut at the same angle.
- Check the fit of the two pieces by holding them against the wall. Adjust the angle if needed for a tight and seamless joint.
Fitting And Adjusting The Mitered Pieces:
- Hold both mitered pieces against the wall, aligning them at the corner.
- Check for any gaps or misalignments and make adjustments as necessary.
- Use a coping saw or file to trim any excess material or smooth out any rough edges.
- Test the fit again, making sure the corner is clean and seamless.
By following these steps, you can confidently cut outside corners with a mitered technique for a professional-looking finish on your molding project. Take your time, double-check your measurements and angles, and make any necessary adjustments for a flawless result. Happy cutting!
How to Cut Crown Molding Corners
Crown molding is different from standard trim because it installs at a compound angle — it leans away from both the wall and the ceiling simultaneously. This spring angle (typically 38° or 45°) means the saw settings are not the same simple 45° cut you’d use for baseboard.
The Easiest Method: Nested (Upside-Down) Cuts
For beginners, the nested method is by far the simplest way to cut crown molding corners. Turn the molding upside-down on your miter saw table so that:
- The edge that touches the ceiling lies flat on the saw bed
- The edge that touches the wall rests against the saw fence
In this position, set the miter angle to 45° (no bevel needed) and make your cuts. No compound settings, no bevel math — this is the method professional trim carpenters teach beginners first.
Inside Crown Molding Corners
For an inside corner, you need two mitered pieces that meet at the back of the corner:
- Left piece: Miter saw angled left at 45° — long point of the cut faces down
- Right piece: Miter saw angled right at 45° — long point of the cut faces down
The long points of both pieces meet at the wall corner. Test your settings on scrap crown molding before cutting your finished pieces.
Outside Crown Molding Corners
Outside corners wrap around a projecting corner such as a soffit or column:
- Left piece: Miter saw angled left at 45° — long point of the cut faces up
- Right piece: Miter saw angled right at 45° — long point of the cut faces up
The long points extend beyond the corner and meet at the tip. Even a 1° wall variance creates a visible gap on outside crown corners — measure the actual corner with a digital angle finder before cutting.
Compound Miter Settings (Flat Method for 52/38 Crown)
If you prefer to lay the molding flat on the saw table, you need compound angle settings. For the most common 52/38 spring angle crown molding at a standard 90° corner:
| Corner Type | Miter Angle | Bevel Angle |
|---|---|---|
| Inside corner — left piece | 31.6° left | 33.9° |
| Inside corner — right piece | 31.6° right | 33.9° |
| Outside corner — left piece | 31.6° right | 33.9° |
| Outside corner — right piece | 31.6° left | 33.9° |
Many miter saws have pre-set detents at 31.6° and 33.9° specifically for 52/38 crown molding — look for crown molding marks on your saw’s angle scale.
Tips And Tricks For Professional-Looking Corners
Learn how to achieve professional-looking corners when cutting molding with these helpful tips and tricks. Master the art of precision and create seamless transitions for a polished finish.
When it comes to cutting molding corners, achieving a professional-looking finish is essential for enhancing the overall aesthetics of your project. To help you achieve seamless and polished corners, we have compiled a set of tips and tricks that will guide you through the process.
From sanding and smoothing the edges to using Wood Putty for flawless transitions, and applying painting and finishing techniques, we’ve got you covered.
Sanding And Smoothing The Cut Edges:
- Utilize fine-grit sandpaper to smooth the cut edges and remove any imperfections.
- Hold the sandpaper at a slight angle and sand in gentle, circular motions to avoid creating noticeable flat spots.
- Ensure uniformity by checking the edges with your fingertips to detect any roughness.
- Regularly clean the sandpaper with a soft brush or cloth to prevent the accumulation of debris that can affect the smoothness of the edges.
- After sanding, wipe the edges clean with a damp cloth to remove any residual dust or particles.
Using Wood Putty For Seamless Transitions:
- Choose a wood putty that closely matches the color and grain of the molding material to create a seamless transition at the corners.
- Apply a small amount of wood putty to a putty knife and gently smooth it over the cut edges, filling any gaps or imperfections.
- Remove excess putty by wiping the putty knife across the surface at a 45-degree angle.
- Allow the wood putty to dry completely before sanding it down to achieve a perfectly smooth surface.
- After sanding, use a cloth dampened with mineral spirits to clean away any remaining debris.
Painting And Finishing Techniques For A Polished Look:
- Begin by applying a high-quality primer to the cut edges, ensuring even coverage.
- Once the primer is dry, lightly sand the edges with fine-grit sandpaper for a smooth surface.
- Choose a paint color that matches the molding material or complements the overall design.
- Apply a thin and even coat of paint to avoid drips or build-up at the corners.
- Use a small brush to cut in along the edges, ensuring clean and precise lines.
- After the paint has dried, inspect the corners and touch up any areas that require additional coverage.
- For a polished look, consider applying a clear protective finish to the molding corners to add shine and longevity.
By following these tips and tricks, your molding corners will have a professional appearance that enhances the overall beauty of your project. Remember to take your time, be patient, and pay attention to detail for the best results. Now, let’s dive into the next section to learn more about the different types of molding corners and their applications.

Common Mistakes To Avoid When Cutting Molding Corners
Learn how to cut molding corners without making common mistakes. Follow these guidelines: keep sentences brief, use different phrases at the beginning of paragraphs, write in active voice, and avoid repetitive words. Your SEO-friendly content should be unique and easy to understand, passing AI detection while sounding natural.
Cutting molding corners requires precision and attention to detail. To ensure a flawless finish, it’s important to avoid common mistakes that can compromise the quality of your work. Here are some key errors to steer clear of:
Not Double-Checking Measurements:
- Failing to double-check your measurements can lead to inaccurate cuts, resulting in poorly fitting corners.
- Make it a habit to measure twice before cutting once, ensuring precise dimensions for each corner.
- Use a measuring tape or a reliable measuring tool to ensure accuracy.
- Remember that even the smallest measurement discrepancy can affect the overall appearance of your molding corners.
Rushing Through The Cutting Process:
- Cutting molding corners is a delicate task that requires patience and careful execution.
- Avoid rushing through the cutting process, as it can lead to uneven cuts and inaccuracies.
- Take your time to mark the corners accurately before cutting, ensuring the perfect angle and length for each piece.
- Keep in mind that investing a few extra minutes in the cutting process can save you from the frustration of redoing your work later on.
Neglecting To Properly Secure The Molding:
- Securing the molding properly is crucial to maintaining its shape and integrity.
- Neglecting to secure the molding can result in gaps, uneven edges, and an overall unprofessional look.
- Prior to cutting, plan how you will secure the molding to ensure a tight fit, utilizing techniques such as gluing, nailing, or using screws.
- Remember to secure both ends of the molding, providing stability and preventing any potential movement.
Cutting molding corners may seem daunting, but by avoiding these common mistakes, you can achieve clean and precise results. Take the time to measure accurately, resist the temptation to rush, and always secure the molding properly. With a little patience and attention to detail, your molding corners will be a testament to your craftsmanship.

Frequently Asked Questions For How To Cut Molding Corners
How Do You Cut Perfect Molding Corners?
To cut perfect molding corners, follow these steps:
1. Measure and mark the correct angles for precise cutting.
2. Use a miter saw for accurate and clean cuts.
3. Take your time and cut slowly to avoid mistakes.
4. Test the fit of the corners before installing to ensure a seamless finish.
What Angle Do You Cut Corner Molding?
Cut corner molding at a 45-degree angle for a seamless fit.
How Do You Cut A 90 Degree Corner Trim?
To cut a 90-degree corner trim, carefully measure and mark the desired angle. Use a miter saw or a coping saw to cut along the marked line. Ensure precision and accuracy for a clean and professional finish.
How Do You Cut Miter Corners For Trim?
To cut miter corners for trim, follow these steps:
1. Measure and mark the trim pieces at a 45-degree angle.
2. Use a miter saw or miter box to cut the trim at the marked angle.
3. Ensure the angles match perfectly when joining the trim pieces together.
4. Secure the mitered corners with nails or adhesive for a seamless finish.
Conclusion
Learning how to cut molding corners is an essential skill for any DIY enthusiast or professional carpenter. By following the steps outlined in this blog post, you can achieve clean and precise corners in your molding projects. Remember to measure accurately, use the correct tools, and take your time to ensure a precise cut.
Additionally, consider using a coping saw for curved corners and miter saw for straight ones, as these tools will provide the best results. Practice makes perfect, so don’t be discouraged if your first attempt isn’t flawless. With time and experience, you will become more proficient and confident in your molding corner cutting abilities.
So, pick up those tools and get started on your next molding project!