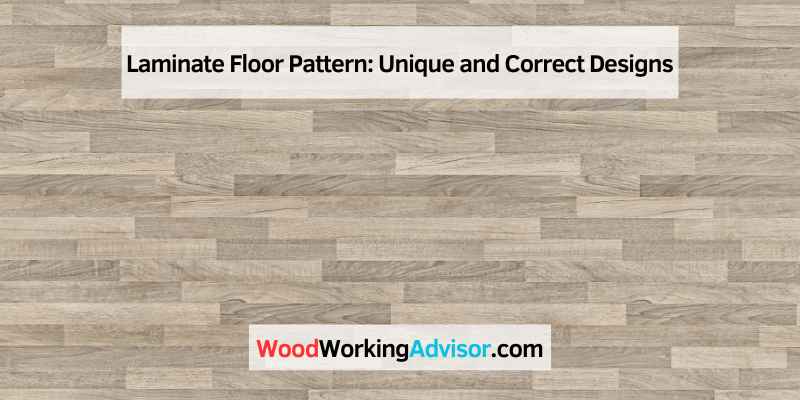
Laminate Floor Pattern: Unique and Correct Designs
When it comes to laminate floor patterns, starting to lay the flooring along the longest and straightest wall in a room is best for achieving an appealing layout and minimizing cuts. It is essential to plan the layout before installation to avoid mistakes and ensure a professional finish.
Laminate flooring is a popular flooring option because of its durability, easy installation, and vast array of design options. However, planning and executing the floor pattern can be overwhelming for beginners. It is essential to choose the right laminate floor pattern that complements the room’s overall design and layout.
Random, grey, design, stagger, herringbone, laying, unique, h joint, color, wood, and different are among the popular laminate flooring patterns to choose from. In addition, understanding the tools and necessary steps for installation from acclimatizing the flooring, testing moisture of the subfloor, marking and cutting the planks, and creating expansion space along the wall ensures proper installation.
Laying Laminate Flooring
When laying laminate flooring, choosing the correct laminate floor pattern is crucial for achieving a unique and visually appealing design. Popular patterns include random, stagger, and herringbone, and it’s essential to follow correct spacing and color guidelines to ensure proper installation.
Laying Laminate Flooring is an excellent way to give your home an updated look without breaking the bank. Whether you’re a beginner or a seasoned DIYer, installing your own laminate flooring can be a rewarding experience. In this article, we’ll walk you through the process of laying laminate flooring step-by-step, providing helpful tips and tricks along the way to ensure your installation is flawless. Let’s get started with our Beginners Guide to Laminate Floor Installation, followed by the Tools Required to Install Laminate Floors, Prepping to Install, Installing Laminate Flooring, Using Shims to Create Expansion Space along Wall, Tips for Installing Starter Rows, Installing the Last Piece of Flooring with a Pull Bar, and finally, Layout for Laminate Floor Installation.
Beginners Guide To Laminate Floor Installation
Before you begin installing your new laminate flooring, there are a few essential things you need to consider. First, make sure you have all of the necessary tools for the job. We’ll cover that in the next section. Take the time to measure the square footage of the area you plan to install the flooring and purchase 10% more than what you need. This extra flooring will ensure that you have enough for mistakes and cutting.
Tools Required To Install Laminate Floors
To install laminate flooring, you will need a few essential tools.
| Table saw or circular saw | Laminate flooring cutter | Pry bar |
| Measuring tape | Spacers | Carpenter’s square |
| Chalk line | Tapping block | Pull bar |
Prepping To Install
Proper prep work is essential for a successful laminate flooring installation. First, remove your old flooring and inspect the subfloor for any damage or unevenness. If necessary, use a self-leveling compound to even out any bumps or dips. Next, lay down a moisture barrier to protect against any potential water damage. It would be best to let this barrier sit for at least 24 hours before beginning the installation process.
Installing Laminate Flooring
Now it’s time to start the installation process. Begin by laying a starter row along the longest wall, placing spacers between the board and the wall to create the necessary expansion gap. Continue laying the boards row by row, using a tapping block and pull bar to ensure tight-fitting joints. Remember to stagger your cuts to create an overall more natural look.
Using Shims To Create Expansion Space Along Wall
It’s important to create the necessary expansion space along the walls to allow for the laminate flooring to expand and contract as needed. To achieve this, use shims between the board and the wall to create a small gap that will remain covered by baseboards.
Tips For Installing Starter Rows
When laying your starter row, make sure it’s straight and level. Using a chalk line can help ensure that the first row is exact. Also, remember to leave the proper expansion gap between the boards and the wall, using spacers between the two.
Installing The Last Piece Of Flooring With A Pull Bar
As you near the end of your installation, you’ll need to fit the final piece of laminate flooring into place. To do this, you’ll need to use a pull bar to click the boards together tightly.
Layout For Laminate Floor Installation
When laying out your laminate flooring, try to mix up the board sizes and colors as much as possible to create a more natural-looking design. Consider using patterns such as herringbone or a unique design like an H-joint for added interest. Remember to use spacers between the boards and the wall to create the necessary expansion gap.
Laminate Floor Patterns And Designs
Diversify the design of your laminate floor with unique patterns and layouts. From herringbone to random designs, the correct laying of different colors and wood types can provide a stunning presentation. Avoid common mistakes by testing moisture levels and following the manufacturer’s directions for spacing.
Laminate flooring is a fantastic, affordable option when it comes to revamping your home floors. With technological advancements in the present age, there are countless laminate flooring designs to choose from – all strikingly similar to natural wood, stone, or tiles – at a fraction of the cost. Laminate floors typically come in distinct sizes, and the patterns vary depending on the plank size. Laminate floor patterns and designs are plenty, and they can provide the illusion of real wood and more without the worry of maintenance. Here are some popular laminate floor patterns and designs.
Different Laminate Floor Patterns
Laminate floors come in several different patterns, each of which can entirely transform its look to imitate other flooring kinds. The popular patterns are random, grey, design, stagger, and herringbone. Each design can add a unique touch to the appearance of your room and boost the value of your home significantly.
Staggered Pattern for Laminate Floor
The staggered laminate floor pattern is relatively easy to install despite its stylish look. It involves offsetting the seams of the rows in a random fashion, creating a broken-joint appearance that resembles a genuine hardwood floor. Staggered laminate flooring is perfect for rooms with high traffic, such as hallways, as it hides wear and tear more effectively.
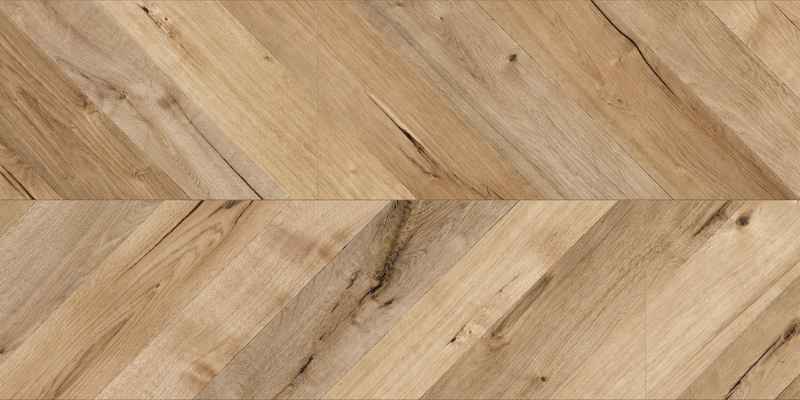
Herringbone Pattern for Laminate Floor
Herringbone laminate flooring is a trendy and timeless way to add sophistication, texture, and depth to your room. The pattern utilizes short planks arranged at angles to form a V-shaped right-angle design. This type of laminate flooring is perfect for upscale living spaces or businesses that need to impress.
Laminate Flooring Layout
Laminate flooring layout is crucial to the success of your installation project. Proper layout planning takes into account all aspects of the room’s shape, including doorways, corners, and angular areas. A proper floor layout results in minimization of waste, correct orientation of the planks, and enhances the finished look of the floor.
Color and Wood Options for Laminate Flooring
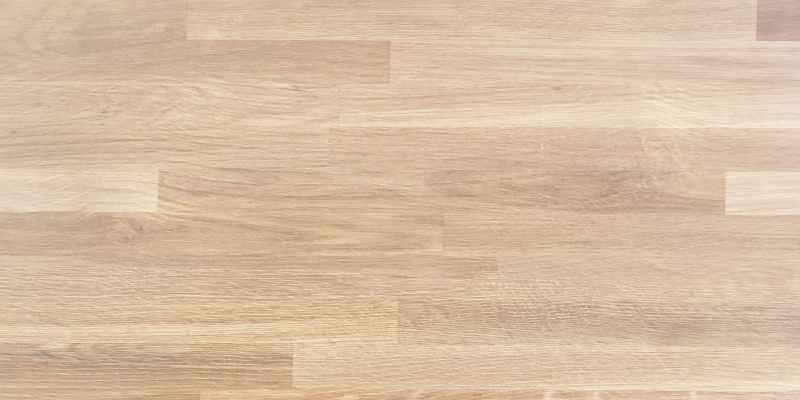
Whether you’re going for a rustic or modern look, laminate flooring comes in a wide range of colors and wood textures that cater to various tastes. Some popular options are the natural wood finishes like maple, oak, and hickory. Alternatively, popular wood options are pine, walnut, cherry, and exotic hardwoods like Brazilian Cherry, Mahogany, and Bamboo. Whatever style of home you have, there is always a laminate flooring color and wood finish that’ll match it.
In conclusion, Laminate floor patterns and designs are an economical and stylish way of breathing new life into your home. Whether you like bright colors or a subtle sheen, there’s a laminate pattern and design for you. Don’t underestimate the power of laminate flooring in your home renovation plans.
Unique Laminate Floor Designs
Experience unique and creative laminate floor designs with various patterns such as herringbone, stagger, and unique color choices. Elevate your space with intricate laminate floor designs that stand out and make a statement.
Laminate flooring offers a plethora of options when it comes to design and style. From a traditional wood look to modern patterns, there is a design to suit every taste. In this post, we will explore some unique laminate floor designs, focusing on three distinct styles: random design, gray laminate flooring, and H-joint design.
Creating A Random Laminate Floor Design
One of the easiest ways to create a unique laminate floor pattern is through a random design layout. This involves laying the boards in a haphazard manner, with no particular rhyme or reason. This design offers a casual and relaxed look that can complement a variety of decor styles. To achieve this pattern, simply grab a handful of planks and lay them down in a sporadic fashion. Keep in mind that this style works best in larger spaces, as it can look cluttered and busy in smaller rooms.
Using Grey Laminate Flooring In Design
Gray has become a popular trend in home decor, and laminate flooring is no exception. A gray laminate floor can add a touch of elegance and sophistication to any room. Paired with white or black furniture, gray flooring can create a sleek and modern look. Alternatively, gray laminate can also be used to create a rustic or vintage feel when combined with distressed wood furniture or accessories.
Unique Laminate Floor Designs Using H-joint
The H-joint design is a unique approach to laminate flooring, perfect for those looking for a creative and distinctive style. This design features H-shaped boards that interlock, creating a pleasing geometric pattern. The H-joint design can be used to create a variety of styles, from traditional to contemporary. To achieve this look, ensure that each board is installed in the correct orientation, and that the joints are securely locked together. This design can make a statement in any room and is sure to impress guests.
In conclusion, laminate flooring is not just a cost-effective and durable solution for your flooring needs, but it also offers various unique design options. Whether you prefer a random, gray, or H-joint design pattern, there are plenty of laminate styles to choose from. So go ahead and get creative with your laminate flooring!
Correct Way To Lay Laminate Flooring
When it comes to laying laminate flooring, the correct way to create an appealing look is by choosing the right pattern. Options like random, grey, design, stagger, herringbone, and unique layouts provide different effects. It’s crucial to follow the manufacturer’s directions when spacing the flooring and laying the pieces correctly.
Laminate flooring is an ideal option for homeowners wanting an affordable, durable, and stylish alternative to traditional hardwood floors. However, laying the flooring correctly is crucial to ensure a beautiful and long-lasting finished product. Here are some essential steps to follow for the correct way to lay laminate flooring.
Testing Moisture of Wood Subfloor
Before laying laminate flooring, it’s essential to check the moisture content of the wood subfloor to prevent any moisture-related issues. You can use a moisture meter to check the subfloor’s moisture levels, and it should be less than 12%.
Laying Laminate Flooring Perpendicular to Joists
It’s critical to install the laminate flooring perpendicular to the joists to ensure stability. If you lay the flooring parallel to the joists, it may result in weak spots and sagging over time.
Cutting Tongue off of First Row of Flooring
Cut the tongue off the first row of laminate flooring to allow space for expansion and contraction. This will also help achieve a more seamless look for the installation.
Running a Chalk-line
Running a chalk-line down the center of the room is an excellent technique for keeping the laminate flooring rows straight. You can use the chalk-line to ensure the rows are straight, even when the walls aren’t.
Using Framing Blade or Laminate Saw Blade
For cutting the laminate planks, use a framing blade or laminate saw blade to avoid chipping the edges. This will ensure a cleaner looking installation.
Spacing Laminate Flooring as per Manufacturer’s Directions
Laying the laminate flooring with insufficient spacing between the boards may result in buckling, so it’s essential to follow the manufacturer’s guidelines. Typically, you should leave a small space between the walls and the laminate boards and a ¼ inch gap between each board.
Final Tips for Installing Laminate Flooring
Some final tips to keep in mind when laying laminate flooring include ensuring that you have the correct tools, accounting for any obstructions in the room, and following the manufacturer’s instructions for care and maintenance.
Overall, following the correct steps for laying laminate flooring will result in a beautiful finished product that will last for years to come.
Common Mistakes To Avoid During Laminate Floor Installation
When installing laminate flooring, it’s important to avoid common mistakes, especially when it comes to the pattern. Be sure to plan the layout carefully and consider factors like plank width, the longest and straightest wall, and using shims for expansion space.
Take time to measure, mark pieces, and check your layout for the best presentation.
When it comes to laminate flooring, installation mistakes can be costly. Even if you choose the perfect laminate floor pattern for your home, these mistakes can make it look unprofessional and poorly installed. In this article, we’ll focus on some of the common mistakes you should avoid during laminate floor installation. To ensure a seamless and professional-looking finish, we recommend paying attention to the following subheadings:
Not Acclimating Flooring In The Home
Acclimating your laminate flooring is an essential step in ensuring it fits your home’s environment. The planks need to adapt to the temperature, humidity, and other factors of your interior before the installation. Not doing this can cause the planks to expand or contract after installation, leading to gaps or buckling.
To avoid this, leave the unopened boxes of laminate flooring in the room where they will be installed for at least 48 hours. This will allow the planks to adjust to the conditions of the room before installation.
Not Testing Moisture Of Wood Subfloor
It’s essential to check for moisture in the wood subfloor before installing laminate flooring. Moisture can cause the planks to warp, buckle, or bubble, leading to an uneven surface.
To test for moisture, use a wood moisture meter to check the subfloor’s moisture content. If the subfloor has a moisture content higher than 12%, let it dry out before installation.
Not Following Manufacturer’s Spacing Instructions
Each laminate flooring manufacturer has its own recommended spacing instructions for installing planks. Not following these instructions can cause planks to shift or warp, leading to an unattractive finish.
Carefully read the manufacturer’s instructions regarding the spacing of planks before starting the installation process. Ensure that the planks are spaced apart according to the guidelines to ensure a neat and uniform appearance.
Not Running A Chalk-line Before Installation
Laminate floor installation requires precision and attention to detail. Failing to run a chalk-line before installation can cause the layout to be off-center and result in poorly aligned planks.
To ensure precision, run a chalk-line from the center of the room to both ends of the wall. This will act as a guideline, making it easy to install the planks in straight rows without any deviation.
By avoiding these common mistakes, you can ensure a perfect laminate floor pattern that will look great in your home for years to come.
Where To Buy Laminate Flooring In The Us
Looking for laminate flooring patterns? You can find a variety of options at stores like Home Depot, Build. com, and LL Flooring in Austin, Texas. From unique designs like herringbone and staggered layouts, to plain grey and classic wood colors, there are plenty of options for every style.
Don’t forget to check out YouTube tutorials for installation tips.
Laminate flooring has become a popular choice for homeowners due to its durability, low maintenance, and versatility in design. With many types and brands available in the market, it can be overwhelming to choose the right one that will suit your needs. If you’re wondering where to buy laminate flooring in the US, you can search online or visit home improvement stores.
Top Laminate Flooring Brands and Prices
When it comes to laminate flooring, some of the top brands in the US are Home Depot, LL Flooring, and Build.com. Among these brands, LL Flooring offers a wide selection of laminate flooring options with prices ranging from $16.73 to $117.59. Home Depot also offers affordable options, with their top laminate flooring priced at $35.13. Build.com, on the other hand, offers unique designs with prices starting at $54.96.
Options for Natural and Matte Finish Laminate Flooring
Natural and matte finish laminate flooring has become popular due to their ability to mimic the look of authentic wood. Kahrs offers Avanti, Canvas, and Oak Etch options that come in natural finishes priced at $145.28. Green Building Supply offers a brushed, natural finish with wood adhesive, click plank/board options priced at $54.80. LL Flooring also offers natural and matte finishes, with prices ranging from $34.31 to $109.37.
Water-Resistant Laminate Flooring Options
For areas with high moisture levels, water-resistant laminate flooring options are recommended. LL Flooring offers water-resistant options priced at $77.83 to $100, while Home Depot offers a sale with prices as low as $35.13. Flooring Inc also offers water-resistant laminate flooring options with prices starting at $19.44.
If you’re planning to install laminate flooring, there are also online resources available, such as DIY videos on YouTube. Home Repair Tutor and RW Supply+Design offer step-by-step installation guides for beginners, while So That’s How You Do That! provides tips on how to layout laminate planks for a seamless finish.
In conclusion, with the availability of various laminate flooring brands and price points, you can easily find one that will suit your design preferences and budget. By exploring your options and doing adequate research, you can achieve a beautiful and functional flooring solution for your home.
Frequently Asked Questions On Laminate Floor Pattern
How Do You Plan Laminate Flooring Layout?
When planning laminate flooring layout, start laying the flooring along the longest and straightest wall in the room. This creates a visually appealing design and minimizes the need for excessive cuts. As you move from right to left, the last piece in each row will always be cut off, with the cut-off piece from the left shifting down to begin the next row on the right.
Is There A Pattern To Laying Laminate Flooring?
Yes, there is a recommended pattern for laying laminate flooring. It is best to start along the longest, straightest wall in the room, moving from right to left. The last piece in each row will always be cut off, with the cut-off piece from the left shifting down to begin the next row of flooring on the right.
This creates a visually pleasing layout and minimizes the need for excessive cuts.
How Many Inches Should You Stagger Laminate Flooring?
When planning the layout for laminate flooring, it is best to start laying it along the longest, straightest wall in the room. This creates a visually appealing layout and minimizes the need for excessive cuts. As for the staggering, the general rule is to stagger the planks at least 6 inches apart to create a random and natural pattern.
Should Laminate Be Laid In A Pattern?
Yes, there is a pattern to laying laminate flooring. It is best to start along the longest, straightest wall in the room for a visually appealing layout and to minimize cuts. The last piece in each row will always be cut off, with the cut-off piece from the left shifting down to begin the next row on the right.
Conclusion
When it comes to laminate flooring pattern, the possibilities are endless. Whether you want a classic look or something unique, there is a pattern that will suit your style. By understanding the different types of patterns and taking into consideration the layout of your room, you can create a beautiful and functional space.
Always remember to plan ahead, measure twice, and consult with a professional if needed. With proper planning and execution, your laminate flooring pattern can be the perfect finishing touch to your home’s decor.