Plywood Sawhorses: Cut List for 4 From One Sheet (No Lumber)
Plywood sawhorses cut entirely from one 4×8 sheet of 3/4″ plywood yield four interlocking, notch-jointed sawhorses at 17″ tall each — no 2×4 legs, no screws, and no glue required. That’s different from a standard 2×4-framed sawhorse, which needs separate lumber legs and hardware. This guide covers the full cut list, the notch-and-slot assembly steps, and when a lumber-framed sawhorse is the better choice instead.
What Makes a Plywood Sawhorse Different From a 2×4 Sawhorse?
Best Cutting Guide Pick
Swanson 100" Aluminum Cutting Guide – $39.49
Every panel in the cut list below relies on a straight, splinter-free rip cut across the full 8-foot length of the sheet — freehand circular saw cuts drift enough to throw off the notch alignment.
- Best for: Ripping full 8-foot cuts on a 4×8 plywood sheet before cutting notches
- Why we picked it: Expands to 100″ — long enough for a full sheet, unlike shorter shop-made guides
- Main drawback: Two-piece design needs the joiner bar aligned carefully or the seam shows in the cut
As an Amazon Associate we earn from qualifying purchases.
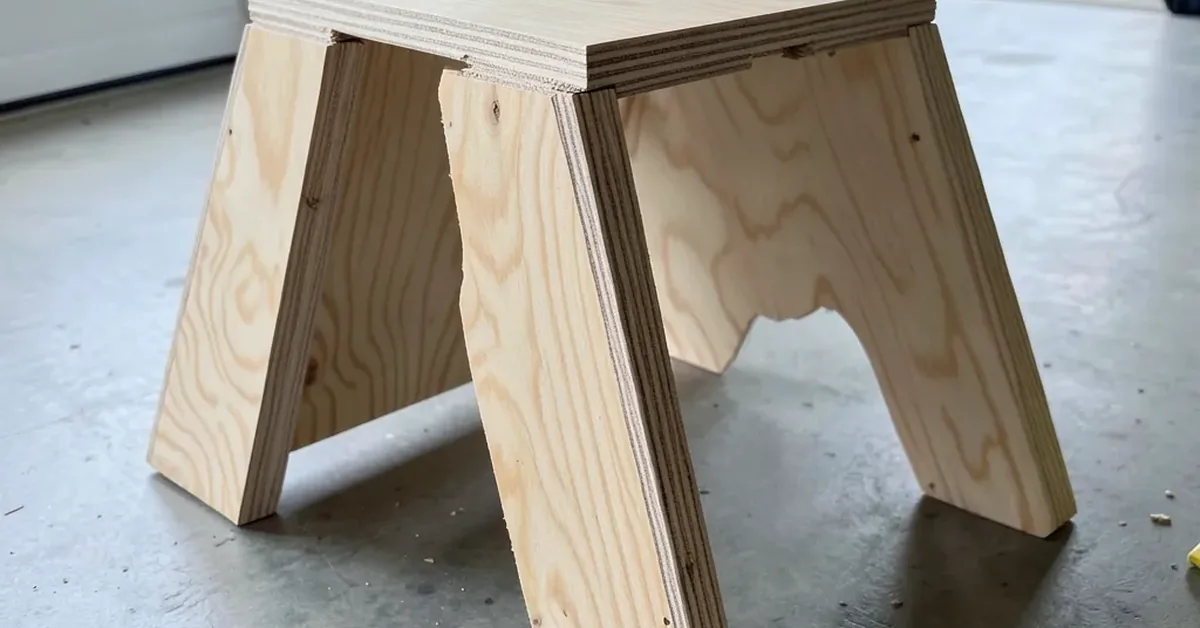
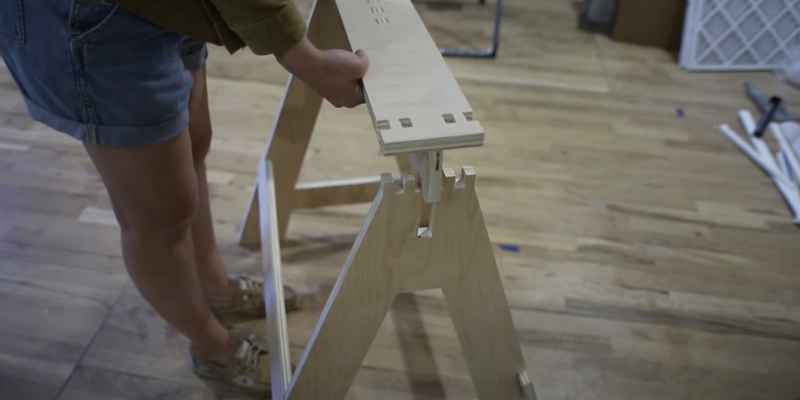
A plywood sawhorse is built entirely from flat plywood panels cut into interlocking A-shaped side pieces and a top rail, slotted together with notched joints instead of screwed onto separate dimensional-lumber legs. The whole structure comes from a single sheet, with no 2x4s, no metal brackets, and often no fasteners at all — the notches hold it together under its own weight and load.
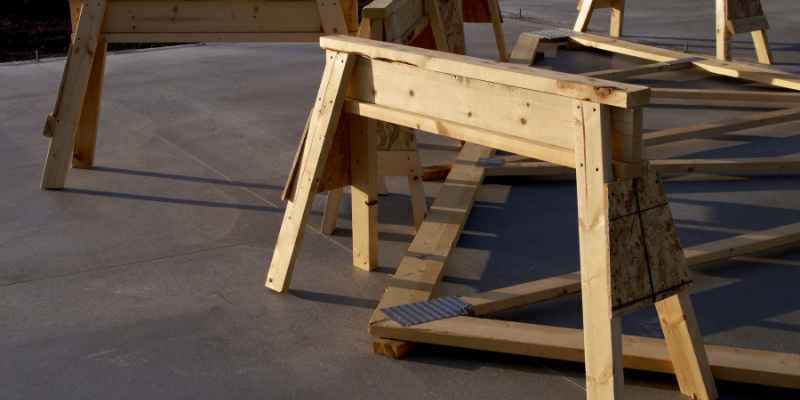
Cut List for a Single-Sheet Plywood Sawhorse (Makes 4)
One 4×8 sheet of 3/4″ plywood, laid out carefully, yields four complete sawhorses standing 17″ tall — stack one on top of another for a 30″ work surface when you need bench height instead of floor height.
| Piece | Qty (for 4 horses) | Notes |
|---|---|---|
| A-shaped side panel, 17″ tall | 8 (2 per horse) | Notched at the top-center to interlock with the top rail |
| Top rail / spine | 4 (1 per horse) | Notched underside to slot down over both side panels |
| Stacking tabs/registration blocks | Cut from offcuts | Optional — lets a second sawhorse nest on top for 30″ height |
Lay out all pieces on the sheet before cutting anything — nesting the A-panels point-to-point is what makes four sawhorses fit on one sheet with minimal waste.
Step-by-Step: Building Interlocking Plywood Sawhorses
- Draw the layout: Mark all 8 side panels and 4 top rails on the sheet per the cut list, nesting shapes to minimize waste.
- Make the long rip cuts first: Use a straightedge guide for the full 8-foot cuts that separate the sheet into workable strips.
- Cut the A-shapes: Cut each side panel to its angled A-profile with a circular saw or jigsaw.
- Cut the interlocking notches: Cut a centered slot in the top of each pair of side panels and a matching notch on the underside of each top rail.
- Test-fit and adjust: Slide the top rail’s notch down over the side panels; the joint should be snug without forcing.
- Sand and finish: Ease all sharp edges and corners, then apply a coat of polyurethane or leave bare for a shop-only horse.
Reinforcing and Non-Slip Additions
A tight notch joint alone holds a plywood sawhorse together for normal use, but a couple of small additions make it safer under heavier loads.
- Glue the notches (optional): A thin bead of wood glue in the slot before assembly stops the joint from working loose over years of use — skip it if you want the horses to disassemble flat for storage.
- Rubber feet or non-slip strips: Add self-adhesive rubber pads to the bottom edges so the horse doesn’t skate on smooth concrete or tile.
- Top surface grip: A strip of non-slip tape across the top rail keeps a workpiece from sliding during a cut.
Plywood vs. 2×4 Sawhorses: Which Should You Build?
Both designs are legitimate — the right one depends on what tools and material you already have. If you’d rather use dimensional lumber and standard sawhorse brackets, see our guide to building a 2×4 wooden sawhorse instead.
| Trait | Plywood Sawhorse | 2×4 Sawhorse |
|---|---|---|
| Material needed | One 4×8 sheet, makes 4 horses | 2×4 lumber + brackets or angle-cut joinery per horse |
| Fasteners | None required (notch-fit) | Screws or brackets required |
| Storage | Disassembles flat, stacks to save space | Fixed frame, takes up more storage footprint |
| Best for | Shop use, flat storage, cutting a single sheet on top | Heavier construction loads, outdoor jobsite use |
Common Mistakes When Building Plywood Sawhorses
- Cutting notches too loose: A slot wider than the plywood’s actual thickness (often slightly under 3/4″) leaves a wobbly joint — test-fit on a scrap piece first.
- Skipping the layout step: Cutting pieces one at a time without a full sheet layout wastes material and can leave you short a panel.
- Using thin or low-grade plywood: 1/2″ or less flexes too much under load — stick to 3/4″ cabinet-grade or better.
- Freehand ripping the long cuts: An 8-foot freehand cut drifts enough to throw off notch alignment across all four horses.
Frequently Asked Questions About Plywood Sawhorses
How many sawhorses can you get from one sheet of plywood?
A standard 4×8 sheet of 3/4″ plywood, laid out efficiently, yields four complete interlocking sawhorses at 17″ tall each.
Do plywood sawhorses need screws?
No. The notched, interlocking joint design holds together under its own weight without screws or glue, though a small bead of glue in the joint adds long-term rigidity if you don’t need to disassemble them.
How tall should a plywood sawhorse be?
17″ is a common single-horse height for floor-level work; stacking one sawhorse on another raises the working surface to about 30″, closer to standard workbench height.
What thickness plywood is best for sawhorses?
3/4″ cabinet-grade or construction-grade plywood. Thinner plywood (1/2″ or less) flexes too much under load and won’t hold a tight notch joint.
Are plywood sawhorses as strong as 2×4 sawhorses?
For shop use and cutting support, yes — the flat panel design distributes load well. For heavy construction or outdoor jobsite loads, a braced 2×4-framed sawhorse with brackets is the sturdier choice.
Conclusion
A single sheet of 3/4″ plywood, cut carefully with a straight guide, gets you four interlocking sawhorses with no lumber, brackets, or screws — a genuinely different build than a standard 2×4 sawhorse. Follow the cut list above, test-fit the notches on scrap first, and you’ll have a stackable set that stores flat when you are done.
Sponsored / affiliate links. As an Amazon Associate I earn from qualifying purchases. I may earn additional commission from eligible campaigns.