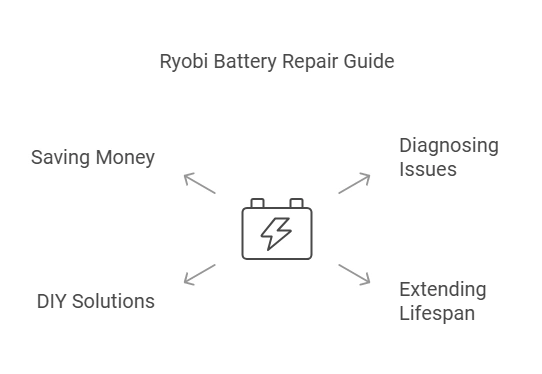
Repair Ryobi Battery: Save Money and Extend the Lifespan!
To repair a Ryobi battery, first ensure safety, then identify and replace faulty components promptly. Ryobi batteries are a vital component in power tools, providing the necessary energy for efficient performance.
Over time, these batteries can experience wear and tear, leading to issues like reduced capacity or failure to charge. In this guide, we will explore some simple steps to repair Ryobi battery yourself and avoid costly replacements. By following these steps, you can extend the lifespan of your Ryobi battery and keep your power tools running optimally.
Let’s delve into the process of effectively repairing your Ryobi battery and getting your tools back in action.
Credit: storables.com
Understanding Ryobi Batteries
The Importance Of A Reliable Battery
Ryobi batteries are crucial for power tools to function efficiently.
Common Issues With Ryobi Batteries
Identifying common problems is vital for timely repair and maintenance.

Credit: www.amazon.com
Diagnosing Battery Problems
- Overheating during charging or use.
- Decreased run time per charge.
- Difficulty holding a charge.
- Use a multimeter to check voltage output.
- Test battery in the tool it powers for performance.
- Compare results to manufacturer specifications.
Extend Battery Lifespan
To extend the lifespan of your Ryobi battery, consider repairing it. By addressing issues early on and properly maintaining the battery, you can ensure it lasts longer and provides reliable use. Regular maintenance, such as cleaning the battery terminals and storing it properly, can help optimize its performance and durability.
Proper storage and maintenance
Taking proper care of your Ryobi batteries is essential for extending their lifespan. Proper storage and maintenance practices can greatly impact the longevity and performance of your batteries. By following these simple tips, you can ensure that your batteries remain in top condition for as long as possible.
Avoiding common battery-damaging practices
To maximize the lifespan of your Ryobi batteries, it’s crucial to avoid common battery-damaging practices. These detrimental behaviors can significantly shorten the lifespan of your batteries and reduce their overall effectiveness. By being mindful of these practices, you can safeguard the health and efficiency of your batteries for an extended period.
By incorporating these tips into your routine, you can significantly extend the lifespan of your Ryobi batteries, potentially saving you time and money in the long run.
Repairing Ryobi Battery
When it comes to the world of power tools, Ryobi is a well-known name that homeowners and professionals rely on for their projects. However, over time, the batteries on these tools can weaken or die completely, leaving you in need of a solution. One cost-effective option is to consider repairing your Ryobi battery instead of purchasing a brand new one.
If your Ryobi battery is not holding a charge or performing as it should, it is possible that individual cells within the battery pack are faulty or damaged. By replacing these specific cells, you can potentially breathe new life into your battery and get it back to its optimal performance. Here’s how you can do it:
- Identify the faulty cells: Carefully open the battery pack by removing the screws or clips holding it together. Once open, inspect the cells for any signs of damage or inconsistencies. Look for cells with significantly lower voltage readings compared to the rest.
- Acquire replacement cells: Once you have identified the faulty cells, you can purchase replacement cells from reputable online stores or local battery retailers. Make sure the replacement cells match the specifications of your Ryobi battery.
- Remove the damaged cells: Using a soldering iron and desoldering wick, carefully remove the faulty cells from the battery pack. Take note of the polarity and connections of the cells to ensure proper installation of the replacement cells.
- Solder the new cells: Place the replacement cells in the correct positions within the battery pack, ensuring proper polarity and connections. Use a low-temperature soldering iron to solder the cells in place, taking care not to overheat or damage the cells in the process.
- Reassemble the battery pack: Once the new cells are securely soldered in place, reassemble the battery pack using the screws or clips. Ensure all the connections are tight and secure.
With the individual cells replaced, your Ryobi battery has a good chance of working like new again. This cost-effective repair option can save you money and extend the lifespan of your battery.
Repairing Ryobi Battery: Rejuvenating a completely dead battery
In some cases, a Ryobi battery may be completely dead, exhibiting no signs of life whatsoever. Before giving up on it, consider the rejuvenation process to potentially revive your battery. Here’s how:
- Perform a deep discharge: Completely drain the battery to the point where the power tool no longer operates. This process allows the battery to reset its internal circuitry and can help revive dead cells.
- Create a battery pack discharger: Using a resistor and simple wiring, you can create a battery pack discharger to safely and efficiently discharge the battery at a controlled rate.
- Apply a pulse to the battery: Using an electronics pulse generator, apply a series of brief voltage pulses to the battery. This method can help break down corrosion and restore conductivity within the battery cells.
- Recharge the battery: After performing the deep discharge and applying the pulse, recharge the battery using the original charger or a compatible one.
Note: Please exercise caution when attempting to rejuvenate a completely dead battery. Ensure proper safety measures are followed and it is always recommended to seek professional assistance if you are unsure about the process.
Save Money With Diy Solutions
When it comes to repairing your Ryobi battery, opting for DIY solutions can be a game-changer in terms of cost savings. Instead of shelling out money for a brand new battery, you can explore cost-effective alternatives and affordable replacement parts to get your battery up and running again. Here are some handy tips to help you save money while tackling your battery repair:
Cost-effective Alternatives To Buying New Batteries
Instead of immediately rushing to the store to purchase a new Ryobi battery, consider trying out these cost-effective alternatives:
- Reconditioning the battery: Reconditioning involves restoring the battery’s performance by cycling it through a series of charge and discharge cycles. This can be done using specialized tools or by following a step-by-step guide available online.
- Repairing faulty cells: Batteries often fail due to a few individual cells no longer holding a charge. By identifying and replacing these faulty cells with new ones, you can revive your battery without breaking the bank.
- Exploring aftermarket options: Look for reputable manufacturers who offer compatible third-party batteries or battery rebuild kits specifically designed for Ryobi tools. These options are often more affordable than buying directly from the original equipment manufacturer.
Tips For Sourcing Affordable Replacement Parts
When searching for affordable replacement parts for your Ryobi battery, these tips can help you find reliable sources without burning a hole in your pocket:
- Check online marketplaces: Browse through platforms like eBay or Amazon for sellers offering genuine or compatible replacement parts at competitive prices. Ensure to read reviews and ratings before making a purchase.
- Visit local hardware stores: Pay a visit to your nearest hardware store and inquire about availability and prices of replacement parts for Ryobi batteries. You might find surprising deals and discounts on offer that aren’t advertised online.
- Contact battery rebuilders: Look for local businesses or online services that specialize in battery rebuilding, as they may offer affordable replacement parts for your Ryobi battery.
By considering these cost-effective alternatives and sourcing affordable replacement parts, you can save a significant amount of money while giving your Ryobi battery a new lease on life. Embrace the DIY approach and enjoy the satisfaction of fixing things yourself!
Credit: www.walmart.com
Frequently Asked Questions On Repair Ryobi Battery
Q: How Do I Repair My Ryobi Battery?
A: To repair your Ryobi battery, start by cleaning the battery contacts with a soft cloth. Then, check for loose connections inside the battery pack and tighten them if necessary. If the battery still doesn’t work, consider replacing the individual cell or contacting Ryobi for further assistance.
Q: Can I Replace The Cells In My Ryobi Battery?
A: Yes, it is possible to replace the cells in your Ryobi battery. However, it requires some technical knowledge and equipment. If you’re not comfortable with this process, it’s recommended to contact a professional or reach out to Ryobi customer support for assistance.
Q: How Long Does A Ryobi Battery Last?
A: The lifespan of a Ryobi battery depends on various factors, such as usage, charging habits, and storage conditions. On average, a Ryobi battery can last for 2 to 3 years with regular use and proper care. It’s important to follow the manufacturer’s instructions for charging and maintenance to prolong its lifespan.
Conclusion
In the end, repairing your Ryobi battery is a cost-effective and eco-friendly solution. With the right tools and know-how, you can extend the life of your battery and get more mileage out of your power tools. Keep in mind the safety precautions and follow the steps carefully for a successful battery repair.
Your efforts will pay off in the long run with a fully functional and rejuvenated battery.