Can You Spray Polycrylic? Yes — Aerosol Cans or a Sprayer
Yes, you can spray Polycrylic for a smooth, durable finish on your project. Polycrylic is a popular water-based protective coating that can be easily sprayed on surfaces.
It offers excellent protection against moisture, heat, and sunlight, making it ideal for use on furniture, cabinets, and other woodworking projects. With its easy application and quick drying time, spraying Polycrylic can give your project a professional-looking finish with minimal effort.
What Is Polycrylic?
Polycrylic is a protective finish that can be applied by spraying on various surfaces. It provides a clear and durable coating, making it an effective choice for protecting furniture, cabinets, and other woodworking projects.
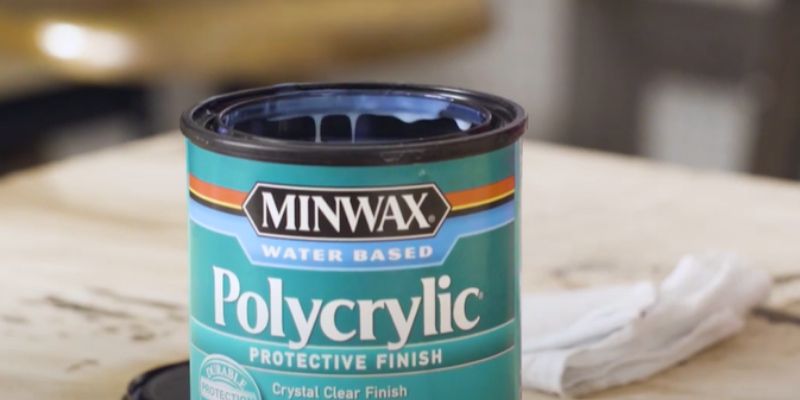
Polycrylic is a type of water-based protective finish used to add durability and beauty to various surfaces. It is a clear, quick-drying, and durable topcoat that can be applied to wood, painted surfaces, and other materials. Polycrylic is made from a combination of acrylic and polyurethane, giving it both the advantages of acrylic and the protective properties of polyurethane.
Properties Of Polycrylic
Polycrylic offers a range of desirable properties that make it a popular choice for finishing projects:
- Easy Application: Polycrylic is easy to apply with a brush, roller, or sprayer, making it suitable for both professionals and DIY enthusiasts.
- Quick Drying: Unlike other finishes that require extended drying times, polycrylic dries quickly, allowing for multiple coats to be applied in a shorter time frame.
- Clear Finish: Polycrylic dries to a crystal-clear finish, ensuring that it does not alter the appearance or color of the underlying surface.
- Durability: Polycrylic provides excellent durability and protection against scratches, stains, and moisture. It forms a protective barrier that helps extend the lifespan of the finished surface.
- Low Odor: Unlike some solvent-based finishes, polyacrylic has a low odor, making it more pleasant to work with and suitable for indoor applications.
Advantages Of Polycrylic
Using polyacrylic as a protective finish offers several advantages:
- Versatility: Polycrylic can be used on various materials, including wood, metal, plastic, and painted surfaces. This versatility makes it a go-to choice for a wide range of projects.
- Water-based: Being water-based, polyacrylic is easy to clean up with soap and water, making it more convenient to work with and reducing the need for harsh solvents.
- Low VOC: Polycrylic has low volatile organic compounds (VOCs), making it a safer choice for the environment and indoor use. It helps maintain better air quality.
- Enhances Appearance: The clear finish of polyacrylic enhances the natural beauty of wood and preserves its color, making it an ideal choice for furniture, cabinets, and other decorative items.
- UV Protection: Polycrylic provides UV resistance, helping to protect the finish and prevent fading or yellowing when exposed to sunlight.
Spraying Polycrylic: The Basics
Spraying Polycrylic is a common method for applying this protective finish. It is possible to spray Polycrylic onto your desired surface, providing a smooth and even coat for a professional-looking result.
When it comes to adding a protective finish to your woodworking projects, polyacrylic is a popular choice. Its water-based formula provides durability and a clear protective coat. While brushing polyacrylic is the most common application method, spraying polyacrylic can offer a smooth and professional finish, especially for larger surfaces or intricate details. In this article, we will delve into the basics of spraying polyacrylic, from preparing the surface to understanding the application process.
Preparing The Surface
Properly preparing the surface is crucial to achieving a flawless finish when spraying polyacrylic. Here are a few essential steps:
- Clean the surface: Begin by thoroughly cleaning the surface to remove any dust, dirt, or grime. A clean surface ensures better adhesion and a smoother finish.
- Sand the surface: If the surface has imperfections or rough spots, use sandpaper to smooth it out. This step promotes better adhesion and helps the polyacrylic adhere evenly.
- Remove sanding dust: After sanding, use a tack cloth or a soft, lint-free cloth to remove any sanding dust. Make sure to remove all the dust particles to avoid defects in the final finish.
Choosing The Right Equipment
Selecting the right equipment is crucial for a successful spraying experience. Consider these factors:
- Spray Gun: Choose a high-quality spray gun designed for water-based finishes. Look for a gun that provides a fine mist and adjustable nozzle settings for achieving your desired finish.
- Air Compressor: If your spray gun requires an air compressor, ensure it has sufficient airflow and pressure to operate the gun effectively.
- Protective Gear: Always wear safety goggles, a respirator mask, and gloves when working with polycrylic or any other finishing products. Protecting yourself from fumes and overspray is essential.
Understanding The Application Process
The application process involves a few key steps to ensure an even and smooth coat of polycrylic:
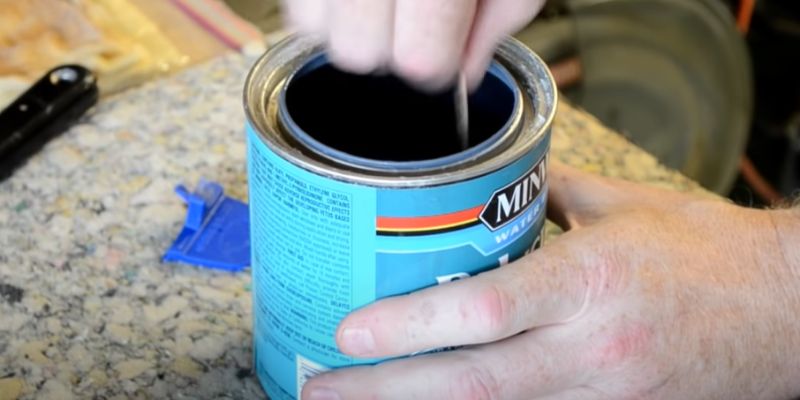
- Dilution: Depending on the manufacturer’s instructions and desired finish, you may need to dilute the polycrylic with water. This step helps the product atomize properly and allows for better control during spraying.
- Practice on Scrap: Before applying polycrylic to your project, practice spraying on a scrap piece of wood or cardboard. This helps you get accustomed to the spray pattern and adjust the nozzle settings accordingly.
- Event Coverage: Hold the spray gun approximately 8-12 inches away from the surface and apply the polycrylic in smooth, even strokes. Maintain a consistent speed and overlap each pass slightly for complete coverage.
- Multiple Coats: For optimal protection, it’s recommended to apply multiple thin coats rather than a single heavy coat. Allow each coat to dry according to the manufacturer’s instructions before applying the next.
By following these steps and practicing proper technique, you can achieve a professional-looking finish when spraying polycrylic. Remember to clean your equipment thoroughly after each use and ensure proper ventilation in your workspace. Now that you’re familiar with the basics, you’re ready to give your woodworking projects a flawless and protective polycrylic finish!
Tips For Achieving Flawless Finishes
Spraying polycrylic can be a game-changer when it comes to achieving flawless finishes on your woodworking projects. Whether you are a seasoned DIYer or a beginner, mastering the proper technique is crucial for getting the best results. In this blog post, we will discuss some useful tips that will help you achieve professional-looking finishes with polycrylic.
Proper Technique And Spraying Distance
Proper technique can make all the difference in achieving flawless finishes with polycrylic. When spraying this water-based protective finish, it’s essential to hold the spray gun at the correct distance from your project. Aim for a consistent distance of around 8-10 inches for an even application.
Remember that the spraying distance can vary depending on the specific type of spray gun you are using, so be sure to refer to the manufacturer’s instructions for the recommended distance. By maintaining a proper distance, you can minimize the risk of overspray or uneven application, resulting in a smooth and flawless finish.
Dealing With Drips And Runs
Even with proper technique, you may encounter the occasional drip or run while spraying polycrylic. Don’t panic! Instead, take these simple steps to remedy the situation and achieve a flawless finish:
- Before starting the spraying process, ensure your work area is clean and free from dust or debris that could potentially mix with the polycrylic and cause drips.
- Hold the spray gun parallel to the surface and move in a smooth and steady motion, maintaining a consistent spraying distance.
- If you notice a drip or run, stop spraying immediately and let it dry. Once dry, use fine-grit sandpaper to carefully sand down the affected area.
- After sanding, wipe away any dust or residue with a clean cloth. You can then proceed with additional coats if needed, ensuring to follow the proper technique to avoid further drips or runs.
Avoiding Common Mistakes
Achieving flawless finishes requires not only proper technique but also avoiding common mistakes that could compromise your final result. Here are a few pitfalls to steer clear of:
- Excessive spraying: Applying too much polycrylic in one coat can lead to runs and drips. Remember to apply thin and even coats, allowing proper drying time between each layer.
- Rushing the drying process: Polycrylic needs adequate drying time to cure properly. Rushing the process by applying additional coats too soon can result in a less-than-flawless finish. Patience is key!
- Not preparing the surface: Failing to properly prepare the surface can lead to poor adhesion and an uneven finish. Before spraying polycrylic, make sure to sand and clean the surface to remove any imperfections or contaminants.
- Ignoring safety precautions: Always wear personal protective equipment, such as a mask and goggles, to safeguard yourself from potential fumes or overspray.
By following these tips and avoiding common mistakes, you can achieve flawless finishes when spraying polycrylic. Remember to practice proper technique, deal with drips and runs promptly, and stay mindful of potential pitfalls. Happy spraying!
Enhancing Durability And Glossiness
When it comes to protecting and beautifying your woodworking projects, spraying polycrylic is a top choice. Not only does it offer excellent durability, but it also provides a glossy finish that enhances the natural beauty of the wood. In this article, we will explore the techniques for applying multiple coats, as well as sanding and buffing to achieve the best results.
Applying Multiple Coats
When spraying polycrylic, it’s important to apply multiple coats to ensure adequate protection and a deep, lustrous finish. By following these steps, you can achieve a professional-looking result:
- Clean the surface: Before applying the first coat, make sure the wood surface is clean and free from dust or debris. Use a soft cloth or a tack cloth to remove any particles.
- Thin and mix the polycrylic: Depending on the brand and your desired final finish, it’s often recommended to thin the polycrylic before spraying. Follow the manufacturer’s instructions for the appropriate ratio of thinning agent to polycrylic. Mix the solution thoroughly.
- Apply the first coat: Using a high-quality spray gun, apply a thin and even layer of polycrylic to the wood surface. Make sure to hold the spray gun at a consistent distance and move smoothly across the surface. Allow the first coat to dry completely before moving on to the next step.
- Sand between coats: After the first coat has dried, lightly sand the surface with fine-grit sandpaper. This step helps smooth out any imperfections and promotes adhesion between the layers. Wipe away any dust with a tack cloth before applying the next coat.
- Repeat the process: Apply subsequent coats following steps 2 to 4 until you achieve the desired level of protection and glossiness. Keep in mind that thin coats are better than thick ones since they dry faster and reduce the risk of drips or brush marks.
Sanding And Buffing Techniques
To further enhance the glossiness and smoothness of your sprayed polycrylic finish, sanding and buffing play crucial roles. Follow these techniques:
- Final sanding: Once all the coats have dried, use a high-grit sandpaper to sand the surface gently. Start with 400-grit sandpaper and gradually move to finer grits like 800 or 1000. This process helps remove any imperfections like dust nibs or brush marks.
- Buffing with rubbing compound: After sanding, apply a small amount of rubbing compound to a clean, lint-free cloth. Gently rub the surface in circular motions, applying light pressure. This step helps to remove any remaining imperfections and brings out the shine.
- Polishing with a finishing compound: To achieve a mirror-like finish, apply a finishing compound to a separate clean cloth. Similar to the previous step, buff the surface using circular motions. The finishing compound helps to remove any remaining fine scratches and further enhances the glossiness of the polycrylic.
By applying multiple coats and utilizing sanding and buffing techniques, you can ensure a protective and glossy polycrylic finish that will make your woodworking projects stand out.
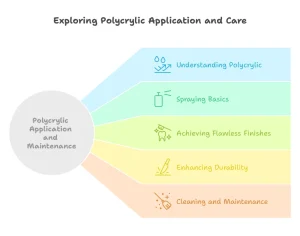
Cleaning And Maintenance
Proper cleaning and maintenance are essential in preserving the quality and lifespan of your polycrylic finishes. By ensuring that you clean your equipment thoroughly and perform regular maintenance, you can keep your surfaces looking pristine for years to come.
Properly Cleaning Equipment
When it comes to cleaning equipment used for spraying polycrylic finishes, following the correct procedure is crucial. Cleaning the equipment promptly after use will prevent any residual polycrylic from hardening and clogging the nozzle.
To properly clean your spray gun, disassemble its components and soak them in a cleaning solution. Using a soft-bristle brush, gently scrub away any polycrylic residue from the nozzle, needle, and other parts. Rinse each component thoroughly and wipe them dry with a clean cloth.
For cleaning brushes or rollers, first, remove as much excess polycrylic as possible by scraping it off with a putty knife or a scraper. Then, wash the brushes or rollers using warm soapy water. Rinse them thoroughly and allow them to air dry.
Maintaining And Touching Up Polycrylic Finishes
Maintaining the appearance of your polycrylic finishes can be easily achieved by implementing regular touch-ups. Over time, surfaces can develop minor scratches, blemishes, or wear and tear. Luckily, with polycrylic, these imperfections can be remedied with a simple touch-up process.
Before touching up your polycrylic finish, ensure that the surface is clean and free from dust or debris. Lightly sand the affected area with fine-grit sandpaper, moving in the direction of the wood grain. Wipe away any sanding dust with a clean, lint-free cloth.
Using a small brush, apply a thin and even coat of polycrylic onto the damaged area. Allow it to dry according to the manufacturer’s instructions. Once dry, lightly sand the touched-up area with fine-grit sandpaper to blend it seamlessly with the surrounding finish. Finally, wipe away any sanding dust and assess the difference.
Regular maintenance and touch-ups will help your polycrylic finishes maintain their shine and protect them from further damage. By following these simple yet effective cleaning and maintenance practices, you can enjoy the beauty and longevity of your polycrylic-coated surfaces for years to come.
Conclusion
Spraying Polycrylic is a convenient and efficient way to apply this protective finish to your surfaces. Whether you are working on furniture, cabinets, or other projects, using a spray gun can save you time and effort. Just remember to follow the recommended application tips and techniques to achieve the best results.
By understanding the process and taking the necessary precautions, you can confidently spray Polycrylic and achieve a beautiful and durable finish for your projects.