Tenoning Jig for Table Saw: Enhance Precision and Efficiency!
A tenoning jig for a table saw ensures precise and accurate cutting of tenons in woodworking projects. It is a valuable tool for woodworkers.
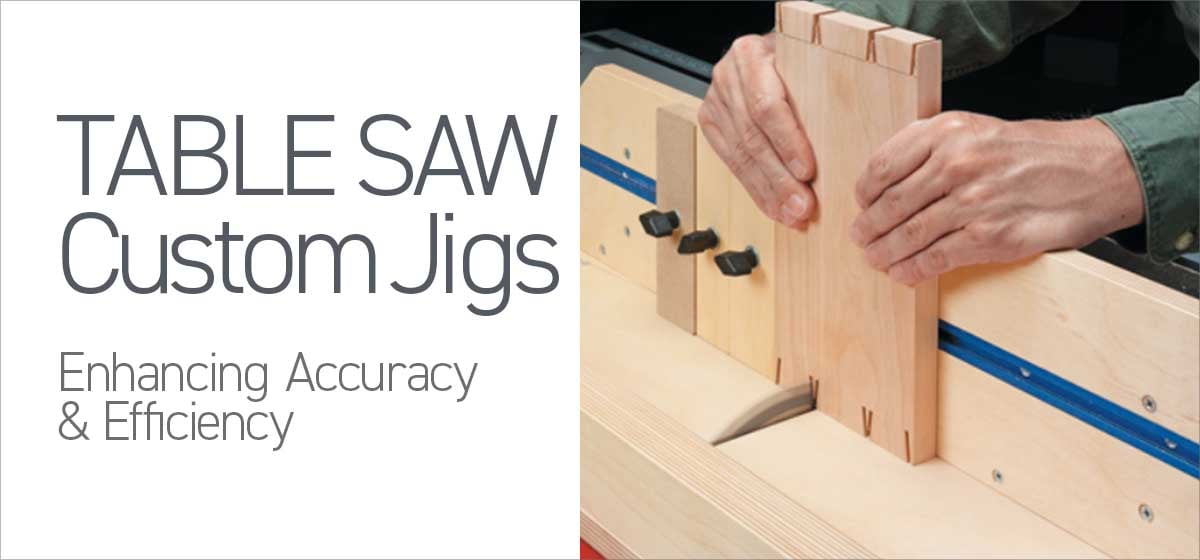
Woodworkers often use tenoning jigs to create strong and secure joints in furniture and other wooden projects. By guiding the workpiece through the saw blade at a precise angle and depth, tenoning jigs help achieve clean and professional results. This efficient tool minimizes the risk of mistakes and ensures consistent and accurate tenons for seamless joinery.
With adjustable features and a sturdy design, tenoning jigs are essential accessories for any woodworking shop aiming for precision and efficiency.
Benefits Of Using A Tenoning Jig
Discover the advantages of using a tenoning jig with your table saw. From improved accuracy to enhanced safety, this tool can revolutionize your woodworking projects.
Improved Accuracy
Ensure precise and consistent cuts every time. The tenoning jig allows for repeatable joinery with minimal margin of error.
Enhanced Safety
Protect yourself from accidents and injuries by using a tenoning jig to securely hold your workpiece in place during cutting.
Key Features Of A Tenoning Jig
Tenoning jigs are essential accessories for table saws that ensure precise and efficient tenon cutting. Understanding the key features of a tenoning jig is crucial for woodworkers looking to enhance their joinery capabilities. Let’s delve into the key components that make a tenoning jig a valuable tool in any workshop.
Adjustable Stops
Adjustable stops allow for precise control over the length and depth of tenons, ensuring consistency in your joinery projects.
Built-in Clamps
Built-in clamps secure the workpiece in place, providing stability and safety during cutting operations.
Setting Up The Tenoning Jig
Setting up the tenoning jig is crucial for ensuring precise and accurate cuts on your table saw. Proper setup is essential for achieving clean and professional-looking tenons. In this article, we will walk you through the process of setting up your tenoning jig step by step. Pay close attention to the following steps to ensure optimal performance from your tenoning jig.
Choosing The Right Blade
Before setting up your tenoning jig, it’s important to ensure that you are using the right blade for the job. Select a blade suitable for cutting tenons, such as a dado blade or a specialized tenoning blade. A sharp and appropriately sized blade will ensure clean cuts and smooth tenon shoulders.
Aligning The Jig With The Saw Blade
To achieve accurate and precise cuts, it’s crucial to align the tenoning jig with the saw blade. Ensure that the jig is parallel to the miter gauge slots on the table saw. Use a square to check the alignment and make any necessary adjustments to ensure that the jig is perfectly parallel to the saw blade.
Mastering The Tenoning Technique
Learn the art of perfect tenoning with a specialized jig for your table saw. Achieve precise, professional results every time with our step-by-step guide to mastering the tenoning technique. Elevate your woodworking projects with this essential tool and technique combination.
If you’re a woodworking enthusiast or a professional carpenter, mastering the tenoning technique is essential to achieving precise and sturdy joinery. The tenoning jig for table saws is a valuable tool in this process, allowing you to create strong and reliable tenons with ease. In this article, we will walk you through the process of mastering the tenoning technique, from making initial cuts to fine-tuning the fit.
Making Initial Cuts
Before delving into the intricacies of the tenoning technique, you need to start by making the initial cuts on your workpiece. This is where the tenoning jig comes into play. With a tenoning jig firmly attached to your table saw, you can ensure accurate and repeatable cuts each time. Here’s a step-by-step guide to making your initial cuts:
- Begin by setting the blade height to the desired depth of your tenon. This will depend on the thickness of your workpiece and the specific requirements of your project.
- Position your workpiece against the tenoning jig, aligning it precisely with the cutting line.
- Secure the workpiece in place using clamps or hold-downs, ensuring it doesn’t move during the cutting process.
- With all safety precautions taken, turn on the table saw and slowly feed the workpiece into the blade, guiding it along the jig’s fence.
- Continue pushing the workpiece until the initial cut is complete, and you have achieved the desired length of the tenon.
By following these steps, you will have successfully made the initial cuts for your tenon, setting the stage for the next crucial step in the tenoning technique – fine-tuning the fit.
Fine-tuning The Fit
When it comes to creating strong and precise tenon joints, achieving the perfect fit is paramount. Fine-tuning the fit involves carefully shaving off excess material to ensure a seamless match between the tenon and its corresponding mortise. Here are the steps to fine-tuning the fit:
- Start by testing the fit of your tenon in the mortise. It should slide in snugly without requiring excessive force.
- If the tenon is too tight, make minor adjustments by removing thin shavings with a chisel or a shoulder plane.
- Conversely, if the tenon is too loose, you can use veneer or thin shims to achieve a tighter fit.
- Continue testing and making adjustments until you are satisfied with the fit. Remember that a well-fitted tenon should remain sturdy and not wobble within the mortise.
By following these steps, you will be able to fine-tune the fit of your tenon, resulting in a strong and seamless joint. Mastering the tenoning technique takes practice and patience, but with the right tools and methodology, you can achieve professional-level joinery in your woodworking projects.
Maintenance And Safety Tips
When it comes to using a tenoning jig for a table saw, it is crucial to prioritize maintenance and safety. By following regular inspection protocols and adhering to safe operating practices, you can ensure a smooth and secure woodworking experience. Let’s dive into some important points:
Regular Inspection
Performing regular inspections of your tenoning jig is essential for its optimal functionality and longevity. Here are some areas that you should pay close attention to:
- Check the alignment of the jig components, especially the sliding mechanism and fence.
- Inspect the bolts, nuts, and screws for any signs of loosening or wear.
- Ensure the miter gauge bar is in proper alignment and free from debris.
- Inspect the clamps and locking mechanisms for any defects or damage.
By conducting these inspections regularly, you can catch any potential issues before they become safety hazards or affect the performance of your tenoning jig.
Safe Operating Practices
Using a tenoning jig safely should be your top priority. Here are some safe operating practices that you should follow:
- Always wear appropriate personal protective equipment, including safety glasses and ear protection.
- Ensure that the table saw is powered off and unplugged before attaching or removing the tenoning jig.
- Follow the manufacturer’s instructions for setting up and adjusting the jig.
- Make sure the workpiece is securely clamped and held against the jig to prevent kickback.
- Never reach over the spinning blade or use your hands to hold the stock during operation.
- Maintain a clear workspace, free from clutter or distractions.
- Keep your hands and fingers away from the cutting area at all times.
- If you notice any abnormalities or unusual sounds during operation, stop immediately and investigate the issue.
Following these safe operating practices will greatly reduce the risk of accidents or injuries while using a tenoning jig for your table saw.
Frequently Asked Questions On Tenoning Jig For Table Saw
What Is A Tenoning Jig And How Does It Work?
A Tenoning Jig is a woodworking tool used with a table saw to create precise and strong tenon joints. It works by guiding the workpiece through the blade while ensuring a straight and accurate cut, resulting in tight-fitting joints for furniture and other woodworking projects.
Why Should I Use A Tenoning Jig Instead Of Other Methods?
Using a Tenoning Jig offers several advantages over other methods. It provides precise and repeatable cuts, ensuring a perfect fit for tenon joints. It also enhances safety by keeping your hands away from the blade, reducing the risk of accidents.
Additionally, it saves time and effort by streamlining the tenon-making process.
Can I Build My Own Tenoning Jig Or Should I Buy One?
While it is possible to build your own Tenoning Jig, buying a dedicated one offers numerous benefits. Professionally made Tenoning Jigs are designed with precision and accuracy in mind, ensuring consistent results. Additionally, they often come with adjustable features, allowing you to customize the jig for different tenon sizes and angles.
Investing in a quality Tenoning Jig will save you time and frustration in the long run.
Conclusion
A tenoning jig for your table saw is an invaluable tool for improving woodworking precision and safety. Its simple design and ease of use make it a must-have for woodworkers of all skill levels. By incorporating this versatile jig into your projects, you can achieve accurate and professional-looking tenons with ease.
Embrace the benefits of this essential woodworking accessory today!