
What Grit Sandpaper for Deck Sanding? (Start to Finish Grits)
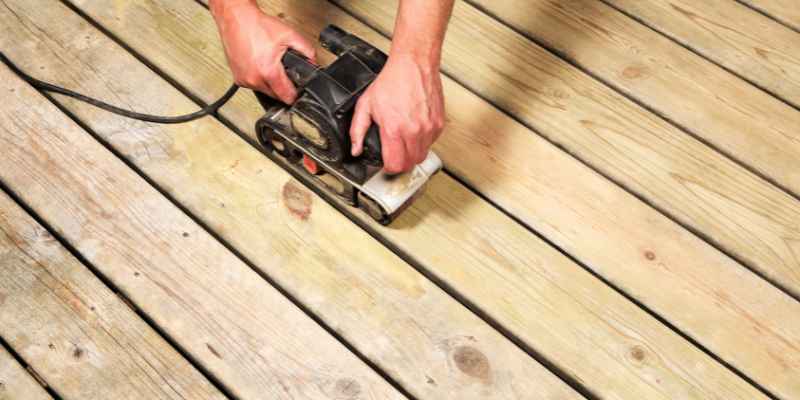
For deck sanding, use a grit sandpaper between 60 to 80 to effectively remove old stain or debris and prepare the surface for refinishing. When sanding your deck, it’s crucial to choose the right grit sandpaper to achieve desired results.
Grit sandpaper ranging from 60 to 80 is the most suitable option for deck sanding. This coarse grit helps remove previous finishes, stains, or debris effectively, preparing the surface for refinishing. By using grit sandpaper within this range, you can achieve a smooth and even finish, ensuring your deck is ready for a fresh coat of stain or paint. Sanding is one part of a larger deck maintenance routine — see our full category for cleaning, repair, and refinishing guides.
Choosing The Right Grit Sandpaper
Properly selecting the grit sandpaper for deck sanding is crucial for achieving a smooth and even finish. Consider the level of damage and the desired outcome to determine the ideal grit size for your project.
What Grit For Deck Boards Vs. Posts And Handrails?
Deck boards and stair treads — the surfaces people actually walk on — do best with 60- or 80-grit sandpaper, since they see the most foot traffic and weather exposure. Posts and handrails can typically go a step finer, 80- or 100-grit, since they’re touched more than walked on and don’t need as aggressive a strip. Railings, stair treads, and board edges are also the areas most worth hand-sanding with a sanding block instead of a power sander, since a large orbital sander can round over edges you want to keep crisp.
Understanding The Grit Number System
When it comes to deck sanding, choosing the right grit sandpaper is crucial for achieving smooth and long-lasting results. The grit number system is used to indicate the coarseness or fineness of the sandpaper. It measures the number of abrasive particles per square inch of sandpaper. The lower the grit number, the coarser the sandpaper, while higher grit numbers indicate finer sandpaper.
Coarse Grit Sandpaper for Initial Sanding:
Coarse Grit Sandpaper For Initial Sanding
Before you start sanding your deck, it’s recommended to begin with coarse grit sandpaper, typically in the range of 40 to 60 grit. Coarse grit sandpaper is designed to remove the top layer of the wood and any stubborn stains or old finishes. It is effective in quickly leveling rough spots, weathered areas, and removing splinters or protrusions. Using this coarse grit sandpaper will provide a clean and smooth surface to work on during the next stages of sanding.
Medium Grit Sandpaper for Smoothing:
Medium Grit Sandpaper For Smoothing
After your initial sanding with coarse grit sandpaper, it’s time to move on to medium grit sandpaper. Medium grit sandpaper usually falls in the range of 80 to 120 grit. This sandpaper is ideal for smoothing out the roughness left by the coarse grit sandpaper. It helps to even out the surface, remove any visible scratches or marks, and prepare the deck for the final sanding stages. By using medium grit sandpaper, you’ll achieve a more refined and even texture, ensuring a better surface for staining or sealing.
Fine Grit Sandpaper for Final Touches:
Fine Grit Sandpaper For Final Touches
For the final touches on your deck sanding project, fine grit sandpaper is the key. Fine grit sandpaper typically ranges from 150 to 220 grit. This sandpaper is used for creating a smooth and uniform finish on the wood surface. It helps to remove any remaining imperfections, blemishes, or fine scratches left by the previous sanding stages. Additionally, fine grit sandpaper prepares the deck for staining or sealing, allowing the finish to adhere properly and ensure a polished and professional look.
Choosing the right grit sandpaper for deck sanding is essential to achieve a flawless and professional finish. Starting with coarse grit sandpaper for initial sanding, moving on to medium grit sandpaper for smoothing, and finishing off with fine grit sandpaper for final touches will result in a deck that’s ready to be preserved and enjoyed for years to come.
Factors To Consider When Choosing Grit Sandpaper
When it comes to sanding your deck, choosing the right grit sandpaper is crucial to achieving the desired results. Various factors need to be taken into consideration to ensure that you select the optimal sandpaper for your specific needs. These factors include:
Type Of Wood And Its Condition
The type of wood used for your deck will dictate the grit sandpaper you should use. Different woods have varying levels of hardness, and using the wrong grit can result in damage to the surface. In order to determine the appropriate grit sandpaper, assess the condition of the wood. If the wood is in good condition with minimal imperfections, a fine-grit sandpaper, such as 120 or 150 grit, will be sufficient for a smooth finish. However, for older or weathered wood that has rougher surfaces, coarser grits like 60 or 80 grit may be necessary to remove the outer layer and reveal a fresh surface for refinishing.
Extent Of Damage Or Stains On The Deck
If your deck has noticeable damage, such as deep scratches or gouges, you’ll need to use a coarser grit sandpaper to effectively smooth out these imperfections. Coarser grits, like 40 or 50 grit, are ideal for removing tough stains and heavy layers of finishes as well. On the other hand, if your deck only has minor blemishes or light staining, a finer grit sandpaper will be sufficient to achieve the desired results.
Desired Level Of Smoothness
Consider the level of smoothness you want to achieve when selecting the grit sandpaper. Finer grits, ranging from 120 to 180 grit, are ideal for obtaining a smooth finish, especially if you plan on applying a clear or translucent sealer. If you prefer a more rustic look or if you intend to apply a pigmented stain, slightly coarser sandpaper, such as 80 or 100 grit, can create a textured surface that enhances the appearance of the wood.
Time And Effort Allocation
Lastly, you need to decide on the amount of time and effort you are willing to invest in the sanding process. Coarser grit sandpaper will remove material faster, but it may require more power and effort to use effectively. Finer grit sandpaper, on the other hand, will produce a smoother finish but may take longer to complete the sanding process. Consider your availability, physical capabilities, and overall timeline for the project when selecting the appropriate grit sandpaper.
By taking into account these factors – the type of wood and its condition, extent of damage or stains, desired level of smoothness, and time and effort allocation – you can make an informed decision when it comes to choosing the right grit sandpaper for your deck sanding project.
Best Assorted Grit Sandpaper Pick
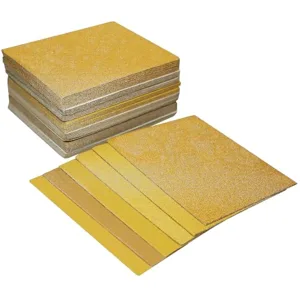
60-Pc Assorted Grit Hook-and-Loop Sandpaper Set (60-220 Grit)
Covers every stage this guide recommends — 60/80 grit for stripping deck boards, 100/120/150 for smoothing — in one hook-and-loop pack sized for a standard random orbit sander.
- Best for: anyone who doesn’t want to buy each grit separately
- Why we picked it: covers the full 60-220 progression this guide recommends in one order
- Main drawback: hook-and-loop only fits sanders with that attachment style, not clip-on pads
Compare more deck sanding supplies
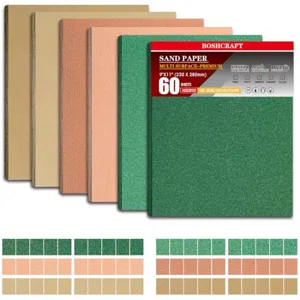 Option 1 BOSHCRAFT Sheet Assortment
|
 Option 2 SKIL 5″ Random Orbital Sander
|
 Option 3 DEWALT Random Orbit Sander
|
As an Amazon Associate we earn from qualifying purchases.
Special Cases: Dealing With Paint Or Varnish
When it comes to sanding your deck, there are special cases that require a different approach. Dealing with paint or varnish requires specific grits of sandpaper to effectively remove these coatings and prepare the surface for refinishing. In this section, we will discuss the different grit sandpapers that are suitable for paint and varnish removal, as well as how to use them.
Using Coarse Grit Sandpaper For Paint Removal
To remove paint from your deck, you will need to use a coarse grit sandpaper. Coarse grit sandpaper, such as 40 or 60 grit, is designed to aggressively remove layers of paint and other coatings. Start by thoroughly sanding the painted areas, working in small sections at a time. Use long, sweeping strokes, and apply even pressure to effectively strip away the paint. It’s essential to wear protective goggles and a dust mask during this process to avoid inhaling harmful paint particles.
Selecting Medium Grit Sandpaper For Varnish Removal
If your deck has a varnish finish that needs to be removed, a medium grit sandpaper will be the most suitable choice. Medium grit sandpaper, typically around 80 or 100 grit, is effective in sanding away varnish without damaging the surface of the wood. Work in small sections, applying even pressure while sanding. Make sure to follow the wood grain to achieve a consistent finish. After sanding, wipe away the loosened varnish particles with a clean cloth or vacuum to prepare the surface for the next step.
Fine Grit Sandpaper For Smoothing The Surface
After removing the paint or varnish, it’s time to smooth the deck’s surface. Fine grit sandpaper, such as 120 or 150 grit, is ideal for this step. Sand the entire deck using long, straight strokes, working in the direction of the wood grain. The goal is to achieve a smooth and even surface, free from any imperfections left behind from the previous steps. Remove any remaining dust or debris by vacuuming or wiping with a clean cloth before applying a new finish.
Techniques For Effective Deck Sanding
Sanding your deck is an essential step in maintaining its beauty and prolonging its lifespan. By removing dirt, grime, and worn-out layers of wood, you can create a smooth and even surface that will be ready for refinishing or staining. However, to achieve the best results, you need to follow proper techniques for effective deck sanding. In this blog post, we will explore the key techniques that will help you achieve a professional-looking finish.
Proper Equipment And Safety Precautions
Before you start sanding your deck, it’s important to ensure that you have the right equipment and that you prioritize safety. Here are a few essential tools and safety precautions to keep in mind:
- Wear protective goggles, gloves, and a dust mask to shield yourself from dust and debris.
- Make sure your power sander is in good working condition and fitted with the appropriate sandpaper.
- Choose sandpaper with the right grit for your deck. More on that in the next section.
- Remove any loose nails or screws and inspect the surface for any damage that needs to be repaired before sanding.
Sanding In The Direction Of The Wood Grain
When sanding your deck, it’s crucial to always sand in the direction of the wood grain. This helps to prevent scratches and ensures that the sanding process is even and smooth. Sanding against the grain can result in uneven surfaces and visible marks that can be difficult to remove. By following the natural lines of the wood, you’ll achieve a more polished and professional finish.
Progressive Sanding With Different Grits
To achieve the best results, it’s essential to use a progression of sandpaper grits during the deck sanding process. Start with a coarse grit sandpaper to remove any rough or damaged areas. Then, gradually move to finer grits to achieve a smooth finish. Here is a general guideline for choosing the right grit:
| Grit | Use |
|---|---|
| 40-60 | Initial sanding or removing deep stains and paint |
| 80-100 | Intermediate sanding to smooth rough areas |
| 120-150 | Final sanding for a smooth finish |
Remember to change the sandpaper frequently to maintain its effectiveness.
Avoiding Over-sanding And Damage To The Deck
While sanding is an important step in deck maintenance, it’s crucial to avoid over-sanding, which can lead to damage. Over-sanding can remove too much wood and weaken the structure of the deck. To prevent this, pay close attention to the progress as you sand, and stop sanding once you have achieved a smooth and even surface. Remember, the goal is to prepare the deck for refinishing, not to remove all the wood.
By following these techniques for effective deck sanding, you can ensure a professional result and prolong the life and beauty of your deck.
Maintaining And Extending The Life Of Sandpaper
To maintain and extend the life of sandpaper when deck sanding, it is important to choose the right grit. The ideal grit for deck sanding is usually between 60 and 80, allowing for efficient removal of old finishes while avoiding excessive damage to the wood surface.
When it comes to deck sanding, using the right grit sandpaper is crucial for achieving a smooth, even surface. But just as important it is to choose the correct grit, it is equally important to know how to maintain and extend the life of your sandpaper. This not only saves you money in the long run but also ensures optimal performance throughout your deck sanding project.
Cleaning Sandpaper For Reuse
After sanding for a while, you may notice that your sandpaper becomes clogged with dust, debris, and wood particles. Cleaning sandpaper regularly not only helps maintain its effectiveness but also prevents those particles from being transferred onto your deck surface, resulting in uneven sanding. Luckily, cleaning sandpaper is a simple process.
- Start by gently tapping the sandpaper against a solid surface to remove loose debris. This will help dislodge any particles trapped within the grit.
- If there are still visible particles on the sandpaper, you can use a soft-bristle brush to gently scrub the surface and remove any remaining debris.
- For tougher buildup, you can create a cleaning solution by mixing warm water with a small amount of mild detergent. Dip the brush in the solution and gently scrub the sandpaper in a circular motion. Be careful not to oversaturate the sandpaper as excessive moisture can damage it.
- Once you have cleaned the sandpaper, rinse it with clean water and allow it to dry completely before reusing. Storing damp sandpaper can lead to mold or mildew growth, rendering it ineffective.
Storing Sandpaper In A Dry Environment
Proper storage is essential for prolonging the life of your sandpaper. Storing sandpaper in a dry environment helps prevent moisture absorption, which can cause the paper to lose its rigidity and lead to premature wear and tear. Here are some tips for storing sandpaper:
- Keep your sandpaper in airtight containers or plastic bags to protect it from humidity and moisture.
- Store sandpaper in a cool, dry place, away from any heat sources or direct sunlight.
- Avoid storing sandpaper near chemicals or solvents, as they can deteriorate the paper.
- Consider using a sandpaper organizer or filing system to keep different grits organized and easily accessible.
Rotating And Replacing Sandpaper As Needed
Rotating and replacing sandpaper regularly is vital for maintaining its effectiveness. Over time, sandpaper wears down, resulting in decreased sanding efficiency and rougher surfaces. By adhering to a few simple guidelines, you can ensure you are using sandpaper at its optimal performance level:
- Periodically inspect your sandpaper for signs of wear, such as fraying or loss of grit. If you notice any significant damage, it’s time to replace it.
- If you have a large deck sanding project, consider using multiple sheets of sandpaper and rotating them. This helps distribute the wear and tear more evenly, extending the life of each individual sheet.
- As you sand, be mindful of pressure and technique. Applying excessive force or using improper sanding techniques can accelerate the wear of the sandpaper.
By implementing these practices and taking proactive measures to clean, store, and rotate sandpaper, you can significantly extend its lifespan, save money, and achieve superior results in your deck sanding endeavors.

Frequently Asked Questions Of What Grit Sandpaper For Deck Sanding
What Is The Best Grit For Sanding A Deck?
The best grit for sanding a deck depends on condition: start with 80 grit for most decks (or 40-60 for heavily damaged/weathered wood), move to 80-100 grit to smooth scratches, then finish with 120-150 grit. Don’t go finer than 150 grit on an outdoor deck — an overly smooth surface can actually hinder stain absorption. Always sand in the direction of the grain, and don’t skip grit steps in between.
Can I Sand Deck With 40 Grit?
Yes, you can sand your deck with 40 grit sandpaper. It is a coarse grit that can effectively remove roughness and stains from the wood surface, preparing it for refinishing. Make sure to use proper safety precautions and follow the manufacturer’s guidelines for best results.
What Is The Fastest Way To Sand A Deck?
The fastest way to sand a deck is by using a high-powered sander. It quickly removes old finish and smoothens the surface for refinishing. Make sure to wear protective gear and follow safety precautions.
What Grit Sandpaper For Pressure Treated Wood?
For pressure treated wood, use a grit sandpaper between 60 and 80. This will effectively remove any imperfections or roughness from the wood’s surface.
Conclusion
To achieve a beautifully sanded deck, choosing the right grit sandpaper is crucial. By understanding the different grit levels and their specific purposes, you can ensure a successful deck sanding project. Opting for a coarse grit sandpaper to remove the initial layer of dirt and old finish, followed by a finer grit to smoothen the wood’s surface, will help you achieve the desired result.
Remember to always follow the manufacturer’s recommendations and take proper safety precautions. Happy deck sanding!