How to Burnish Wood
Burnishing wood is the process of polishing the surface to create a smooth, glossy finish. To burnish wood, start by sanding the surface to remove any imperfections, then apply a burnishing solution or wax and buff it in with a cloth or brush, followed by a final buff with a soft cloth to achieve the desired shine.
Introduction To Burnishing Wood
Experience the art of burnishing wood and enhance your woodworking projects with a sleek and polished finish. Discover what burnishing wood is and how you can achieve this technique to create professional-looking results.
Burnishing wood is a technique that enhances the natural beauty and durability of wood surfaces. It involves rubbing or polishing the wood with a hard object, such as a burnishing tool or a smooth hard object like a stone, bone, or metal. This process creates a smooth, shiny finish that not only protects the wood but also highlights its grain patterns and color variations.
What Is Burnishing Wood?
Burnishing wood is the process of rubbing or polishing the surface of wood with a hard object, such as a burnishing tool or a smooth hard object like a stone, bone, or metal. This technique is often used to smoothen out rough surfaces, enhance the grain patterns, and create a polished, glossy finish. Burnishing can be done by hand or with the help of a power tool, depending on the scale of the project.
Benefits Of Burnishing Wood
Burnishing wood offers several benefits that make it a popular choice for woodworking enthusiasts and professionals alike. Here are some of the advantages:
- Enhanced durability: Burnishing creates a hard, protective layer on the wood surface, making it more resistant to scratches, stains, and moisture.
- Improved appearance: The process brings out the natural beauty of the wood, enhancing its grain patterns and color variations. The resulting glossy finish adds a touch of elegance to any woodworking project.
- Smooth finish: Burnishing smoothens out rough surfaces and creates a silky, tactile feel. This makes the wood more inviting to touch and enhances its overall quality.
- Cost-effective: Burnishing is a cost-effective way to achieve a high-end, polished look without the need for expensive equipment or complex techniques.
- Versatility: This technique can be used on a wide range of wood types, including hardwoods and softwoods, as well as on furniture, flooring, and other wooden objects.
In conclusion, burnishing wood is a technique that can transform ordinary wood surfaces into stunning pieces of craftsmanship. It not only protects the wood but also enhances its natural beauty and durability. By adding a glossy finish and highlighting the grain patterns, burnishing creates a smooth, inviting surface that will impress anyone who sees or touches it.
Tools And Materials Needed
In order to successfully burnish wood, you will need a few essential tools and materials. These items will help you achieve the desired outcome and enhance the beauty of the wood. Let’s take a look at what you will need:
Burnishing Tool
A burnishing tool is an indispensable item when it comes to burnishing wood. This tool is specifically designed to create the smooth and shiny finish that is characteristic of burnished wood. It is usually made of a hard material like steel or tungsten carbide, with a rounded or polished edge. The burnishing tool comes in various shapes and sizes, allowing you to choose the one that best suits your project.
Fine Sandpaper
Another essential item you’ll need is fine sandpaper. This will help prepare the wood surface for burnishing by smoothing out any imperfections or roughness. It is recommended to use sandpaper with a grit between 220 and 400 for best results. Be sure to sand the wood evenly and gently to avoid damaging the surface.
Soft Cloth
A soft cloth is necessary for the final stage of the burnishing process. This cloth is used to buff and polish the surface of the wood, giving it a glossy appearance. Choose a lint-free cloth, such as microfiber or a clean cotton cloth, to prevent any particles from being left behind on the wood. Make sure the cloth is soft enough to avoid scratching the surface.
By having these tools and materials ready, you’ll be well-prepared to embark on your burnishing wood project. It’s time to bring out the natural beauty of the wood and create a stunning masterpiece!
Preparing The Wood Surface
Burnishing wood is a technique used to enhance the surface by polishing it with a hard, smooth object. It helps to achieve a glossy finish and bring out the natural beauty of the wood. To burnish wood, start by sanding the surface to remove any imperfections, then use a burnishing tool to rub the wood in a circular motion until it becomes smooth and shiny.
Sanding The Wood
Before you begin the burnishing process, it’s important to prepare the wood surface properly. The first step is sanding the wood, which helps to smooth out any rough patches and ensure a more even finish.
Start by choosing the appropriate sandpaper grit based on the condition of the wood and the desired level of smoothness. If the wood has deep scratches or imperfections, you may need to start with a coarser grit and gradually work your way to a finer grit.
When sanding, always move the sandpaper in the direction of the wood grain to avoid damaging the surface. Apply light pressure and make sure to sand evenly across the entire surface, paying extra attention to any rough areas.
Cleaning The Wood
Once you have finished sanding the wood, it’s important to thoroughly clean the surface before proceeding with the burnishing process. Cleaning the wood removes any dust or debris that may have accumulated during sanding, ensuring a smooth and flawless finish.
Start by using a soft, lint-free cloth or a vacuum cleaner with a brush attachment to remove any loose dust. Make sure to reach into crevices and corners to remove any hidden debris.
Next, you can use a damp cloth or sponge with mild soap and water to wipe down the wood surface. Be careful not to saturate the wood with water, as excessive moisture can cause damage.
After cleaning, allow the wood to dry completely before proceeding with the burnishing process. You can use a dry cloth or air-dry the wood naturally.
Summary
Preparing the wood surface is a crucial step in the burnishing process. By sanding the wood and cleaning it thoroughly, you ensure a smooth and flawless surface, ready for the burnishing technique.
- Start by sanding the wood with the appropriate grit, moving in the direction of the wood grain.
- Thoroughly clean the wood surface, removing any dust or debris.
- Allow the wood to dry completely before proceeding with burnishing.
With the wood surface properly prepared, you are now ready to move on to the next steps of burnishing, bringing out the natural beauty of the wood.
Techniques For Burnishing Wood
When it comes to finishing wood, burnishing is a technique that can add a beautiful and polished look to your project. Burnishing involves rubbing a hard object against the wood surface to compress the wood fibers, resulting in a smooth and glossy appearance. There are two popular techniques for burnishing wood: dry burnishing and wet burnishing. Here’s a closer look at each method:
Dry Burnishing
Dry burnishing involves using friction to create heat, which then helps to compress the wood fibers. The heat generated from the friction of rubbing a hard object against the wood surface causes the wood fibers to soften. This technique is effective for creating a glossy and smooth finish. Here are some steps to follow when dry burnishing wood:
- Start by sanding the wood surface to remove any roughness or imperfections.
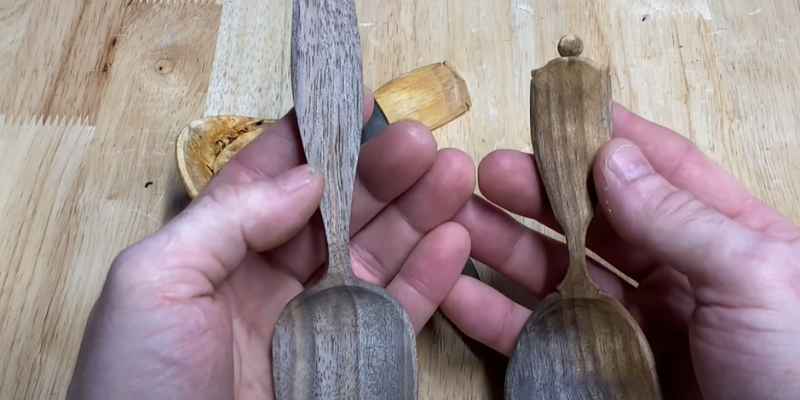
- Choose a hard object like a bone folder, metal spoon, or a burnishing tool specifically designed for dry burnishing.
- Apply pressure and rub the hard object in a circular motion against the wood surface.
- Continue burnishing until you achieve the desired level of glossiness and smoothness.
- Finish the process by applying a wood finish or polish to protect the burnished surface.
Wet Burnishing
Wet burnishing, as the name suggests, involves using water or a lubricant to aid in the burnishing process. The lubricant helps reduce friction and prevents the wood fibers from overheating. This technique is particularly useful when working with soft woods or when you want to achieve a higher level of shine. Here’s how to wet burnish wood:
- Prepare the wood surface by sanding it to remove any imperfections.
- Use a lubricant such as water, oil, or a burnishing compound specifically designed for wet burnishing.
- Apply the lubricant to the wood surface, ensuring it is evenly distributed.
- Choose a hard object like a bone folder, metal spoon, or a burnishing tool designed for wet burnishing.
- Apply pressure and rub the hard object in a circular or back-and-forth motion against the wood surface.
- Continue burnishing until you achieve the desired level of glossiness and smoothness.
- Once done, wipe off any excess lubricant and apply a wood finish or polish to protect the burnished surface.
Now that you know the techniques for burnishing wood, you can experiment with both methods to achieve the perfect finish for your woodworking projects.
Finishing Touches And Maintenance
Once you have burnished your wood and achieved the desired smoothness and shine, it’s time to focus on the finishing touches and maintenance. These essential steps will not only preserve the beauty of your burnished wood but also extend its lifespan. In this section, we will explore the importance of applying a protective finish and provide tips on regular cleaning and maintenance to keep your burnished wood looking stunning for years to come.
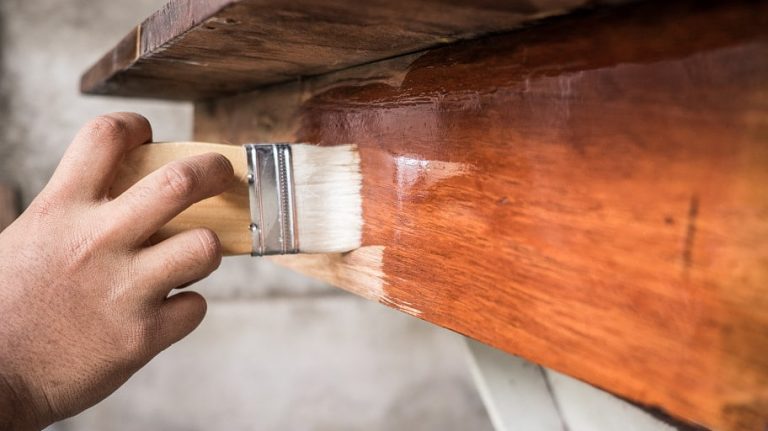
Applying A Protective Finish
After burnishing your wood, it is crucial to apply a protective finish to safeguard it from moisture, scratches, and wear. A protective finish acts as a barrier, shielding the wood from potential damage while highlighting its natural beauty. There are various protective finishes available, such as polyurethane, varnish, and wax, each with its unique advantages. Here’s a breakdown:
Polyurethane:
Polyurethane is a popular protective finish due to its durability and versatility. It comes in different forms, including water-based and oil-based options. Water-based polyurethane dries quickly, has a low odor, and is more environmentally friendly. On the other hand, oil-based polyurethane provides a more durable and glossy finish, making it ideal for high-traffic areas.
Varnish:
Varnish offers excellent protection while enhancing the wood’s natural color and grain pattern. It creates a hard and durable surface that is resistant to moisture, making it suitable for both indoor and outdoor applications. Varnish can be applied through brushing, spraying, or wiping, depending on the desired result and the type of wood being finished.
Wax:
Wax provides a traditional and warm finish to burnished wood. It offers modest protection and is best suited for lower-traffic areas or decorative pieces. Applying wax involves rubbing it onto the wood’s surface and then buffing it to a shine. The wax creates a protective layer and can be reapplied periodically to maintain its effectiveness.
Regular Cleaning And Maintenance
To keep your burnished wood looking its best, regular cleaning and maintenance are essential. Here are some tips to ensure your wood remains in pristine condition:
- Use a soft, lint-free cloth or microfiber cloth to dust your burnished wood regularly. This helps remove any accumulated dirt or debris without scratching the surface.
- Avoid using harsh chemicals or abrasive cleaners as they can damage the finish. Instead, opt for mild soapy water or a specialized wood cleaner, following the manufacturer’s instructions.
- Wipe up spills immediately to prevent any moisture from seeping into the wood and causing damage. Use a damp cloth to gently absorb the liquid, being careful not to rub or scrub the surface vigorously.
- Protect your burnished wood from excessive sunlight exposure, as this can cause fading and discoloration over time. Consider using curtains or blinds to regulate the amount of sunlight the wood receives.
- Periodically inspect your burnished wood for any signs of wear or damage. If you notice scratches or dull spots, you can try using a wood polish or a touch-up product specifically designed for your type of finish.
By following these simple steps and incorporating them into your regular cleaning routine, you can enjoy the beauty of your burnished wood for years to come. Remember, proper maintenance is key to preserving its natural allure and ensuring its longevity.
Frequently Asked Questions For What Is Burnishing Wood How To Burnish Wood
How Do You Burnish Wood?
To burnish wood, follow these steps:
1. Sand the wood surface with fine-grit sandpaper to smoothen it.
2. Apply a burnishing solution, such as tung oil or wax, using a soft cloth.
3. Rub the solution into the wood in circular motions.
4. Allow it to dry completely.
5. Buff the wood with a clean cloth for a polished finish.
How Do You Burnish Wood On A Lathe?
To burnish wood on a lathe, follow these steps:
1. Start the lathe and adjust the speed.
2. Hold the burnishing tool against the spinning wood.
3. Apply gentle pressure and move the tool along the wood’s surface.
4. Repeat the process until the desired burnished finish is achieved.
5. Sand lightly for a smooth final touch.
Why Do You Rub Wood Shavings On Wood?
Rubbing wood shavings on wood helps to smooth the surface and remove imperfections. It allows for better adhesion when applying finishes or glue. The friction and pressure of rubbing the shavings creates heat, which melts the waxy substance present in the wood fibers, resulting in a smoother finish.
What Are Examples Of Burnishing?
Examples of burnishing include using a wooden spoon to smooth clay pottery, rubbing a leather shoe with a brush to create shine, and using a burnishing tool to polish metal surfaces.
Conclusion
To conclude, burnishing wood is an effective technique that enhances the appearance and durability of wooden surfaces. By using a burnishing tool and applying pressure, you can achieve a smooth and polished finish. This age-old method is ideal for highlighting the natural beauty of wood and can be easily done at home with the right tools and techniques.
Embrace burnishing wood to elevate the elegance of your wooden furniture and crafts.