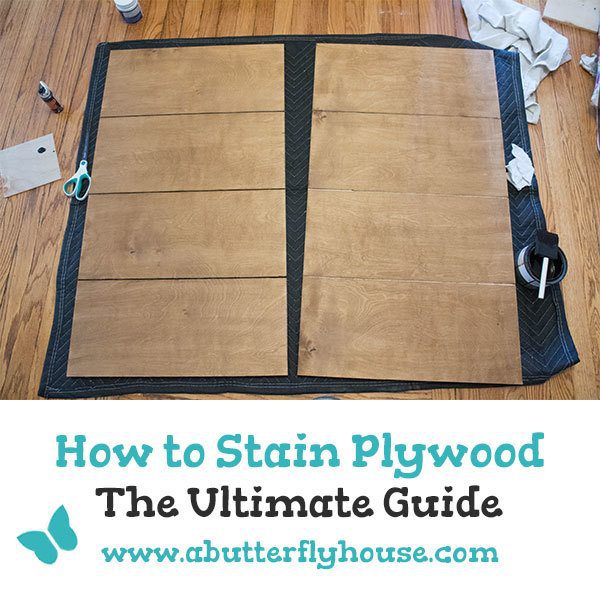
Best Plywood for Staining: Oak Beats Birch for Even Color
For staining, birch plywood is ideal due to its smooth surface and uniform grain patterns. When choosing plywood for staining projects, it is essential to select a high-quality, furniture-grade birch plywood to achieve the best results.
Birch plywood is known for its ability to take stains well, resulting in a beautiful and even finish that enhances the natural wood grain. This type of plywood is durable, easy to work with, and offers a versatile canvas for various staining techniques.
Whether you are a seasoned woodworker or a DIY enthusiast, birch plywood is a top choice for achieving professional-looking stained finishes in your woodworking projects.
Choosing The Right Type Of Plywood
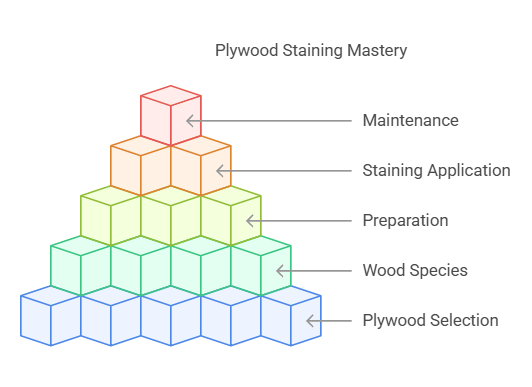
The key to achieving a beautiful stained finish on your woodworking project lies in selecting the appropriate plywood. Understanding Different Plywood Grades and Selecting the Best Plywood Thickness are crucial factors to consider when choosing the right material for staining.
Understanding Different Plywood Grades
- Plywood comes in different grades such as A, B, C, and D, with A being the highest quality.
- Grade A plywood has minimal imperfections, making it ideal for projects where appearance is paramount.
- Lower grades like C and D may have knots and defects, which can affect the final stained outcome.
Selecting The Best Plywood Thickness
- The thickness of plywood ranges from 1/8 inch to 3/4 inch, with thicker panels providing more stability.
- For staining projects, a thicker plywood like 3/4 inch is recommended to ensure a durable and uniform finish.
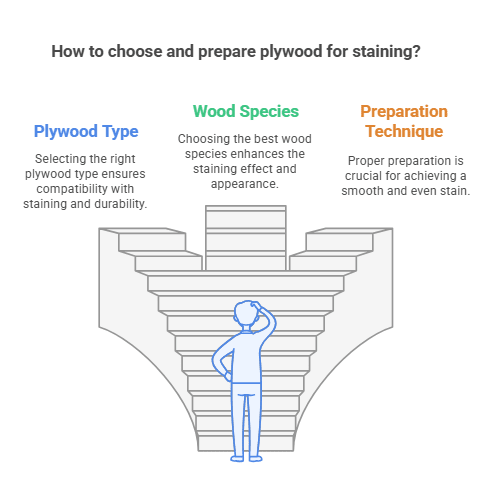
Understanding The Impact Of Wood Species
Assessing Different Wood Species For Staining
When selecting the best plywood for staining, it’s essential to consider the type of wood species used. Various wood species impact how well the plywood takes the stain and the overall appearance of the finished project.
Key Wood Species Characteristics
Each wood species has unique characteristics that affect its ability to absorb and display stain. Some species, such as birch and cherry, have a smooth and even texture, making them ideal for staining. On the other hand, woods like oak and pine may absorb stain unevenly.
Best Wood Species For Staining
For optimal staining results, maple and mahogany are excellent choices due to their fine grain and uniform appearance. Other premium wood species such as walnut and teak also stain beautifully and enhance the natural beauty of the wood.
Preparing Plywood For Staining
When it comes to staining plywood, proper preparation is key to achieving a beautiful and long-lasting finish. Preparing plywood for staining involves several important steps, including proper sanding techniques and the application of wood conditioner. Let’s delve into these crucial aspects of preparing plywood for staining to ensure a flawless end result.
Proper Sanding Techniques
Before staining plywood, it’s essential to sand the surface to achieve a smooth and even finish. Proper sanding techniques involve using progressively finer grit sandpaper to remove any rough spots, blemishes, or irregularities on the surface. Start with coarse sandpaper to smooth out any imperfections, then gradually work your way up to finer grits for a polished, uniform surface. Make sure to sand with the grain of the wood to avoid creating scratches or uneven areas.
Importance Of Applying Wood Conditioner
Applying wood conditioner to plywood before staining is a critical step that should not be overlooked. Wood conditioner helps the plywood absorb the stain more evenly, preventing blotchiness and uneven coloring. It also enhances the overall appearance of the stained plywood, creating a more professional and refined look. Be sure to apply the wood conditioner according to the manufacturer’s instructions and allow it to penetrate the surface before proceeding with the staining process.
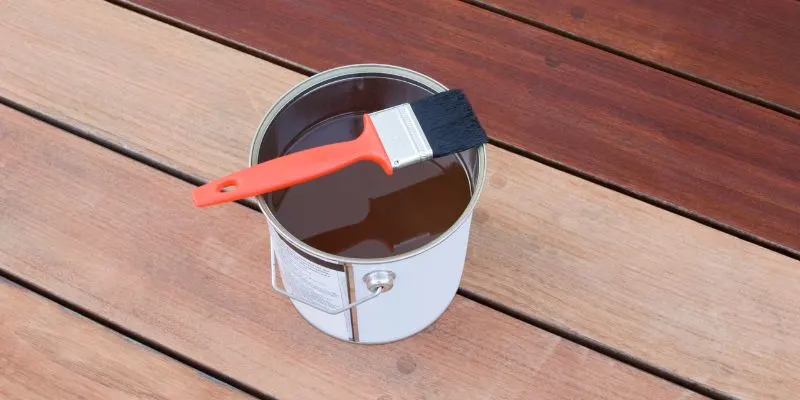
Applying Stain Techniques
When it comes to staining plywood, applying the right techniques can make all the difference in achieving a beautiful and long-lasting finish. In this section, we will explore various staining methods that can help you enhance the natural beauty of your plywood. We will also discuss the importance of choosing the right stain color to complement your project. Let’s dive in!
Exploring Staining Methods
Before you start staining your plywood, it’s essential to familiarize yourself with different staining methods. Here are some popular options:
- Brushing: This is the most common method of applying stain to plywood. Use a high-quality brush to evenly distribute the stain over the plywood surface. Brush in the direction of the wood grain to achieve a smooth and professional finish.
- Wiping: Wiping is another effective technique for staining plywood. Apply the stain with a clean cloth or sponge, working it into the wood. Wiping allows you to control the intensity of the stain and create a more subtle or uniform appearance.
- Spraying: If you’re working with a large plywood surface or intricate details, spraying can be a convenient method. Use an HVLP (High Volume Low Pressure) sprayer to evenly apply the stain. This technique requires careful preparation to avoid overspray, so make sure to mask off surrounding areas properly.
Choosing The Right Stain Color
The choice of stain color can drastically impact the overall look of your plywood project. Here are a few factors to consider when selecting a stain color:
- Wood Type: Different types of wood absorb stain differently, resulting in varied color outcomes. Test the stain on a small, inconspicuous area of the plywood to ensure it achieves your desired color.
- Project Style: Consider the overall style and aesthetic of your project. Traditional or rustic designs often pair well with warmer, darker stain colors, while contemporary or minimalist projects may benefit from lighter or natural hues.
- Pre-stain Conditioner: Plywood can have a porous surface, causing uneven stain absorption. To minimize this issue, use a pre-stain conditioner before applying the stain. This helps to promote an even color distribution.
- Test Samples: If you’re unsure about the stain color, it’s always a good idea to create test samples on a scrap piece of plywood. This allows you to see how the stain looks on your specific type of plywood and make any necessary adjustments before applying it to your project.
By leveraging the staining methods mentioned above and carefully choosing the right stain color, you can achieve stunning results when staining your plywood. Take the time to experiment and find the techniques and colors that best suit your project, and enjoy the transformation of your plywood into a beautiful, customized piece.
Finishing And Maintaining Stained Plywood
Finishing and maintaining stained plywood is crucial to ensure its durability and aesthetic appeal. By applying a protective finish and following a few maintenance tips, you can extend the lifespan of your stained plywood surfaces and keep them looking beautiful. In this section, we will discuss how to apply a protective finish and provide some useful tips for maintaining stained plywood.
Applying Protective Finish
Applying a protective finish is an essential step in the staining process, as it helps to seal the wood and protect it from moisture, dirt, and UV rays. Here are some important factors to consider when choosing and applying a protective finish for your stained plywood:
- Choose the right finish: Opt for a finish that is compatible with stained plywood, such as polyurethane, lacquer, or varnish. Consider the level of sheen you desire, as finishes range from matte to glossy.
- Preparation: Before applying the finish, make sure the stained plywood surface is clean, dry, and free from any dust or debris. Sand the surface lightly to promote adhesion.
- Apply in thin coats: To achieve a smooth and even finish, apply the protective coat(s) in thin, even layers. Follow the manufacturer’s instructions regarding drying time and the number of coats required.
- Sand between coats: For a flawless finish, lightly sand the surface between coats, using a fine-grit sandpaper. This will help remove any imperfections and promote adhesion between the coats.
- Allow for proper drying and curing: Ensure that the stained plywood is allowed to dry and cure completely before subjecting it to any heavy use. This will ensure the longevity of the protective finish and prevent any damage.
Tips For Maintaining Stained Plywood
Proper maintenance is essential to preserve the beauty and integrity of stained plywood. Here are a few tips to keep in mind:
- Regular cleaning: Clean the stained plywood surface regularly with a mild soap or wood cleaner and a soft cloth or sponge. Avoid using harsh chemicals or abrasive cleaners, as they can damage the protective finish.
- Protect from direct sunlight: Direct sunlight can cause the stained plywood to fade and lose its color over time. Consider using blinds or curtains to minimize sun exposure, especially in rooms with large windows.
- Avoid excessive moisture: While a protective finish helps to prevent moisture damage, it is important to wipe up any spills or water immediately. Prolonged exposure to moisture can lead to warping or swelling of the plywood.
- Use coasters and mats: To prevent scratches and dents, use coasters under glasses and mats or trivets under hot objects, such as pots and pans.
- Inspect for damage: Regularly inspect the stained plywood surface for any signs of damage, such as scratches or chips in the finish. Promptly address any issues to prevent further damage and maintain the overall appearance.
Frequently Asked Questions For Best Plywood For Staining
What Is The Best Plywood For Staining?
The best plywood for staining is commonly referred to as “stain-grade plywood. ” It has a smooth surface and tight grain, allowing the stain to penetrate evenly. Hardwood plywood, such as oak or birch, is often recommended for staining due to its natural beauty and durability.
Can Any Plywood Be Stained?
While any plywood can technically be stained, not all types of plywood are suitable for staining. Plywood with low-grade veneers, uneven surfaces, or open grain may result in an uneven stain application or poor finish. It is best to use high-quality hardwood plywood specifically designed for staining projects.
How Do I Prepare Plywood For Staining?
To prepare plywood for staining, start by sanding the surface with progressively finer grit sandpaper. This will smooth out any rough spots or imperfections. Next, apply a coat of sanding sealer to the plywood to help achieve an even stain absorption.
Finally, wipe down the plywood with a clean cloth to remove any dust before applying the stain.
Conclusion
Choosing the right plywood for staining is crucial for achieving optimal results. By considering factors such as the type of wood and its grain pattern, you can ensure a successful staining project. Remember to prepare the wood properly and select high-quality stains and sealants to enhance the overall finish.
Experiment with different plywood options to find the perfect match for your staining needs.