Birdhouse Gourd Painting Ideas: Genius Essentials
To paint a birdhouse gourd, start by cleaning and drying it thoroughly. Drill an entrance hole and drainage holes, then sand the surface smooth. Apply an exterior-safe primer, then use non-toxic acrylic or latex paint for your design. Finish with a clear, non-toxic waterproof sealer to protect it from the elements and ensure it’s safe for birds.
Hello, friends! Md Meraj here. There’s something truly special about turning a simple, dried gourd into a beautiful and functional home for your feathered neighbors. But when you stare at that plain, bumpy surface, you might feel a little stuck. What colors should you use? How do you make it last? It can feel overwhelming, but I promise it’s one of the most rewarding projects you can do.
Don’t worry, I’m here to guide you. We’re going to break down everything you need to know, from preparing your gourd to painting designs that will make both you and the birds happy. Let’s turn that plain gourd into a masterpiece together!
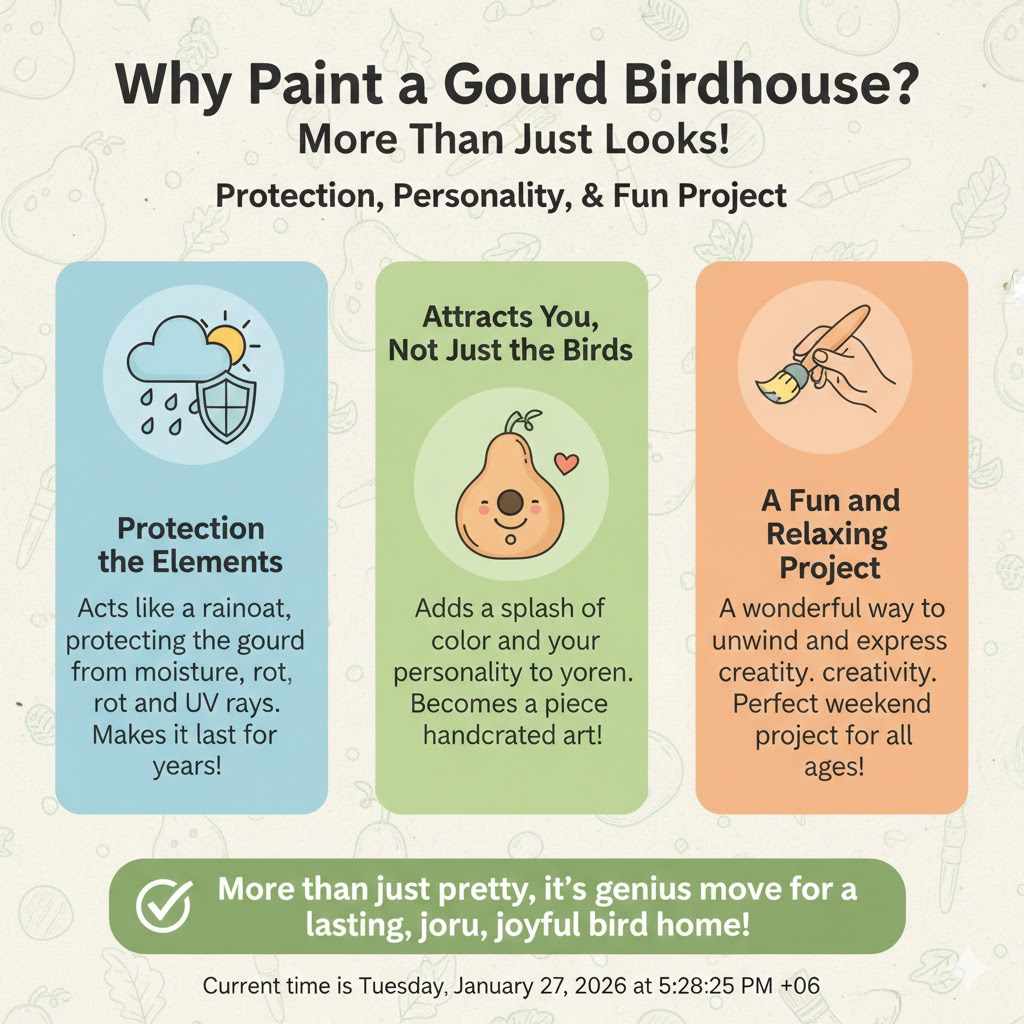
Why Paint a Gourd Birdhouse? More Than Just Looks!
You might think painting a gourd is just about making it pretty, but it’s so much more. A good paint job is your first line of defense for your little bird home. Here’s why taking the time to paint your gourd birdhouse is a genius move.
- Protection from the Elements: A dried gourd is tough, but it’s still a natural material. Sun, rain, and snow can cause it to break down over time. A proper coat of paint and sealer acts like a raincoat, protecting the gourd from moisture and preventing rot. It also shields it from the sun’s harsh UV rays, which can make the gourd brittle.
- Attracts You, Not Just the Birds: Let’s be honest, a beautifully painted birdhouse is a joy to look at! It adds a splash of color and personality to your garden, patio, or backyard. It becomes a piece of handcrafted art that you can proudly display.
- A Fun and Relaxing Project: Painting is a wonderful way to unwind and express your creativity. There are no strict rules. You can create something rustic and simple or bright and whimsical. It’s a perfect weekend project for yourself or to do with kids and grandkids.
The Genius Essentials: Preparing Your Gourd for a Perfect Paint Job
Before you even think about picking up a paintbrush, we need to get your gourd ready. This is the most important part of the entire process. A well-prepared gourd will hold paint beautifully and last for many seasons. Rushing this step is like building a house on a shaky foundation—it just won’t work out well!
Step 1: Choose and Clean Your Gourd
First, you need a good gourd. Look for one that is fully dried and cured. It should feel light, and you should hear seeds rattling inside when you shake it. Avoid any gourds with soft spots, cracks, or signs of mold. The ideal birdhouse gourd is the Lagenaria, or “bottle gourd,” variety, which has that classic birdhouse shape.
Once you have your gourd, it’s time for a bath. Dried gourds often have a layer of dirt and moldy-looking patterns on their skin. This is totally normal!
- Soak it: Fill a bucket or sink with warm water and a splash of dish soap or bleach (about one part bleach to ten parts water). Let the gourd soak for 15-30 minutes. This will soften the outer layer of skin.
- Scrub it: Use a copper or steel scouring pad to scrub away the outer skin. It should come off fairly easily, revealing the smooth, light-tan surface underneath. It might take some elbow grease, but keep at it!
- Rinse and Dry: Rinse the gourd thoroughly with clean water and let it dry completely. This can take a day or two. Make sure it’s bone-dry before you move on to the next step.
Step 2: Drilling the Holes (Safety First!)
Now, we turn our gourd into a proper house. You’ll need a drill. Please, always wear safety glasses when using power tools. Your eyes are precious!
- The Entrance Hole: This is the front door for your birds. The size of this hole determines which birds will move in. A spade bit or a hole saw bit on your drill works best for creating a clean, round hole.
- Drainage Holes: Drill 3-4 small holes (about 1/4 inch) in the very bottom of the gourd. This is critical! These holes allow any rain that might blow inside to drain out, keeping the nest and the baby birds dry.
- Hanging Holes: Drill two small holes near the top “neck” of the gourd. You’ll thread a wire or strong cord through these to hang your birdhouse.
The size of the entrance hole is very important for attracting specific birds. A smaller hole keeps out bigger birds and predators. The National Audubon Society provides excellent resources on birdhouse specifications for different species.
| Bird Species | Recommended Entrance Hole Diameter |
|---|---|
| Wrens | 1 inch to 1 1/8 inches |
| Chickadees | 1 1/8 inches |
| Bluebirds & Tree Swallows | 1 1/2 inches |
| Purple Martins | 2 1/8 inches |
Step 3: Sanding and Priming
This is the final prep step that makes a huge difference. Think of it as creating the perfect canvas.
- Sanding: Lightly sand the entire outer surface of the gourd with medium-grit sandpaper (around 120-grit). This scuffs up the surface just enough to help the primer and paint stick better. Wipe away all the dust with a damp cloth and let it dry.
- Priming: Never skip the primer! A good quality exterior primer does two things: it seals the gourd so it doesn’t soak up all your paint, and it gives the paint a uniform surface to adhere to. This means your colors will be brighter and your paint job will last much longer. Apply one or two thin coats of a spray-on or brush-on exterior primer. Let it dry completely according to the manufacturer’s instructions.
Choosing Your Paint and Tools
With your gourd prepped and primed, it’s time for the fun part: painting! The type of paint you choose matters for both looks and bird safety.
The Best Paint for Gourd Birdhouses
The golden rule is to use a paint that is durable enough for the outdoors but also non-toxic for the birds. Birds can sometimes peck at their houses, so you want to avoid anything with harmful chemicals.
| Paint Type | Pros | Cons | Best For |
|---|---|---|---|
| Exterior Acrylic Craft Paint | Wide variety of colors, easy to find, non-toxic, cleans up with water. | May require a good sealer for maximum durability. | Detailed designs, beginners, and creative projects. |
| Exterior Latex House Paint | Very durable, excellent weather resistance, often sold in small sample pots. | Fewer creative color options, can be thick. | Solid base coats and long-lasting, simple designs. |
| Milk Paint | Non-toxic, eco-friendly, creates a beautiful rustic/matte finish. | Needs to be sealed very well, can chip without a good topcoat. | Achieving a vintage, country, or “primitive” look. |
A crucial tip: Lean toward lighter colors. Dark-colored birdhouses can absorb too much heat from the sun, creating an unsafe, oven-like environment for baby birds inside.
Brushes and Other Fun Tools
You don’t need fancy equipment. Here’s a simple kit:
- Assorted Paintbrushes: A small flat brush for base coats and a few small, round brushes for details are perfect.
- Sponges: Sea sponges or even kitchen sponges can create wonderful textures for things like foliage or clouds.
- Dotting Tools: You can buy these at craft stores, but the back of a paintbrush, a Q-tip, or even a pencil eraser works great for making perfect polka dots.
- Painter’s Tape: Excellent for creating sharp, clean lines for geometric patterns.
The Final Armor: Sealing Your Birdhouse
After your beautiful paint job is completely dry, you need to seal it. This protects your artwork from the weather and adds years to the life of your birdhouse. Use a non-toxic, water-based exterior varnish or polyurethane. Apply 2-3 thin coats, letting each coat dry fully before applying the next. Look for sealers that are “bird-safe” or “non-toxic” once cured.
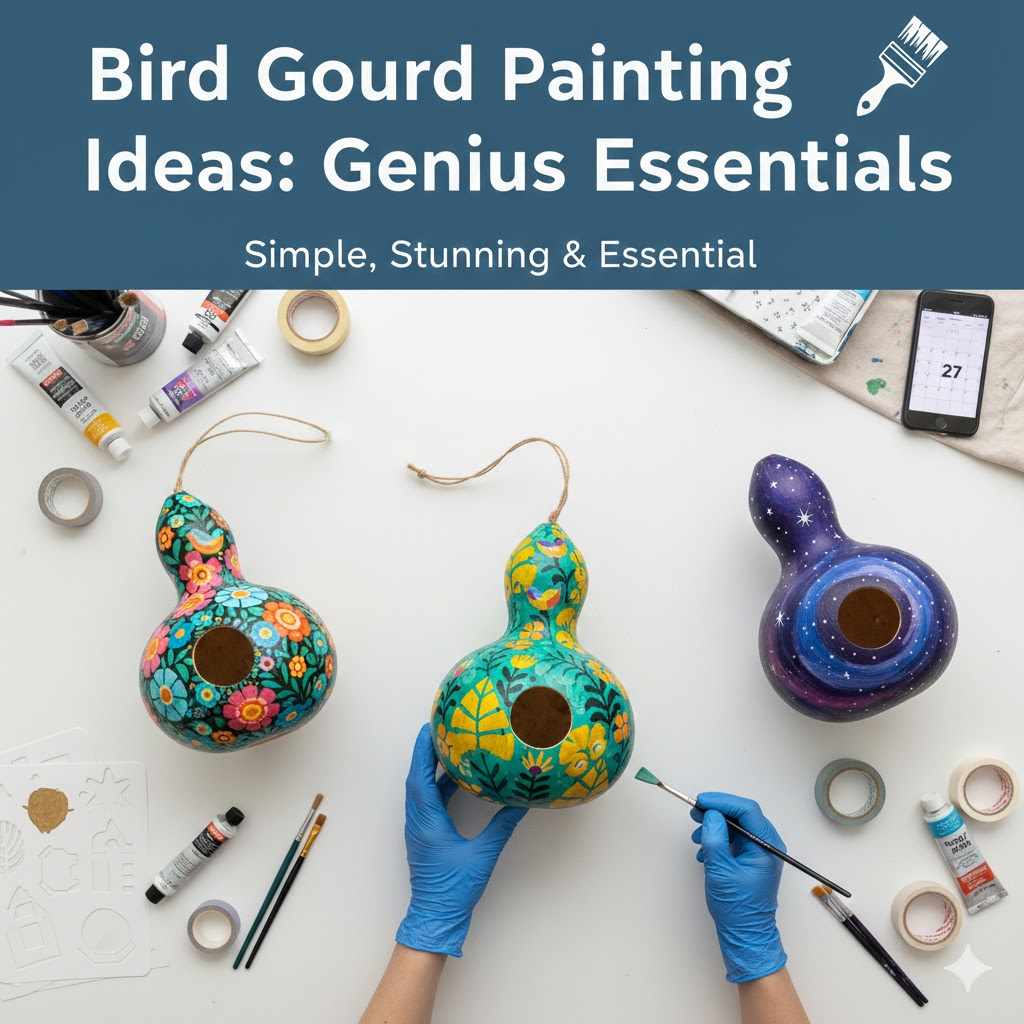
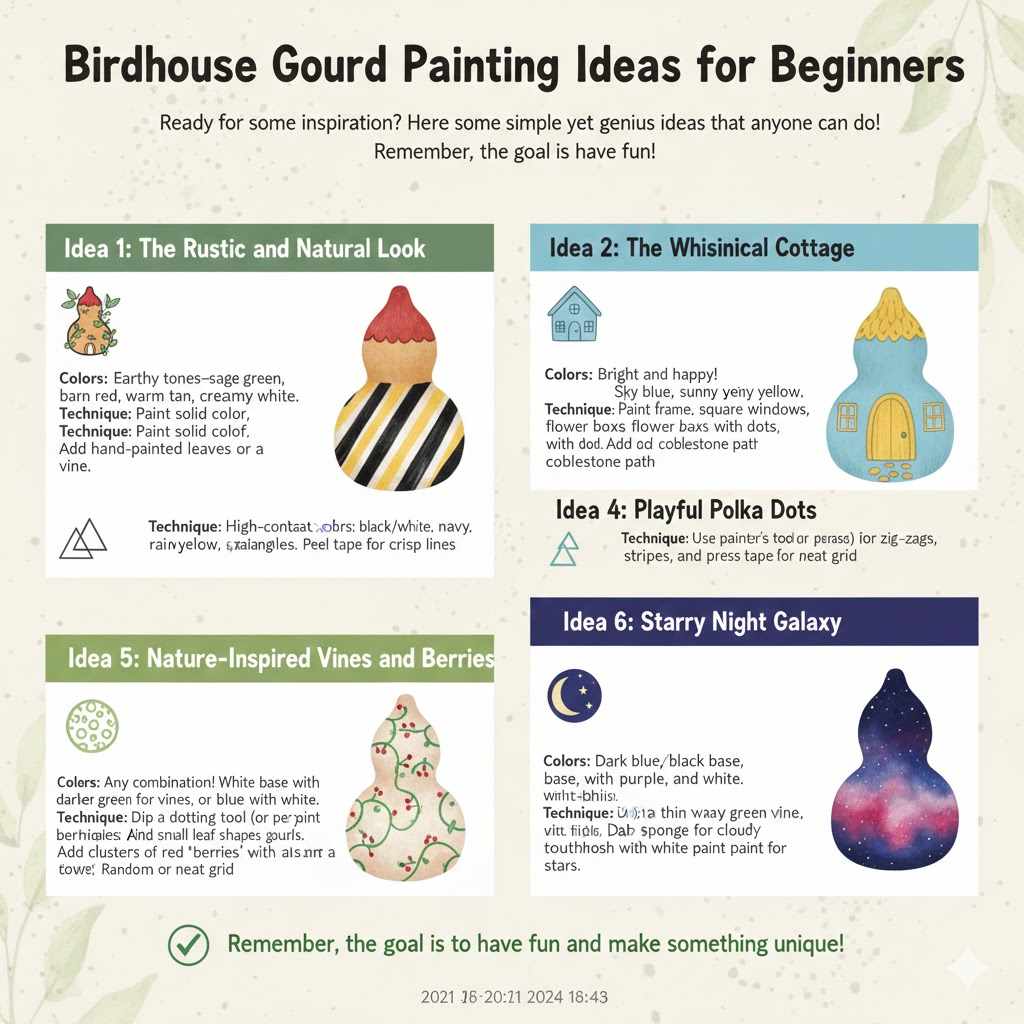
Birdhouse Gourd Painting Ideas for Beginners
Ready for some inspiration? Here are some simple yet genius ideas that anyone can do. Remember, the goal is to have fun!
Idea 1: The Rustic and Natural Look
This is a timeless classic. It’s designed to blend in with your garden and look like a part of nature.
- Colors: Think earthy tones—sage green, barn red, warm tan, creamy white.
- Technique: Paint the body of the gourd a solid color, like green or tan. Then, paint the “roof” area (the top curve) a contrasting color like red or brown. You can keep it that simple or add a few hand-painted leaves or a vine winding up the side.
Idea 2: The Whimsical Cottage
Turn your gourd into a tiny fairy-tale home. This one is always a crowd-pleaser.
- Colors: Bright and happy! Sky blue, sunny yellow, cheerful pink.
- Technique: The entrance hole is already the “front door.” Use a fine brush to paint a little door frame around it. Add a couple of simple square windows on the sides. Paint tiny flower boxes underneath the windows with dots of red, yellow, and purple for flowers. You can even paint a little cobblestone path leading up to the door.
Idea 3: Bold Geometric Patterns
If you like a more modern look, this is a fun and easy one to tackle.
- Colors: High-contrast colors work best, like black and white, navy and yellow, or a rainbow of stripes.
- Technique: This is where painter’s tape is your best friend. After your base coat is dry, use the tape to create zig-zags, stripes, or triangles. Press the edges of the tape down firmly. Paint your second color, and while the paint is still slightly tacky, carefully peel the tape away to reveal your crisp, clean lines.
Idea 4: Playful Polka Dots
It doesn’t get much simpler or more cheerful than polka dots. It’s almost impossible to mess this up!
- Colors: Any combination you love! A white base with colorful dots is classic, but a blue gourd with white dots looks lovely too.
- Technique: Paint your solid base color and let it dry. Then, dip your dotting tool (or the end of a pencil eraser) into your accent color and press it onto the gourd. Create a random pattern or a neat grid. You can vary the dot sizes by using different tools.
Idea 5: Nature-Inspired Vines and Berries
Celebrate the garden setting of your birdhouse with this organic design.
- Colors: A cream or light green base with darker green for vines and red or blue for berries.
- Technique: Start with your light base color. Once dry, use a very fine brush to paint a thin, wavy green line snaking its way around the gourd. This is your vine. Go back and add small leaf shapes along the vine. Finally, use a dotting tool or the tip of your brush to add little clusters of red “berries.”
Idea 6: Starry Night Galaxy
This one looks impressive but is surprisingly easy. It’s a great way to experiment with blending colors.
- Colors: A dark blue or black base, with purple, pink, and white for the nebula and stars.
- Technique: Paint the entire gourd with your dark base color. While it’s still a little wet, dab a sponge into some purple paint and gently blot it in a few areas to create a cloudy “nebula.” Repeat with a little bit of pink. Finally, dip an old toothbrush into white paint, pull back the bristles with your thumb, and flick it at the gourd to create a field of tiny stars.
Frequently Asked Questions (FAQ)
What kind of paint is best for gourd birdhouses?
The best and safest paint is non-toxic, water-based acrylic craft paint or exterior latex paint. Always choose lighter colors to prevent the birdhouse from overheating in the sun. Ensure any sealer you use is also non-toxic and water-based once cured.
Do I need to seal my painted gourd birdhouse?
Yes, absolutely! Sealing is a critical step. A few coats of a clear, non-toxic, waterproof sealer (like an exterior-grade polyurethane) will protect your beautiful paint job from rain and sun, preventing it from peeling and helping the gourd last for many years.
How big should the entrance hole be for birds?
The hole size depends on the birds you want to attract. For small birds like wrens and chickadees, a 1 1/8-inch hole is perfect. For bluebirds, aim for a 1 1/2-inch hole. A smaller hole helps keep larger, more aggressive birds and predators out.
How do I clean a gourd before painting?
Soak the dried gourd in a solution of one part bleach to ten parts water for about 20-30 minutes. Then, use a stiff brush or a steel wool pad to scrub off the outer layer of skin and any mildew. Rinse it well and let it dry completely, which can take a day or two, before you start drilling or painting.
Can I use spray paint on a gourd birdhouse?
It’s generally better to avoid aerosol spray paints. While they provide quick coverage, they contain harsh chemicals and solvents that can be toxic to birds. Stick with brush-on, water-based paints for the safety of your feathered tenants.
How long do gourd birdhouses last outside?
A well-prepared, painted, and sealed gourd birdhouse can last for a decade or even longer! The key is thorough preparation and a good protective topcoat. Bringing it inside for the winter in very harsh climates can extend its life even further.
What colors are best to attract birds?
Birds are most attracted to natural, earthy colors that mimic their environment, such as shades of green, brown, tan, and grey. While birds can see color, bright, flashy colors might attract predators. Soft, natural tones provide better camouflage and make birds feel safer.
Your Garden, Your Art
There you have it! From a dusty, dried gourd to a vibrant, welcoming home for birds, you now have all the essential knowledge to create something wonderful. Remember, the most important part of this project is to have fun with it. Don’t worry about making it perfect; the birds won’t judge your brush strokes. They’ll just be happy to have a safe, dry place to raise their families.
Every time you look out into your garden and see that beautiful birdhouse you created—and especially when you see a little bird darting in or out—you’ll feel a great sense of accomplishment. You didn’t just paint a gourd; you built a home. So grab a gourd, pick out some colors, and let your creativity take flight!