Can You Refinish Engineered Hardwood? Only If the Veneer Is 3mm+
Yes, you can refinish engineered hardwood – but only if the top veneer layer is at least 3mm thick; anything under 2mm can only be screened and recoated, never sanded. Sanding through a thin veneer exposes the plywood core underneath, ruining the floor for good. This guide covers how to check your veneer thickness, the exact sanding and finishing steps, realistic DIY vs. professional costs, and the mistakes that ruin most first-time refinishing jobs.
How Thick Does Your Veneer Need to Be to Refinish It?
Veneer thickness is the measurement of real hardwood on top of the plywood or HDF core, and it is the single factor that determines whether your floor can be sanded at all – not whether it’s labeled “engineered” in our broader wood flooring guide. Every time a floor is sanded, roughly 0.5mm to 1mm of wood is removed – go past the veneer and you hit core material that cannot be stained or finished to match.
| Veneer Thickness | Sanding Recommendation | Sander Type | Realistic Refinishes |
|---|---|---|---|
| 0.6mm – 1mm | Do not sand – screen & recoat only | None (buffer/screen pad) | 0 |
| 2mm | One light sanding at most | Random orbital only | 1 |
| 3mm – 4mm | Standard refinishing is safe | Random orbital (never a drum sander) | 1–2 |
| 5mm or more | Full refinishing like solid wood | Drum or orbital | 2–3 |
📊 Most engineered hardwood sold today has a veneer between 0.6mm and 6mm – only floors at 2mm or thicker can be sanded even once. Source: engineered hardwood manufacturer spec sheets (veneer-thickness industry standard cited across major flooring brands).
How to Check Your Floor’s Veneer Thickness
Look at a floor vent cutout, a transition strip, or a closet threshold – anywhere the plank edge is already exposed – and measure the top wood layer with a ruler or caliper before the wood-grain core seam. No exposed edge available? Pull one staple or loosen a plank in an inconspicuous closet corner, or search the manufacturer’s model number (often on the box or a leftover plank) for the spec sheet, which lists veneer thickness directly.
Step-by-Step: How to Refinish Engineered Hardwood Yourself
Refinishing engineered hardwood follows the same order as solid wood, but every step is lighter-touch because there’s less material to work with. Here’s the process from start to finish:
- Confirm veneer thickness: Verify it’s 2mm or more before doing anything else – this determines every step after it.
- Clear and clean the room: Remove furniture and vacuum thoroughly so grit doesn’t scratch the floor during sanding.
- Sand with a random orbital sander: Use 120–150 grit paper and keep the sander moving – a stationary pass for even a few extra seconds can cut through a 3mm veneer.
- Vacuum and tack the dust: Remove all sanding dust with a vacuum, then wipe with a tack cloth so the finish bonds cleanly.
- Stain if desired: Apply a compatible wood stain in thin, even coats if you’re changing the floor’s color.
- Apply 2–3 coats of finish: Use a water-based polyurethane made for engineered floors, sanding lightly with a fine screen between coats.
- Cure before use: Let the final coat cure 24–48 hours for foot traffic and a full 7 days before moving furniture back.
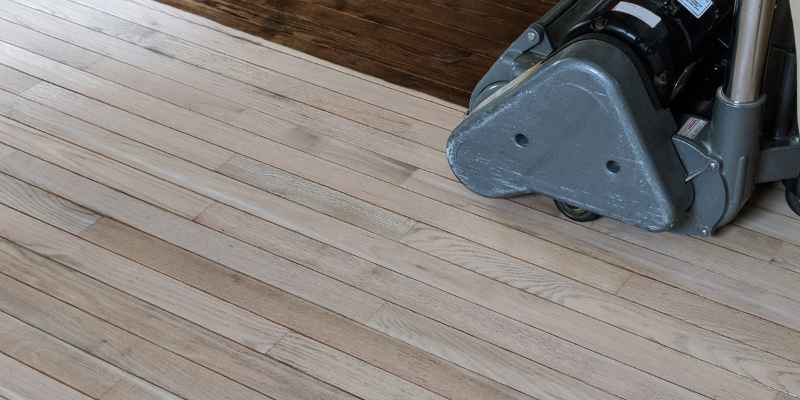
A random orbital sander is the safer choice for engineered hardwood because it removes material in slow, even passes instead of the aggressive strip a drum sander applies – and on a thin veneer, that difference is what separates a successful refinish from a ruined floor.
Best Engineered Hardwood Refinishing Sander
 |
DEWALT DWE6423 5-Inch Random Orbit Sander – $79.00 Variable-speed random orbital design – the sander type this guide recommends over a drum sander for any veneer under 5mm, since it removes material in slow, even passes instead of an aggressive strip.
|
As an Amazon Associate we earn from qualifying purchases.
DIY vs. Professional Refinishing: Costs and When to Call a Pro
Professional refinishing for engineered hardwood typically runs $3 to $8 per square foot, while DIY materials (sandpaper, stain, and finish) usually cost $1 to $2 per square foot – the trade-off is the risk of sanding through a thin veneer, which a professional’s floor-thickness gauge and experience are built to avoid.
Call a professional if your veneer measures under 3mm, if the floor has water damage or structural cupping, or if you don’t own (or want to rent) a random orbital floor sander. DIY is reasonable if your veneer is confirmed at 3mm or more, the floor is otherwise flat and undamaged, and you’re comfortable working in slow, even passes rather than rushing the sanding step.
Common Problems After Refinishing (and How to Fix Them)
Scratches and Dents
For light scratches, a color-matched wood filler applied with a putty knife, leveled flush, and lightly sanded before a fresh coat of finish will blend in cleanly. For a scratch or dent that goes through the veneer, the only real fix is replacing that plank – filler over exposed core material will always show a color mismatch.
Blotchy or Uneven Stain
Engineered veneers – especially oak and maple – absorb stain unevenly if it’s applied too heavily or without a pre-stain conditioner. If blotching shows up after the first coat, lightly screen-sand the area and apply a thinner second coat rather than sanding through the veneer trying to remove it entirely.
Warping and Cupping
Warping and cupping after refinishing almost always trace back to moisture – either the floor was refinished before it fully dried from a spill or leak, or ambient humidity was too high during the finish cure. Identify and fix the moisture source first; planks that don’t flatten back out on their own will need to be replaced.
How to Maintain Refinished Engineered Hardwood
A fresh finish lasts longer with the right daily habits. Sweep or vacuum regularly to keep grit from scratching the new finish, wipe up spills immediately since standing moisture is what causes most post-refinish warping, and use felt pads under furniture legs. Stick to a cleaner made for engineered hardwood floors rather than a wet mop – excess water is the most common cause of a refinished floor needing repairs within the first year.
If you’re not sure your floor needs a full refinish yet, see our guide on caring for engineered hardwood floors day-to-day, and check how many times a floor can realistically be refinished before replacement makes more sense than another sanding pass.
“The biggest mistake we see is homeowners running a sander over engineered hardwood the same way they would solid wood. A drum sander strips material fast, and on a 3mm veneer that’s often enough to break through the wear layer in a single slow pass.”
Frequently Asked Questions
How do you know how thick the veneer is on your engineered hardwood floor?
Check an exposed plank edge at a floor vent, transition strip, or closet threshold and measure the top wood layer with a ruler before the seam to the core. If no edge is exposed, look up the manufacturer’s model number from the box or a leftover plank – the spec sheet lists veneer thickness directly.
Can you refinish engineered hardwood floors yourself, or do you need a pro?
Yes, if your veneer is confirmed at 3mm or thicker and the floor is flat with no water damage. Use a random orbital sander, not a drum sander, and keep it moving constantly. Call a professional if the veneer is under 3mm, since the margin for error is too thin to safely sand at home.
How much does it cost to refinish engineered hardwood floors?
Professional refinishing typically costs $3 to $8 per square foot, depending on region and finish type. DIY materials – sandpaper, stain, and polyurethane – usually run $1 to $2 per square foot, not counting a sander rental if you don’t already own one.
What happens if you sand through a thin veneer by accident?
Sanding through the veneer exposes the plywood or HDF core underneath, which won’t stain or finish to match the surrounding wood. The only fix for a sanded-through spot is replacing that individual plank – there’s no finish that can restore a core layer to look like hardwood.
Can engineered hardwood be refinished more than once?
Yes, most engineered hardwood with a 3mm or thicker veneer can be refinished 1 to 3 times before the wear layer is too thin to sand safely again. Floors with a 5mm or thicker veneer can often handle 2 to 3 full refinishes, similar to solid hardwood.
Conclusion
Engineered hardwood can be refinished, but the veneer thickness – not the flooring type – decides whether sanding is safe. Measure it before you start, use a random orbital sander instead of a drum sander, and know when a floor is too thin to sand and needs a screen-and-recoat or a professional’s judgment instead.
Sponsored / affiliate links. As an Amazon Associate I earn from qualifying purchases. I may earn additional commission from eligible campaigns.