Expert Techniques for Removing Glued Wood Flooring from Subfloor: Quick, Easy, and Effective Steps
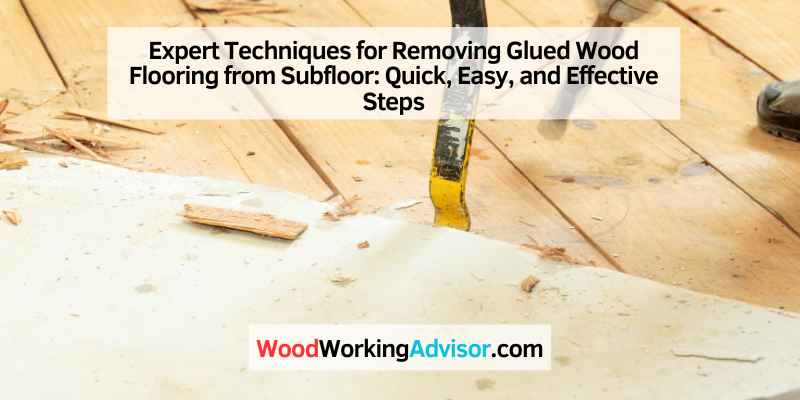
To remove glued wood flooring from a subfloor, use a heat gun to soften the adhesive, then carefully pry up the planks with a pry bar or chisel. Once the adhesive is softened, the flooring should be easy to remove without damaging the subfloor.
Removing glued wood flooring from a subfloor can be a challenging task, but with the right tools and techniques, it can be done efficiently and without causing any damage. Whether you are looking to replace the old flooring or preparing the subfloor for a new installation, understanding the correct methods for removing glued wood flooring is essential.
This article will guide you through the process, providing step-by-step instructions and tips to make the job easier. By following these instructions, you can successfully remove the glued wood flooring and achieve professional results. So, let’s dive in and learn how to remove glued wood flooring from a subfloor.
Preparation
Removing glued wood flooring from a subfloor requires careful preparation and attention to detail. With proper tools and techniques, you can safely remove the flooring without damaging the subfloor surface.
Gather The Necessary Tools
Before you start removing glued wood flooring from a subfloor, it is important to gather the necessary tools. Having the right tools at hand will make the process much easier and smoother. Here is a list of tools you will need:
- Safety goggles
- Gloves
- Dust mask
- Pry bar
- Hammer
- Scraper or putty knife
- Heat gun or hairdryer
- Utility knife
- Power saw or circular saw
- Nail puller
Clear The Area
Before you dive into removing the glued wood flooring, it’s essential to clear the area to ensure a smooth and efficient process. Follow these steps to clear the area:
Step 1: Remove any furniture or obstacles
Clear the room of any furniture, rugs, or other objects that might obstruct your work area. It’s important to have a clear and open space to maneuver safely and effectively.
Step 2: Cover any vulnerable surfaces
Protect any vulnerable surfaces, such as adjacent walls or cabinets, by using drop cloths or old sheets. This will prevent any accidental damage while removing the glued wood flooring.
Step 3: Ensure proper ventilation
Open windows and doors to create a well-ventilated space. Removing glued wood flooring can release a considerable amount of dust and potentially harmful fumes, so proper ventilation is crucial for your safety and comfort.
By following these steps and gathering the necessary tools, you will be well-prepared to remove glued wood flooring from your subfloor.
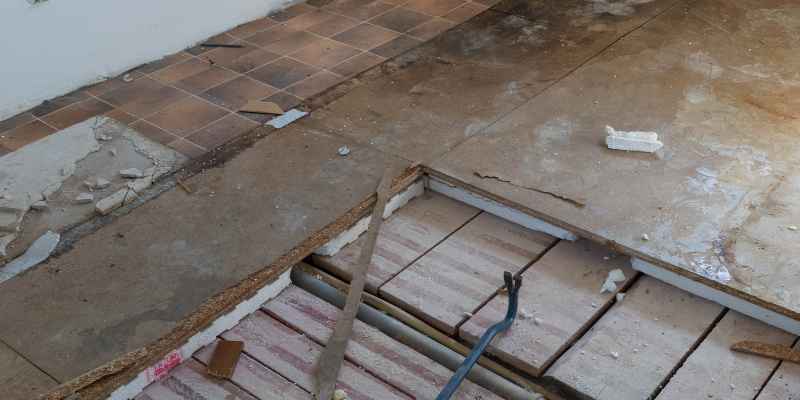
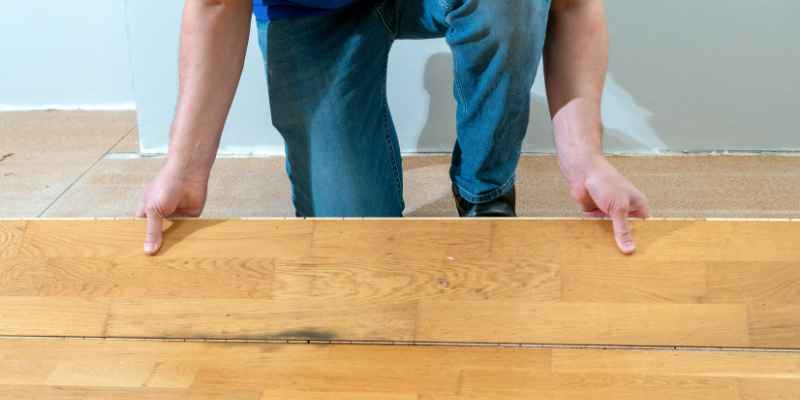
Assessing The Flooring
Assessing the flooring involves the process of removing glued wood flooring from the subfloor. This task requires careful evaluation and skillful execution to ensure the subfloor remains intact.
Assessing the flooring is an important step before removing glued wood flooring from the subfloor. It helps us understand the type of adhesive used and identify any potential damage or moisture that may affect the removal process. By carefully assessing the flooring, you can determine the best approach to efficiently remove the glued wood flooring and ensure a successful outcome.
Identify The Type Of Adhesive Used
One of the first things to do when assessing the flooring is to identify the type of adhesive used. This is crucial as different adhesives require different removal methods. There are various types of adhesives commonly used for wood flooring, including glue-down adhesives, adhesive tapes, and adhesive sheets. By determining the type of adhesive, you can choose the most effective technique for removing it without causing any damage to the subfloor.
Check For Any Damage Or Moisture
Another important aspect to consider when assessing the flooring is checking for any damage or moisture. Damaged areas or excessive moisture can complicate the removal process and may require additional precautions. Carefully inspect the wood flooring for any signs of cracks, warping, or separation from the subfloor. Additionally, check for moisture using a moisture meter or by visually inspecting the flooring for discoloration or mold growth. Identifying and addressing any damage or moisture issues beforehand will ensure a smoother removal process and minimize any potential risks.
In conclusion, assessing the flooring is a crucial step before removing glued wood flooring from the subfloor. By identifying the type of adhesive used and checking for any damage or moisture, you can plan and execute the removal process effectively. It is important to thoroughly assess the flooring to ensure a successful and problem-free removal, ultimately preparing the subfloor for new flooring installation.
Using Heat And Steam
When removing glued wood flooring from a subfloor, one effective method is to utilize heat and steam. This approach softens the adhesive, making it easier to loosen and remove the flooring. Here, we will explore the steps involved in using heat and steam to remove glued wood flooring.
Apply Heat To Soften The Adhesive
The first step in the process is to apply heat directly to the glued wood flooring. This can be done using a heat gun or a handheld hairdryer. Make sure to set the heat gun or hairdryer to a medium or high heat setting. Hold the heat source about 6 inches away from the flooring and move it in a sweeping motion, evenly distributing the heat. This will help soften the adhesive and make it more pliable for removal.
Utilize Steam To Loosen The Glue
Once the adhesive has been warmed up with heat, it’s time to utilize steam to further loosen the glue. Fill a steamer with water and wait for it to heat up. Then, hold the steamer close to the glued wood flooring, allowing the steam to penetrate the adhesive. The heat from the steam will continue to soften the glue, making it easier to separate the flooring from the subfloor.
While the steam is working its magic, you can use a scraper or putty knife to gently pry up the edges of the glued wood flooring. Be careful not to apply too much force, as this could cause damage to the subfloor. Instead, take your time and repeat the process of applying heat and steam as needed to gradually loosen and remove the flooring.
Remember to wear protective gloves and eye goggles during this process to ensure your safety. Also, be aware that using heat and steam to remove glued wood flooring may create some fumes, so make sure the area is well-ventilated.
Mechanical Removal Methods
Mechanical removal methods offer effective solutions for removing glued wood flooring from subfloors. With various tools and techniques available, it becomes easier to eliminate the adhesive and restore the subfloor to its original state.
Scraping The Adhesive
One effective method of removing glued wood flooring from the subfloor is by scraping the adhesive. This process involves using a manual or power scraper to carefully scrape away the glue layer, allowing for the separation of the wood from the subfloor.
To start, fit the scraper with a sharp blade to ensure smooth and efficient removal of the adhesive. Position the blade at a slight angle and apply gentle pressure as you push the scraper forward, working in small sections at a time.
Remember to always wear protective gloves when scraping to prevent any injuries. It’s also advisable to wear safety goggles and a dust mask to shield yourself from flying debris or dust particles.
As you scrape, the adhesive may accumulate on the blade, so make sure to have a utility knife handy to remove any build-up and keep the scraper functioning effectively. Take breaks intermittently to clean the blade and disposal any excess adhesive to prevent clogging.
Grinding Or Sanding The Surface
Another mechanical method for removing glued wood flooring from the subfloor is by grinding or sanding the surface. This approach involves using a floor grinder or sander to remove both the wood flooring and the adhesive from the subfloor.
Before starting, ensure you have the appropriate safety gear, including safety goggles, a dust mask, and ear protection. These will safeguard against potential hazards, such as flying debris, dust, and excessive noise.
Next, select a floor grinder or sander with coarse-grit sandpaper or diamond-cutting wheels, suitable for removing adhesive. Begin the process by making parallel passes over the glued wood flooring, gradually moving across the surface.
It’s important to work systematically and only remove small sections at a time, allowing the grinder or sander to effectively break down the adhesive layer. Take care to prevent overheating the surface by maintaining a consistent speed and avoiding excessive pressure.
Ensure proper ventilation in the work area, as grinding or sanding can produce a significant amount of dust. Keeping windows open and using fans or air purifiers will assist in minimizing airborne particles.
Chemical Adhesive Removers
Chemical adhesive removers are effective solutions for removing glued wood flooring from subfloors. They are specifically designed to dissolve the adhesive, making it easier to remove the flooring without causing damage to the subfloor. When selecting the appropriate remover, it is important to consider the type of adhesive used and the compatibility with your flooring material. Additionally, proper application and removal techniques are key to achieving successful results. In this section, we will explore the process of using chemical adhesive removers for removing glued wood flooring.
Selecting The Appropriate Remover
When selecting a chemical adhesive remover, it is crucial to choose one that is compatible with both the adhesive and the type of wood flooring you have. Different adhesives require different types of removers, so make sure to read the instructions and choose a product that is specifically formulated for your type of adhesive. Additionally, consider the compatibility with your wood flooring material. Some removers may be suitable for certain types of wood while causing damage to others. It is always recommended to test the remover on a small, inconspicuous area before applying it to the entire floor.
Applying And Removing The Adhesive Remover
Once you have selected the appropriate adhesive remover, follow these steps to apply and remove it effectively:
- Begin by preparing the work area. Remove any furniture or obstacles and ensure proper ventilation by opening windows or using fans.
- Read the manufacturer’s instructions carefully before starting the process. Put on protective gloves and a mask to avoid direct contact with the remover and fumes.
- Apply the adhesive remover evenly on small sections of the flooring, using a brush or a sponge. Allow the remover to penetrate the adhesive for the recommended amount of time, usually indicated on the product label.
- Use a scraper or a putty knife to gently lift the loosened flooring, starting from one edge. Take your time and be cautious to avoid damaging the subfloor.
- Continue applying the remover and removing the flooring in small sections until the entire floor is free from adhesive.
- Once all the flooring is removed, clean the subfloor thoroughly to remove any remaining adhesive residue. Use a damp cloth or mop with warm water and mild detergent, following the manufacturer’s guidelines.
- Allow the subfloor to dry completely before proceeding with any further flooring installation or treatment.
By following these steps and using the appropriate adhesive remover, you can effectively remove glued wood flooring from your subfloor without causing unnecessary damage. Remember to always prioritize safety and follow the manufacturer’s instructions for the best results.
Conclusion
Removing glued wood flooring from a subfloor can be a daunting task, but with the right techniques and tools, it is definitely achievable. By following the steps outlined in this blog post, you can save yourself time and effort in the removal process.
Remember to take appropriate safety precautions and be patient throughout the process. With a bit of perseverance, you’ll soon have a clean and ready-to-install subfloor for your next flooring project. Happy remodeling!