Can You Stain Cedar Wood? Discover the Power of Enhancing Its Beauty!
Yes, cedar wood can be stained to enhance its appearance and protect it from moisture and UV damage. Cedar wood can be transformed with stains, which enhance its look and safeguard it from moisture and UV damage.
Whether you want to darken or lighten the color, staining cedar is an effective method for adding character to fences, furniture, decks, and other cedar wood surfaces. Stains are available in various shades, from transparent to opaque, allowing you to choose the desired level of wood grain visibility.
Before staining, it’s essential to prepare the cedar wood by cleaning and sanding it to ensure the best results. This article will guide you on how to stain cedar wood effectively for long-lasting and attractive outcomes.

Benefits Of Staining Cedar Wood
When it comes to cedar wood, staining it can bring numerous benefits. Staining not only enhances the natural beauty of the wood but also offers protection against weathering and increases its overall durability. In this article, we will delve deeper into the advantages of staining cedar wood.
Protection Against Weathering
One of the key benefits of staining cedar wood is its ability to protect against weathering. Unprotected cedar wood is susceptible to damage from the elements, including rain, sunlight, and extreme temperatures. By applying a stain, you create a protective barrier that shields the wood from these harmful effects.
Enhanced Durability
Staining cedar wood not only enhances its durability but also extends its lifespan. The stain penetrates the surface and strengthens the wood, making it more resistant to warping, cracking, and decay. This is especially important for outdoor applications, where the wood is exposed to constant moisture and changing weather conditions.
Increased Aesthetic Appeal
Staining cedar wood can significantly enhance its aesthetic appeal. The natural grain and texture of cedar wood are highlighted with the application of stain, resulting in a beautiful and unique appearance. Whether you prefer a transparent stain that allows the natural beauty of the wood to shine through, or a colored stain that complements your desired aesthetics, staining cedar wood can transform your space.
Overall, staining cedar wood provides a multitude of benefits. From protecting against weathering and enhancing durability to improving the visual appeal, staining is a worthwhile investment. Whether you have a cedar deck, fence, or any other cedar wood application, consider staining it to enjoy the advantages it brings.
Understanding Cedar Wood
When it comes to enhancing the natural beauty of wood, staining is a popular choice for many homeowners. It can transform the appearance of bare wood, adding depth and color, while preserving its natural characteristics. But can you stain cedar wood? Let’s dive into understanding cedar wood to find out!
Characteristics Of Cedar Wood
Cedar wood is known for its durability, resistance to decay, and natural beauty. It has a distinctive reddish-brown color with light streaks running through it, giving it a unique and enchanting appeal. Here are some prominent characteristics of cedar wood:
| Characteristic | Description |
|---|---|
| Aromatic | Cedar has a pleasing aroma that acts as a natural insect repellent. |
| Dimensionally Stable | It is less likely to warp, shrink, or swell when exposed to moisture and temperature changes. |
| Naturally Resistant | Cedar wood contains natural oils and resins that make it resistant to rot, decay, and insect damage. |
Types Of Cedar Wood
There are several types of cedar wood available, each with its own unique qualities and characteristics. The most common types include:
- Western Red Cedar: Known for its rich color and exceptional durability, this type of cedar is often used for outdoor projects, such as fences, decks, and siding.
- Eastern Red Cedar: This variety of cedar has a distinct reddish hue and is primarily used for indoor applications, such as closets, chests, and paneling.
- Spanish Cedar: Despite its name, Spanish cedar does not actually belong to the cedar family. It is used for its beautiful grain and natural resistance to insects, making it a popular choice for outdoor furniture and decking.
Common Uses Of Cedar Wood
Due to its exceptional properties, cedar wood finds a wide range of applications. Here are some common uses:
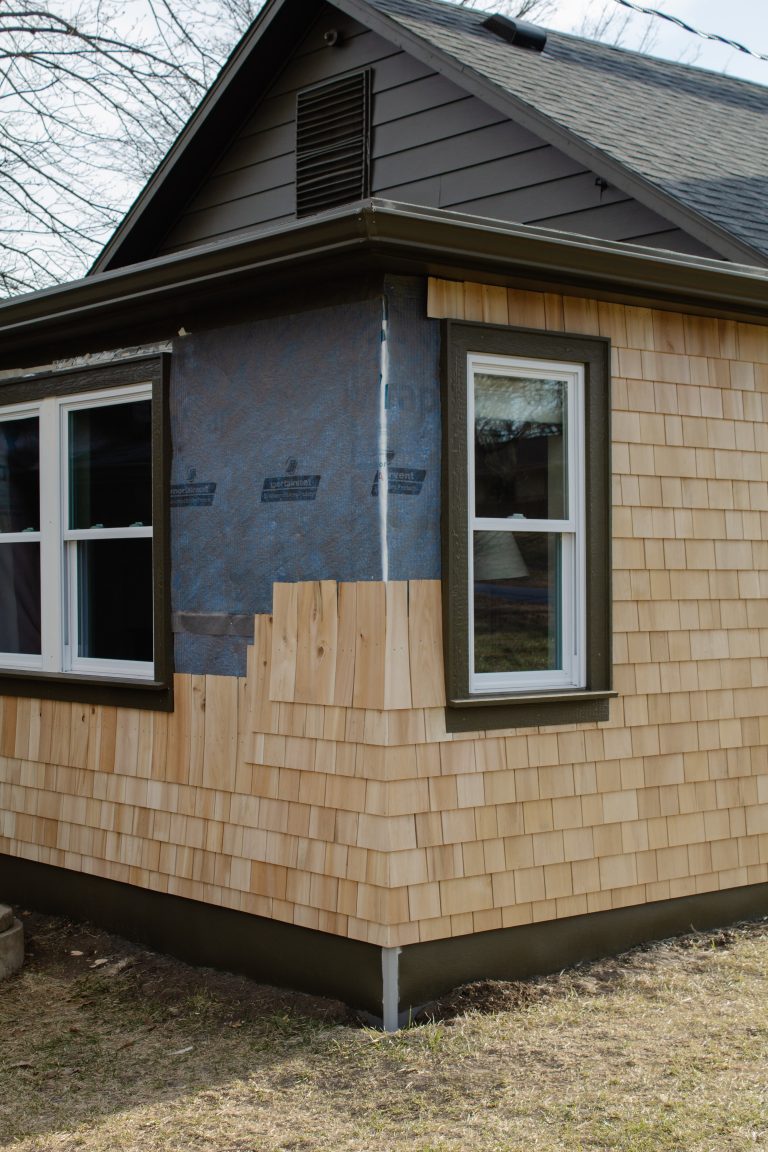
- Exterior Siding: Cedar siding provides both beauty and protection against the elements.
- Furniture: Cedar is often used to craft outdoor furniture, showcasing its natural resistance to rot and decay.
- Decking: Cedar decking is highly sought after for its durability and beautiful color.
- Shingles and Shakes: Cedar shingles and shakes are popular choices for roofing due to their longevity and natural insulation properties.
- Closets and Chests: The aromatic properties of cedar make it an excellent choice for furniture pieces that require odor control, such as closets and chests.
- Interior Paneling: Cedar paneling adds warmth and character to interiors, creating a cozy and inviting atmosphere.
How To Choose The Right Stain
Wondering if you can stain cedar wood? The right stain for cedar wood can enhance its natural beauty and provide long-lasting protection. Follow these expert tips to choose the perfect stain for your cedar projects.
Consider The Desired Finish
When it comes to staining cedar wood, it’s essential to first think about the desired finish you want to achieve. Whether you prefer a natural look that allows the beauty of the wood to shine through, or you want to darken and protect the wood with a semi-transparent or solid stain, understanding your desired finish will help you choose the right stain.
Selecting The Right Stain Color
The next step in choosing the right stain for your cedar wood is to consider the stain color. With countless options available, it’s important to select a color that complements your overall design aesthetic and enhances the natural character of the wood. If you want to maintain a light and airy feel, a clear or light-toned stain will be suitable. For a more dramatic look, darker stains can provide a rich and luxurious appearance.
Choosing Between Oil-based And Water-based Stains
Another important decision when selecting a stain for cedar wood is determining whether to go with an oil-based or water-based stain. Each type has its advantages and considerations.
- Oil-based stains: These stains penetrate deeply into the wood, offering excellent durability and protection against UV damage. They also provide a rich and warm finish. However, they require longer drying time and emit strong fumes during application. Moreover, they may darken over time.
- Water-based stains: These stains dry faster and emit fewer fumes compared to oil-based stains. They offer good protection against UV damage and are available in a wide range of colors. Additionally, they tend to maintain their original color over time. However, they may not penetrate as deeply as oil-based stains, and may require more frequent reapplication.
In conclusion, understanding the desired finish, selecting the right stain color, and determining whether to use an oil-based or water-based stain are crucial steps in choosing the right stain for your cedar wood project. Taking the time to consider these factors will help you achieve the desired look and ensure long-lasting results.
Steps To Prepare Cedar Wood For Staining
Before staining cedar wood, it is crucial to properly prepare the surface to achieve a beautiful, long-lasting finish. This process involves cleaning the surface, removing existing finishes, and sanding and smoothing the wood. Following these steps will ensure that your cedar wood is ready to absorb the stain and enhance its natural beauty.
Cleaning The Surface
To start the preparation process, it is important to clean the cedar wood surface thoroughly. Use a mild soap or wood cleaner mixed with water to remove any dirt, debris, or mold that may have accumulated on the wood. Scrub the surface gently with a soft-bristle brush or sponge, working in the direction of the wood grain. Rinse the wood with clean water and allow it to dry completely.
Removing Existing Finishes
If the cedar wood has been previously stained or treated with a sealant, it is essential to remove these existing finishes before applying a new stain. This can be done using a stain stripper or wood stripper, which breaks down the old finish and allows it to be easily scraped away. Apply the stripper according to the manufacturer’s instructions and use a putty knife or scraper to remove the softened finish. Ensure all traces of the old finish are removed before proceeding to the next step.
Sanding And Smoothing The Wood
Once the surface is clean and free from old finishes, it’s time to sand and smooth the cedar wood. This step helps to remove any rough patches, stains, or imperfections, creating a smooth and uniform surface for the stain. Start by using a medium-grit sandpaper to sand the wood, working in the direction of the grain. Gradually switch to a fine-grit sandpaper for a smoother finish. Remember to sand the edges and corners as well. After sanding, wipe away any dust with a clean cloth or tack cloth.
To achieve the best results, it is recommended to use a sanding block or an orbital sander with a dust collection system. This helps to minimize dust and ensures a more efficient sanding process. Be sure to wear protective goggles and a mask while sanding to protect yourself from dust particles.
Once the cedar wood surface is thoroughly cleaned, all existing finishes are removed, and the wood is sanded and smoothed, it is ready for staining. Following these steps will help you achieve a professional-looking finish and enhance the natural beauty of your cedar wood.

Tips And Techniques For Successful Staining
Discover the secrets to successfully staining cedar wood with these helpful tips and techniques. From proper preparation to selecting the right stain, learn how to enhance the beauty of your cedar while protecting it against the elements.
Throughout this blog post, we have discussed the process of staining cedar wood and the benefits it can provide. However, to ensure a successful staining project, it is essential to follow some tips and techniques. In this section, we will delve deeper into how to apply the stain effectively, whether to use a brush or sprayer, and how to avoid common staining mistakes.
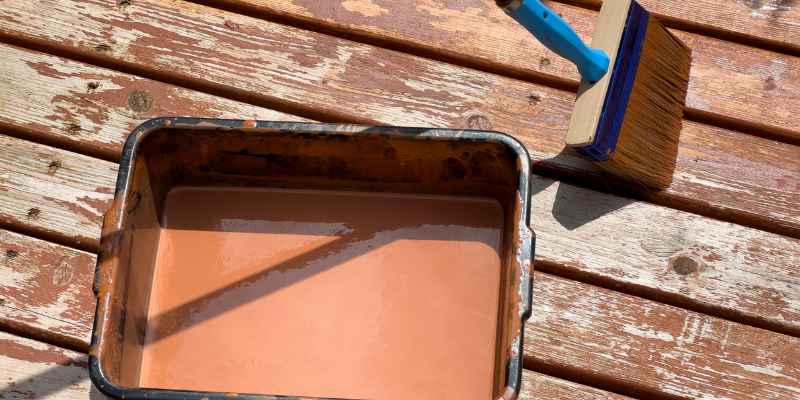
Applying The Stain
When it comes to applying stain to cedar wood, proper preparation is key. Before starting the process, make sure to clean the wood thoroughly, removing any dirt or debris. Sanding the surface lightly can also help the stain penetrate the wood more evenly.
When applying the stain, it is crucial to follow the manufacturer’s instructions. Different stains may require specific application methods. In general, using a brush or sprayer is the most common approach for stain application.
Using A Brush Or Sprayer
Using a brush allows for more control and precision, especially when working on smaller projects or intricate details. It is recommended to use a natural bristle brush for oil-based stains and a synthetic brush for water-based stains.
To apply the stain with a brush, dip the brush into the stain and lightly tap off any excess. Start by brushing the stain in the direction of the wood grain, ensuring even coverage. Work in small sections to avoid drying or lap marks.
On the other hand, using a sprayer can provide a faster and more efficient application, especially when working on large surfaces. It is important to select the appropriate sprayer and adjust the nozzle for a consistent spray pattern. Cover surrounding areas to protect them from overspray.
When using a sprayer, apply the stain evenly, moving the sprayer in a sweeping motion. Be mindful of oversaturation, as it may result in uneven coloring or pooling. Remember to follow the manufacturer’s instructions and wear protective gear.
Avoiding Common Staining Mistakes
To ensure a successful staining project, it is crucial to avoid common mistakes that can compromise the final result. Here are a few tips to keep in mind:
1. Properly prepare the wood: Ensure the wood is clean and free from dust, debris, and previous stains or finishes. This will allow the stain to penetrate effectively and provide a smooth finish.
2. Test the stain color: Before applying the stain to the entire surface, it is recommended to perform a small test on a hidden area. This will help you determine if the chosen stain color complements the wood and achieve the desired outcome.
3. Apply thin coats: It is better to apply multiple thin coats of stain rather than one thick coat. This allows the stain to penetrate evenly and minimizes the risk of drips or blotches.
4. Wipe off excess stain: After applying the stain, use a clean cloth or rag to remove any excess. This will prevent the stain from pooling or drying unevenly.
5. Allow proper drying time: Make sure to allow sufficient drying time between coats and before using or exposing the stained surface to water or harsh conditions. This will ensure the stain fully cures and provides long-lasting protection.
By following these tips and techniques, you can achieve a beautiful and long-lasting finish when staining cedar wood. Remember to choose the right stain, apply it skillfully, and avoid common mistakes for the best results.
Conclusion
Staining cedar wood is a viable option to enhance its appearance and protect it against external elements. Whether you want to preserve its natural color or achieve a specific shade, choosing the right stain and following proper application techniques is key.
By understanding the characteristics of cedar wood and its compatibility with different stains, you can ensure a successful staining project that will prolong the lifespan and beauty of your cedar wood.