Can You Tile Over Wood? Yes, If Your Floor Passes 3 Checks
Yes, you can tile over an existing wood floor, but only if that floor is solid, flat, and fastened down rather than floating. Tile and grout are rigid; wood floors and the subfloor underneath them flex and move with humidity and foot traffic, and that mismatch is the real reason tile jobs crack within a year or two – not “bad tile work.” Before you tile over any wood floor, run it through three checks: how it’s fastened, how flat it is, and how much height you have to spare. This guide walks through each check, when you have to pull the old floor up instead, and which decoupling product actually works for an existing floor rather than a brand-new subfloor.
Why You Can’t Just Tile Directly Onto Wood
Best for Low-Height Buildup on Existing Floors
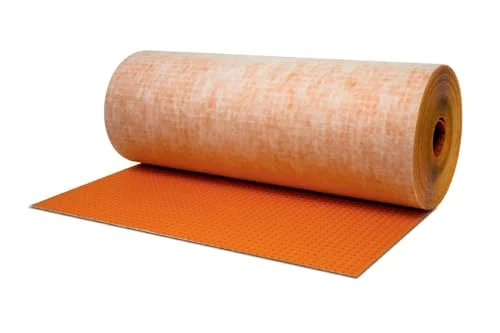 |
Schluter DITRA Uncoupling Membrane (54 sq ft) – $123.95 At 1/8-inch thick, this is the thinnest way to decouple tile from a sound existing wood floor without eating up your door clearance the way cement board does.
|
Wood is dimensionally unstable compared to tile. Solid hardwood and even engineered wood boards swell and shrink across the seasons as humidity changes, and any wood subfloor underneath flexes slightly under load. Ceramic and stone tile, along with the grout between the joints, are rigid and essentially can’t stretch or compress at all. When you set tile directly on wood with nothing between them, every bit of that seasonal movement gets transferred straight into the tile assembly. The grout joints are usually the first thing to crack, followed by the tile itself popping loose or cracking along a grout line. The fix in the construction industry isn’t a thicker layer of thinset or a “stronger” adhesive – it’s a layer that physically decouples the tile from the wood’s movement, which is either a cement backer board (like HardieBacker or Durock) or a purpose-built uncoupling membrane such as Schluter DITRA.
The 3-Check Test: Can Your Existing Wood Floor Take Tile?
Before you decide to tile over what’s already down instead of tearing it out, run the floor through these three checks. Failing any one of them means removal, not a membrane, is the right call.
Check 1: How is it fastened?
A solid hardwood or engineered wood floor that’s nailed, screwed, or fully glued down can serve as a base for an uncoupling membrane. A floating floor – click-lock engineered wood, laminate, or any system installed with expansion gaps and no fasteners into the subfloor – cannot. Floating floors are built to expand and contract as one connected sheet that moves independently of what’s under it, and no membrane can decouple movement happening across an entire floating panel system. If you can’t say with certainty that your floor is fastened down, check the installation records or pull a shoe molding piece to look for nail or staple heads before you proceed.
Check 2: How flat and sound is it?
Lay a straightedge or a 6-foot level across several spots on the floor. Gaps of more than about 1/8 inch over a 10-foot span, visible cupping at board edges, soft or spongy spots, or any sign of water staining or rot mean the floor needs repair or removal before anything else happens. An uncoupling membrane handles movement, not an uneven or damaged substrate – tiling over a floor that isn’t flat just telegraphs every dip and hump straight into your finished tile.
Check 3: Do you have the height to spare?
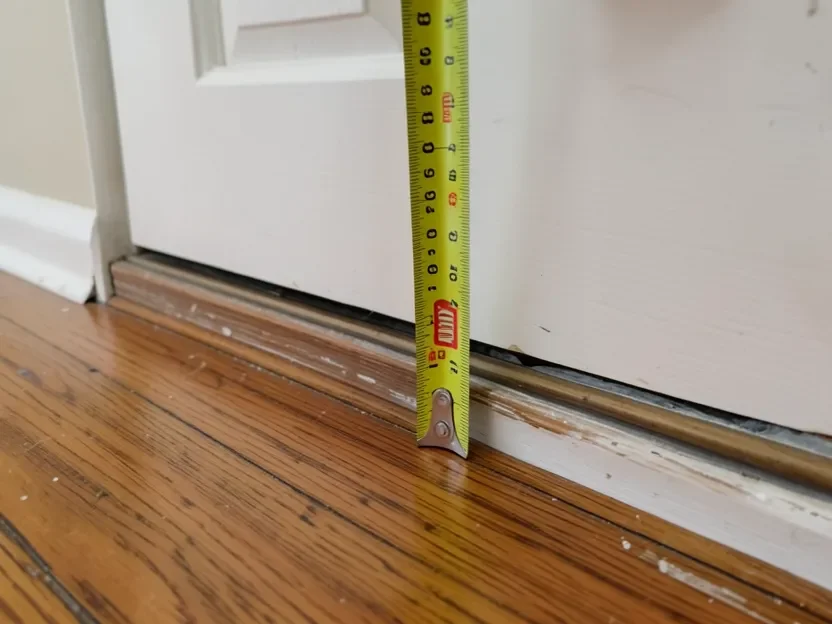
Adding an uncoupling membrane, thinset mortar, and tile on top of an existing floor typically adds roughly 3/4 to 1 inch of total height (see the FAQ below for the breakdown). Measure the clearance at every door in the room, check that appliances like dishwashers still slide in and out, and plan the transition height where the new tile meets flooring in an adjoining room. This is the check people skip most often, and it’s the one that turns into an expensive surprise mid-project.
The Deflection Standard That Actually Matters
A floor can look perfectly solid and still be too “bouncy” for tile. The TCNA Handbook and ANSI A108.01 set the actual engineering benchmark: framed floors that will carry ceramic or stone tile shouldn’t deflect more than L/360 under live load, where L is the clear span of the joist in inches. For large-format tile – anything with a side longer than 15 inches – the recommended limit tightens to L/480 or better, because bigger tiles bridge fewer joints and concentrate stress at the bond line. In practical terms, a joist spanning 10 feet (120 inches) shouldn’t flex more than about 1/3 inch under load. This standard applies to the floor system as a whole, old subfloor and existing wood layer included, not just to whatever backer or membrane you add on top. If your house is older and the joists are undersized or spaced wider than current code, no amount of membrane fixes that – you’re looking at sistering joists or reinforcing the structure before tile goes down, and that’s worth a second opinion from a contractor rather than guesswork.
Backer Board vs. Uncoupling Membrane for an Existing Wood Floor
Both options solve the wood-movement problem, but they fit different situations when you’re building on top of a floor that’s already there instead of framing a new subfloor from scratch:
- Cement backer board (HardieBacker, Durock) is screwed down over the existing floor and adds roughly 1/4 to 1/2 inch of height. It’s the more forgiving choice if the floor needs a small amount of leveling along with the decoupling, but that extra thickness eats into door clearance faster and it’s heavier and slower to install.
- Uncoupling membrane (Schluter DITRA and similar sheet membranes) is roughly 1/8 inch thick and bonds down with thinset, adding minimal height while still fully decoupling the tile from the wood’s movement. It’s the better fit specifically when the existing floor is already flat and sound (it passed Check 2 above) and the limiting factor is how much height you can spare (Check 3) – which is the situation most people renovating over an existing wood floor actually run into.
If you’re not working over an existing floor at all but framing a new plywood subfloor from the joists up, the product and prep priorities shift – see our full plywood subfloor tiling guide for the deflection-first build sequence, trowel sizing, and a waterproofing membrane option better suited to new construction in wet areas.
When You Should Remove the Wood Floor Instead
Pull the old floor up rather than tiling over it when any of the following apply: it’s a floating floor of any kind; it’s cupped, gapped, soft, or water-damaged; there’s active moisture coming from below (a crawlspace or slab issue needs to be solved first, not covered up); or the added height would block doors, stairs, or appliances. Removal also makes sense if the existing floor was only ever meant to be a finish surface with a thin wear layer – some engineered wood products aren’t rated to serve as a long-term substrate under another flooring material. When in doubt, a flooring contractor can check joist spacing and moisture content in under an hour, which is far cheaper than re-doing a tile floor that cracked because the base underneath it wasn’t right.
Step-by-Step: Tiling Over a Sound Wood Floor
Once your floor has passed all three checks, the process is straightforward: clean and vacuum the floor, dry-fit and cut the uncoupling membrane sheets to the room, bond the membrane down with thinset mortar using a notched trowel sized to the membrane manufacturer’s spec, let it cure, then lay your tile in fresh thinset on top of the membrane following standard layout and spacing practices. Grout once the tile has set. For the specific trowel-notch sizing, tile layout, and grouting details, our plywood subfloor tiling guide covers that portion of the job step by step – the only real difference once the membrane is down is that you’re no longer working with bare wood.
Frequently Asked Questions
Do I have to remove my hardwood floor before tiling?
Only if it fails one of the three checks: it’s a floating floor, it’s cupped or uneven by more than about 1/8 inch over 10 feet, or there isn’t enough height clearance left for the membrane, thinset, and tile once you add roughly 3/4 to 1 inch total. A flat, glued-down or well-fastened solid or engineered wood floor with enough clearance can usually stay in place under an uncoupling membrane.
Can you tile directly on wood with no membrane or backer board?
No. Wood expands, contracts, and flexes with humidity and foot traffic; tile and grout are rigid and can’t absorb that movement. Without a cement backer board or an uncoupling membrane like Schluter DITRA between the wood and the tile, cracks typically show up within a year or two, even over solid, well-built floors.
Can you tile over a floating wood floor, like click-lock engineered or laminate?
No. A floating floor is designed to expand and contract as one connected unit that isn’t fastened to the subfloor, and it will keep shifting under tile no matter what membrane you use. Floating floors need to come up before tile goes down.
How much height does tiling over an existing wood floor add?
Budget roughly 3/4 to 1 inch total: about 1/8 inch for an uncoupling membrane (more for cement backer board), plus 3/16 inch or so for thinset mortar, plus the tile itself, which typically runs 3/8 to 1/2 inch. Check that against door swings, appliance clearances, and thresholds to adjoining rooms before you commit.
Sponsored / affiliate links. As an Amazon Associate I earn from qualifying purchases. I may earn additional commission from eligible campaigns.