Common Woodworking Pitfalls And How to Avoid Them: Master the Craft
To avoid common woodworking pitfalls, prioritize proper planning, conduct thorough research, invest in quality tools, and maintain a safe working environment. Woodworking can be both a fulfilling hobby and a lucrative profession, but it is not without its challenges.
From inaccurate measurements to poorly executed joinery, there are plenty of pitfalls that can derail even the most experienced woodworker. However, with careful planning, attention to detail, and the right approach, these pitfalls can be avoided. We will explore some common woodworking pitfalls and provide practical tips on how to steer clear of them.
Whether you are a beginner or an experienced woodworker, understanding and overcoming these challenges will help you achieve better results and enjoy your woodworking projects to the fullest. So, let’s dive in and discover the solutions to some of the most common woodworking pitfalls.
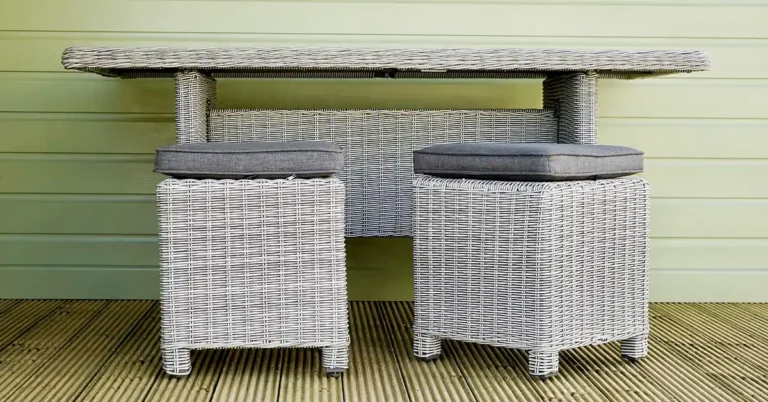
Choosing The Right Wood
Choosing the right wood is crucial to avoid common pitfalls in woodworking. With proper research and guidance, you can ensure the durability, aesthetics, and functionality of your projects. Make informed decisions and select the right wood for your specific needs to achieve the desired results.
Considering The Wood Species
When it comes to choosing the right wood for your woodworking project, one of the most critical aspects to consider is the wood species. Different wood species have varying characteristics that can significantly affect the outcome of your project. Here are some key points to keep in mind when considering the wood species:
1. Durability: Some wood species, such as oak and teak, are known for their exceptional durability and ability to withstand wear and tear over time. On the other hand, softer woods like pine may be more susceptible to dents and scratches. Think about the intended use of your project and choose a wood species that will best suit its purpose.
2. Appearance: The visual appeal of the wood species is another important factor to consider. Each wood species has its unique grain pattern, color, and overall appearance. Some woods, like walnut or cherry, offer rich and warm tones, while others, like maple or birch, provide a lighter and more minimalist aesthetic. Consider the desired look and feel of your project to ensure the wood species aligns with your vision.
3. Availability and cost: Availability and cost can vary greatly depending on the wood species. Some species may be more readily available and affordable, making them a practical choice for budget-conscious DIYers. However, rare or exotic woods may require more research and investment. Consider your budget and accessibility when selecting a wood species.
Proficiency Wood Moisture Levels
Another crucial aspect of choosing the right wood is understanding its moisture levels. Wood naturally contains moisture, which can impact its stability and performance in your woodworking project. Here’s what you need to know:
1. Moisture content: Wood moisture content refers to the amount of water present in the wood fibers. It is measured as a percentage of the wood’s weight. Understanding the moisture content is essential because it affects how the wood will behave once it is cut and shaped. (e.g. Moisture content determines wood’s susceptibility to swelling, warping, or cracking.)
2. Air-dried vs. kiln-dried: Wood can be air-dried or kiln-dried to reduce its moisture content. Air-dried wood is allowed to naturally dry over time, while kiln-dried wood is placed in a controlled environment to speed up the drying process. Kiln-dried wood generally offers more stability and is less prone to deformation. However, keep in mind that different projects may require different moisture levels, so choose accordingly.
3. Acclimation: Before using wood in your project, it’s crucial to allow it to acclimate to the environment where it will be installed or used. This helps to minimize the potential for wood movement caused by changes in temperature and humidity. (e.g. Allow the wood to acclimate for at least 48 hours before beginning your project.)
Remember, choosing the right wood is a crucial step toward successful woodworking. By carefully considering the wood species and understanding its moisture levels, you can avoid common pitfalls and ensure a satisfying and long-lasting result.

Proper Tool Usage
Understanding the proper usage of different types of woodworking tools is crucial for achieving accurate and professional results in your woodworking projects. Not only does it ensure efficient working, but it also helps maintain the lifespan of your tools. In this section, we will explore the different types of woodworking tools and learn how to properly maintain and sharpen them.
Understanding Different Types Of Woodworking Tools
Woodworking tools come in various types, each with its own purpose and functionality. Being familiar with these tools will help you choose the right one for specific tasks, allowing you to work more effectively. Here are some common woodworking tools:
| Tool | Description |
|---|---|
| Saw | A cutting tool used for making straight or curved cuts in wood. |
| Chisel | A sharp-edged tool used for carving, shaping, and cleaning out wood. |
| Plane | A tool used for smoothing wood surfaces or reducing the thickness of wood. |
Maintaining And Sharpening Tools
In order to keep your woodworking tools in optimal condition, regular maintenance and sharpening are necessary. Neglecting to maintain your tools can result in poor performance and can even lead to accidents. Let’s take a look at some essential maintenance practices:
- Clean your tools after each use to remove dust, dirt, and other debris.
- Keep your tools properly lubricated to prevent rust and ensure smooth operation.
- Inspect your tools regularly for any signs of damage or wear and replace any worn-out parts.
- Sharpen your cutting tools, such as chisels and saws, regularly to maintain their effectiveness. A sharp tool not only makes your work easier but also produces cleaner and more precise cuts.
Remember, practicing proper tool usage not only enhances your woodworking skills but also extends the lifespan of your tools, saving you time and money in the long run. By understanding the different types of woodworking tools and maintaining them effectively, you will be well-equipped to tackle any woodworking project with confidence.
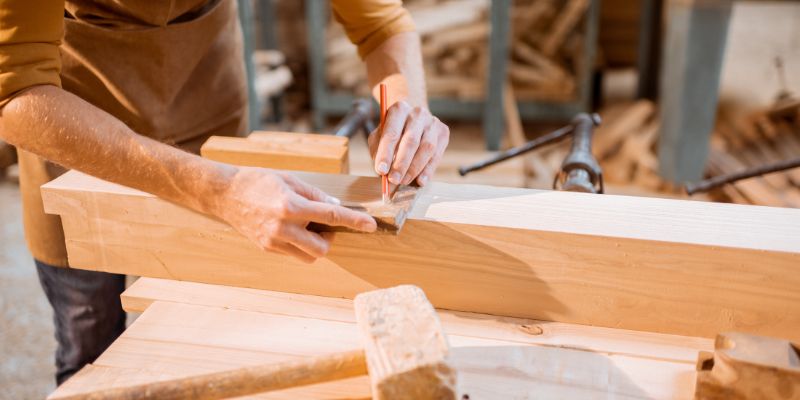
Accurate Measurement And Cutting
Accurately measuring and cutting wood is crucial in avoiding common pitfalls in woodworking. Learn how to avoid these mistakes and achieve precise results for your projects.
Using The Right Measuring Tools
Accurate measurement is the foundation of successful woodworking projects. Whether you’re building a simple bookshelf or an intricate cabinet, using the right measuring tools can make all the difference. Here are some essential tools you need for precise measurement:
- Tape Measure: A reliable tape measure with clear markings is a must-have. Look for one with both inch and metric measurements, as this versatility will come in handy for a wide range of projects.
- Ruler: Having a ruler with both metric and imperial markings is essential for measuring smaller distances accurately.
- Combination Square: This versatile tool allows you to measure 90-degree angles, check for squareness, and mark straight lines.
- Carpenter’s Square: Similar to a combination square, a carpenter’s square is specifically designed for measuring and marking right angles.
Techniques For Precise Cutting
Once you have accurate measurements, it’s time to focus on ensuring precise cutting. Here are some techniques to help you achieve the perfect cut every time:
- Marking the Cut: Before making any cuts, mark the exact line you need to follow. Use a sharp pencil or marking knife, and ensure your marking is clear and visible.
- Cutting Slowly and Steadily: Rushing through a cut can lead to inaccuracies. Instead, take your time and cut slowly and steadily, allowing the blade to glide smoothly through the wood.
- Using a Sharp Blade: Dull blades can cause tear-out or rough edges. Make sure your saw blade or cutting tool is sharp for clean and precise cuts.
- Supporting the Wood: To prevent splintering or uneven cuts, make sure the wood is properly supported. Use clamps or a sturdy workbench to secure the wood in place.
- Practice Makes Perfect: Precision cutting is a skill that improves with practice. Take the time to hone your cutting techniques and experiment with different tools to find what works best for you.
Remember, accuracy in measurement and cutting is vital for successful woodworking projects. By using the right tools and adopting precise cutting techniques, you’ll be well on your way to crafting beautiful and professional-looking pieces.
Joinery Techniques
Understanding common joinery methods is essential for any woodworking project. Proper joinery techniques ensure strong and durable joints that can withstand the test of time. By paying attention to the details and avoiding common pitfalls, you can achieve professional-looking results that will leave you proud of your craftsmanship.
Understanding Common Joinery Methods
When it comes to woodworking, there are several common joinery methods to consider. Each method has its advantages and is suitable for different applications. By understanding these techniques, you can choose the right one for your project and ensure a successful outcome.
Dovetail joints
The dovetail joint is renowned for its strength and durability. This method involves interlocking pins and tails that provide strong mechanical connections. Dovetail joints are commonly used in drawer construction, cabinets, and furniture making. Their unique design prevents the joint from coming apart under pressure, making them ideal for projects that require long-lasting and sturdy connections.
Mortise and tenon joints
Mortise and tenon joints are among the most versatile and widely used joinery methods. This technique involves creating a hole (mortise) and fitting a corresponding piece (tenon) into it. Mortise and tenon joints can be used to connect two pieces at various angles, making them suitable for a wide range of projects, including chairs, tables, and cabinets. These joints provide excellent support and can withstand substantial stress, guaranteeing a strong and durable connection.
Biscuit joints
Biscuit joints offer a quick and effective way to join two pieces of wood together. This method involves cutting a small slot in each piece and inserting a thin, oval-shaped biscuit made of compressed wood. Once the biscuit is inserted and wood glue is applied, it swells, creating a secure bond. Biscuit joints are commonly used in paneling, edge joining, and carcass construction. While biscuit joints may not be as strong as dovetail or mortise and tenon joints, they are still a reliable option that can produce solid connections.
Ensuring Strong And Durable Joints
Regardless of the joinery technique you choose, ensuring strong and durable joints is crucial for the success of your woodworking project. Here are some key tips to keep in mind:
- Use proper measurements and accurate cuts. Precise joinery relies on precise measurements and clean-cutting techniques, so take your time to ensure accuracy.
- Invest in high-quality woodworking tools. Using the right tools for the job will not only make your work easier but also provide better results in terms of accuracy and durability.
- Select the right type of wood. Different types of wood have varying levels of strength and durability. Consider the purpose of your project and choose wood species that can withstand the intended use.
- Apply a suitable adhesive. Using the right type of wood glue or adhesive is crucial for achieving strong bonds. Follow the manufacturer’s instructions and choose a product suitable for the type of wood you are working with.
- Take your time during assembly. Rushing the assembly process can lead to mistakes and weakened joints. Take the necessary time to ensure proper alignment and fit before applying any glue.
- Consider reinforcing your joints. Depending on the project’s requirements, you may want to reinforce your joints with additional fasteners such as screws or nails. This can add extra strength and stability to your connections.
By following these guidelines and understanding common joinery methods, you can avoid common woodworking pitfalls and achieve professional-grade results. Remember, practice makes perfect, so don’t hesitate to experiment with different techniques and refine your skills over time.
Finishing Touches
When it comes to woodworking, the finishing touches are what truly bring a project to life. Applying stains and finishes can transform a piece of wood from a rough, unfinished surface to a beautifully polished work of art. However, it’s important to do it right to avoid common finishing mistakes that can ruin all of your hard work. In this section, we will explore the ins and outs of applying stains and finishes, as well as some tips to avoid those pesky pitfalls that can occur along the way.
Applying Stains And Finishes
Applying stains and finishes may seem straightforward, but there are some important steps and techniques that you should follow to achieve the best results. Here are some key points to keep in mind:
- Prepare the wood: Before applying any stain or finish, it’s crucial to prepare the wood properly. This involves sanding the surface smooth and removing any dust or debris. A smooth, clean surface will ensure that the stain or finish adheres evenly.
- Choose the right product: There are a wide variety of stains and finishes available, each with its own characteristics and uses. It’s important to choose the right product for the type of wood you are working with and the desired outcome. Before applying any product, always read and follow the manufacturer’s instructions.
- Apply evenly: When applying stains or finishes, it’s essential to apply them evenly to avoid blotches or streaks. One technique you can use is to apply the product with a brush or cloth, working in the direction of the wood grain. Another option is to use a spray gun for a more controlled and uniform application.
- Allow for proper drying time: After applying a stain or finish, it’s crucial to let it dry completely before moving on to the next step or handling the wood. Drying times can vary depending on the product and environmental conditions, so be sure to read the instructions and allow sufficient time for drying.
Avoiding Common Finishing Mistakes
Even with careful attention to detail, finishing mistakes can still happen. Here are some common pitfalls to watch out for and how to avoid them:
- Avoid over-application: One common mistake is applying too much stain or finish, which can lead to an uneven or gummy surface. Always follow the manufacturer’s recommended application guidelines and apply in thin, even coats.
- Watch out for drips and runs: Drips and runs can occur when applying a stain or finish, especially on vertical surfaces. To prevent this, be mindful of the amount of product you apply and use steady, controlled brush strokes or sprays.
- Don’t rush the drying process: It can be tempting to rush through the drying process, but it’s important to be patient. Hastily handling or moving the wood before it’s fully dried can result in smudges, fingerprints, or damage to the finish. Follow the recommended drying times and avoid touching the surface until it’s completely dry.
- Protect your workspace: Stains and finishes can be messy, so it’s essential to protect your workspace. Use drop cloths or newspaper to catch any spills or drips, and always work in a well-ventilated area to minimize fumes and ensure proper drying.
By following these tips and techniques for applying stains and finishes, as well as avoiding common finishing mistakes, you can take your woodworking projects to the next level. With a little care and patience, you’ll be able to achieve a professional-looking finish that showcases the beauty of the wood.
Conclusion
Woodworking can be a rewarding hobby, but it’s not without its pitfalls. By being aware of these common mistakes and learning how to avoid them, you can save yourself time, frustration, and even money. Remember to always plan your projects thoroughly, choose the right tools and materials, and practice proper safety precautions.
With these tips in mind, you’ll be well on your way to successful woodworking projects. Happy woodworking!