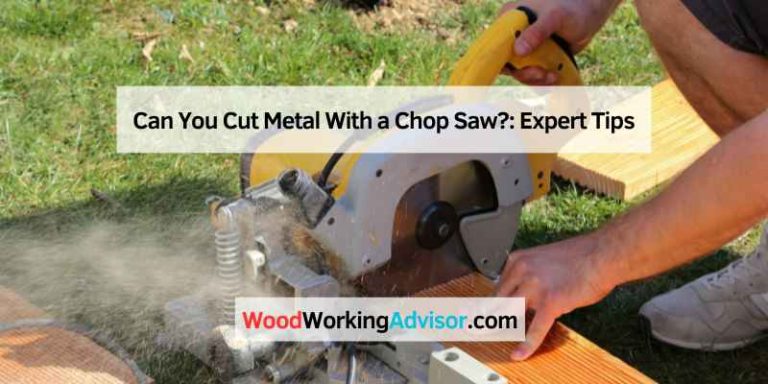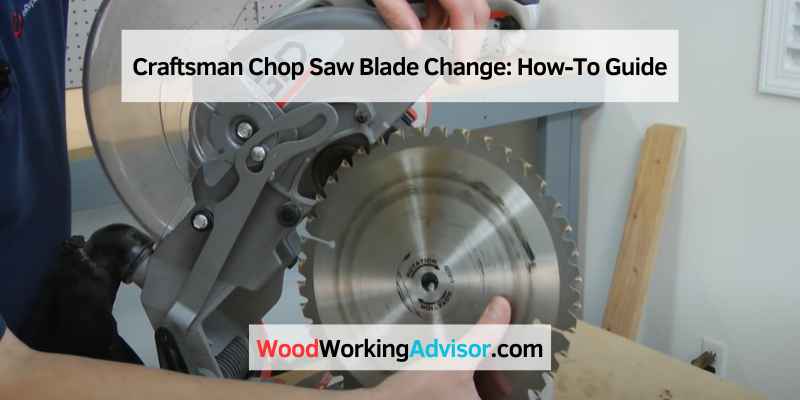
Craftsman Chop Saw Blade Change: How-To Guide
To change the blade on a Craftsman Chop Saw, follow these simple steps for a safe and efficient replacement. Craftsman Chop Saws are powerful tools that require occasional blade changes.
Whether you need to replace a dull blade or switch to a different type for a specific job, knowing how to change the blade is essential. This article will provide a step-by-step guide on how to change the blade on a Craftsman Chop Saw, ensuring that you can complete the task quickly and safely.
By following these instructions, you’ll be able to keep your saw running smoothly and effectively, and achieve the best possible results in your woodworking projects. So, let’s get started and learn how to change the blade on a Craftsman Chop Saw.
Preparing For The Blade Change
Start of Preparing for the Blade Change section
Before you start changing the blade on your Craftsman chop saw, it’s important to gather all the necessary tools. Ensuring safety measures is crucial to protect yourself and maintain a smooth process. Let’s go through what you need and how to ensure your safety.
Gathering Necessary Tools
To begin, make sure you have the following tools within arm’s reach:
- An adjustable wrench
- A socket wrench
- A screwdriver
- A blade locking pin or block
- Safety goggles
- Work gloves
Ensuring Safety Measures
Before changing the blade, take the following safety measures:
- Switch off the chop saw and unplug it from the power source to prevent any accidental starting.
- Allow the saw to cool down if it has been used recently, as the blade can become extremely hot.
- Put on your safety goggles and work gloves to protect your eyes and hands from any potential debris or sharp edges.
- Position the chop saw on a stable and level surface to ensure stability during the blade change.
Now that you have gathered the necessary tools and taken the appropriate safety measures, you are ready to proceed with the blade change on your Craftsman chop saw.
Step-by-step Blade Change Process
The blade change process on a Craftsman Chop Saw is a straightforward task that can be easily accomplished with the right knowledge and tools. In this step-by-step guide, we will walk you through the process of removing the old blade and installing a new one, ensuring safety and precision throughout the entire procedure.
Removing The Old Blade
Before starting the blade change process, ensure that the chop saw is unplugged from the power source for safety.
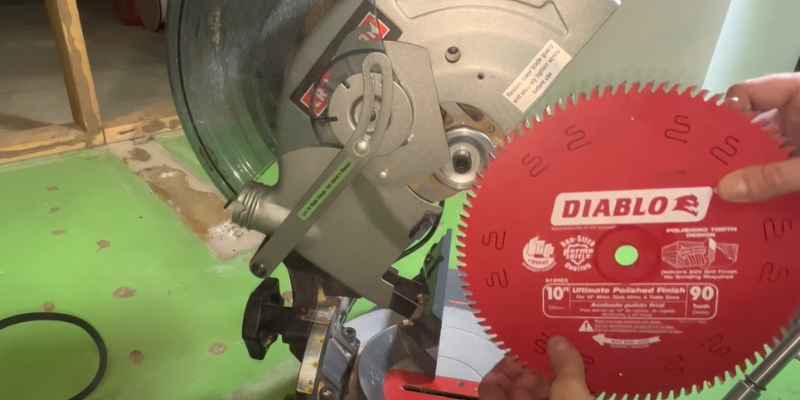
Using the provided wrench, loosen the arbor bolt by turning it counterclockwise. Then, carefully remove the outer washer and the old blade from the arbor.
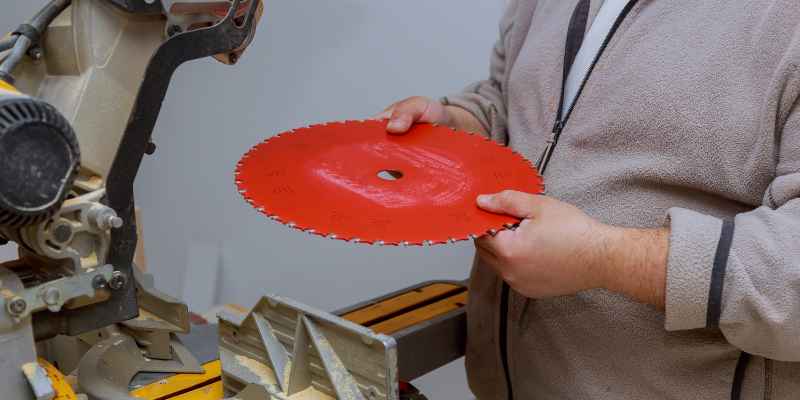
Installing The New Blade
Ensure the new blade is suitable for your Craftsman Chop Saw and matches the recommended specifications for the tool. Carefully place the new blade on the arbor, making sure the blade teeth are facing the correct direction.
Reattach the outer washer and, using the wrench, tighten the arbor bolt by turning it clockwise until the blade is securely in place. Double-check that the blade is properly aligned and tightened to prevent any issues during operation.
Testing The New Blade
Once the blade change is complete, it’s crucial to perform a thorough test to ensure the new blade is functioning at its best. This step not only verifies the safety and functionality but also gives confidence in the cut precision of the new blade. Here is a step-by-step guide on how to conduct a comprehensive test of the new chop saw blade.
Safety Check
Before starting the testing process, it’s essential to conduct a safety check to avoid accidents and ensure a secure working environment. Ensure that the chop saw is turned off and unplugged. Verify that the blade guard is functioning correctly, and there are no loose or damaged components. Also, check for the proper installation of the new blade, ensuring it is securely tightened according to the manufacturer’s guidelines.
Testing Cut Precision
Now that the safety check is complete, it’s time to focus on testing the cut precision of the new blade. Start by securing your material firmly and adjusting the cutting angle if necessary. Turn on the chop saw and make a series of test cuts to evaluate the precision and smoothness of the blade. Inspect the cuts to ensure they are clean, straight, and free from any signs of burning or chipping. Remember to wear appropriate safety gear throughout the testing process.
Maintenance Tips
A Craftsman chop saw is a powerful and versatile tool that can handle a variety of cutting tasks. However, to ensure optimal performance and safety, it’s essential to take proper care of your chop saw. In this section, we will discuss some important maintenance tips to keep your Craftsman chop saw in top shape.
Cleaning The Saw
Regular cleaning is crucial to maintain the efficiency and longevity of your Craftsman chop saw. After each use, make sure to clean the saw thoroughly to remove any residue or debris that may have accumulated during cutting. Here are some steps to effectively clean your chop saw:
- Start by unplugging the chop saw and allowing it to cool down. Safety should always be a top priority.
- Use a brush or compressed air to remove any dust or debris from the blade guard, motor housing, and other parts of the saw.
- Inspect the power cord for any signs of damage and replace it if necessary. Safety first!
- Wipe down the saw with a clean, damp cloth to remove any remaining dirt or grime.
- Apply a thin layer of lubricating oil to the moving parts of the saw, such as the pivot points and blade guard.
Checking Blade Alignment
Proper blade alignment is crucial for accurate and safe cutting with your Craftsman chop saw. Over time, the blade can become misaligned, affecting the quality of your cuts. Here’s how you can check and adjust the blade alignment:
- Start by detaching the power cord from the chop saw. Safety is paramount!
- Using a wrench, loosen the blade bolt and remove the blade from the saw.
- Inspect the blade for any signs of wear or damage. Replace the blade if necessary.
- Place the new or reinstalled blade on the saw, ensuring that it sits securely.
- Tighten the blade bolt with the wrench, but be careful not to overtighten.
- To check the alignment, turn on the chop saw and observe the blade’s rotation. It should run smoothly without any wobbling or excessive vibrations.
- If you notice any misalignment, refer to your user manual for instructions on adjusting the blade alignment.
By following these maintenance tips, you can ensure that your Craftsman chop saw performs at its best and lasts for years to come. Regular cleaning and checking blade alignment will not only enhance your cutting experience but also contribute to your safety. Don’t neglect the maintenance of your chop saw, and it will reward you with precise and efficient cuts every time!
Troubleshooting Common Issues
If you encounter problems when changing the blade on your Craftsman Chop Saw, knowing how to troubleshoot common issues can save you time and frustration.
Blade Stuck In The Saw
Is your blade stuck in the saw and refusing to come out? Here’s what you can do:
- Turn off the saw and unplug it from the power source.
- Check if the blade is securely tightened or if any parts are obstructing its removal.
- Use a lubricant to loosen any stuck parts, and gently wiggle the blade to release it.
Inaccurate Cuts
Are you experiencing inaccurate cuts after changing the blade on your chop saw? Here are some tips to help you achieve precision:
- Ensure the blade is properly aligned with the cutting angle and secured in place.
- Inspect the material you are cutting for any obstructions or defects that may affect the blade’s performance.
- Adjust the cutting speed and pressure to match the materials you are working with for cleaner cuts.
Frequently Asked Questions On Craftsman Chop Saw Blade Change
How Often Should I Change My Craftsman Chop Saw Blade?
You should consider changing your Craftsman Chop Saw blade after approximately 200-300 cuts, depending on the material and type of cuts you are making. Regular inspection of blade condition is essential for optimal performance and safety.
What Tools Do I Need To Change A Craftsman Chop Saw Blade?
To change a Craftsman Chop Saw blade, you’ll typically need an Allen wrench, possibly a screwdriver, and the replacement blade. Follow the manufacturer’s instructions and safety precautions outlined in the user manual for a seamless blade-changing process.
Are There Any Safety Precautions I Should Take During The Blade Change?
Yes, safety is paramount when changing the blade in a Craftsman Chop Saw. Ensure the power is off, blade is fully stopped, and take necessary precautions to avoid contact with the sharp edges. Wear proper safety gear and refer to the user manual for detailed instructions.
Conclusion
Changing the blade of your Craftsman chop saw is an essential task that ensures optimal cutting performance and safety. With a few simple steps, you can easily replace the blade and continue working with precision and efficiency. Remember to follow the manufacturer’s guidelines and safety precautions to avoid any accidents.
Regular maintenance and blade changes will prolong the life of your chop saw and maintain its cutting accuracy. Keep your Craftsman chop saw in top condition and enjoy its reliable performance for years to come.