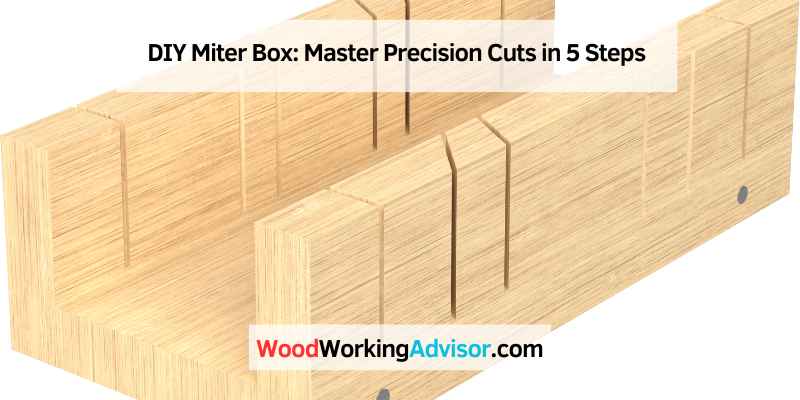
DIY Miter Box: Master Precision Cuts in 5 Steps
A DIY miter box is a simple tool used to make precise angle cuts in wood. It’s essential for woodworking projects.
A miter box is an indispensable tool for anyone involved in woodworking. It’s designed to help you make accurate and clean angled cuts, typically at 45 or 90 degrees. Building a miter box yourself can be a cost-effective solution, allowing you to customize it to your specific needs.
This tool is particularly useful for creating picture frames, trim work, and other projects requiring precise angled cuts. With just a few materials and basic woodworking skills, you can create a reliable miter box that enhances the quality of your work. Whether you’re a beginner or an experienced woodworker, a DIY miter box is a valuable addition to your toolkit.
Introduction To DIY Miter Box
Building your own miter box saves money. It also gives you a custom tool. A DIY miter box fits your needs perfectly. Store-bought miter boxes can be expensive. Making one yourself is easy. You can use scrap wood. You also learn new skills. This project is fun and useful.
| Tools | Materials |
|---|---|
| Saw | Wood pieces |
| Drill | Nails or screws |
| Ruler | Wood glue |
| Pencil | Sandpaper |
Step 1: Designing Your Miter Box
First, decide the size of your miter box. Measure your saw width. Add a few inches for extra space. This helps with easy cutting. Next, decide the length of your box. Longer boxes are better for big pieces. Shorter boxes work for small jobs. Choose the height of the walls too. Higher walls guide your saw better.
Think about the cuts you need. Common cuts are 45 and 90 degrees. These are useful for many projects. You may need other angles too. Custom angles can help with unique tasks. Mark these angles on your box. Accurate marks ensure perfect cuts.
Step 2: Cutting The Wood
Wear safety glasses to protect your eyes. Gloves can keep your hands safe. Make sure the work area is clean. Use a firm grip on the saw. Always cut away from your body.
Use a ruler to measure the wood. Mark the cutting lines with a pencil. Double-check measurements to avoid mistakes. A clear mark makes cutting easier.
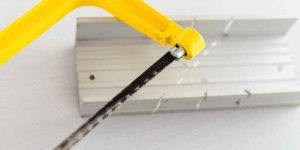
Place the wood firmly in the miter box. Hold the saw at the correct angle. Use slow and steady strokes. Let the saw do the work. Check the cut for accuracy.
Step 3: Assembling The Box
Place the sides of the box on a flat surface. Ensure the edges touch each other. Use a square tool to check angles. All corners must be 90 degrees. Adjust if needed. This ensures the box is straight.
Apply wood glue to the edges. Press the pieces together. Hold them tightly for a few minutes. Use clamps to keep pieces in place. Let the glue dry completely. Screws can add extra strength. Drill pilot holes first. Then, insert screws carefully.
Step 4: Adding The Guides
Choose strong wood for guides. Hardwoods like oak work well. Ensure the wood is straight. Avoid knots or cracks. Sand the edges smooth. This helps accuracy.
Place guides on the box sides. Use clamps to hold them. Drill pilot holes first. This prevents wood splitting. Use screws to secure guides. Check alignment before tightening screws. Adjust as needed for a perfect fit.
Step 5: Finishing Touches
Begin by sanding the miter box. Use fine-grit sandpaper for best results. Move the sandpaper in small circles. This helps smooth the wood. Sand all surfaces of the miter box. Be sure to sand corners and edges. Check the wood often. It should feel smooth to the touch. Stop sanding when the wood is smooth.
Choose a finish or sealant for the wood. This protects the wood from damage. Use a brush to apply the finish. Apply a thin, even coat. Let the finish dry completely. Read the instructions on the can. You may need more than one coat. Wait for each coat to dry. Your miter box will look great and last longer.
Testing Your Miter Box
Place your wood in the miter box. Secure it firmly with clamps. Mark the spot where you want to cut. Align the saw with the marked line. Hold the saw at a steady angle. Begin to saw with slow, even strokes. Increase speed once the cut is started. Check the cut for accuracy.
Inspect the cut for any rough edges. Use sandpaper to smooth them out. Ensure the angles are precise. Adjust the miter box if angles are off. Make small changes to improve accuracy. Test again to see improvements. Repeat until satisfied with the result.
Maintenance And Care
Use a soft brush to remove sawdust. Wipe the miter box with a damp cloth. Dry it thoroughly to prevent rust. Check for any wood chips. Clean the saw blade with a blade cleaner. Make sure the miter box is free of debris.
Store the miter box in a dry place. Keep it away from moisture. Hang it on a wall to save space. Use a cover to protect it from dust. Avoid storing it on the floor. Keep it out of direct sunlight.
Frequently Asked Questions
Can You Make A Mitre Box?
Yes, you can make a mitre box. Use wood or plastic and a saw to create precise angles.
How Do You Cut A 45 Degree Angle Without A Miter Box?
Use a protractor to mark a 45-degree angle on the material. Cut along the line with a handsaw.
Are Miter Boxes Worth It?
Yes, miter boxes are worth it. They provide precise cuts, improve accuracy, and are affordable. Ideal for DIY projects.
How To Cut A 22.5 Degree Angle On A Miter Box?
Place the wood in the miter box. Align the saw with the 22. 5-degree slot. Cut carefully along the guided path.
Conclusion
Crafting your own DIY miter box is a rewarding project. It saves money and boosts your woodworking skills. With simple materials and steps, you can create precise miter cuts. Enjoy the satisfaction of using a tool you built yourself. Happy woodworking and stay creative!