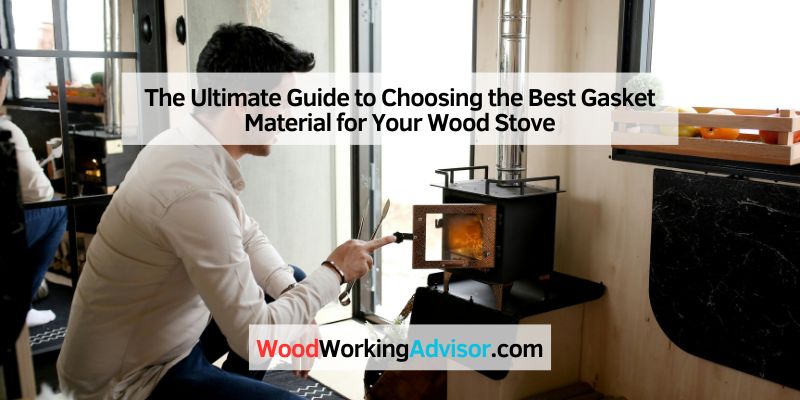
The Ultimate Guide to Choosing the Best Gasket Material for Your Wood Stove
Hey there! If you’re cozying up by your wood stove on a chilly evening, you know how important it is to keep that fire burning efficiently. I’ve spent countless winters tinkering with my own wood stove, and let me tell you, one of the unsung heroes of a well-functioning stove is the gasket material. It’s that little strip of material that seals the door, keeps the heat in, and ensures your stove runs safely and efficiently. Choosing the right gasket material for your wood stove can feel overwhelming with all the options out there, but don’t worry—I’ve been down this road and I’m here to guide you through it.
In this article, I’ll break down everything you need to know about gasket materials, from types and sizes to installation tips and maintenance. Let’s dive in and make sure your wood stove is ready to keep you warm all winter long!
What Is a Wood Stove Gasket and Why Does It Matter?
Picture this: you’re loading logs into your wood stove, and you notice smoke creeping out from the door’s edges. Or maybe your fire isn’t burning as hot as it used to. Chances are, your gasket is to blame. A wood stove gasket is a heat-resistant seal, usually found around the door or glass panel, that creates an airtight barrier between the firebox and the outside world. This seal is crucial because it controls airflow, prevents heat loss, and keeps smoke from leaking into your home.
When I first started using my wood stove, I didn’t think much about the gasket. But after a season of use, I noticed my fires weren’t as strong, and my living room smelled faintly of smoke. That’s when I learned how vital a good gasket is. Without a proper seal, your stove burns more wood than necessary, loses efficiency, and can even pose safety risks like carbon monoxide leaks. A worn-out or poorly chosen gasket can make your cozy evenings less comfortable and more expensive. So, let’s explore how to pick the right gasket material to keep your stove in top shape.
Types of Gasket Materials for Wood Stoves
When it comes to gasket materials, not all are created equal. Over the years, I’ve tried a few different types, and each has its own strengths. Here’s a breakdown of the most common gasket materials you’ll find for wood stoves:
Fiberglass Rope Gaskets
Fiberglass rope gaskets are the go-to choice for most wood stove owners, and for good reason. They’re made from woven fiberglass, which is incredibly heat-resistant—often rated up to 1,000°F. These gaskets are soft yet durable, making them perfect for creating a tight seal around the stove door. I’ve used fiberglass rope gaskets on my old Buck Stove, and they’ve held up beautifully through years of daily fires.
Some fiberglass gaskets come with a graphite coating, which adds extra durability and makes them less likely to stick to the stove’s metal surfaces. This coating also helps reduce creosote buildup, which is a bonus if you’re burning wood regularly. If your stove door has a groove, fiberglass rope is likely what you need.
Flat Gaskets
Flat gaskets are another option, especially for stoves with flat surfaces, like around the glass panel. These are typically thin strips of fiberglass or ceramic material with adhesive backing. I’ve used flat gaskets on my stove’s glass door, and they’re super easy to install—just peel and stick. They’re not as common for door seals but work great for specific applications where a rope gasket won’t fit.
Tadpole Gaskets
Tadpole gaskets are a bit more specialized. They have a unique design with a bulb-like end and a flat “tail,” making them ideal for uneven surfaces or hinges. The bulb compresses to form a tight seal, while the tail conforms to the stove’s surface. I haven’t used tadpole gaskets myself, but I’ve seen them recommended for older stoves with tricky door designs. They’re a bit pricier but worth it if your stove has an unusual setup.
Ceramic Fiber Gaskets
Ceramic fiber gaskets are less common but excellent for high-temperature applications. They’re often used in combustion blowers or burn pots, where extreme heat is a factor. These gaskets are pricier and more brittle than fiberglass, so they’re not ideal for every stove. I’ve only used ceramic gaskets in specific repair jobs, like sealing a combustion blower, and they did the job well but required careful handling.
Here’s a quick comparison table to help you choose:
| Gasket Type | Best For | Heat Resistance | Ease of Installation | Cost |
|---|---|---|---|---|
| Fiberglass Rope | Door seals, general use | Up to 1,000°F | Moderate | Low |
| Flat Gasket | Glass panels, flat surfaces | Up to 1,000°F | Easy | Low |
| Tadpole Gasket | Uneven surfaces, hinges | Up to 1,000°F | Moderate | Medium |
| Ceramic Fiber | Combustion blowers, burn pots | Up to 2,000°F | Difficult | High |
How to Choose the Right Gasket Size
Choosing the correct gasket size is one of the trickiest parts of the process, but it’s critical for a good seal. I learned this the hard way when I bought a rope gasket that was too small for my stove’s door groove. The door wouldn’t close properly, and air leaks made my fires burn too fast. Here’s how to get it right:
First, check your stove’s owner’s manual. Most manuals list the exact gasket size and type for your model. If you don’t have the manual (like I didn’t for my old stove), you’ll need to measure the groove in the door. Use a ruler or tape measure to check the width and depth of the channel where the gasket sits. Common rope gasket sizes range from 1/4 inch to 1 inch in diameter, with 3/8 inch and 5/8 inch being the most popular.
If the old gasket is still intact, remove a small section and measure its diameter. If it’s too worn or flattened, try to reshape it into its original round form to get an accurate measurement. I always order an extra foot of gasket material just in case—better to have too much than too little.
For flat gaskets, measure the width of the surface where it will be applied, like the edge of a glass panel. Tadpole gaskets are a bit more complex, so you may need to consult a stove professional if your manual isn’t clear.
Pro tip: If your stove is leaking air even with a new gasket, the size might be off. Try the “dollar bill test.” Place a dollar bill across the door’s gasketed area, close the door, and tug. If it pulls out easily, your gasket is too small or worn out.
Adhesives for Gasket Installation
Installing a gasket isn’t just about picking the right material—you also need the right adhesive to keep it in place. I’ve made the mistake of using cheap glue that turned brittle and cracked after a few fires. Here’s what you need to know about adhesives:
Most rope gaskets require high-temperature gasket cement or RTV silicone to secure them in the door’s groove. I prefer RTV silicone because it stays flexible and withstands temperatures up to 450°F or more. Brands like Rutland or LavaLock make reliable options. Apply a thin bead of adhesive in the groove, press the gasket in, and let it cure for 24 hours before firing up the stove.
Flat gaskets often come with self-adhesive backing, which is a lifesaver. Just clean the surface thoroughly, peel off the backing, and stick it on. For ceramic gaskets, you might not need adhesive if they’re sandwiched between metal surfaces and secured with screws or bolts.
One thing I’ve learned: don’t skimp on adhesive quality. Cheap glue can harden and make the gasket brittle, leading to early failure. Also, avoid using regular silicone—it won’t handle the heat.
When to Replace Your Wood Stove Gasket
How do you know when it’s time to replace your gasket? In my experience, gaskets don’t last forever, but they don’t need replacing every season either. Here are some signs to watch for:
- Air Leaks: If you see smoke escaping or feel drafts around the door, your gasket is failing.
- Visible Wear: Look for fraying, flattening, or crumbling. My old fiberglass rope gasket started unraveling after three years of heavy use.
- Poor Fire Control: If your fire burns too fast or you can’t control the heat, the gasket might not be sealing properly.
- Discoloration: A blackened or brittle gasket doesn’t always need replacing, but it’s a sign to inspect it closely.
Most rope gaskets last 2-5 years, depending on how often you use your stove. Glass gaskets can last up to 5 years, while ceramic gaskets in high-heat areas may need replacing every time they’re exposed. I check my gasket annually during the off-season, using the dollar bill test to confirm it’s still sealing.
Step-by-Step Guide to Replacing a Wood Stove Gasket
Replacing a gasket is easier than it sounds, and I’ve done it enough times to share a foolproof process. Here’s how I do it:
- Gather Your Tools: You’ll need a new gasket, high-temperature adhesive, a wire brush or sandpaper, scissors or a knife, and gloves to keep your hands clean.
- Cool the Stove: Make sure the stove is completely cold. I learned this the hard way when I tried to replace a gasket on a warm stove—ouch!
- Remove the Old Gasket: Open the door and pull out the old gasket. Use a screwdriver or pliers if it’s stuck. Clean the groove with a wire brush or sandpaper to remove old adhesive.
- Measure and Cut: Dry-fit the new gasket by laying it in the groove without adhesive. Cut it to length, leaving a little extra to ensure a tight fit. Some stoves require overlapping ends, while others need a butt joint—check your manual.
- Apply Adhesive: For rope gaskets, apply a thin layer of gasket cement or RTV silicone in the groove. For flat gaskets, ensure the surface is clean before sticking.
- Install the Gasket: Press the gasket firmly into the groove, starting at one end and working your way around. For corners, bend gently without stretching. If using adhesive, let it cure for 24 hours.
- Test the Seal: Close the door and do the dollar bill test. If it’s too loose, you may need a thicker gasket or tighter door adjustments.
The first time I replaced a gasket, it took me about an hour. Now, I can do it in 30 minutes. It’s a simple job that makes a big difference.
Maintenance Tips for Long-Lasting Gaskets
A good gasket can last years if you take care of it. Here are some tips I’ve picked up:
- Clean Regularly: Remove creosote or ash buildup from the gasket with a soft brush. Avoid harsh chemicals that can degrade the material.
- Avoid Over-Tightening: Slamming the door or over-tightening the latch can compress the gasket too much, shortening its lifespan.
- Check Annually: Inspect your gasket at the start of each heating season. A quick dollar bill test can save you from bigger problems later.
- Use Quality Materials: Stick to reputable brands like Rutland, LavaLock, or those recommended by your stove manufacturer. Cheap gaskets wear out faster.
I also spray my fiberglass gasket with a light coat of WD-40 every few months. It sounds odd, but it helps keep the material flexible and prevents fraying.
Common Mistakes to Avoid
I’ve made my fair share of mistakes when dealing with gaskets, so let me save you some trouble:
- Using the Wrong Size: A gasket that’s too small won’t seal, and one that’s too large can prevent the door from closing properly.
- Skipping Cleaning: Old adhesive or debris in the groove can weaken the new gasket’s bond.
- Using Low-Quality Adhesive: Cheap glue can harden or fail under heat, causing the gasket to come loose.
- Ignoring the Manual: Every stove is different. Always check the manufacturer’s recommendations for gasket type and size.
Where to Buy Gasket Materials
You can find gasket materials at hardware stores, stove shops, or online retailers. I’ve had great luck with sites like eFireplaceStore.com, Woodstove-FireplaceGlass.com, and StoveGaskets.com. They offer a wide range of sizes and types, often with free shipping on larger orders. Local stove shops are also a great option if you want to match your old gasket in person. Prices typically range from $2.50 to $4 per foot for rope gaskets, with kits including adhesive costing $20-$40.
Conclusion
Choosing the right gasket material for your wood stove doesn’t have to be a chore. After years of trial and error, I’ve learned that a little research and care go a long way in keeping your stove efficient and safe. Whether you’re opting for a fiberglass rope gasket, a flat gasket for your glass panel, or a specialized tadpole gasket, the key is to match the material and size to your stove’s needs. Take the time to measure carefully, use high-quality adhesive, and maintain your gasket regularly. Your wood stove will reward you with cozy, efficient fires all winter long.
I hope this guide has given you the confidence to tackle your gasket replacement or upgrade. There’s something deeply satisfying about maintaining your own wood stove—it’s like giving a trusted friend a little TLC. So grab your tools, pick the right gasket, and enjoy those warm, crackling fires. If you have any questions or need a hand, I’m always here to help!
FAQs
What is the best gasket material for a wood stove door?
Fiberglass rope gaskets are the most popular choice for wood stove doors. They’re heat-resistant, affordable, and create a reliable airtight seal. Graphite-impregnated fiberglass is even better for durability and ease of replacement.
How often should I replace my wood stove gasket?
It depends on usage, but most rope gaskets last 2-5 years. Glass gaskets can last up to 5 years, while ceramic gaskets may need replacing every time they’re exposed. Check annually with the dollar bill test to be sure.
Can I use regular silicone to install a gasket?
No, regular silicone can’t handle the high temperatures of a wood stove. Use high-temperature RTV silicone or gasket cement rated for at least 450°F to ensure a secure, long-lasting bond.
How do I know if my gasket is the right size?
Check your stove’s manual for the recommended size. If you don’t have it, measure the groove’s width and depth or the old gasket’s diameter. Common sizes are 3/8 inch to 5/8 inch for rope gaskets.
Can I make my own gasket material?
I don’t recommend it. Homemade gaskets, like those made from fiberglass or fire-retardant rope, often can’t withstand the extreme heat and pressure of a wood stove. Stick to manufacturer-approved materials for safety.