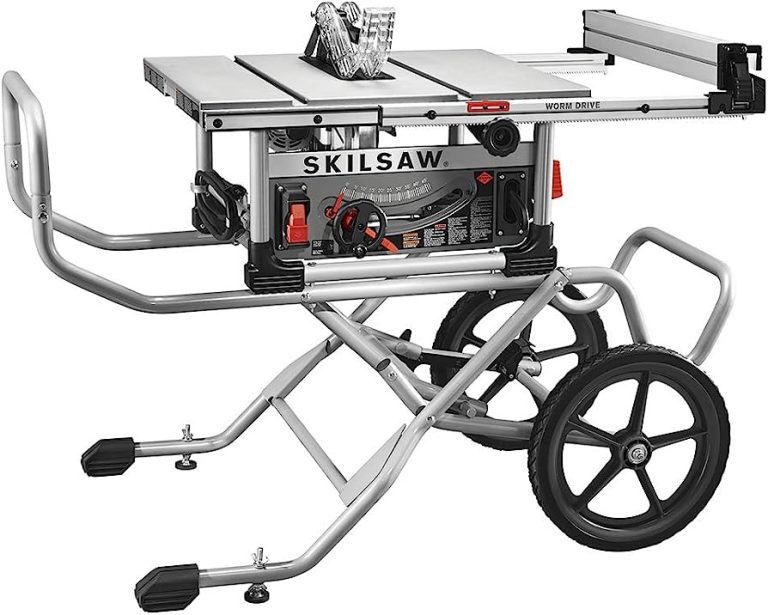
How to Cut Thin Strips on a Table Saw: Expert Tips for Precision Cuts
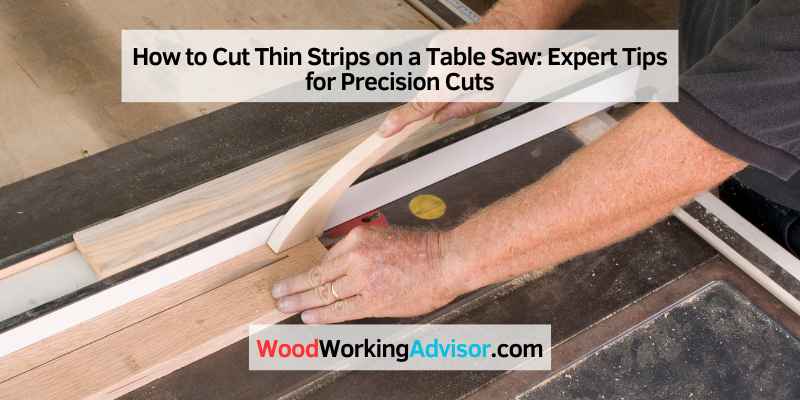
To cut thin strips on a table saw, adjust the fence parallel to the blade at the desired width and use a push stick to guide the workpiece safely through the cut. Cutting thin strips on a table saw can be a challenging task if not done correctly.
Whether you are working on a woodworking project or need precise strips for a specific purpose, having the right technique is crucial. This article will provide you with step-by-step instructions on how to cut thin strips on a table saw.
By following these guidelines, you will be able to achieve accurate and clean cuts while ensuring your safety. So, let’s dive in and learn how to effectively cut thin strips on a table saw.
Understanding The Importance Of Thin Strips
Cutting thin strips on a table saw is an essential skill for woodworking projects. With precision and caution, learn how to achieve accurate results using this powerful tool.
The Role Of Thin Strips In Woodworking Projects
- Thin strips play a vital role in various woodworking projects, from furniture making to intricate crafts. These narrow pieces of wood are commonly used for edging, inlays, veneering, and many other applications. Understanding their importance can greatly enhance your woodworking skills and project outcomes.
Benefits of Using a Table Saw for Cutting Precise Thin Strips:
- Accurate Cutting: Table saws are known for their precision and stability, making them an ideal tool for cutting thin strips with utmost accuracy. The use of a fence and a miter gauge ensures consistent results, allowing you to create uniform strips for your projects.
- Versatility: Table saws offer versatility when it comes to cutting thin strips. They allow you to adjust the width of the strip by simply adjusting the table saw’s fence. This flexibility empowers you to match the specifications required by your project, whether it be 1/8 inch or 1/16 inch strips.
- Safety Measures: Table saws provide safety features such as blade guards, riving knives, and anti-kickback pawls. These safety mechanisms ensure that you can cut thin strips without putting yourself at risk of accidents or injuries. Always prioritize safety by following the manufacturer’s guidelines and wearing appropriate protective gear.
- Time Efficiency: Cutting thin strips on a table saw saves you time and effort. With the ability to make precise cuts in a single pass, you can complete your projects more efficiently. This efficiency enables you to take on more woodworking projects or focus on other aspects of your craft.
- Clean and Smooth Cuts: The design of a table saw blade, combined with its powerful motor, allows for clean and smooth cuts on thin strips. This professional finish eliminates the need for extensive sanding or additional finishing, saving you valuable time and effort.
- Repeatable Results: The stability and precision of a table saw make it easier to achieve repeatable results. This is particularly important when working on projects that require multiple identical thin strips. With a table saw, you can cut consistent strips time and time again, ensuring a seamless and professional look for your creations.
By understanding the importance of thin strips in woodworking projects and leveraging the benefits of using a table saw for cutting precise strips, you can elevate the quality of your craftsmanship. With accuracy, versatility, safety, time efficiency, clean cuts, and repeatable results, a table saw becomes an indispensable tool in your woodworking arsenal.

Essential Tools And Safety Precautions
Learn how to cut thin strips on a table saw with essential tools and safety precautions. This guide provides step-by-step instructions to ensure a precise and safe cutting process.
Table saws are incredibly versatile tools that can be used for a wide range of woodworking projects. One common task that you may encounter when using a table saw is cutting thin strips. Whether you’re working on a DIY project or a professional job, it’s essential to have the right tools and take safety precautions to ensure that you get the best results without any accidents.
In this section, we’ll cover the must-have tools for cutting thin strips on a table saw and the importance of safety precautions.
Must-Have Tools For Cutting Thin Strips On A Table Saw:
- Push sticks: These are essential for guiding the thin strip through the saw safely. They allow you to maintain a safe distance from the blade while exerting pressure on the workpiece. Make sure to use a push stick that is specifically designed for thin strip cutting.
- Featherboards: These handy tools help in holding the stock securely against the table saw’s fence, ensuring a straight and accurate cut. They prevent the material from slipping or wandering during the cutting process.
- Zero-clearance insert: This specialized insert replaces the original throat plate of the table saw. It provides support directly around the blade, reducing tear-out and minimizing the chances of the thin strip getting caught and causing kickback.
- Thin rip jig: A thin rip jig is a helpful accessory that allows you to make consistent and precise cuts when working with narrow strips. It acts as a guide, ensuring uniformity in the strips’ thickness.
Importance Of Safety Precautions When Working With A Table Saw:
- Wear safety goggles: Protecting your eyes should always be a top priority when using power tools. Safety goggles will shield your eyes from any flying debris or potential accidents that may occur during the cutting process.
- Use a blade guard: The blade guard is a protective enclosure that covers the table saw’s blade. It helps in reducing the risk of accidental contact with the blade and provides an added layer of safety.
- Maintain a proper working environment: Ensure that your workspace is clean and free from clutter. Remove any obstacles or distractions that may lead to accidents while operating the table saw.
- Keep your hands away from the blade: Always maintain a safe distance from the blade when cutting thin strips. Use a push stick or other appropriate tools to guide the material through the saw, keeping your hands out of harm’s way.
- Use a splitter or riving knife: These devices are designed to prevent kickback, which can occur when the material gets trapped between the blade and the fence. A splitter or riving knife keeps the workpiece separated, reducing the risk of kickback.
Remember, safety should always be a priority when working with power tools. By utilizing the must-have tools and adhering to safety precautions, you can ensure a successful and accident-free experience when cutting thin strips on a table saw.
Setting Up The Table Saw For Thin Strip Cuts
Learn how to set up your table saw for precise thin strip cuts with these simple steps. Achieve clean and accurate results every time without the hassle.
To achieve accurate and precise cuts when working with thin strips on a table saw, it is crucial to properly set up the equipment and utilize the right accessories for added stability. Follow these steps to ensure your table saw is ready for cutting thin strips:
Adjusting The Blade Height And Angle For Accurate Cuts:
- Start by adjusting the blade height: Set the blade to the appropriate height, ensuring it is slightly higher than the thickness of the material you will be cutting. This prevents the workpiece from getting caught in the blade and reduces the chance of kickback.
- Fine-tune the blade angle if needed: Depending on the desired cut, you may need to adjust the blade angle. Double-check that it is set to the correct angle, whether it be 90 degrees for a straight cut or a different angle for more intricate designs.
Choosing The Right Table Saw Fence And Using Feather Boards For Added Stability:
- Select a reliable table saw fence: The fence serves as a guide for your workpiece and plays a crucial role in achieving consistent and accurate cuts. Make sure your table saw is equipped with a sturdy and precise fence that can be easily adjusted to match the desired width of your thin strip.
- Employ feather boards for added stability: Feather boards are excellent accessories that help keep your workpiece firmly against the table saw fence and prevent it from drifting during the cutting process. Position the feather boards horizontally or vertically, depending on the cut you’re making, to provide extra stability and minimize the chance of your thin strip slipping or shifting.
By following these guidelines, you can set up your table saw for cutting thin strips with accuracy, precision, and confidence. Remember to always prioritize safety and use appropriate personal protective equipment when operating your table saw. Now that you have your table saw ready, it’s time to proceed to the next steps of cutting those thin strips flawlessly.
Ripping Thin Strips From Wide Boards
Learn how to cut thin strips on a table saw by safely ripping them from wide boards. This technique allows you to create precise strips for various woodworking projects with ease.
Step-By-Step Guide On :
- Begin by ensuring the table saw is properly set up and adjusted for accurate cuts. Check the blade alignment, fence position, and blade height.
- Choose the right blade for the job. A thin-kerf blade with a high tooth count (such as 40 or more) is ideal for cutting thin strips smoothly and cleanly.
- Position the fence according to the desired width of the strips. Use a measuring tape or a precise marking tool to ensure accuracy.
Before starting the cut, assess the width of the board to be ripped. If it is less than 6 inches wide, move on to the next step. If it is wider, proceed with the following precautions:
- Use a push stick to maintain a safe distance between your hands and the blade. This tool allows for greater control and reduces the risk of accidents.
- Position your body to the side of the blade, keeping your hands out of the line of fire. This ensures your safety in case of kickback.
- Make sure the board is fully supported throughout the cut. Use an outfeed table or roller stand as needed.
- Start the cut by turning on the table saw and pushing the board smoothly and steadily through the blade. Maintain a consistent feed rate to achieve clean, even strips.
- Continue feeding the board until you have completed the cut. Do not rush the process but focus on maintaining control and precision.
- After the cut, inspect the thin strip for any imperfections, such as burning or rough edges. If necessary, use sandpaper or a router to smooth out any irregularities.
- Repeat the process as needed to create additional thin strips from your wide boards.
- Remember to always prioritize safety. Wear safety goggles, avoid loose clothing or jewelry, and keep your work area free from distractions.
Importance Of Using A Push Stick And Maintaining Proper Positioning:
Using a push stick and maintaining proper positioning are crucial for ensuring safety and accuracy when ripping thin strips on a table saw. Here’s why:
- A push stick allows you to maintain a safe distance from the blade while still exerting control over the board. It reduces the risk of hand injuries by keeping your fingers away from the spinning blade.
- Proper positioning, such as standing to the side of the blade and keeping hands clear, minimizes the chance of accidents caused by kickback. This protective stance ensures that your body remains out of the path of any potential flying debris.
- By using a push stick and maintaining proper positioning, you have better control over the board as it passes through the blade. This control results in cleaner and more accurate cuts, reducing the need for rework or waste.
- Safety should always be the top priority, and these practices help mitigate risks associated with table saw use. Taking the time to implement these precautions will not only protect you from harm but also contribute to a more enjoyable woodworking experience.
Remember, whether you’re a professional woodworker or a hobbyist, following these guidelines is essential to cutting thin strips safely and efficiently on a table saw. Stay focused, be aware of your surroundings, and maintain proper positioning throughout the process.
Using A Resaw Jig For Thin Strip Cuts
Learn how to effortlessly cut thin strips on your table saw with the help of a resaw jig. This simple and efficient technique will ensure precise and accurate results every time.
Here’S How A Resaw Jig Can Help You Cut Precise Thin Strips On A Table Saw:
Bullet points:
- A resaw jig is a versatile tool that helps you make consistently accurate thin strip cuts on a table saw.
- It ensures safety by keeping your hands away from the blade, reducing the risk of accidents.
- A resaw jig allows you to make multiple identical cuts without having to mark each strip individually.
- It helps you achieve precise thickness by guiding the wood steadily through the blade.
- With a resaw jig, you can easily cut thin strips of any length at a consistent width, making it ideal for various woodworking projects.
How to build and set up a resaw jig for precise thin strip cuts
Bullet points:
- Measure the distance from your table saw blade to the fence and cut a piece of plywood to match that width.
- Attach a hardwood guide, such as a strip of maple, to the plywood, ensuring it is straight and parallel to the blade.
- Install a toggle clamp to hold your workpiece securely against the guide.
- Adjust the height of the guide to correspond with the desired thickness of your thin strips.
- Set the fence on your table saw to align with the outer edge of the guide.
- Secure the resaw jig to the table saw fence using clamps or screws, ensuring it is firmly attached.
- Place your workpiece against the guide and clamp it in place, making sure it rests firmly and securely.
- Adjust the angle of the blade, if needed, to ensure a smooth and accurate cut.
- Turn on the table saw and slowly feed your workpiece through the blade, using smooth and steady pressure.
- Keep your hands clear of the blade, using the resaw jig to guide the wood and maintain a consistent cut.
Remember, using a resaw jig can greatly enhance your ability to cut thin strips on a table saw accurately. Follow the steps to build and set up your own resaw jig, and you’ll have precise and consistent results for your woodworking projects.
Stay safe and enjoy the satisfaction of creating beautiful thin strips with ease.

Credit: www.kregtool.com
Crosscutting Thin Strips Safely And Accurately
Cutting thin strips on a table saw can be done safely and accurately by following these simple steps. Start by setting up the fence and blade height, then use a push stick to guide the wood through the cut. Take your time and make sure to use proper safety precautions for a precise and smooth cut.
Proper Techniques For Crosscutting Thin Strips On A Table Saw:
To ensure precision and safety when crosscutting thin strips on a table saw, it is important to follow proper techniques. Here are some guidelines to help you achieve accurate and safe results:
- Use a push stick: When cutting thin strips, using a push stick is essential for keeping your hands at a safe distance from the blade. It provides better control and reduces the risk of accidents.
- Set up a featherboard: A featherboard is a useful tool for holding the workpiece securely against the table saw’s fence. It prevents the workpiece from moving during the cut, ensuring a straight and accurate result.
- Use a zero-clearance insert: A zero-clearance insert is a specialized throat plate that supports the workpiece right up to the blade, minimizing tear-out and improving accuracy.
- Employ a sacrificial board: Thin strips can sometimes splinter as they pass through the blade. To prevent this, attach a sacrificial board to the workpiece with double-sided tape. This sacrificial board will bear the brunt of tear-out, protecting your desired strip.
- Make multiple passes: When working with thin strips, it is often safer and more accurate to make multiple passes instead of rushing through one cut. Take your time and make incremental cuts, gradually moving the fence closer to the blade for each pass.
Implementing A Crosscut Sled For Improved Precision And Safety:
Crosscut sleds are highly beneficial tools for cutting thin strips on a table saw. They provide enhanced precision, stability, and safety. Here’s why you should consider using a crosscut sled:
- Increased accuracy: A crosscut sled allows for consistent and repeatable cuts. The sled’s fence acts as a guide, ensuring the workpiece maintains a straight and perpendicular position during the cut. This leads to precise and uniform thin strips.
- Improved safety: By using a crosscut sled, your hands remain further away from the blade, significantly reducing the risk of accidents. The sled’s design provides added stability, keeping the workpiece firmly in place throughout the cut.
- Enhanced control: With a crosscut sled, you have better control over the workpiece. The larger surface area provided by the sled minimizes the chances of the strips shifting or bending during the cut. This ensures a more accurate and reliable result.
- Support for small or irregular workpieces: Working with small or irregularly shaped thin strips can be challenging. Crosscut sleds offer additional support and stability, making it easier to handle these types of workpieces safely and accurately.
Employing proper techniques and using a crosscut sled are essential when cutting thin strips on a table saw. Following these guidelines will help you achieve precise, straight cuts while prioritizing safety.
Utilizing A Zero-Clearance Insert For Clean Cuts
Achieve clean cuts when cutting thin strips on a table saw by utilizing a zero-clearance insert. This tool reduces tear-out and provides a smooth surface, ensuring precise and accurate results.
Explanation Of Zero-Clearance Inserts And Their Role In Reducing Tear-Out
When it comes to cutting thin strips on a table saw, utilizing a zero-clearance insert is essential for achieving clean cuts and minimizing tear-out. Here’s a breakdown of what zero-clearance inserts are and why they play a crucial role:
- Zero-clearance inserts are specially designed throat plates that fit snugly around the table saw blade, leaving minimal space for the workpiece to fall into. This eliminates the possibility of small offcuts or chips getting trapped between the blade and the throat plate.
- The primary purpose of a zero-clearance insert is to provide support to the workpiece, effectively reducing tear-out. By minimizing gaps, it helps prevent wood fibers from tearing away when they come in contact with the rotating blade.
- Zero-clearance inserts also enhance safety by reducing the risk of kickback. With the reduced gap between the blade and the insert, there is less chance of the workpiece binding or wandering off course, leading to a more secure cutting process.
How To Create And Install A Zero-Clearance Insert For Optimal Results
Creating and installing your own zero-clearance insert is a straightforward process that ensures the best possible results. Follow these steps for optimal performance:
- Select the right material: Begin by choosing a suitable material for your zero-clearance insert. High-density fiberboard (HDF) or phenolic plywood are popular choices due to their stability and durability.
- Measure and mark: Take precise measurements of your table saw’s existing throat plate and use them as a reference when marking the dimensions on your chosen material. Ensure accuracy for a seamless fit.
- Cut the insert shape: Using a jigsaw, carefully cut out the shape of the zero-clearance insert, following the marked guidelines. Remember to account for the blade kerf to create a snug fit.
- Create a small hole: To easily remove and insert the zero-clearance insert, drill a small hole near the back of the insert without compromising its structural integrity.
- Fine-tune the fit: Once the initial shape is cut, place the insert onto the table saw and test the fit. Make any necessary adjustments by sanding or using a file until it fits snugly against the throat opening.
- Attach leveling screws: On the underside of the insert, drill and add leveling screws in the corners or center for easy leveling adjustments. This ensures the insert is perfectly aligned with the table saw surface.
- Install the zero-clearance insert: With the leveling screws in place, carefully insert the zero-clearance insert into the table saw’s throat opening. Ensure a tight fit and level it with the table surface using the leveling screws.
By creating and installing a custom zero-clearance insert, you can achieve cleaner cuts, minimize tear-out, and enhance overall safety when cutting thin strips on your table saw. Keep in mind that maintaining and replacing the insert when necessary will further enhance the quality of your cuts.
Employing Featherboards And Hold-Downs For Stability
Employing featherboards and hold-downs are essential for ensuring stability when cutting thin strips on a table saw. These tools help to hold the workpiece firmly against the table and fence, preventing it from shifting or becoming dangerous during the cutting process.
Importance Of Using Featherboards And Hold-Downs For Improved Stability:
Using featherboards and hold-downs when cutting thin strips on a table saw is crucial for ensuring stability and safety. These simple yet effective tools help to prevent kickback, reduce the risk of accidents, and improve the overall quality of your cuts.
They provide the necessary support and pressure to keep the workpiece firmly in place, allowing you to focus on making precise and accurate cuts. By employing featherboards and hold-downs, you can confidently tackle projects that require cutting narrow strips without compromising on safety or precision.
Proper Positioning And Setup Of Featherboards And Hold-Downs:
To make the most out of your featherboards and hold-downs, it’s important to position and set them up correctly. Here are some key considerations to keep in mind:
- Align the featherboards parallel to the table saw’s blade, ensuring that they exert pressure against the workpiece’s edges. This will prevent any movement or wobbling during the cutting process.
- Secure the featherboards firmly in place using the appropriate mounting hardware, such as clamps or magnets. Make sure they are tightly fastened to avoid any slippage or displacement while cutting.
- Position the featherboards in a way that allows for smooth feeding of the workpiece through the blade. They should be placed before and after the blade, so that they can hold the workpiece securely throughout the entire cutting process.
- Adjust the featherboards’ pressure according to the thickness and size of the workpiece. The pressure should be sufficient for stability, but not too tight that it restricts the movement of the workpiece.
- Additionally, utilize hold-downs to further enhance stability during the cutting process. Hold-downs can be positioned vertically or horizontally, depending on the specific requirements of your project. They work in conjunction with featherboards to prevent any lifting or shifting of the workpiece during cutting.
By following these guidelines, you can ensure that your featherboards and hold-downs are positioned and set up properly, contributing to a safer and more efficient cutting experience.
Remember, when handling a table saw, safety should always be a top priority. Employing featherboards and hold-downs not only enhances stability but also minimizes the risk of accidents and ensures accurate and precise cuts. So, take the time to properly position and set up these invaluable tools before starting your project.
Addressing Potential Issues And Troubleshooting
To address potential issues and troubleshoot while cutting thin strips on a table saw, follow these tips: align the rip fence precisely, use a push stick or push block for safety, maintain steady pressure, and ensure your blade is sharp and properly aligned.
Remember to always prioritize safety measures when operating machinery.
Cutting thin strips on a table saw can be a challenging task, but with the right techniques and troubleshooting tips, you can achieve flawless results. In this section, we’ll discuss common issues that can arise when cutting thin strips and how to overcome them.
We’ll also provide troubleshooting tips to help you achieve perfect thin strip cuts.
Common Issues When Cutting Thin Strips And How To Overcome Them:
- Safety concerns: Cutting thin strips on a table saw requires extra attention to safety measures. Ensure you follow these precautions:
- Wear safety goggles and gloves: Protect your eyes from flying debris and your hands from potential accidents.
- Use a push stick: Keep your fingers away from the blade by utilizing a push stick while guiding the strip through the saw.
- Maintain adequate workspace: Clear clutter and create a spacious work area to minimize accidents.
- Strip wandering: Thin strips can sometimes move or wander away from the fence, resulting in inaccurate cuts. Follow these steps to address this issue:
- Use featherboards: Attach featherboards to the fence and the table to provide consistent pressure against the strip, preventing it from wandering.
- Adjust the fence: Ensure the fence is properly aligned parallel to the blade. Make adjustments as needed to maintain accuracy.
- Splintering: Cutting thin strips can often lead to splintering, which can ruin the quality of the cut. Here’s how you can prevent or minimize splintering:
- Use a sharp blade: A sharp blade helps create cleaner cuts with reduced chances of splintering. Replace the blade if it becomes dull.
- Use a zero-clearance insert: Install a zero-clearance insert on your table saw for improved support and reduced tear-out. This will minimize splintering and provide cleaner cuts.
Troubleshooting Tips For Achieving Flawless Thin Strip Cuts:
- Blade selection: Choose the appropriate blade for cutting thin strips. A blade with a high tooth count and a fine tooth configuration works best for clean and accurate cuts.
- Feed rate: Maintain a consistent feed rate when pushing the strip through the blade. Too fast or too slow can result in poor quality cuts. Find a pace that provides a smooth and steady motion.
- Support the material: Adequate support on the infeed and outfeed sides of the blade is crucial for stability. Ensure the material is well-supported to avoid any bending or warping during the cutting process.
- Trial cuts: Before cutting your final thin strip, make test cuts on scrap pieces of the same material. This allows you to adjust settings and techniques accordingly without wasting valuable material.
Remember, practice makes perfect when it comes to cutting thin strips on a table saw. Take your time, follow the necessary safety precautions, and implement these troubleshooting tips to achieve flawless and precise cuts every time. Happy woodworking!
Frequently Asked Questions On How To Cut Thin Strips On A Table Saw
How Do You Rip Narrow Boards With A Table Saw?
To rip narrow boards with a table saw, follow these steps:
1. Adjust the fence to the desired width of the board.
2. Ensure the blade is at the appropriate height.
3. Align the board with the fence and feed it through the blade, applying steady pressure.
4. Use a push stick or push block to keep your hands safe and maintain control.
How Do You Cut Veneer On A Table Saw?
To cut veneer on a table saw, follow these steps: secure the veneer with tape, set the blade height, adjust the fence for the desired width, and make slow, steady cuts with a push stick.
How Do You Cut Wood Into Thin Sheets?
To cut wood into thin sheets, use a table saw or a veneer cutter with a sharp blade.
How Do You Cut Thin Strips Without A Table Saw?
To cut thin strips without a table saw, use a circular saw or a miter saw with a fine-toothed blade.
Conclusion
To summarize, cutting thin strips on a table saw can be a daunting task, but with the right technique and safety precautions, it can be accomplished successfully. By choosing the appropriate blade and adjusting the fence accurately, you can ensure clean and precise cuts.
Remember to use a push stick or push block to keep your hands safe and maintain proper control of the material. Taking the time to measure and mark your material before cutting will also help you achieve the desired width for your thin strips.
With practice and patience, you’ll become more comfortable and proficient in this technique, allowing you to tackle a variety of woodworking projects with confidence. Happy cutting!