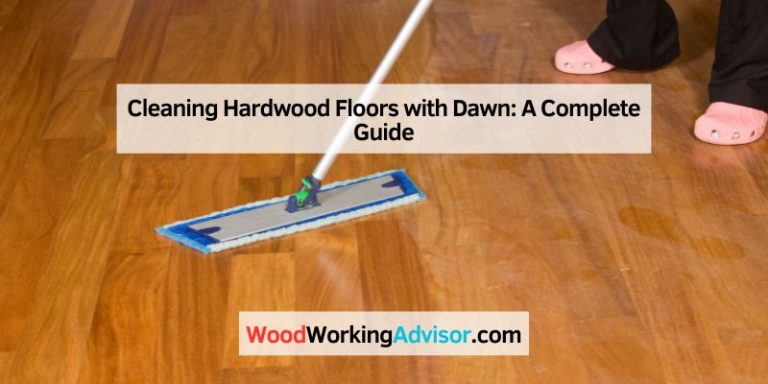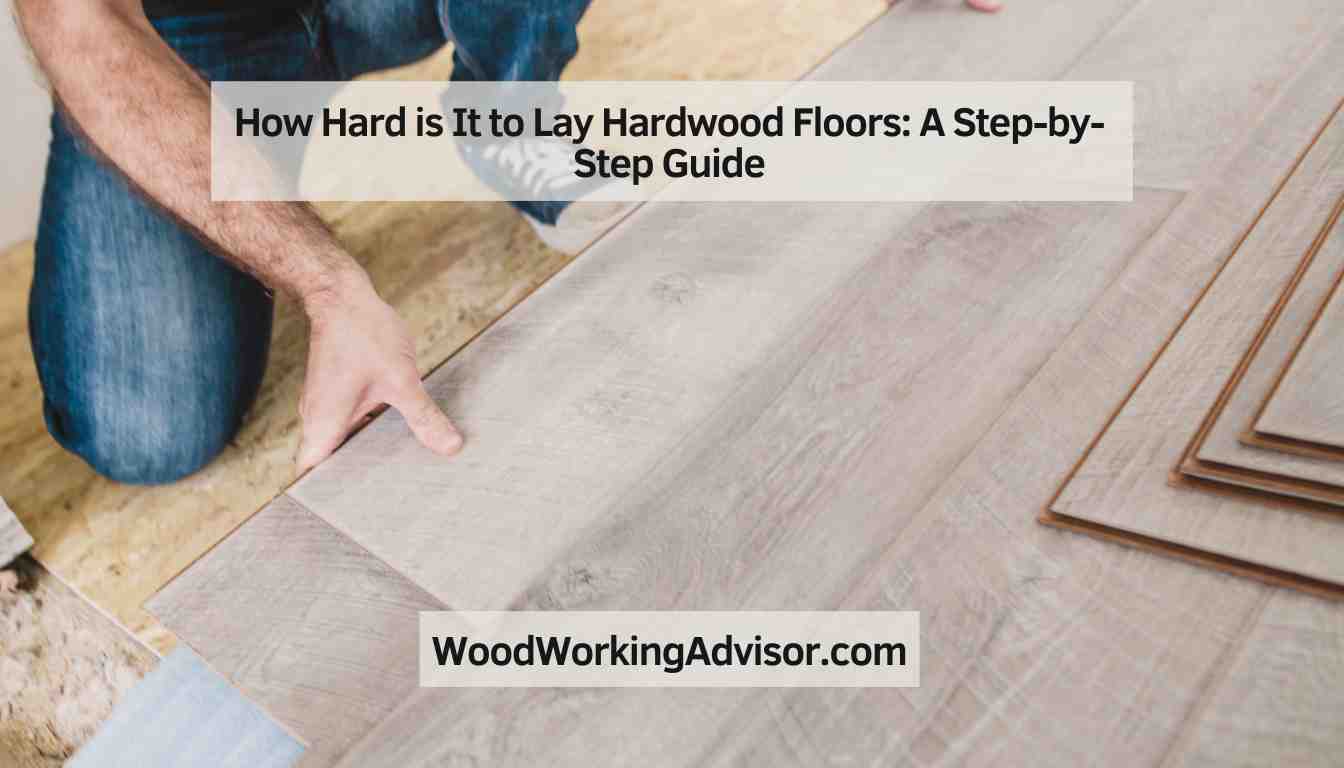
How Hard is It to Lay Hardwood Floors: A Step-by-Step Guide
Laying hardwood floors can be challenging for beginners, requiring precision and patience. It involves measuring, cutting, and installing each piece carefully.
However, with the right tools and knowledge, it is achievable by DIY enthusiasts. Hardwood floors can add beauty and value to a home, making the effort worthwhile. Understanding the process and taking the time to do it correctly can result in a stunning transformation of any space.
By following the correct steps and techniques, even those without prior experience can successfully install hardwood floors. In this guide, we will explore the process of laying hardwood floors and provide tips for a successful installation. Whether you are a seasoned DIYer or a beginner, this comprehensive resource will help you navigate through the project with confidence.
Choosing The Right Hardwood Flooring
Choosing the Right Hardwood Flooring is a crucial decision when it comes to laying hardwood floors. Let’s dive into the key considerations for selecting the perfect hardwood flooring for your space.
Consider Your Budget
Start by determining your budget for hardwood flooring installation. Be realistic about what you can afford.
Selecting The Wood Type And Finish
Consider the wood type that suits your style and needs. Different finishes such as matte, glossy, or distressed can impact the overall look.
Credit: buildmyplace.com
Preparing The Subfloor
Preparing the subfloor is a crucial step when installing hardwood floors, as it sets the foundation for a successful project.
Assessing The Subfloor Condition
Before laying hardwood floors, assessing the condition of the subfloor is necessary to identify any issues that could affect the installation.
- Look for uneven areas or structural damage
- Check for moisture levels to prevent warping
- Ensure the subfloor is clean and free of debris
Leveling The Subfloor
Leveling the subfloor is essential to ensure a smooth and durable surface for the hardwood flooring to be installed on.
- Fill any gaps or cracks with appropriate filler
- Use a leveling compound to even out any uneven sections
- Sand down any high points on the subfloor
Gathering The Necessary Tools And Materials
When laying hardwood floors, gathering the necessary tools and materials is a crucial first step to ensure a smooth and successful installation process. Having the right equipment and supplies on hand will help streamline the project and minimize disruptions. Let’s dive into the essential tools for installation and the materials needed for underlayment and transition strips.
Essential Tools For Installation
Before diving into the installation process, it’s important to have the following essential tools at your disposal:
- Miter saw: A miter saw will be needed for making precise cuts on the hardwood planks.
- Nail gun: A pneumatic nail gun is essential for securely fastening the hardwood flooring to the subfloor.
- Hammer and nails: These basic tools are necessary for any finishing work and can serve as a backup for the nail gun.
- Tape measure: Accurate measurements are critical for ensuring a professional-looking installation.
- Level: Checking for the levelness of the subfloor and the hardwood planks is crucial for a seamless installation.
- Tapping block and pull bar: These tools are essential for ensuring tight and precise fitting of the hardwood planks during installation.
- Safety equipment: Protective eyewear, ear protection, and gloves are essential for ensuring safe installation practices.
Materials For Underlayment And Transition Strips
Aside from the tools, you’ll also need specific materials for underlayment and transition strips:
- Underlayment: A proper underlayment material, such as foam or cork, will provide cushioning and noise reduction while also acting as a moisture barrier.
- Transition strips: These strips are essential for bridging the gap between the hardwood flooring and other flooring types, providing a seamless transition between rooms.
- Adhesive and fasteners: Depending on the installation method, you may need adhesive and fasteners for securing the underlayment and transition strips.
- Moisture barrier: If installing over concrete, a moisture barrier may be necessary to prevent moisture damage to the hardwood flooring.
- Wood filler and finishing products: These materials will come in handy for filling gaps and imperfections, as well as for applying the final finish once the installation is complete.
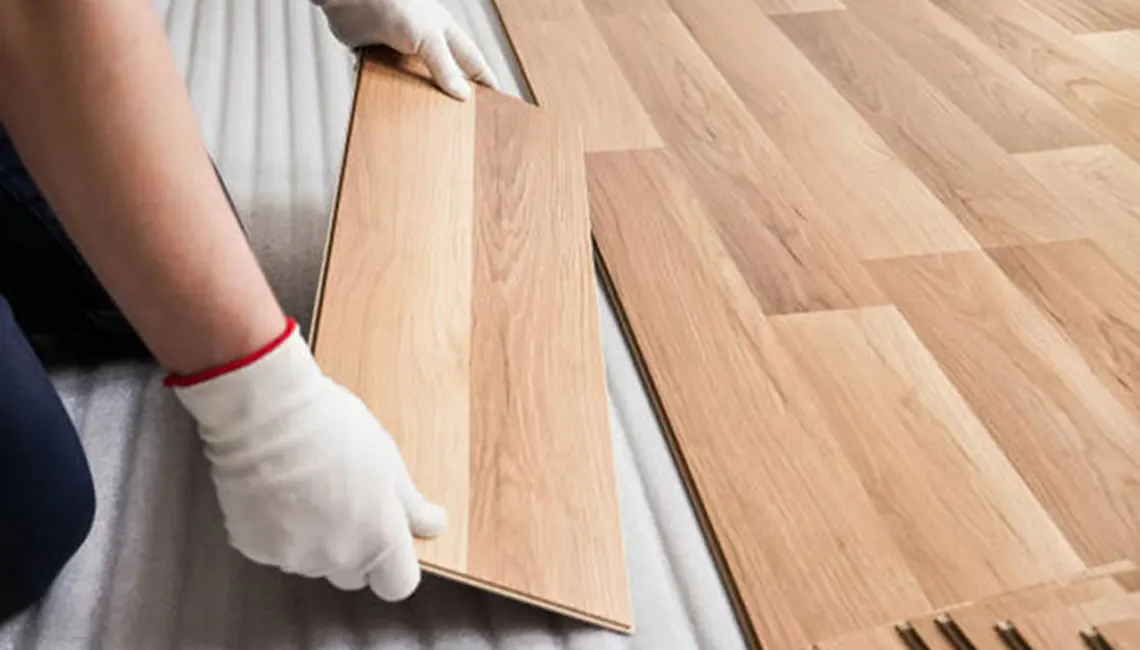
Installing The Hardwood Flooring
When it comes to installing hardwood flooring, it may seem like a daunting task. However, with the right preparation and approach, laying hardwood floors can be a relatively straightforward process. In this section, we will walk you through the important steps involved in installing hardwood flooring. From acclimating the wood to fitting and nailing the boards, we will cover everything you need to know to successfully lay hardwood floors in your home.
Before you begin laying your hardwood flooring, it is essential to acclimate the wood to the environment in which it will be installed. This process involves allowing the wood to adjust to the temperature and humidity of the room. Failure to acclimate the wood properly can result in gaps or warping after installation. Here are the steps to follow when acclimating your hardwood:
| Acclimation Steps |
|---|
| 1. Remove the packaging or wrapping from the wood. |
| 2. Place the wood in the room where it will be installed. |
| 3. Keep the wood stacked with spacers between each layer. |
| 4. Allow the wood to acclimate for at least 48-72 hours. |
By properly acclimating the wood, you can minimize the risk of issues such as expansion or contraction once the hardwood flooring is installed.
Once the wood has been acclimated, it is time to start laying the first rows of your hardwood flooring. This step sets the foundation for the rest of the installation and requires careful planning and precision. Here are the steps to follow when laying the first rows:
- Begin by measuring and marking the center of the room.
- Start laying the first row of boards along the longest wall, ensuring they are aligned with the center mark.
- Use spacers to maintain a consistent gap between the boards and the wall.
- Attach the boards to the subfloor using a pneumatic flooring nailer or adhesive, following the manufacturer’s instructions.
- Continue laying subsequent rows of boards, ensuring each row is tightly connected to the previous one.
As you progress with the installation, you may encounter walls, doorways, or obstacles that require fitting and nailing the boards in a specific way. This step requires careful measurement and cutting of the boards to ensure a seamless and professional-looking finish. Here are the steps to follow when fitting and nailing the boards:
- Measure and cut the boards to the required size using a miter saw or circular saw.
- Fit the boards around obstacles, such as doorways, by carefully marking and cutting the necessary angles.
- Ensure each board fits tightly against the adjacent ones, leaving no gaps or unevenness.
- Secure the boards to the subfloor by nailing them in place, using a hammer and finishing nails.
By following these steps and taking your time, you can achieve a professional installation of hardwood flooring in your home. Remember to always refer to the manufacturer’s instructions and seek professional help if needed. With proper planning and execution, laying hardwood floors can be a rewarding and beautiful addition to your space.
Finishing And Maintenance
After successfully laying hardwood floors, the next crucial step is ensuring the proper finishing and maintenance of your beautiful investment. By applying finish and implementing regular upkeep, you can protect your hardwood floors and keep them looking great for years to come.
Applying Finish
Applying finish to your hardwood floors helps enhance their appearance while providing a protective layer. There are different types of finishes available, including polyurethane and oil-based finishes. When applying finish, follow these simple steps:
- Begin by thoroughly cleaning the floors to remove any dust or debris.
- Fill any holes or gaps with wood filler and let it dry completely.
- Apply the chosen finish using a high-quality brush or roller, following the manufacturer’s instructions.
- Allow the first coat to dry completely before applying subsequent coats, usually with a light sanding in between.
- Once the final coat is applied, allow it to dry fully for the recommended time.
By properly applying finish, you not only protect your hardwood floors but also enhance their beauty and longevity.
Maintaining And Protecting Your Hardwood Floors
Maintaining and protecting your hardwood floors is essential to extend their lifespan and preserve their natural beauty. Regular maintenance tasks include:
- Sweeping or vacuuming your floors regularly to remove dirt and debris.
- Using a damp mop or hardwood floor cleaner to remove stubborn stains and spills.
- Avoiding the use of harsh cleaners or abrasive tools that can damage the finish.
- Placing floor mats at entrances to prevent dirt and grit from scratching the surface.
- Using furniture pads or felt protectors to prevent scratches caused by moving furniture.
- Regularly checking for signs of wear, such as scratches or worn-out finish, and addressing them promptly.
| Maintenance Task | Frequency |
|---|---|
| Sweeping or vacuuming | At least once a week |
| Mopping | As needed, using a damp mop |
| Regular inspections | Every few months |
Maintaining and protecting your hardwood floors may require some effort, but the results are well worth it. With proper care, your floors will stay in top condition and continue to be a stunning feature of your home.
Credit: www.porcelaintiles.in
Frequently Asked Questions For How Hard Is It To Lay Hardwood Floors
Is It Worth Installing Hardwood Floors Yourself?
Yes, installing hardwood floors yourself can be worth it. It can save money and give a sense of accomplishment. However, it requires time, skill, and proper tools. If you’re confident in your abilities and have the time, it can be a rewarding project.
How Hard Is It To Install Your Own Hardwood Floors?
Installing your own hardwood floors can be challenging but doable with proper tools and expertise. Prep work is key.
Can You Lay Wood Floor Yourself?
Yes, you can lay wood floor yourself. Ensure proper tools, preparation, and follow installation instructions.
What Do I Need To Know Before Installing Hardwood Floors?
Before installing hardwood floors, measure the area accurately. Ensure the subfloor is smooth and level for proper installation. Acclimate the wood to the room’s environment beforehand. Proper tools and materials are essential for a successful installation. Finally, it’s important to follow the manufacturer’s guidelines for installation.
Conclusion
Laying hardwood floors requires patience and attention to detail but the results are well worth it. With the right tools and guidance, anyone can tackle this project. Remember to plan carefully, measure precisely, and take your time to ensure a beautiful and long-lasting finish.
Whether it’s for your home or a renovation project, laying hardwood floors is a rewarding endeavor.