Which Direction Should You Lay Hardwood Floors
Hardwood floors should be laid parallel to the longest wall in the room for the best visual effect and ease of installation. Laying hardwood floors in the correct direction is essential to create a seamless and visually appealing look in your space.
Aligning the planks parallel to the longest wall allows for an open and spacious feel, making the room appear larger. This also helps to highlight the natural grain patterns and characteristics of the hardwood. By following this placement guideline, you can enhance the aesthetic appeal of your home and achieve a professional and polished finish.
Factors To Consider Before Laying Hardwood Floors
Before laying hardwood floors, it’s important to consider the direction in which you want to lay them. By carefully evaluating factors such as the room’s shape, natural light sources, and the overall aesthetic you want to achieve, you can make an informed decision that enhances the beauty and functionality of your space.
Assessing the Room’s Layout
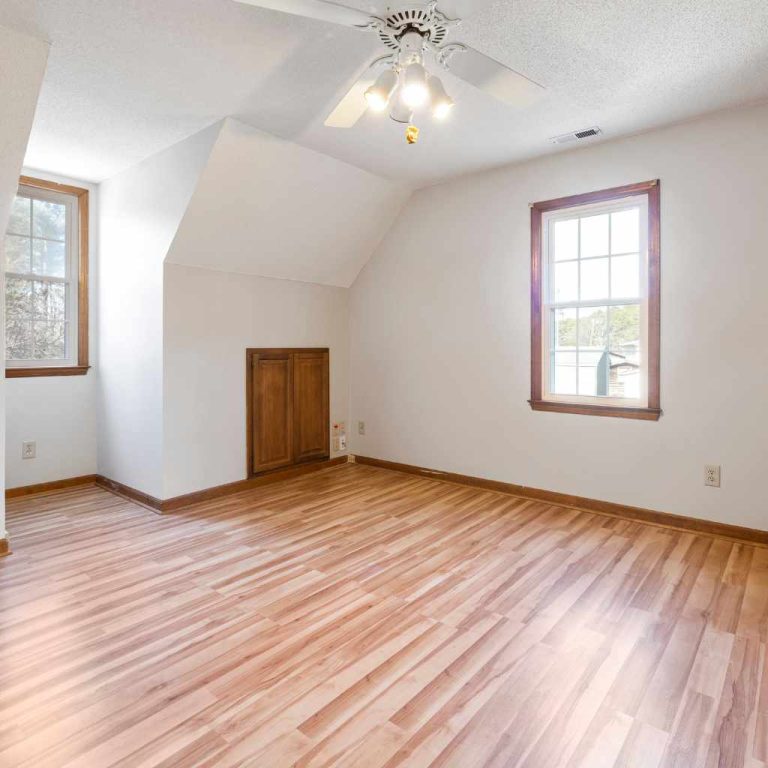
Before you start laying hardwood floors, it’s crucial to assess the layout of the room. This step will help you determine the best direction to lay the planks and ensure a visually appealing end result. Consider the shape and dimensions of the room, as well as the placement of doors and windows, as these factors can impact the flow and overall aesthetic. Taking the time to evaluate the room’s layout will help you make an informed decision on which direction to lay the hardwood.
Determining the Subfloor Type
Another important factor to consider before laying hardwood floors is the type of subfloor you have. It’s essential to ensure that the subfloor is sturdy and level, as any irregularities can cause issues with the installation and affect the longevity of the hardwood. Different subfloor types, such as concrete or plywood, may require specific installation methods or additional preparation steps. By knowing the type of subfloor, you can choose the appropriate installation technique and ensure a stable foundation for your new hardwood floors.
Considering the Wood Species and Grain Pattern
When it comes to hardwood flooring, the wood species and grain pattern are factors that add a unique touch to your space. Different wood species have varying characteristics, such as color, hardness, and grain patterns. Some species, like oak or maple, have a pronounced grain, while others, like ash or hickory, offer a smoother appearance. Additionally, the grain pattern can be influenced by whether you choose plain-sawn, quarter-sawn, or rift-sawn planks. Considering these factors will help you choose a wood species and grain pattern that aligns with your aesthetic preferences and complements your overall interior design.
In conclusion, assessing the room’s layout, determining the subfloor type, and considering the wood species and grain pattern are essential factors to consider before laying hardwood floors. By taking the time to evaluate these aspects, you can ensure a successful and visually pleasing installation process. Remember, a well-planned and properly executed hardwood flooring project can transform your space into a warm and inviting environment that you’ll enjoy for years to come.
 Lay Hardwood Floors” width=”800″ height=”400″ />
Knowledge Different Flooring Layouts
When it comes to installing hardwood floors, the choice of flooring layout can significantly impact the overall look and feel of a space. Different layouts offer unique visual effects that can enhance the design and aesthetics of your room. In this blog post, we will explore three popular flooring layouts: traditional parallel installation, diagonal installation for added visual interest, and herringbone or chevron patterns for a classic look.
1. Traditional Parallel Installation
A traditional parallel installation is the most common and straightforward layout for hardwood floors. It involves laying the planks parallel to the longest wall in a room. This layout creates a clean and classic look that works well in both traditional and modern interiors. It is particularly suitable for small or narrow spaces, as the parallel lines give the illusion of a wider and more spacious area. Moreover, this layout is relatively easy to install, making it a popular choice for DIY enthusiasts.
2. Diagonal Installation For Added Visual Interest
If you’re looking to add a touch of uniqueness to your hardwood floors, a diagonal installation is an excellent option. This layout involves laying the planks at a 45-degree angle to the walls, creating a visually interesting pattern. The diagonal lines draw attention to the flooring and can make a room appear more dynamic and spacious. However, it’s important to note that a diagonal installation requires more precise measurements and cutting compared to a traditional parallel installation. Therefore, professional installation is recommended to achieve optimal results.
3. Herringbone Or Chevron Patterns For A Classic Look
For those seeking a timeless and sophisticated look, herringbone or chevron patterns are ideal choices. These layouts involve arranging the planks in a zigzag or V-shaped pattern, respectively. Herringbone patterns create a sense of elegance and can add a touch of luxury to any room. On the other hand, chevron patterns exude a sense of movement and energy. Both layouts require meticulous attention to detail during installation, as the angles and cuts need to be perfectly aligned. Professional expertise is recommended to ensure a flawless result.
In conclusion, the direction in which you lay your hardwood floors can significantly impact the overall aesthetics of your space. Whether you prefer a traditional parallel installation for a clean and classic look, a diagonal installation for added visual interest, or herringbone/chevron patterns for a timeless appeal, each layout offers its own unique charm. Consider the size, shape, and design of your room, as well as your personal style preferences, when choosing the most suitable flooring layout for your hardwood floors.
Choosing The Best Direction For Your Hardwood Floors
When it comes to installing hardwood floors, choosing the right direction can make a significant difference in enhancing the overall aesthetics of your space. Not only does the direction affect the appearance, but it also impacts the dimensions, architectural features, natural light, and traffic flow within the room. By carefully considering these factors, you can make an informed decision and create a harmonious look that complements your style and space.
Enhancing The Room’s Dimensions
The direction in which you lay your hardwood floors can significantly impact the perception of a room’s size. By choosing the best direction, you can create an illusion of more space, adding depth and enhancing the dimensions. There are two primary options to consider: installing the planks parallel or perpendicular to the longest wall of the room. Here’s how each option affects the overall appearance:
- Parallel installation: When hardwood planks are laid parallel to the longest wall, it creates a sense of continuity and makes the room appear longer. This direction is suitable for narrow rooms or hallways, where you want to create an elongated effect.
- Perpendicular installation: Installing the planks perpendicular to the longest wall can make the room feel wider. This direction is ideal for square or smaller spaces, as it creates a broader visual expanse.
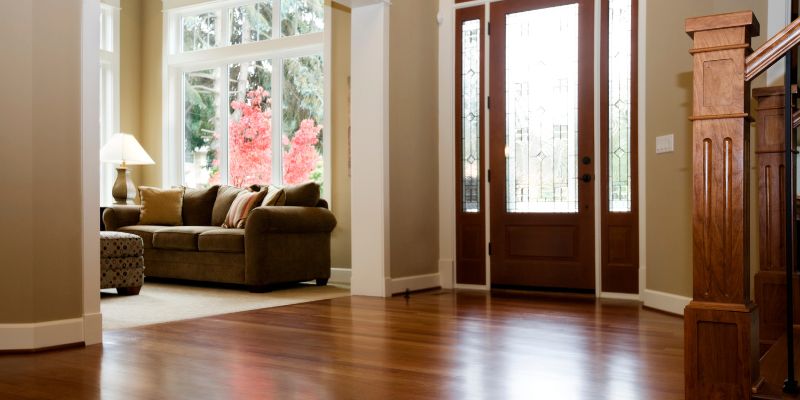
Complementing The Architectural Features
Another crucial aspect to consider when choosing the direction for your hardwood floors is the architectural features within the space. You want the flooring to complement these features rather than clash with them. Here’s how the direction of the planks can work harmoniously with different architectural elements:
| Architectural Feature | Ideal Direction |
|---|---|
| Fireplace or focal point wall | Parallel installation, leading towards the focal point |
| Windows or French doors | Perpendicular installation, following the direction of the natural light |
| Staircase or entryway | Multiple options based on the layout and design of the staircase |
Considering Natural Light And Traffic Flow
In addition to the dimensions and architectural features, two critical factors that influence the direction of your hardwood floors are natural light and traffic flow. By taking these into account, you can ensure optimal functionality and create a cohesive flow throughout the space.
- Natural light: If your room receives ample natural light, consider installing the planks perpendicular to the windows. This allows the natural light to flow across the hardwood, enhancing its beauty.
- Traffic flow: The direction of the planks should align with the traffic patterns in the room. Typically, it is best to install the hardwood in the same direction as the foot traffic, ensuring a smooth transition from one area to another.
By carefully considering the dimensions, architectural features, natural light, and traffic flow, you can choose the best direction for your hardwood floors. Remember, each room is unique, and there may be exceptions based on specific circumstances. Take the time to analyze your space and consult with a professional to ensure the perfect flooring installation that brings out the best in your home.
Tips For Perfectly Aligning The Flooring
When it comes to laying hardwood floors, achieving a perfectly aligned and professional-looking result is key. This is where the proper techniques for aligning the flooring come into play. In this section, we will discuss three essential tips to help you ensure that your hardwood floors are perfectly aligned. By following these tips, you can create a seamless and visually appealing flooring installation.
1. Establishing A Straight Reference Line
Before you begin installing the hardwood flooring, it is essential to establish a straight reference line. This line will serve as a guide for aligning the first row of flooring and ensuring that subsequent rows follow in a straight and seamless manner. To establish the reference line, you can use a chalk line chalk line to mark a perfectly straight line on the subfloor.
2. Using Spacers For Consistent Gaps
Consistent gaps between the hardwood planks are crucial for both the aesthetic appeal and the structural integrity of the flooring. To achieve this, it is recommended to use spacers during the installation process. Spacers help maintain an even gap between the planks, allowing for expansion and preventing buckling or warping of the floorboards. Place the spacers along each side of the plank as you lay it down and remove them once the adhesive has dried or the flooring has been nailed down.
3. Checking For Levelness Throughout The Installation
Levelness is crucial for ensuring a smooth and professional-looking installation. As you lay each row of hardwood planks, regularly check for levelness using a level or straight edge. This will ensure that the floor remains flat and free from any noticeable unevenness. Adjustments can be made by adding or removing adhesives, and shims, or repositioning the planks as necessary.
By following these three indispensable tips for aligning hardwood floors, you can achieve stunning and professionally installed flooring. Remember to establish a straight reference line, use spacers for consistent gaps, and check for levelness throughout the installation process. With these techniques, you’ll have perfectly aligned hardwood floors that enhance the beauty and value of your space.

Dealing With Unique Room Features And Transitions
Choosing the right direction for laying hardwood floors can enhance unique room features and transitions, creating a visually appealing space that flows seamlessly. With attention to detail and expert guidance, you can optimize the layout to complement the room’s design and maximize its aesthetic potential.
1. Installing Around Doorways And Staircases
When it comes to laying hardwood floors around doorways and staircases, it requires a careful approach to ensure a seamless and professional finish. One important consideration is the direction in which the hardwood should be laid. To achieve an aesthetically pleasing result, it is crucial to follow a few guidelines:
- Avoid changing the direction abruptly when transitioning from one room to another or from one type of flooring to another. Instead, try to maintain a consistent direction to create a harmonious flow.
- Generally, it is best to lay the hardwood planks parallel to the longest wall in the room. This creates an illusion of a larger space and draws the eye along the length of the room.
- When installing hardwood floors in a hallway, it is advisable to lay the planks perpendicular to the hallway walls. This technique can make the hallway appear wider and more inviting.
2. Transitioning Between Different Flooring Materials
Transitioning between different flooring materials can present a unique challenge when laying hardwood floors. Fortunately, there are several effective techniques that can help achieve a smooth and visually appealing transition:
- Use a transition strip: A transition strip is a narrow strip of material that acts as a bridge between two types of flooring. It helps to connect the different materials and provides a seamless transition.
- Create a border: If you want to create a distinctive transition between hardwood and another flooring material, consider adding a border. This can be achieved by laying a row of planks at a 45-degree angle along the perimeter of the room.
- Combine flooring materials: Instead of abruptly changing from one flooring material to another, consider incorporating both materials in a creative and visually appealing pattern. For example, you can alternate rows of hardwood and tile to create a unique and stylish transition.
3. Addressing Uneven Subfloor Levels
Addressing uneven subfloor levels is essential to ensure a stable and level surface for installing hardwood floors. Here are a few key steps to tackle this challenge:
- Begin by evaluating the subfloor for any high or low spots. Use a long straight edge to identify any irregularities and mark them for correction.
- If you encounter uneven subfloor areas, consider using a self-leveling compound. This compound can be poured on top of the subfloor to fill in the gaps and create a smooth and even surface.
- Another option is to use plywood underlayment to address minor level differences. This involves installing a layer of plywood on top of the subfloor to create a level surface for the hardwood planks.
- Remember to always follow the manufacturer’s instructions and seek professional advice if needed to ensure the best possible outcome.
By keeping these guidelines in mind and addressing unique room features and transitions, you can confidently lay hardwood floors that enhance the beauty and functionality of your space. Whether you are installing around doorways and staircases, transitioning between different flooring materials, or addressing uneven subfloor levels, careful planning and execution will result in a stunning and cohesive hardwood floor installation.
Common Mistakes To Avoid When Laying Hardwood Floors
When it comes to laying hardwood floors, it’s essential to avoid common mistakes that can lead to costly repairs and unsatisfactory results. From neglecting acclimation time to incorrect expansion gap calculation and insufficient nail or glue application, these mistakes can affect the durability and aesthetic appeal of your hardwood floors. By understanding and avoiding these common mistakes, you can ensure a successful hardwood floor installation.
Neglecting Acclimation Time
One of the most common mistakes people make when laying hardwood floors is neglecting to properly acclimate the flooring material. Hardwood is a natural material that expands and contracts with changes in temperature and humidity. To prevent warping, buckling, or gaps in your hardwood floors, it’s crucial to allow the flooring to acclimate to the environment where it will be installed.
The ideal acclimation time for hardwood floors is typically around 48 hours. During this period, the flooring should be stored in the room where it will be installed, allowing it to adjust to the temperature and humidity levels. Failure to acclimate the hardwood could result in installation problems and compromise the overall longevity of your floors.
Incorrect Expansion Gap Calculation
Another mistake that can occur during hardwood floor installation is incorrect expansion gap calculation. An expansion gap is a necessary space left around the perimeter of the flooring, allowing room for the natural expansion and contraction of the wood. Failure to calculate the proper expansion gap can lead to unsightly buckling, warping, or even damage to your hardwood floors.
Typically, the recommended expansion gap is around 1/4 inch. However, it’s essential to consider factors such as the type of wood, the width of the planks, and the environmental conditions. By accurately calculating and leaving the appropriate expansion gap, you can ensure your hardwood floors have the necessary space to adjust without causing any structural issues.
Insufficient Nail Or Glue Application
Lastly, insufficient nail or glue application is a mistake that can compromise the stability and durability of your hardwood floors. Whether you choose to nail or glue the flooring, it’s vital to ensure even and adequate application throughout the entire installation process. Inadequate nailing or gluing can result in loose planks, squeaky floors, or even complete flooring failure.
Before you begin the installation, make sure you familiarize yourself with the manufacturer’s guidelines for nail or glue application. Be diligent in following the recommended spacing and techniques to ensure a secure and long-lasting hardwood floor.
By avoiding these common mistakes, you can save yourself from unnecessary frustration and expenses. Remember to prioritize acclimation time, accurately calculate the expansion gap, and thoroughly apply nails or glue for a successful hardwood floor installation.
Conclusion
Ultimately, the direction in which you lay hardwood floors depends on various factors such as the size and shape of the room, the style of the flooring, and personal preference. By following guidelines and considering these factors, you can make an informed decision that enhances the aesthetic appeal and functionality of your space.
Don’t forget to consult with a professional if you are unsure about the best direction for your hardwood floors. With careful consideration, you can achieve an exquisite and timeless look for your home.