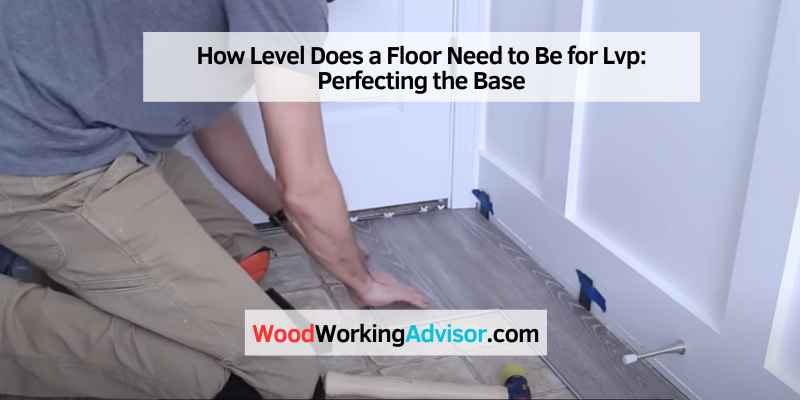
How Level Does a Floor Need to Be for LVP: Perfecting the Base
The floor for LVP installation needs to be completely flat for a successful installation. An uneven subfloor can cause issues such as unstable flooring and accelerated wear.
Vinyl can be installed on various types of subfloor, including concrete and wood, but it must be level for optimal results. Make sure the floor is smooth, flat, and free of cracks, gaps, dust, grease, wax, paint, or any other contaminants to ensure the best appearance and longevity of the vinyl flooring.
When installing Luxury Vinyl Plank (LVP) flooring, it is crucial to ensure that the floor is level. A level floor is essential for a successful installation and to prevent potential problems down the line. In this blog post, we will explore the importance of having a flat subfloor for LVP, the potential issues that can arise from an uneven surface, and how to prepare the floor to achieve the desired levelness. By following these guidelines, you can ensure a smooth and durable LVP flooring installation that will enhance the beauty and functionality of your space.

Introduction To LVP Flooring
To ensure a successful installation, the floor for LVP needs to be quite level. An uneven subfloor can lead to stability issues and quicker wear and tear. It’s crucial to prepare the subfloor properly, ensuring it’s smooth, flat, and free of cracks, gaps, and contaminants for the best results with vinyl plank flooring.
Vinyl plank flooring, also known as LVP (Luxury Vinyl Plank), has gained immense popularity in recent years due to its durability, affordability, and wide range of design options. Whether you are renovating your home or commercial space, LVP flooring offers a practical and stylish solution that mimics the look of hardwood or stone without the high cost and maintenance.
Benefits Of LVP
There are several key benefits of choosing LVP flooring for your space:
1. Durability: LVP flooring is known for its exceptional durability, making it a perfect choice for high-traffic areas such as hallways, kitchens, and commercial spaces. It can withstand heavy foot traffic, spills, and even pet claws without showing signs of wear and tear.
2. Water Resistance: Unlike hardwood or laminate flooring, LVP is waterproof, making it an ideal choice for bathrooms, kitchens, and basements. It is resistant to moisture, preventing any damage caused by water spills or humidity.
3. Easy Maintenance: LVP flooring requires minimal maintenance. Regular sweeping or vacuuming, along with occasional damp mopping, is usually sufficient to keep it clean and looking new. It does not require any special treatments or refinishing like hardwood flooring.
4. Wide Range of Designs: LVP flooring offers endless design possibilities, allowing you to achieve the desired aesthetic for your space. From realistic wood grain textures to stone-inspired patterns, you can find LVP flooring that suits your style and complements your existing decor.
Common Misconceptions About LVP Installation
When it comes to installing LVP flooring, there are a few common misconceptions that need to be addressed:
1. Subfloor Leveling: One of the misconceptions is that the subfloor needs to be perfectly level for LVP installation. While it is important to have a relatively smooth and even subfloor, it doesn’t need to be completely level. LVP flooring can tolerate minor imperfections in the subfloor, such as slight variations in height or small dips.
2. Uneven Floors: Another misconception is that you can’t install LVP flooring on uneven floors. While it is true that an extremely uneven subfloor can cause problems with the installation and durability of the flooring, minor irregularities can often be addressed with the use of floor leveling compounds or underlayment materials.
3. Professional Installation: Many people believe that LVP flooring can only be installed by professionals. However, with the right tools and following proper installation guidelines, it is possible to install LVP flooring as a DIY project. It is important to carefully read and follow the manufacturer’s instructions to ensure a successful installation.
In conclusion, LVP flooring is a versatile and practical choice for any space. Its numerous benefits, including durability, water resistance, easy maintenance, and a wide range of design options, make it a popular flooring choice. By addressing common misconceptions about LVP installation, you can confidently choose LVP flooring for your next project, knowing that it can be installed successfully on a variety of subfloors.
Subfloor Flatness Requirements
For successful LVP installation, ensure your subfloor is flat to prevent instability and premature wear. A smooth, level surface is crucial, free of cracks, gaps, and contaminants like dust or grease, for a flawless vinyl flooring finish. Properly leveling the subfloor is essential for a long-lasting and visually appealing LVP installation.
Standards For Subfloor Evenness
Subfloors must be level within a certain tolerance for successful LVP installation.
Industry standards recommend a maximum variation of 3/16 inch in a 10-foot span.
Consequences Of An Uneven Subfloor
- Instability: Uneven subfloors can cause LVP to shift or buckle over time.
- Visible imperfections: Uneven surfaces may result in gaps or bulges in the flooring.
- Decreased longevity: An uneven subfloor can lead to premature wear and tear of the LVP.
Ensuring your subfloor meets the required flatness standards is crucial for a durable and visually appealing vinyl plank flooring installation.
Measuring Floor Evenness
To ensure a successful LVP installation, the floor must be level. An uneven subfloor can cause instability and premature wear of the vinyl planks. Prioritize a smooth, flat, and clean surface free of cracks, gaps, and contaminants for the best results.
Tools For Measuring Floor Level
Tools: To measure the level of a floor for LVP, you will need a straight edge, a long level, a measuring tape, and a flashlight.
How To Identify High And Low Spots
High spots: Use a straight edge to detect areas where the gap between the edge and the floor is noticeable.
Low spots: Place a level on the floor and look for areas where the bubble indicates a slope or depression.
Preparing Different Subfloor Types
To ensure a successful installation of LVP (Luxury Vinyl Plank) flooring, it is important that the subfloor is level. An uneven subfloor can lead to instability and faster wear of the flooring. Whether it is concrete or wood, the floor must be flat for optimal results.
Concrete Subfloor Preparation
When preparing a concrete subfloor for installing LVP, it’s crucial to ensure that the surface is clean, level, and free from any imperfections. Here are the essential steps to prepare a concrete subfloor:
- Inspect the subfloor: Carefully examine the concrete subfloor for any cracks, holes, or uneven areas.
- Repair any imperfections: Fill in any cracks or holes with a suitable concrete patching compound to create a smooth and level surface.
- Clean the subfloor: Thoroughly clean the concrete surface to remove any dirt, dust, or debris that could affect the adhesion of the LVP.
- Apply a primer: Use a concrete primer to ensure proper adhesion of the LVP to the subfloor.
- Level the subfloor: If necessary, use a self-leveling compound to create a perfectly flat surface for the LVP installation.
Wood Subfloor Preparation
Preparing a wood subfloor for LVP installation requires specific steps to ensure a stable and even surface. Here’s how to prepare a wood subfloor for LVP:
- Inspect the subfloor: Check the wood subfloor for any signs of damage, such as warping or rot.
- Repair any damage: Replace any damaged or warped sections of the wood subfloor to create a solid foundation for the LVP.
- Clean the subfloor: Thoroughly clean the wood surface to remove any dirt, dust, or debris that could affect the installation of the LVP.
- Install an underlayment: Consider adding an underlayment to provide additional cushioning and support for the LVP.
- Level the subfloor: Use shims or a leveling compound to ensure that the wood subfloor is completely level before installing the LVP.
Addressing Subfloor Imperfections
Before installing luxury vinyl plank (LVP) flooring, it is crucial to address any subfloor imperfections to ensure a smooth and durable installation. Subfloor imperfections such as gaps, cracks, and uneven surfaces can negatively impact the appearance and longevity of your LVP flooring. By addressing these imperfections, you can create a level and stable foundation for your new flooring, enhancing its overall performance and visual appeal.
Filling Gaps And Cracks
One of the key steps in preparing a subfloor for LVP installation is filling any existing gaps and cracks. These imperfections can compromise the integrity of the flooring and lead to visible irregularities once the LVP is installed. Use a high-quality floor patching compound to fill in any gaps and cracks, ensuring a smooth and level surface for the LVP to be laid upon. Additionally, consider applying a second coat of the patching compound to further level the subfloor and create a seamless foundation for the new flooring.
Sanding And Grinding Techniques
If the subfloor exhibits uneven areas or rough surfaces, sanding and grinding techniques can be employed to smoothen the substrate. Utilize a floor prep sprayer to apply a layer of primer, which is critical in preparing the subfloor for LVP installation, particularly on concrete or tile surfaces. After priming, sand or grind the subfloor to eliminate any rough patches and create a uniformly smooth base for the LVP. This process not only enhances the aesthetics of the flooring but also ensures that the planks lay flat and securely, preventing premature wear and instability.
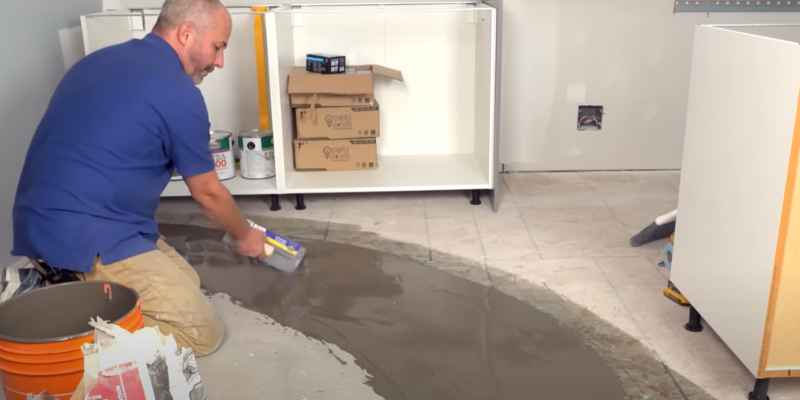
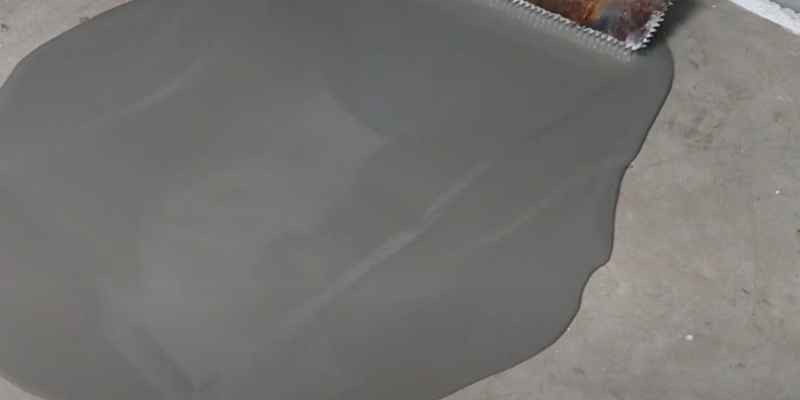
Importance Of A Leveling Compound
Achieving a level floor is crucial for a successful LVP installation. An uneven subfloor can cause stability issues and premature wear. Ensure a flat surface to avoid problems like varying plank heights, which can impact the flooring’s durability and appearance.
Choosing The Right Leveling Compound
When it comes to installing luxury vinyl plank (LVP) flooring, having a level subfloor is essential. Even a slight irregularity in the subfloor can cause the floor to buckle or warp over time. To ensure a smooth and stable installation, it’s important to choose the right leveling compound.
There are several types of leveling compounds available, including cement-based, gypsum-based, and self-leveling compounds. Cement-based compounds are the most common and are suitable for most subfloors. Gypsum-based compounds are ideal for wood subfloors, as they are more flexible and can better withstand movement. Self-leveling compounds are a good option if you have a large area to level, as they are easier to apply and spread out evenly.
Application Tips For Best Results
Applying leveling compound can be a tricky process, but with the right tools and techniques, you can achieve a level surface for your LVP flooring. Here are some tips for applying leveling compound for best results:
- Start with a clean, dry, and dust-free subfloor.
- Fill any gaps or cracks in the subfloor with a patching compound before applying the leveling compound.
- Follow the manufacturer’s instructions for mixing the compound, and mix only as much as you can use within the recommended time frame.
- Pour the compound onto the subfloor and use a trowel to spread it out evenly.
- Use a spiked roller to remove any air pockets and ensure the compound is level.
- Allow the compound to dry completely before installing the LVP flooring.
By following these tips, you can ensure a smooth and level surface for your LVP flooring, which will not only look great but also last longer.
In conclusion, a leveling compound is an essential component of installing LVP flooring. Choosing the right compound and applying it correctly can make all the difference in achieving a stable and long-lasting flooring surface. Remember to follow the manufacturer’s instructions carefully and take the time to properly prepare the subfloor before applying the leveling compound. With these steps, you can ensure a successful and beautiful LVP flooring installation.
Primer And Its Role In Floor Preparation
Primer plays a crucial role in floor preparation for installing Luxury Vinyl Plank (LVP) flooring. It is essential for creating a smooth and stable surface, ensuring the best possible results for your flooring installation. Let’s explore the benefits of applying primer and the various application methods.
Benefits Of Applying Primer
Applying primer offers several advantages that contribute to the overall quality and longevity of your LVP flooring installation. Some of the key benefits include:
- Enhanced adhesion between the subfloor and the LVP, reducing the risk of peeling or lifting.
- Improved moisture resistance, preventing potential damage to the flooring over time.
- Minimized risk of mold and mildew growth, promoting a healthier indoor environment.
- Even absorption of adhesive, ensuring a strong bond between the flooring and the subfloor.
Application Methods For Primer
When it comes to applying primer for LVP floor preparation, there are a few key methods to consider:
- Roller Application: Using a paint roller to apply the primer evenly across the subfloor surface, ensuring comprehensive coverage.
- Spray Application: Utilizing a specialized primer sprayer to achieve consistent and efficient application, particularly suitable for larger areas.
- Trowel Application: Employing a trowel to spread the primer, ensuring thorough coverage and addressing any irregularities in the subfloor.
Laying The LVP Flooring
To ensure a successful installation of LVP flooring, the subfloor must be level. Any unevenness can cause instability and wear down the flooring more quickly. It is recommended to have a subfloor that is as flat as possible, free of cracks, gaps, dust, grease, wax, paint, and other contaminants.
Proper preparation is key to a smooth and long-lasting LVP installation.
Step-by-step Installation Guide
Before starting the installation of LVP flooring, it is essential to ensure that the subfloor is level to achieve a successful and long-lasting result.
Here is a step-by-step guide for laying LVP flooring:
- Prepare the subfloor by cleaning and leveling it to the required flatness.
- Acclimate the LVP planks in the installation area according to the manufacturer’s instructions.
- Begin installation from the left corner of the room, working towards the right, leaving a small expansion gap along the walls.
- Interlock the planks by firmly pressing the edges together, ensuring a tight fit.
- Continue laying the planks row by row, staggering the joints for a natural appearance.
- Use a tapping block and rubber mallet to ensure the planks are securely locked together.
- Complete the installation and trim the last row of planks to fit using a utility knife.
- Install transition strips and molding to finish the edges and create a seamless look.
Troubleshooting Common Issues
If you encounter any of the following common issues during the installation of LVP flooring, here are some troubleshooting tips:
- Gaps between planks: Ensure the subfloor is flat and free of debris before installation. If gaps persist, consider using a tapping block and mallet to secure the planks together.
- Uneven surface: Address any unevenness in the subfloor by using a floor leveling compound to create a smooth base for the LVP installation.
- Difficulty locking planks: Check for debris or damage in the click-lock system of the planks and make sure the edges are clean and undamaged for a secure fit.
- Trimming issues: Use a sharp utility knife and a straight edge to achieve clean and precise cuts when trimming the planks to fit the room dimensions.
Maintenance And Care For LVP Floors
When installing LVP floors, it is important to have a level subfloor for a successful installation. An uneven subfloor can cause the planks to have varying heights, leading to instability and quicker wear and tear. Ensure that your floor is flat and free of cracks, gaps, and contaminants for a smooth and long-lasting result.
Routine Cleaning Recommendations
To keep your LVP floors looking their best, it’s important to clean them regularly. A simple sweep or vacuum can remove dust and debris, while a damp mop can remove dirt and stains. Avoid using harsh chemicals or abrasive scrubbers, as they can damage the flooring. Instead, use a neutral pH cleaner that is specifically designed for LVP floors.
Avoiding And Addressing Wear And Tear
While LVP floors are durable and resistant to wear and tear, they can still become damaged over time. To avoid this, it’s important to take care when moving furniture and avoid wearing high heels or cleats on the flooring. If you do notice any scratches or scuffs, you can use a color-matched repair kit to fix them.
Ensuring A Flat Subfloor
To ensure a successful installation and prevent potential problems, such as planks having varying heights that will make the flooring unstable and wear down more quickly, it is crucial to have a flat subfloor. The subfloor should be level within a tolerance of 3/16 inch over a 10-foot radius. This can be achieved by using a floor leveling compound or by sanding down high spots and filling in low spots with a patching compound. Additionally, it’s important to make sure the subfloor is clean, dry, and free of any debris that could impact the installation of the LVP flooring.
In conclusion, maintaining and caring for LVP floors is important for their longevity and appearance. Regular cleaning, avoiding wear and tear, and ensuring a flat subfloor are all key factors in keeping your LVP floors looking their best.
Faqs In LVP Installation
When installing LVP, the floor needs to be level to ensure a successful installation. An uneven subfloor can cause issues such as unstable flooring and quicker wear and tear. It is important to have a smooth, flat, and clean surface free of cracks, gaps, and contaminants for the best results.
Can LVP Be Installed Over An Uneven Floor?
It is essential for the success of your installation that the floor is level. An uneven subfloor can lead to potential problems, such as planks having varying heights that will make the flooring unstable and wear down more quickly. Therefore, it’s crucial to ensure that the floor is properly leveled before installing LVP.
Do All Rooms Need Leveling For LVP?
Before installing your vinyl flooring, whether the subfloor of your work area is hardwood or concrete, one crucial step is to make sure the subfloor is level and clean. This will ensure that the installation is smooth and the flooring remains stable and durable over time.
Frequently Asked Questions
Can You Put Vinyl Plank Flooring On An Uneven Floor?
Vinyl plank flooring can be installed on uneven floors, but it is crucial that the subfloor is flat for a successful installation. An uneven subfloor can cause planks to vary in height and make the flooring unstable. It is recommended to level the subfloor before installation to avoid any potential problems.
Does Floor Have To Be Perfectly Level For LVP?
For successful LVP installation, the floor must be flat to avoid instability and premature wear due to uneven planks.
How Smooth Does A Floor Need To Be For Vinyl Sheet?
For vinyl sheet installation, the floor needs to be smooth, flat, and rigid. It should be free of cracks, gaps, dust, grease, wax, paint, and any other dirt or stains. A level subfloor is important to ensure stability and prevent wear and tear.
Prior to installation, make sure to clean and prepare the subfloor accordingly.
Do I Need To Level The Concrete Floor Before LVP?
Yes, the concrete floor should be leveled before installing LVP to ensure a successful and stable flooring installation.
Conclusion
To ensure a successful LVP installation, it’s crucial to have a flat subfloor. An uneven floor can cause instability and wear down the flooring more quickly. While the levelness requirements may vary depending on the manufacturer’s recommendations, a general rule of thumb is that the floor should not have more than a 3/16-inch height difference over a 10-foot radius.
Proper floor preparation, including filling gaps and voids, using floor levelling compound, and ensuring the subfloor is clean and free of contaminants, is essential for a smooth installation. Following these guidelines will help you achieve a beautiful and long-lasting LVP floor.