
How to Attach a Drawer Front
To attach a drawer front, first position it on the drawer box, ensuring it is aligned correctly. Then, using screws or nails, secure the drawer front in place by attaching it to the drawer box from the inside.
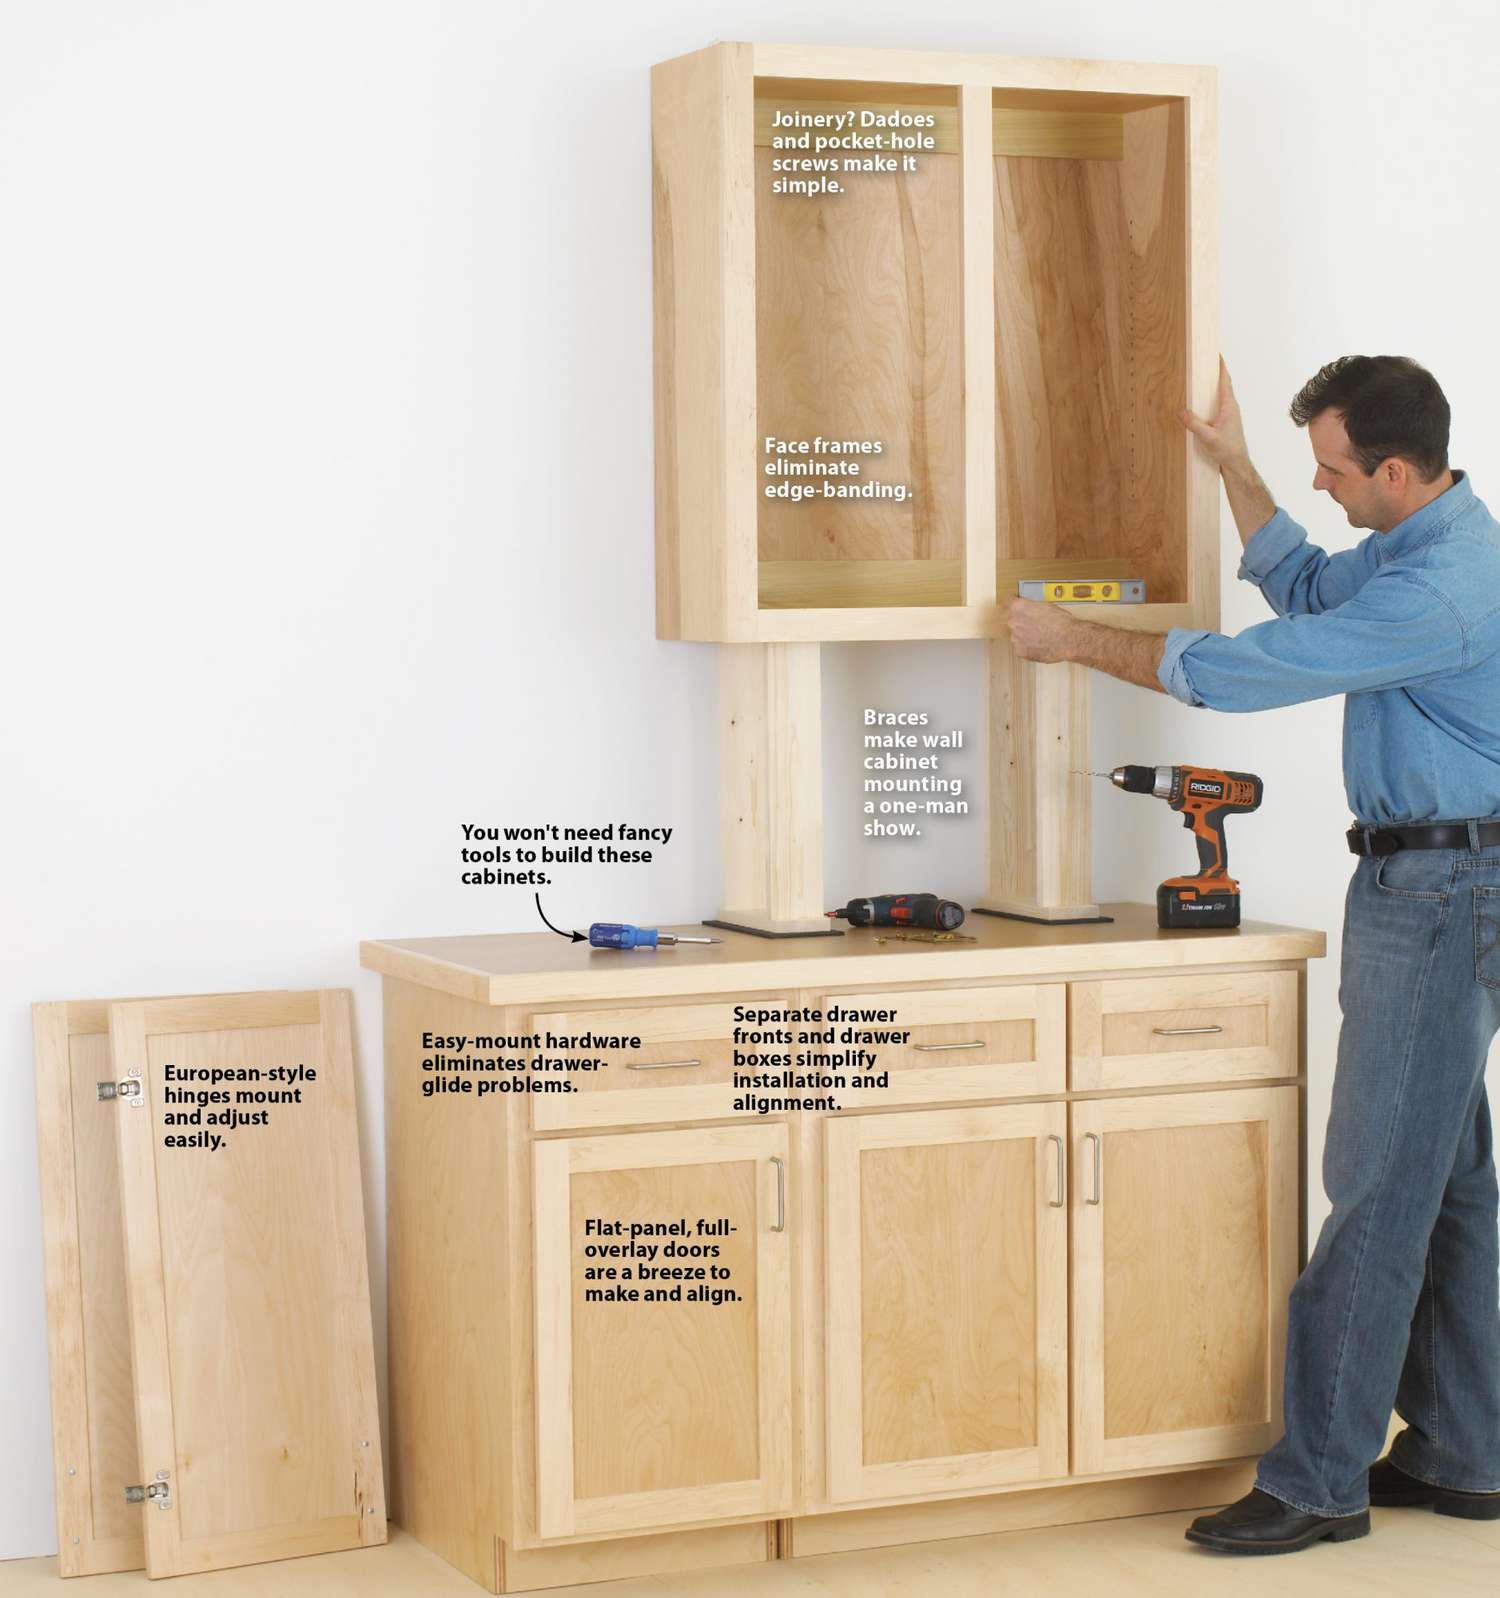
Credit: www.woodmagazine.com
Preparation And Measurement
Properly attaching a drawer front is essential to achieving a seamless and professional-looking finish. Before diving into the process, it is crucial to prepare and measure accurately. With the right tools and measurements at hand, you can ensure a sturdy attachment that enhances the aesthetic appeal of your drawers.
Gathering Tools And Materials
Before you begin the process of attaching a drawer front, make sure you have the necessary tools and materials within easy reach. Having everything on hand will save you time and allow for a smooth and efficient installation. Here are the essential tools and materials you will need:
- Screwdriver or drill with appropriate bits
- Tape measure
- Pencil or marker
- Screws or fasteners specific for drawer fronts
- Level
- Appropriate safety equipment (gloves, goggles, etc.)
Measuring And Marking
Accurate measurements are crucial when attaching a drawer front. Taking the time to measure and mark correctly will ensure a seamless fit and alignment. Follow these steps to measure and mark your drawer front:
- Using a tape measure, determine the exact placement of the drawer front on the drawer box. Position it evenly to achieve a balanced and symmetrical look.
- Mark the precise locations of the screw holes or fasteners on both the drawer front and the drawer box. These marks will serve as your guide for drilling or screwing.
- With a level, double-check the positioning of the drawer front to ensure it is straight and aligned with surrounding elements, such as adjacent drawers or cabinet doors.
- Make any necessary adjustments to the markings or positioning before proceeding with attaching the drawer front.
By carefully preparing and measuring your drawer front, you set a solid foundation for a successful attachment. Whether you’re revamping your existing drawers or embarking on a DIY project, ensuring precise measurements and proper marking guarantees a professional and polished result.

Credit: m.youtube.com
Attaching The Drawer Front
When it comes to assembling a drawer, one crucial step is attaching the drawer front. The drawer front not only adds to the aesthetics of the piece but also helps in ensuring smooth and effortless operation. In this blog post, we will discuss two popular methods for attaching the drawer front: the Clamp and Attach Method and the Double-Sided Tape Method.
Clamp And Attach Method
The Clamp and Attach Method is a traditional and reliable way to attach a drawer front. It involves using clamps to secure the front panel in place while attaching it to the drawer box. This method requires precision and patience, but it ensures a strong and sturdy attachment.
To use the Clamp and Attach Method, follow the steps below:
- Position the drawer front on the drawer box, making sure it is aligned correctly.
- Use clamps to hold the drawer front in place, exerting gentle pressure to keep it secure.
- Utilize screws or nails to attach the front panel to the drawer box from the inside.
- Remove the clamps once the attachment is complete.
This method guarantees a durable attachment, allowing the drawer front to withstand regular usage and prevent any potential wobbling.
Double-sided Tape Method
The Double-Sided Tape Method provides an alternative route to attaching a drawer front, particularly for those seeking a quicker and simpler process. This method is less time-consuming and involves eliminating the need for clamps.
To use the Double-Sided Tape Method, follow the steps below:
- Clean both the drawer front and the drawer box to ensure a strong bond.
- Cut the double-sided tape into strips and place them evenly on the back of the drawer front.
- Carefully position the front panel on the drawer box, ensuring proper alignment.
- Press firmly on the drawer front to secure it in place, utilizing even pressure to activate the adhesive on the tape.
This method offers a convenient and efficient way to attach the drawer front. However, it is important to note that the adhesive strength of the double-sided tape may vary, depending on the brand and quality. Thus, it is advisable to choose a reliable and high-quality tape for optimal results.
Adjustment And Final Touches
Attach the drawer front with ease by making necessary adjustments and applying final touches. This step-by-step process ensures a secure and professional finish for your furniture project.
Adjustment and Final Touches are crucial steps in attaching a drawer front, ensuring that the completed piece looks flawless and functions smoothly. Checking Alignment and Applying Finishing Touches are the key components to achieving a polished result.
Checking Alignment
Once the drawer front is attached, it’s essential to carefully check the alignment to ensure that it is perfectly level and centered. This can be done by using a level to ensure that the drawer front is not slanted in any direction. Additionally, measuring the distance from the drawer front to the edges of the cabinet opening can help verify that it is properly positioned.
Applying Finishing Touches
Applying finishing touches is the final step in completing the installation of a drawer front. This includes adding any necessary hardware such as handles or knobs. Additionally, applying a final coat of wood finish or paint, if desired, can enhance the overall appearance and provide extra protection to the drawer front.
In conclusion, adjusting the alignment and applying finishing touches are essential for a well-installed drawer front. These final touches ensure that the drawer operates correctly and looks aesthetically pleasing in its intended space.
Troubleshooting And Tips
Attaching a drawer front may seem like a straightforward process, but sometimes, things don’t go as planned. In this section, we will discuss common issues you may encounter and provide tips to help you overcome them. So, let’s get started!
Dealing With Misalignment
Misalignment can be a common problem when attaching a drawer front. Here are a few tips to help you resolve this issue:
- Check the measurements: Ensure that the drawer front is the correct size and that it aligns properly with the drawer box. Double-check your measurements before proceeding.
- Adjust the screws: If the drawer front is slightly misaligned, you can try loosening the screws that hold it in place. Gently push or pull the front until it aligns correctly, and then tighten the screws back.
- Use shims: In cases where the misalignment is significant, you can use thin wooden shims to help level the drawer front. Place these shims strategically behind the front to achieve the desired alignment.
By following these steps, you should be able to tackle misalignment issues effectively.
Additional Tips For Success
Here are some additional tips to ensure a successful attachment of your drawer front:
- Use a template: Consider creating a template out of cardboard or plywood that matches the shape of the drawer front. This template can help you accurately position and attach the front.
- Pre-drill holes: To avoid splitting the wood, it is advisable to pre-drill the screw holes in both the drawer front and the drawer box.
- Apply adhesive: Applying a small amount of adhesive to the back of the drawer front can provide extra support and prevent any potential movement over time.
- Take your time: It’s important to be patient and take your time during the attachment process. Rushing can lead to mistakes and misalignments.
Remember, attaching a drawer front requires careful attention to detail. By following these troubleshooting tips and adhering to the additional suggestions, you’ll be well on your way to successfully attaching your drawer front!
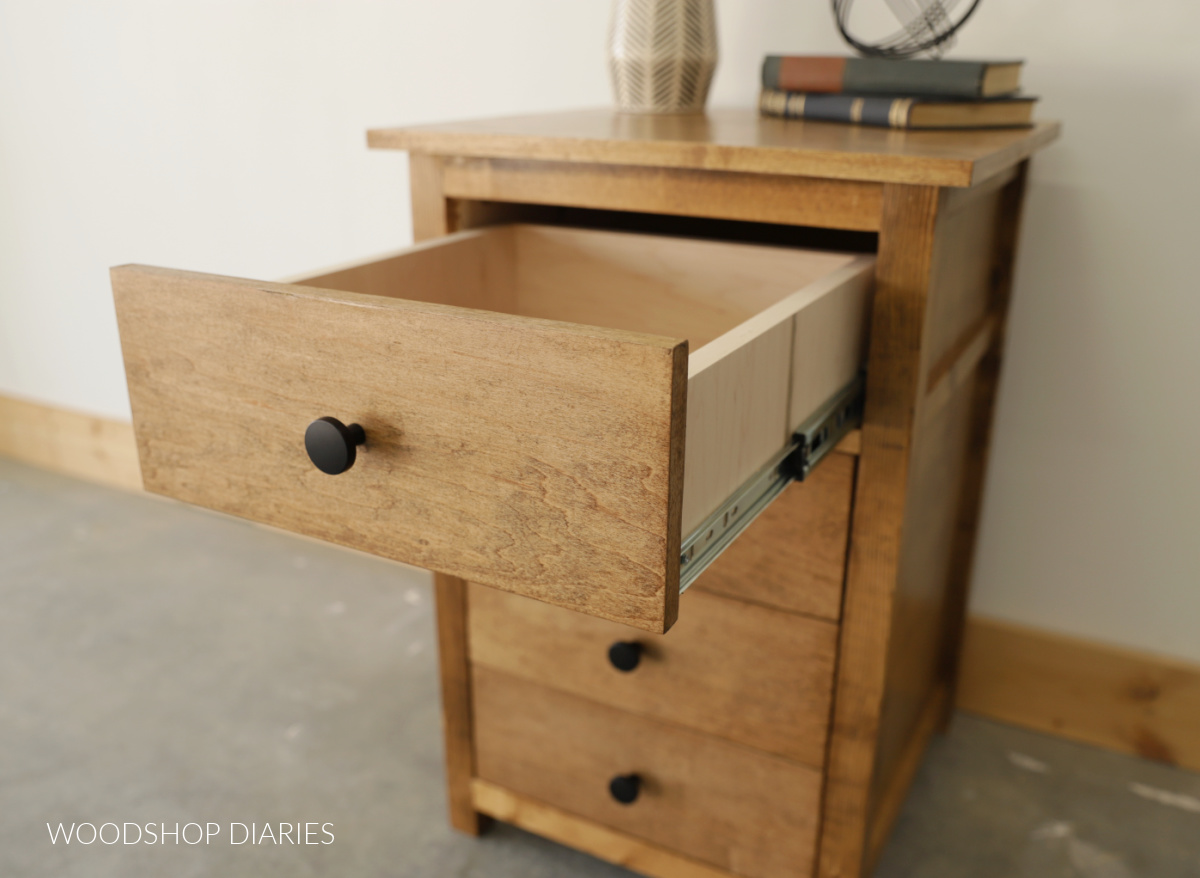
Credit: www.woodshopdiaries.com
Frequently Asked Questions On How To Attach A Drawer Front
How Do You Attach The Front Of A Drawer?
Attach the front of a drawer by aligning it with the opening, securing it with screws, and checking for smooth movement. Ensure the drawer front is square and level for a professional finish. Consider using a drawer front mounting bracket for ease.
How Many Screws Do I Need To Attach Drawer Fronts?
Attach drawer fronts with two screws to achieve stability and ensure proper alignment. Use one screw on each side of the drawer, about 2-3 inches from the top and bottom. This will securely fasten the fronts and maintain the functionality of your drawers.
How Do You Secure A False Drawer Front?
To secure a false drawer front, follow these steps:
1. Measure and mark the desired placement on the cabinet.
2. Attach the drawer front using screws from the inside of the cabinet.
3. Ensure the front is aligned and level with the surrounding drawers.
4. Use a drill to pilot holes for the screws and prevent splitting.
5. Tighten the screws securely to hold the false front in place.
How Do You Fix A Drawer Front?
To fix a drawer front, remove it and evaluate any damage. Tighten or replace loose screws, adjust the alignment, and fill in any gaps with wood filler. Sand the surface smooth, then repaint or refinish as needed. Reattach the front, ensuring it is secure and level.
Conclusion
To sum up, attaching a drawer front is a simple yet crucial part of any DIY project. By following the steps outlined in this blog post, you can achieve a professional-looking finish. It’s important to carefully measure, align, and secure the drawer front for a flawless result.
With these tips, you can confidently take on this task in your next woodworking project.