Acrylic Saw Blades: Getting Clean Cuts
An acrylic saw blade is specifically designed for cutting acrylic materials. It ensures clean, precise cuts without chipping or cracking.
Acrylic materials are widely used in various applications due to their versatility and clarity. Using the right saw blade is crucial for achieving professional results. Acrylic saw blades have finely-tuned teeth and a special design to minimize damage and ensure smooth edges.
These blades are typically made from high-quality carbide, offering durability and longevity. Choosing the correct blade significantly reduces the risk of melting or shattering the acrylic, providing a clean and polished finish. Whether for DIY projects or professional use, investing in an acrylic-specific saw blade ensures high-quality cuts and enhances the overall craftsmanship.
Types Of Acrylic Saw Blades
Our Top Pick For Acrylic

Freud LU94M010 10″ Plastic Blade – $115
A high tooth-count blade built specifically for acrylic and other plastics, with a tooth geometry designed to shear rather than tear the material.
- Best for: Cast and extruded acrylic sheet on a table saw
- Why we picked it: Purpose-built plastic grind minimizes chipping and edge melt
- Main drawback: Priced higher than general-purpose wood blades
Compare more acrylic-cutting blade options
 Option 1 Amana Tool LB10801C – $136
|
 Option 2 Diablo D1080X – $52
|
 Option 3 DEWALT DWA11080 – $49
|
As an Amazon Associate we earn from qualifying purchases.
Standard blades are common for cutting acrylic. They have sharp teeth that make clean cuts. These blades work well for simple projects. They are also good for straight cuts.
Triple Chip Grind blades offer high precision. They have alternating teeth that reduce chipping. These blades are perfect for detailed work. They also last longer than standard blades. Choose them for professional results.
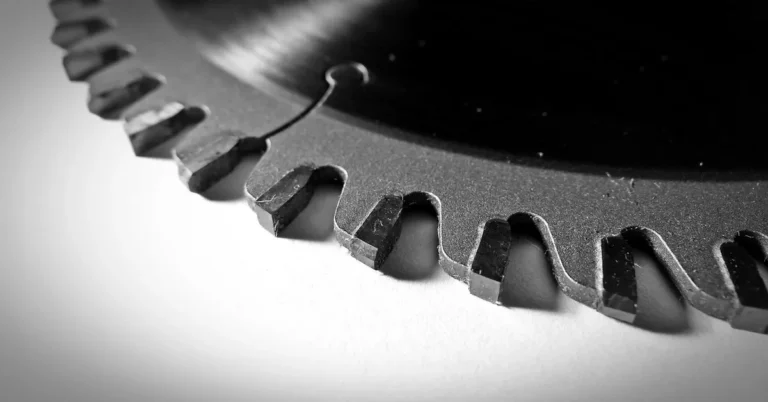
Triple chip grind (TCG) is the industry-standard tooth profile for cutting acrylic, and it’s worth understanding why. On a TCG blade, the teeth alternate between two shapes: a flat-topped “raker” tooth and a trapezoid-shaped tooth with the corners chamfered off. The trapezoid tooth does the rough shearing through the material, and the flat raker tooth right behind it cleans up and flattens the bottom of the cut. That alternating pattern is what keeps acrylic from chipping at the edges — a standard alternate top bevel (ATB) blade (the common profile on most wood-cutting blades) uses pointed, angled teeth that are excellent at slicing wood grain but tend to grab and crack brittle plastics instead of shearing them cleanly.
That’s why acrylic-specific blades are almost always labeled “TCG,” “non-ferrous,” or “plastic” rather than “crosscut” or “combination.” A handful of ATB fine-finish blades with very high tooth counts (80T and up) can produce acceptable results on thin acrylic in a pinch, but a true TCG grind is the safer, more consistent choice, especially on anything thicker than about 1/4 inch.
Acrylic Blade Specs At A Glance
Blade specs matter more for acrylic than for wood because plastic behaves so differently under heat and pressure. Use this table as a quick reference when comparing blades before you buy:
| Blade Type / Grind | Tooth Count | Recommended RPM | Best Acrylic Thickness |
|---|---|---|---|
| Triple Chip Grind (TCG), 10″ blade | 80–100T | 3,000–4,000 RPM | 1/8″–3/4″ |
| High-ATB fine-finish, 10″ blade | 60–80T | 3,500–4,500 RPM | 1/8″–1/4″ (thin sheet only) |
| TCG, 7-1/4″ circular saw blade | 40–60T | 5,000–5,800 RPM (fixed) | 1/8″–1/2″ |
| Fine-tooth HSS/reverse-tooth jigsaw blade | N/A (10–14 TPI) | Low-speed setting, 500–1,500 SPM | 1/8″–1/2″, curved cuts |
As a rule of thumb, thinner acrylic wants more teeth in contact with the material at once (higher tooth count, slower feed), while thicker acrylic needs slightly larger gullets between teeth to clear the melted chips before they re-weld to the cut edge.
Choosing The Right Blade
Tooth count is important for cutting acrylic. Blades with more teeth give smoother cuts. Fewer teeth cut faster but rougher. A blade with 80 teeth is a good choice for clean cuts.
Blades made of carbide last longer. Carbide stays sharp for many cuts. Non-stick coatings help reduce friction. This makes smoother cuts and reduces heat. Heat-resistant coatings also help keep the blade cool. This prevents melting the acrylic.
Beyond tooth count, two other specs decide whether a cut comes out clean or melted: cutting speed and feed rate. On a table saw, blade RPM is usually fixed by the motor, so the practical control you have is feed rate — how fast you push the material through the blade. Acrylic melts when friction builds up faster than the cut can dissipate heat, so a slower, steadier feed at a lower blade speed (where your saw allows adjustment, such as a variable-speed circular saw or router-based cutting) almost always beats a fast pass. On a standard fixed-speed table saw, raising the blade height so more of the tooth is engaged in the cut, rather than only the tip, also helps reduce rubbing and heat buildup.
Table Saw vs. Circular Saw vs. Jigsaw For Acrylic
The right blade only performs well if it’s matched to the right tool for the cut you’re making:
- Table saw: The most accurate option for long, straight rip cuts and repeatable panel sizing. Use a 10″ TCG blade, keep the fence square, and support the sheet fully on the outfeed side so it can’t flex or bind against the blade mid-cut.
- Circular saw: Best for breaking down large acrylic sheets on-site or when a table saw isn’t practical. Clamp a straightedge guide, use a fine-tooth TCG blade sized for the saw, and let the blade do the work — forcing a circular saw through acrylic is the fastest way to crack it.
- Jigsaw: The tool of choice for curved or irregular cuts. Use a fine-toothed, down-cutting or reverse-tooth HSS blade, run it on a low-to-medium speed setting, and keep firm, even downward pressure on the sheet close to the cut line to stop it from vibrating and chipping.
Step-By-Step: How To Get Clean, Chip-Free Cuts
- Leave the protective film on. Most acrylic sheet ships with a paper or plastic masking film — keep it in place while cutting. It reduces surface scratching and gives the blade a slightly more consistent surface to bite into.
- Mark your cut line clearly and, on a table saw or circular saw, clamp a straightedge or use the fence rather than cutting freehand.
- Support the sheet on both sides of the cut. Unsupported acrylic will flex as the blade passes through, which is one of the most common causes of chipping and cracking, especially on thin sheet.
- Set the blade height so it clears the top of the material by roughly 1/4 inch to 1/2 inch — high enough to engage more tooth surface and reduce heat, but not so high that it increases kickback risk.
- Feed at a slow, steady pace. Let the teeth cut; don’t push. If you smell melting plastic or see the cut edge turning white or hazy, you’re feeding too fast or too slow for that blade’s tooth count — ease off and let the blade clear itself.
- Clear chips as you go rather than letting them build up and re-weld to the cut edge, particularly on thicker acrylic where the kerf runs hotter.
- Finish the edge (see below) if the application calls for a polished or glued edge rather than a purely functional cut.
Cooling And Lubrication
Because acrylic is a thermoplastic, heat is the real enemy of a clean cut — not the blade’s sharpness alone. A dull or overheated blade re-melts the kerf as fast as it cuts it, which is what produces that stringy, welded-looking edge. A few things help manage heat without needing a full flood-coolant setup:
- Applying a strip of masking tape directly along the cut line adds a small amount of lubrication and reduces surface chipping on both sides of the kerf.
- A light misting of water or a dedicated plastic-cutting lubricant along the cut line on a table saw helps dissipate heat on thicker stock (1/2 inch and up), though it’s unnecessary and often messy on thin sheet.
- Letting the blade run at full speed before entering the material, and easing off the feed rate rather than stopping mid-cut, prevents localized heat spikes that leave visible melt marks.
- On longer cutting sessions, pause periodically to let the blade cool — a blade that’s too hot to touch is also too hot to cut acrylic cleanly.
Edge Finishing After Cutting
A properly cut TCG edge is usually smooth enough to use as-is for utility projects, but if the edge will be visible, glued, or handled often, a quick finishing pass makes a noticeable difference:
- Scraping: Drawing the edge of a sharp utility blade or dedicated acrylic scraper along the cut at a slight angle removes small saw marks without heat.
- Sanding: Progressive wet-sanding with fine-grit paper (starting around 400-grit and working up to 1000–2000-grit) smooths saw marks before polishing.
- Flame polishing: A quick, even pass of a small torch or dedicated flame polisher melts just the surface layer of the edge to a glass-clear shine. This takes practice — too slow or too close and the edge distorts or bubbles.
- Buffing: A buffing wheel with plastic polish compound gives the highest-gloss result for display or retail applications, without the risk of heat distortion from a flame.
Tips For Achieving Clean Cuts
Ensure the blade is securely attached to the saw. Check for any loose screws. Position the blade correctly. The teeth should face the cutting direction. Always use a blade designed for acrylic materials. This prevents chipping and cracking. Double-check the blade before starting the saw. Safety is very important.
Use a moderate speed for cutting acrylic. Too fast can cause melting. Too slow can lead to cracking. Maintain a steady pace throughout the cut. Avoid sudden movements with the saw. Keep the cutting area clean. Remove any debris immediately. This ensures a smooth and clean cut.
Maintenance And Care
Always keep the acrylic saw blade clean. Remove any dust and debris after each use. Use a soft brush to clean the teeth. A mild soap solution can help. Do not use harsh chemicals. Dry the blade completely before storing it. This prevents rust and damage.
Store the blade in a dry place. Use a protective cover to keep it safe. Hang the blade on a wall hook if possible. Avoid stacking blades on top of each other. Keep it away from moisture and extreme temperatures. Proper storage extends the life of your acrylic saw blade.
Common Mistakes To Avoid
Choosing the wrong blade can damage the acrylic. Always use a blade made for acrylic cutting. Metal blades are not suitable for this task. They can cause chipping and cracking. Blades with fine teeth work best for smooth cuts. A rough blade will leave jagged edges. This can ruin your project.
Blade maintenance is crucial for clean cuts. Always keep your blade sharp. Dull blades can cause melting of the acrylic. They also make cutting harder and slower. Clean the blade after each use to remove debris. This helps in maintaining the blade’s efficiency. Store the blade properly to avoid rust and damage.
Beyond blade choice and maintenance, a handful of technique mistakes account for most bad acrylic cuts:
- Using an ATB wood blade instead of a TCG blade. The pointed, alternating-bevel teeth on standard wood blades are designed to slice through fibrous grain. On brittle acrylic they tend to grab and chip the material instead of shearing it — this is the single most common cause of a chipped or cracked edge.
- Feeding too fast. Pushing the material through faster than the tooth count and gullet size can clear builds up friction heat immediately. The result is a melted, gummy edge that re-hardens with a rough, wavy texture rather than a clean line.
- Cutting thin sheet without support. Acrylic under about 1/4 inch will flex under the blade’s lateral pressure if it isn’t fully supported on both sides of the cut line. That flex is what causes stress cracks that can run well beyond the cut itself.
- Removing the protective film too early. Cutting bare, unmasked acrylic increases surface scratching from clamps, fences, and saw tables.
- Ignoring blade dullness. A dull TCG blade behaves like the wrong blade — it rubs and melts rather than shears, even though the tooth geometry is correct.
Applications Of Acrylic Saw Blades
Acrylic-specific blades earn their keep across a wide range of projects, from hobbyist builds to commercial fabrication. Sign makers and retail display builders rely on them for clean, chip-free edges on cast acrylic panels that will be viewed up close. Woodworkers building shop fixtures use them to cut clear acrylic guards and blast shields for table saws and router tables, where a clean, crack-free edge matters for both looks and safety. DIYers use them for custom shelving, picture-frame glazing, terrarium and enclosure panels, and protective barriers — all projects where a rough or chipped edge is immediately visible and hard to fix after the fact.
For home projects, acrylic saw blades are very useful. They are great for cutting plastic panels. People use them for custom shelves and storage units. These blades can also trim laminate flooring. Homeowners find them handy for quick fixes. Acrylic saw blades make clean and accurate cuts. This is important for neat home projects.
Frequently Asked Questions
What Is The Best Saw Blade To Cut Acrylic?
The best saw blade to cut acrylic is a carbide-tipped blade with a high tooth count, ideally 60 to 80 teeth.
Can I Cut Acrylic With A Circular Saw?
Yes, you can cut acrylic with a circular saw. Use a fine-toothed blade for clean cuts. Ensure proper clamping and safety measures.
Which Jigsaw Blade To Use For Acrylic?
Use a fine-toothed, high-speed steel (HSS) jigsaw blade for cutting acrylic. These blades provide smooth, precise cuts.
Can A Hand Saw Cut Acrylic?
Yes, a hand saw can cut acrylic. Use a fine-toothed blade for smoother edges and better control.
Why Does My Acrylic Melt Instead Of Cut?
Melting almost always comes down to heat buildup from a mismatch between blade, speed, and feed rate. A dull blade, a wood-grind ATB blade, or feeding the material too slowly (so the same teeth rub the same spot longer) all generate excess friction. Switching to a sharp TCG blade and using a slightly faster, steadier feed usually solves it.
Do I Need To Support Acrylic Sheet While Cutting?
Yes, especially on sheet thinner than 1/4 inch. Unsupported acrylic flexes under the blade’s lateral pressure, and that flex is one of the most common causes of stress cracks that run beyond the cut line.
Conclusion
Choosing the right acrylic saw blade ensures smooth, precise cuts. It enhances your project’s quality and efficiency. Invest in a high-quality blade for best results. Remember, the right tool makes all the difference. Happy cutting!
Sponsored / affiliate links. As an Amazon Associate I earn from qualifying purchases. I may earn additional commission from eligible campaigns.