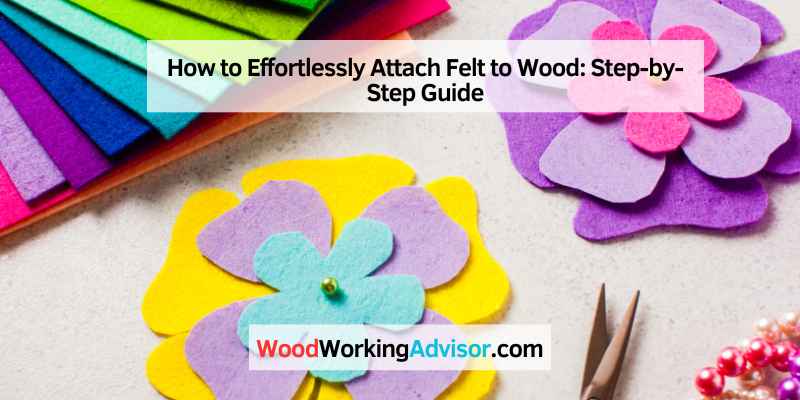
How to Attach Felt to Wood
To attach felt to wood, apply adhesive to the wood surface and press the felt on evenly. Felt provides a protective layer and reduces noise when objects come in contact with the wood.
It is commonly used in various DIY projects and furniture making. Understanding the process of attaching felt to wood can help you achieve a professional and durable finish. By following simple steps, you can ensure the felt securely adheres to the wood surface.
Whether you are covering the bottom of furniture legs or creating a cushioned backing for frames, learning how to attach felt to wood is a valuable skill for DIY enthusiasts and woodworkers alike. Let’s explore the steps involved in this process to achieve the desired results effectively.
Understanding Felt And Wood
Felt is a versatile material known for its soft texture and ability to absorb liquids, while wood is a strong and durable natural material with various types and characteristics.
Properties Of Felt
- Felt is made from wool or synthetic fibers
- It is soft, flexible, and provides a cushioning effect
- Felt is commonly used for crafting, protection, and insulation
Characteristics Of Different Wood Types
| Wood Type | Characteristics |
|---|---|
| Pine | Soft, lightweight, and easy to work with |
| Oak | Durable, strong, and has a prominent grain pattern |
| Maple | Hard, dense, and ideal for furniture making |
Essential Tools And Materials
When it comes to attaching felt to wood, having the right tools and materials is essential for a smooth and successful process. Here is a list of necessary tools and a guide on the types of felt and wood suitable for attachment.
List Of Necessary Tools
Before diving into attaching felt to wood, make sure you have the following tools at your disposal:
- High-quality Felt: Choose a felt material that is durable, thick, and suitable for your project. Wool felt or a polyester felt blend are commonly used options.
- Wood Surface: Opt for a smooth and flat piece of wood that is suitable for your desired project. Plywood or solid wood boards work well.
- Spray Adhesive: An adhesive spray specifically designed for fabric and wood is ideal for attaching felt to wood. It provides a strong bond without leaving a residue.
- Scissors: A sharp pair of scissors will help you cut the felt to the desired shape and size for attachment.
- Measuring Tools: A tape measure or ruler will ensure precise measurements for cutting the felt and aligning it on the wood surface.
- Protective Gear: Wearing gloves and a mask is recommended to protect your hands and respiratory system from any potential adhesive fumes.
Types Of Felt And Wood Suitable For Attachment
Choosing the right combination of felt and wood is crucial for a secure and long-lasting attachment. Consider the following options:
| Felt Type | Wood Type |
|---|---|
| Wool Felt: | Absorbs adhesives well and provides a soft and textured finish. Suitable for attaching to solid wood surfaces. |
| Polyester Felt Blend: | Offers a more cost-effective alternative to pure wool felt. Works well with plywood surfaces. |
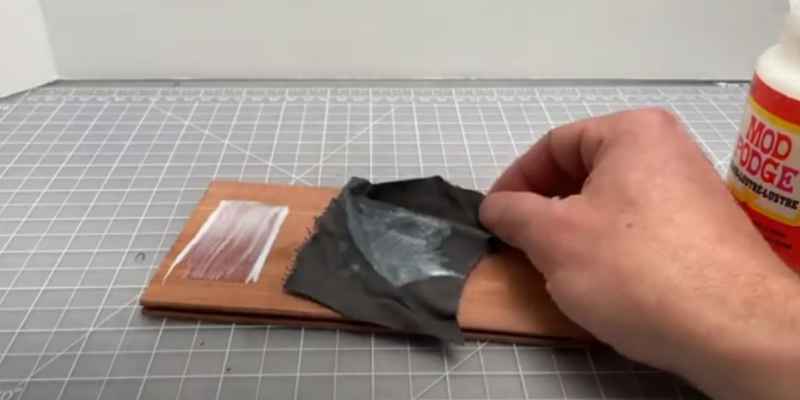
When attaching felt to wood, it’s important to consider the thickness and texture of both materials. Ensure that the wood surface is clean and dry before applying the adhesive spray. Carefully align the felt onto the wood, pressing firmly to create a strong bond. Allow sufficient drying time for the adhesive to set before handling the project.
Preparation
For attaching felt to wood, start by cleaning the wood surface. Apply adhesive evenly and press down the felt firmly. Trim excess felt for a neat finish.
Surface Cleaning
Before attaching felt to wood, it is essential to prepare the surface by cleaning it thoroughly. Over time, wood surfaces can accumulate dust, dirt, and other debris that may affect the adhesion of the felt. To ensure a strong bond between the two materials, follow these simple steps to clean the wood surface:
- Remove any loose dirt or debris by gently brushing the wood with a soft bristle brush or using a clean, dry cloth.
- For more stubborn stains or grime, dampen a cloth with mild soap and water and gently clean the wood surface. Avoid using harsh chemicals or abrasive cleaners as they may damage the wood.
- After cleaning, make sure to fully dry the wood surface before proceeding to the next step. Moisture can affect the adhesion of the felt, so it is crucial to ensure the wood is completely dry.
Cutting And Measuring Felt And Wood
Properly cutting and measuring both the felt and the wood is crucial for a seamless attachment. Follow these steps for accurate measurements and precise cutting:
- Start by measuring the dimensions of the wood surface using a measuring tape. Take care to note the length and width accurately.
- Transfer the measurements onto the felt sheet using a pencil or fabric marker. Ensure that the felt dimensions match the wood surface dimensions precisely.
- Using a sharp pair of scissors or a utility knife, carefully cut the felt along the marked lines. Take your time to make clean and straight cuts for a professional-looking finish.
- If the wood surface has any irregular shapes or curves, consider creating a template using cardboard and tracing it onto the felt. This method will allow for more accurate cutting and a better fit.
- Once both the felt and the wood are accurately cut to size, double-check that the dimensions align before proceeding to the next step.
Attachment Methods
Attaching felt to wood can be achieved using a variety of methods. Each method has its own advantages and considerations. Let’s explore the different attachment methods below:
Adhesive Options
Adhesive options are a popular choice for attaching felt to wood due to their ease of application. Common adhesives include craft glue, hot glue, and spray adhesive.
Stapling And Nailing Techniques
Stapling and nailing techniques involve securing the felt to the wood using staples or nails. This method provides a sturdy attachment but requires appropriate tools and precision.
Finishing Touches
Looking to attach felt to wood for a smooth finish? Start by cleaning the surface and cutting the felt to size. Apply adhesive to the wood and press the felt firmly in place, ensuring a secure bond. Smooth out any wrinkles or air bubbles for a professional result.
Trimming Excess Felt
After attaching felt to wood, the next step to achieve a polished and professional look is trimming any excess felt. To do this, follow these simple steps:
- Use a sharp utility knife or fabric scissors to carefully trim the excess felt along the edges of the wood. Be sure to keep a steady hand to avoid any accidental cuts.
- For a neat and clean finish, make sure to cut along the edges smoothly and evenly. Take your time and pay attention to detail as you trim the felt.
- Remove any loose threads or fibers that may be lingering after trimming. This will give your finished project a clean and refined appearance.
Adding Protective Coating
Your felt-covered wood creation deserves some extra protection to ensure its durability and longevity. Here’s how to add a protective coating:
- Choose a protective coating that suits your project and desired finish. Options include polyurethane, varnish, or lacquer.
- Using a foam brush or a soft-bristle brush, apply a thin and even layer of the protective coating onto the entire surface of the felt-covered wood.
- Allow the first coat to dry completely, following the manufacturer’s instructions for drying time.
- If desired, apply a second coat of the protective coating for added durability.
Remember to let the final coat dry thoroughly before using or displaying your felt-covered wood item.
Maintenance Tips
Maintaining your felt attachments on wood is crucial to ensure they remain in pristine condition and provide effective protection. By following a few simple maintenance tips, you can keep your felt securely attached to the wood surface for an extended period of time, while preventing any wear and tear that may occur over time. In this section, we will provide you with essential cleaning and care instructions, as well as tips on handling wear and tear.
Cleaning And Care Instructions
Your felt attachments can gather dust and dirt over time, diminishing their effectiveness and appearance. Regular cleaning is essential to maintain their functionality. Follow these instructions to ensure your felt stays clean and well-cared for:
- Gently vacuum: Use a soft brush attachment on your vacuum cleaner to remove any loose particles and debris from the felt surface. This is especially important for large felt attachments, such as furniture pads or floor protectors.
- Spot cleaning: In case of minor stains, dab a clean cloth or sponge with mild soapy water and gently blot the affected area. Avoid aggressive scrubbing, as it may damage the felt fibers. Allow the felt to air dry completely before using or storing.
- Deep cleaning: For more stubborn stains or overall cleaning, consider using a dedicated fabric cleaner suitable for felt. Follow the manufacturer’s instructions carefully and test the cleaner on a small, inconspicuous area, to ensure it does not cause any discoloration or damage. After cleaning, allow the felt to dry completely before applying any pressure or weight on it.
Handling Wear And Tear
Despite proper care, wear and tear can still occur on felt attachments. Follow these tips to handle any signs of wear and maintain the longevity of your attachments:
- Regular inspection: Routinely check your felt attachments for any signs of damage, such as fraying edges or loose fibers. Identifying these issues early allows you to address them promptly, preventing further damage.
- Repairing small damages: If you notice any small tears or loose areas, consider using fabric glue or adhesive specifically designed for felt to reattach and reinforce the damaged section. Apply a small amount of glue to the affected area and press firmly until dry.
- Replacement when necessary: In cases where the wear and tear are extensive or irreparable, it may be necessary to replace the felt attachment entirely. This ensures that your wood surface continues to receive the best protection.
Creative Applications
When it comes to attaching felt to wood, the creative applications are endless. Let’s explore how you can customize felt-attached wood and implement innovative design ideas to elevate your projects.
Customizing Felt-attached Wood
Customizing felt-attached wood allows you to personalize your creations through various techniques. From dyeing the felt to stamping unique designs, the possibilities are vast.
Innovative Design Ideas
Implement unique design ideas to make your felt-attached wood stand out. Consider incorporating layered felt for a textured look or mixing colors to create visually appealing patterns.
Frequently Asked Questions On How To Attach Felt To Wood
How Do You Adhere Felt To Wood?
To adhere felt to wood, use a strong adhesive like craft glue or spray adhesive. Apply the adhesive evenly all over the wood surface. Press the felt firmly onto the wood, ensuring it sticks properly. Allow the adhesive to dry completely before using the felt-covered wood.
What Is The Best Way To Attach Felt?
To attach felt, use fabric glue or a hot glue gun for a secure bond. Ensure surfaces are clean and dry for best results.
What Glue Is Best For Wood And Felt?
The best glue for wood and felt is a multi-purpose adhesive like epoxy or fabric glue that bonds strongly between the surfaces.
What Is The Best Way To Bind Fabric To Wood?
The best way to bind fabric to wood is by using a strong adhesive, such as fabric glue or spray adhesive. Apply a thin, even layer to both the fabric and wood surfaces, then press them firmly together. Allow ample drying time before handling.
Conclusion
Incorporating felt onto wood enhances both aesthetics and functionality. Proper attachment techniques ensure lasting results. Experiment with different adhesive options for best outcomes. Start by cleaning and preparing the surface, then securely attach the felt. Enjoy the outcome of your personalized and functional woodworking project.