
How To Build A Solid Wood Exterior Door? [Know The Process]
A solid wood door just at the entrance is probably a dream of every homeowner. While you can always hire a professional and make the exterior door, it is more fun to make it by yourself. You can flaunt your door-making skill to your guests and feel proud and happy for yourself. Now that is truly a different feeling!
But, is it so easy to build a solid wood exterior door by yourself? No, it is not that simple. You need to have the right set of tools and proper guidance to do this. Assuming that you are a beginner, the first thing you need is a guide to instruct you on the steps. And in this article, I am exactly going to talk about this. So you can call me your virtual guide for this project!
Here, I am going to share all my experiences about making a wooden entrance door. You will get to know each step in detail so that you can attempt it confidently and execute it properly. Without any further discussion, let’s start knowing about the project in detail.
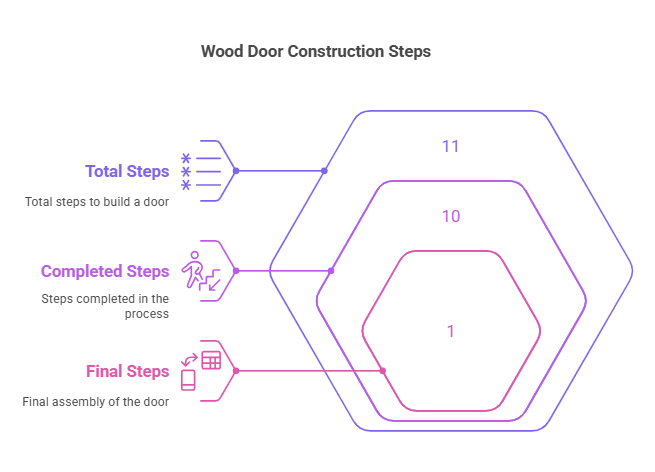
11 Steps To Build A Solid Wood Exterior Door: A Step-by-step Guide
Building a solid wood exterior door is all about having the right tools, following a process, and focusing on details. So you have to be concentrated and have patience during the project because there are a lot of small matters to take care of.
In this section, I will be explaining the process including the tools needed:
Step 1: Slice The Wood Lumber
For the wooden frame of the door, the wood boards or lumbers need to be sliced. You have to cut two wooden planks that are 14” wide and two planks of 9” width. Make all of them 4” thick using the table saw. Use a table saw to cut the lumber into pieces. Note that the height or length of the frame will be decided by the space you have in the entrance. Cut the length with a miter saw.
Now use a planer to smoothen the surface of each plank.
Step 2: Make Mortises And Tenons
When doors are attached by mortises and tenons, they become more stable and structurally strong. This is why I prefer to make mortises and tenons to create the door frame.
To make the mortise, take the long planks that you have cut. Mark three points across the thickness; a midpoint and two side points. At these points, use a table saw drill to make square holes that are half-inch thick and 2 ½ inches deep.
Next, you need to make the tenons on both sides of the wide planks that will go horizontally to the frame. The tenons have to be slightly thinner than the mortises for a nice and perfect fit. With a pencil, mark the portion you need to cut. Then use a miter saw, to cut a little across the pencil marks.
Now use a miter to cut the leftover and make the tenon shapes. Two sides of the wood will be sliced to fit exactly at the middle of the door frame. Polish the wood a bit with a saw for a better fit. Note that there will be three such planks that go horizontally: one at the top, one at the bottom, and one above the middle point. If you want, you can make a curved shape across the inside of the upper plank.
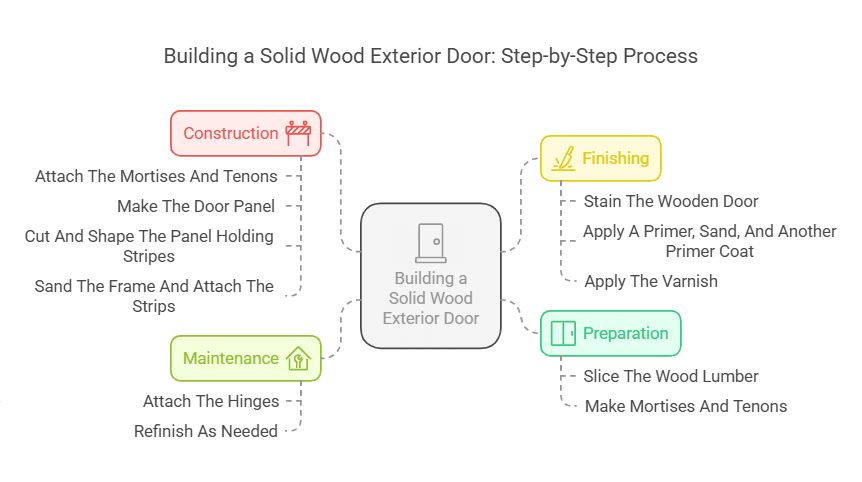
Step 3: Attach The Mortises And Tenons
Now that the mortises and tenons are made, you can install them. Use some glue on the tenons and insert them into the mortises. Press a little for them to adhere well and clamp them. Leave it for 2 to 4 hours for the glue to dry and settle.
Step 4: Make The Door Panel
The area between the horizontal frame planks is filled up with panels. To make the panels, cut the panels and glue them together. But make sure that the seams are not visible.
Now measure the area of the panel by measuring the inner part of the door frame. One panel will be longer than the other. Now that you measured the length and width, cut the panels with the table saw accordingly. Place it inside the door panel once to check the fit.
To make the molding across the edges of the panels, use a milling cutter to cut and polish the edges.
Step 5: Cut And Shape The Panel Holding Stripes
Cut 4 thin wooden strips with the table saw for each panel. The length will be according to the length and width of the panel. After you cut the thin strips, you have to shape them to fit around the panel. Make the top of the strips round by using a router.
But how would you fit the strips around the panel? To do so, make a rabbet with the table saw that would fit right with the panel edge. Half of the thickness is cut off from the strip to fit the panel but the rounded design should stay intact. Now sand the strips to give a polished and sturdy look.
In the end, cut the edges of the strips at a 45-degree angle so that they can be placed beside each other perfectly.
Step 6: Sand The Frame And Attach The Strips
Just as you have polished the strips, you need to sand the door frame to give a smooth finish. So sand the door frame and then move to attach the strips.
Attach each strip to the door frame using glue and brad nails. Note that you have attached the strips in the front part of the frame. The backside of the door is still left.
Step 7: Install The Panels And Strips
Next, glue the panels to the door frame carefully. Make sure that they are not tilted and straight inside the door frame.
After that, install the strips on the backside of the door. Now the panel is secured from both sides as the strips have kind of locked the panel inside the frame.
So basically the door has been made! Wow! But hey, you need to do a lot more to make it presentable and usable. So okay, take a rest for a while as you have done the main task; made an entire door!
Step 8: Stain The Wooden Door
Before staining the door, sand the surfaces well to ensure that the stain is absorbed well. After sanding, wear a mask and hand gloves to be safe.
With a rag, apply an oil-based stain on the wooden door. Be slow and steady and make sure that the stain is polished to every inch of the door. Let it dry and settle for an hour.
Step 9: Apply A Primer, Sand, And Another Primer Coat
To allow the stain to settle, spray a polyurethane primer coat on the wooden door. Then you need to sand it very well for a smooth finish on the wooden door.
With hand sandpaper, sand the entire wooden door. Next, apply a second coat of polyurethane primer on the door.
Step 10: Apply The Varnish
Depending on the finish you want, choose a polyurethane varnish. The varnish should match the primer you have used. So, buy the primer and varnish from the same seller so that he can suggest you the right match.
On the primer, spray the varnish on the door. Let the varnish dry for one to two days. After it dries, you will get a shiny and tiptop finish on the door.
Step 11: Attach The Hinges
You should attach at least three hinges to the side of the door. Choose a middle point and two other points at two ends of the door. But to place the hinges, use the router to make a hole of about 2 mm for the hinges to attach. With a chisel, make the space precise.
Now screw down the hinges to the door!
Next comes the installation of the door which I am not going to describe here. Because hey, our project is done! We have made the solid wood exterior door successfully!
Maintaining A Solid Wood Exterior Door: Know How To Refinish
After you make and install the door, it starts adjusting to the climate and bears a lot of situations. Starting from high moisture to cold weather, the exterior wooden door adjusts to a lot of situations. On top of that, termites and fungus can attack the wood too. This is why refinishing the wooden door is mandatory.
Refinishing the wood keeps the wood solid and sturdy for a long time. Also, the minor damages and holes can be cured by refinishing. It increases the longevity of the door and makes it look brighter.
Here are four steps of maintaining a solid wood exterior door by refinishing:
- Remove the hinges and screws and store them safely. Remove the doorknob too and the other hardware materials;
- Use very mild soap and water and clean the door. With a rag, scrub the door gently and rinse it with water. Then wipe it with a towel and let it dry completely;
- With a stripper, remove the old finish from the door. Next, use medium-grit sandpaper and sand down the door very well. This removes the damaged and fragile layers from the door. Now wipe away the dust from the door with a towel;
- Now if you see any dents or holes, use a wood filler to cure these areas. Then sand the area to make it plain and smooth;
- In the end, apply the primer you have used before, sand the surface, and reapply the primer. Next, spray varnish of your choice to bring back the glossy look of the door;
That is how you should refinish the door once in 3 to 5 years to make it look stunning and long-lasting.
Related Questions:
How Long Does A Solid Wood Exterior Door Last?
The longevity of a solid wood exterior door depends on the wood you have chosen and how frequently you refinish it. Now if you maintain it properly, a solid wooden door can last between 25 to 50 years.
Refinishing after 3 to 5 years will suffice in that case. However, in extreme conditions, it may not survive for as long as 30 years. In that case, high maintenance is mandatory.
Why Do Solid Wood Exterior Doors Crack?
Exterior wooden doors are prone to cracking and damage. This happens as it remains exposed to sunlight, rain, snow, etc. Now if it is not UV and moisture protected, the door will shrink and expand due to these changing conditions. When this happens, the wood door cracks and swells. This causes severe damage to the door.
What Type Of Wood Is Used For Exterior Doors?
Solid hardwood is often preferred to make wooden exterior doors. As hardwood is very sturdy and durable, it is the best choice. Usually, oak is used to make exterior doors. Oak is highly durable and strong.
Besides, it has an excellent appearance that adorns your entrance door. You can choose maple and pine as alternatives to oak for making an exterior door.
How Thick Is An Exterior Wood Door?
The thickness of the exterior wood door often depends on the height and width of the door. Now if the door is 3 to 4 feet wide and 7 to 8 feet long, the ideal thickness for the door is 1 ¾ inches. This is the standard thickness for the standard wooden exterior doors.
Do Exterior Doors Need To Be Solid Core?
Yes, exterior doors should have solid and compact cores. Unlike interior doors, exterior doors are more exposed to sunlight, moisture, termites, and many other conditions.
Now if the core is hollow, these problems can harm the door easily. But if the core is thick and hard, it can defend the external conditions and prevent damages. This is why exterior doors need to be solid core.
How Much Does A Solid Wood Door Cost?
If you decide to buy a solid wooden door instead of making one, you should know the price range. The range is vast and can start at $70 and go up to $600. On average, you can get a solid core exterior door for between $200 to $500. More expensive and cheaper options are available too.
Is Fir A Good Wood For Exterior Doors?
Firwood can be shaped easily and is very cost-effective. It has a very plain appearance which looks classic and beautiful. Considering all these factors, fir is considered a fairly good option to make exterior doors. Though not the best, fir is quite a reasonable option to make exterior doors.
Final Thoughts:
Now you have a concrete idea of how to make a solid wood exterior door. Besides that, I have included some information that will help you to maintain the door. So if you are determined to make your house exterior door by yourself, why don’t you start preparing?
Follow the steps mentioned above and start making a new exterior door for your house.