How to Attach Plexiglass to Wood Without Cracking It
Plexiglass cracks when it’s attached to wood the same way glass or plywood would be. Acrylic expands and contracts with temperature far more than wood does – roughly eight times more across a typical seasonal swing – so a screw driven into a snug, glass-style hole eventually splits the panel as it moves. The fix is simple once you know it: oversized pilot holes, standoff spacers, or an acrylic-safe adhesive instead of a rigid, flush-mounted screw. Below are the three methods that actually hold up, plus the specific hole sizes and adhesive types that prevent the crack in the first place.
3 Ways to Attach Plexiglass to Wood
Every reliable way to attach plexiglass to wood does one thing in common: it leaves the acrylic room to move. The three methods below differ in how they create that room – through an oversized hole, a physical spacer, or a flexible adhesive layer – but skipping that step is what leads to the hairline cracks and clouded glue lines you’ve probably seen on a badly mounted panel.
Best For Standoff Mounting
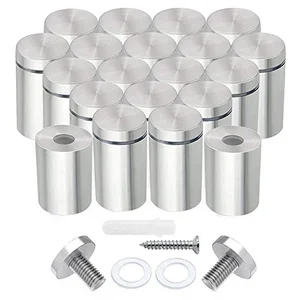 |
Stainless Steel Standoff Screws (20-Pack) – $9.99 Holds a plexiglass panel a half-inch off the wood so it can expand and contract freely – no cracking, no flush-mount stress.
|
Tools and Materials You’ll Need
Whichever method you pick, gather these before you start so you’re not stopping mid-project to find the right bit:
- A cordless drill with a variable-speed trigger (slow speed matters more than power here)
- Drill bits 1.5-2x your screw’s shank diameter, plus a smaller pilot bit for the wood side
- Painter’s tape to cover the drilling area and reduce chipping on the acrylic surface
- Washers sized to your screws (for Method 1), or a standoff kit (for Method 2), or acrylic-safe adhesive/tape (for Method 3)
- A clamp to hold the panel still while drilling – never hand-hold plexiglass under a spinning bit
Method 1: Screws With Oversized Holes
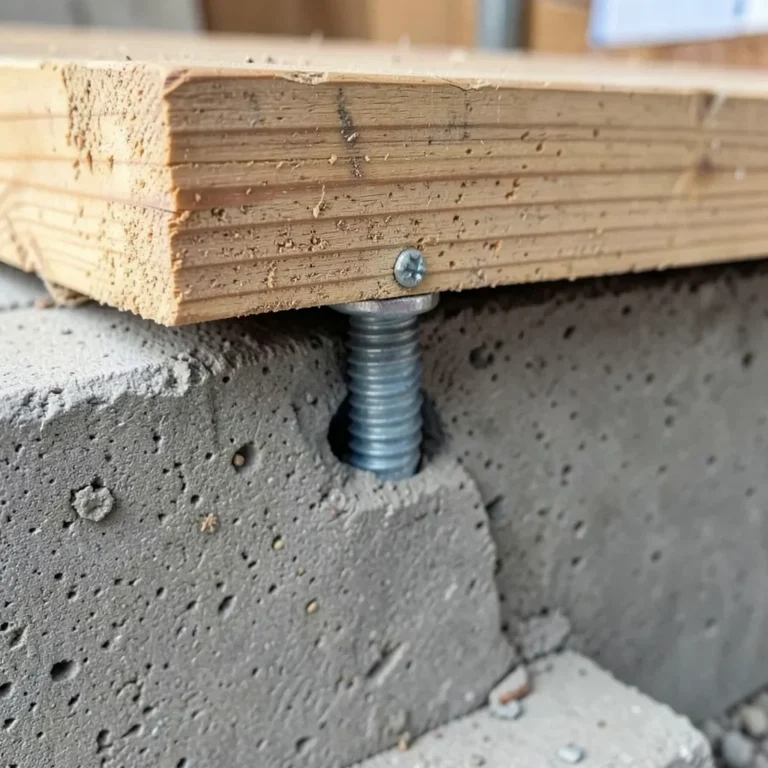
This is the strongest and most adjustable option, and it’s the one most people default to because it’s how you’d mount a piece of plywood. The difference with acrylic is the hole size. Measure your screw’s shank diameter, then drill the hole in the plexiglass 1.5 to 2 times that width – for a standard #8 wood screw (about 4mm), that means a 6-7mm bit, not a 4mm one. Use a slower drill speed than you would for wood, and back the bit out every few seconds to clear the shavings instead of pushing straight through, which is what chips the hole’s edge and starts a crack before you’ve even mounted the panel. See our wood screw sizing chart if you’re not sure which shank diameter you’re working with.
Once the hole is drilled, drop a washer under the screw head before driving it in, and stop turning as soon as the washer contacts the acrylic – don’t snug it down the way you would on wood. The panel should still be able to slide a fraction of a millimeter under the washer. If you’re drilling through acrylic for the first time, our guide on drilling through acrylic without cracking it covers bit selection and speed in more depth.
Method 2: Standoff Mounts for a Floating Look
Standoffs – short metal spacers that thread onto a screw – hold the plexiglass a fixed distance off the wood instead of pulling it flush against the surface. That gap does two things: it gives the acrylic room to expand without ever contacting the wood, and it gives the finished piece a clean, professional “floating” look that a flush-mounted screw can’t match. This is the standard hardware for signage and display panels for exactly that reason.
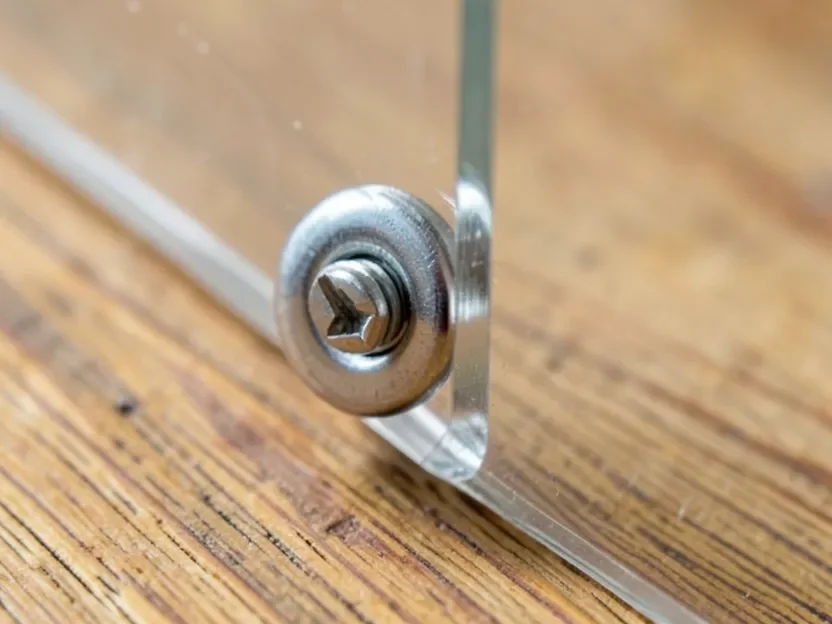
Installation follows the same oversized-hole rule as Method 1 – drill the plexiglass hole larger than the standoff’s screw post, not a tight fit – then thread the standoff into the wood first and finish by threading the cap over the acrylic. Most kits include wall anchors if you’re mounting into drywall instead of a solid wood backer.
Method 3: Adhesive or Mounting Tape (No Drilling)
If you’d rather not drill at all, a bead of 100% silicone adhesive or a strip of acrylic-rated double-sided foam tape will hold small to mid-size panels without any hardware showing. Both stay flexible after curing, which is what lets them absorb the acrylic’s movement instead of fighting it. What you want to avoid is cyanoacrylate – standard super glue – which cures rock-hard and can craze (create a network of fine white stress cracks) right where it touches the acrylic, and generic epoxy runs the same risk unless it’s specifically labeled acrylic-safe. We cover adhesive selection and clamp time in full in our dedicated guide to gluing plexiglass to wood, and if you want a complete screw-free walkthrough, see how to attach plexiglass to wood without screws.
Why Plexiglass Cracks When You Mount It Like Wood or Glass
Acrylic’s coefficient of thermal expansion is roughly 70-80 millionths of an inch per inch per degree Fahrenheit, compared to about 3-5 for wood along the grain – meaning a 24-inch acrylic panel can grow or shrink close to 1/8 inch across a normal seasonal temperature swing, while the wood backing it barely moves at all. Glass, by contrast, expands so little it’s usually ignored. That mismatch is the entire reason plexiglass needs different hardware than either material: a hole or glue line sized for glass or wood gives the acrylic nowhere to go, so the stress concentrates at the fastener or the glue joint until the panel cracks, often weeks or months after installation rather than immediately.
Which Method Should You Use?
- Picture frames and small display panels: screws with oversized holes, or silicone adhesive if the frame rabbet hides the edge
- Signs and wall-mounted panels: standoff mounts, for both the expansion gap and the finished look
- Cabinet doors or furniture inserts: screws with oversized holes and washers, since these panels get handled and need real mechanical strength
- Protective barriers or sneeze guards: double-sided mounting tape or silicone for a screw-free, gap-free seal along the base
Mistakes That Crack Plexiglass During Mounting
- Drilling a snug hole. The single most common cause – size the hole 1.5 to 2 times the screw diameter, not a tight fit.
- Tightening the screw flush. Leave the panel able to slide slightly under the washer; don’t clamp it down the way you would on wood.
- Using super glue or general-purpose epoxy. Both can craze the acrylic’s surface. Stick with 100% silicone or an adhesive labeled acrylic-safe.
- Drilling too fast. High speed and heavy pressure heat and chip the hole’s edge, which is where cracks start under load.
- Skipping the washer. A washer spreads the screw head’s pressure across more surface area instead of concentrating it at one point.
FAQ
How Do You Attach Plexiglass to Wood?
Drill an oversized pilot hole through the plexiglass (about 1.5 to 2 times the screw’s diameter), then drive the screw through that hole into the wood, leaving a small gap under the screw head instead of tightening it flush. Alternatively, use standoff spacers to hold the panel off the wood entirely, or bond it with double-sided mounting tape or 100% silicone adhesive if you don’t want to drill at all.
Can You Screw Plexiglass to Wood Without Cracking It?
Yes, as long as the hole in the plexiglass is oversized rather than a snug fit for the screw shank. Acrylic expands and contracts with temperature far more than the wood or the screw does, so a tight hole leaves no room for that movement and the panel eventually cracks radiating out from the screw. Use a washer under the screw head and stop tightening while the panel can still slide slightly.
What’s the Best Adhesive for Plexiglass to Wood?
100% silicone adhesive or acrylic-compatible double-sided foam mounting tape both work well because they stay flexible and absorb the panel’s movement. Avoid cyanoacrylate (super glue) – it cures too rigidly and can craze or cloud the acrylic’s surface where it contacts the glue, and standard epoxy can do the same if it isn’t formulated for acrylic.
Do You Need to Pre-Drill Plexiglass Before Screwing It to Wood?
Yes. Drilling directly with a screw’s self-tapping threads (or using a hole that matches the screw shank exactly) is the single most common cause of cracked acrylic in this kind of project. Pre-drill with a bit sized 1.5 to 2 times the screw diameter, using a slower drill speed and steady, light pressure so the bit doesn’t grab and chip the edge of the hole.
Final Thoughts
All three methods above hold up long-term as long as the acrylic has room to move – that’s the one rule underneath all of them. Pick screws with oversized holes for the strongest hold, standoffs for a display-ready look, or acrylic-safe tape and silicone when you want the mounting hardware to disappear entirely.
Sponsored / affiliate links. As an Amazon Associate I earn from qualifying purchases. I may earn additional commission from eligible campaigns.