
How to Bevel Wood: 4 Tools Compared (Table Saw to Hand Plane)
A wood bevel angles an edge away from 90 degrees — usually 30 or 45 degrees — and can be cut with a table saw, hand plane, router, or belt sander. Tilting the blade toward the fence instead of away from it is the most common table saw setup mistake, and it risks kickback. This guide compares all four bevel methods, covers the safe table saw fence setup, and explains how a bevel differs from a chamfer or miter.
What Tools Do You Need to Bevel Wood?
Beveling wood just means cutting an angled edge instead of a square one, and several tools can do it — see our full woodworking tools and saws guide for a broader rundown of each one. Pick based on the length of the cut, how much material needs to come off, and whether you need a repeatable, exact angle.
- Table saw — best for long, straight bevel rips along a board’s length
- Hand plane or chisel — best for small pieces, one-off work, or fine control
- Router with a chamfer/bevel bit — best for decorative edges and repeatable depth
- Miter saw or circular saw — best for bevel cuts across the end of a board
- Dremel or rotary tool — best for tight curves and detail work
- Belt sander or angle grinder — best for rough bevels on reclaimed or rough-sawn lumber

Best Bevel-Marking Pick
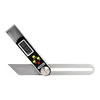
General Tools Digital T-Bevel Gauge & Protractor
Transfers and reads any bevel angle with a digital readout, so you can match the same angle across a table saw, router, or hand plane setup.
- Best for: matching one bevel angle across multiple tools on the same project
- Why we picked it: works with every method in this guide, not just one tool
- Main drawback: digital display needs a battery and can be overkill for a single 45-degree cut
Compare more bevel-cutting tool options
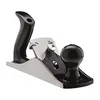 Option 1 Amazon Basics No.4 Bench Hand Plane
|
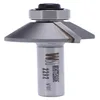 Option 2 Whiteside 45° Chamfer/Bevel Router Bit
|
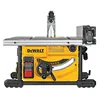 Option 3 DEWALT DWE7485 Compact Jobsite Table Saw
|
As an Amazon Associate we earn from qualifying purchases.
How to Bevel Wood With a Table Saw
A table saw is the fastest way to bevel a long, straight edge. Tilt the arbor to your marked angle — commonly 30 or 45 degrees — using the saw’s angle scale, then make a test cut on scrap before cutting the real workpiece.
- Set the angle: loosen the bevel lock and tilt the blade to the marked angle using the saw’s scale.
- Position the fence: on a right-tilt saw, move the fence to the left of the blade; on a left-tilt saw, keep it to the right — so the blade always tilts away from the fence.
- Use a splitter or riving knife: keep it engaged so the kerf stays open and the blade doesn’t bind.
- Feed with a push stick: guide the board through at a steady pace, keeping your hands well clear of the blade.
- Check the cut: confirm the angle against your gauge before running the rest of the boards.
📊 Positioning the fence so the blade tilts away from it — not toward it — keeps the workpiece from binding under a tilted blade during a bevel rip. — Source: Woodworkers Journal, bevel-ripping safety guidance

How to Bevel Wood by Hand (Chisel, Hand Plane, or Handsaw)
Hand tools give you full control on small pieces or when a shop has no power tools available. A chisel or hand plane works for edge bevels; a handsaw (or coping saw) works for beveling the end of a narrow board.
- Mark your angle with a T-bevel gauge or protractor — 45 degrees is the standard starting point.
- Draw a pencil line along the length of the edge as your cutting guide.
- With a chisel, remove material in thin, controlled passes, checking the angle often.
- With a hand plane, take light, even strokes along the full length of the edge for a smoother result than a chisel alone.
- For an end bevel, clamp the board and saw just outside the marked line, then true up the angle with a plane or sandpaper block.
How to Bevel Wood With a Router
A chamfer bit is a router bit ground at a fixed angle — usually 45 degrees — that cuts a consistent beveled edge in a single pass. It’s the fastest way to get a repeatable bevel on multiple boards, but it only cuts the one angle it’s ground for.
Clamp the workpiece firmly, set the bit depth to control how much of the edge is removed, and guide the router steadily along the edge. Make a pass on scrap first to confirm the depth and angle before cutting your final piece.
How to Bevel Wood With a Circular Saw or Miter Saw
Both tools tilt the blade the same way a table saw does, just for shorter or crosscut work. On a circular saw, loosen the bevel adjustment, tilt the shoe to the marked angle, and clamp a straightedge as a cutting guide.
On a compound miter saw, loosen the bevel adjustment nut, pivot the blade to the marked angle, tighten it, then hold the board firmly against the fence and align the cut line with the blade before cutting. A dual-bevel compound miter saw lets you tilt in either direction without flipping the board, which speeds up repeat cuts.
How to Bevel Wood With a Dremel or Rotary Tool
A rotary tool like a Dremel is best for small pieces, tight curves, or detail work a router can’t reach. Fit it with a straight or angled cutting bit, mark your angle, and guide the tool slowly along the line in light passes. For rougher work — reclaimed lumber or a rough-sawn edge that doesn’t need a precise finish — an angle grinder with a flap disc removes material quickly, though it’s harder to control than a router or Dremel.
Tool Comparison: Table Saw vs. Hand Plane vs. Router vs. Sander
Each tool trades off precision, speed, and the size of job it suits best. Use this table to pick the right one for your project.
| Tool | Precision | Speed | Best For |
|---|---|---|---|
| Table Saw | High — angle locks on the scale | Fast | Long, straight bevel rips on boards and panels |
| Hand Plane / Chisel | Medium — depends on skill | Slow | Small pieces, one-off or delicate work |
| Router (chamfer bit) | High — fixed bit angle, consistent depth | Medium | Decorative edges, repeatable production runs |
| Belt Sander / Angle Grinder | Low — mostly freehand | Fast material removal | Rough bevels, touch-ups, reclaimed lumber |

Bevel vs. Chamfer vs. Miter: What’s the Difference?
A bevel is an angled edge that can be cut at any angle and typically runs the full length or thickness of the board’s edge. A chamfer is a smaller, fixed 45-degree cut that just breaks a sharp corner — mainly for safety and to prevent chipping, not to reshape the whole edge. A miter angles a cut across the face of the board instead of the edge, most often used to join two pieces at a corner. If your project needs a corner-break instead of a full edge angle, see our guide to cutting wood at an angle for other angled-cut techniques.

Common Bevel Angles and When to Use Them
- 30 degrees — shallow decorative edges and some picture-frame or trim details
- 45 degrees — the most common bevel angle, used for tabletop edges, mitered box joints, and most trim work
- Custom or steeper angles — structural or design-specific joints, set on a table saw, miter saw, or router jig’s angle scale
Common Mistakes When Beveling Wood
- Tilting the table saw blade toward the fence instead of away from it, which traps the offcut and raises kickback risk
- Skipping a test cut on scrap before cutting the final workpiece
- Not clamping the workpiece securely for hand or router bevels, which causes tear-out
- Using a dull blade or bit, which burns the wood and leaves a rough, chattery edge
- Not accounting for the extra material a bevel removes compared to a chamfer when planning how two pieces will fit together
Frequently Asked Questions
What is a bevel cut?
A bevel cut changes the angle between a board’s face and its edge from the standard 90 degrees to any other angle, commonly 30 or 45 degrees. Unlike a miter, which angles a cut across the face of the board, a bevel angles the edge itself. Bevels are used for decorative trim, tabletop edges, and joints that need a sloped surface.
What’s the difference between a bevel and a chamfer?
A chamfer is a small, fixed 45-degree cut that breaks a sharp corner without reshaping the full edge, mainly for safety and to prevent chipping. A bevel can be cut at any angle and typically runs the full length or thickness of the edge, changing its overall profile rather than just softening a corner.
What’s the difference between a bevel and a miter cut?
A miter cut angles across the face of a board, most often used to join two pieces at a corner, like picture frame corners. A bevel angles the edge of the board instead of the face. Many compound miter saws can make both cuts at once, which is called a compound cut.
What angle should I use to bevel wood?
Most beveled edges use either 30 or 45 degrees, since these angles suit standard trim, tabletop edges, and mitered corner joints. A 45-degree bevel is the default starting point for most projects unless a specific joint or design calls for a steeper or shallower angle.
Is it safer to bevel-rip on a left-tilt or right-tilt table saw?
Either works as long as the fence is positioned so the blade tilts away from it: fence to the left of the blade on a right-tilt saw, fence to the right on a left-tilt saw. This keeps the workpiece from getting trapped under the spinning blade, which reduces kickback risk during a bevel rip cut.
Can you bevel wood without a table saw?
Yes. A hand plane or chisel can cut a clean bevel without any power tools — mark the angle first, then remove material in light, even passes. A router with a chamfer bit or a rotary tool like a Dremel also works well for smaller pieces or detail work.
Conclusion
A table saw is the fastest way to bevel a long, straight edge, a router with a chamfer bit gives the most repeatable decorative bevel, and a hand plane or chisel gets the job done with no power tools at all. Whichever tool you choose, mark your angle first, make a test cut on scrap, and keep the blade tilting away from the fence on a table saw to avoid kickback. Beveling is one of the simpler edge treatments in woodworking once the angle and tool are set correctly.