How to Build Wood Gates: Expert Tips and Tricks
To build wood gates, measure the opening, choose the wood type, design the gate, and assemble it. Building wood gates requires careful measurement, selection of appropriate materials, and skilled craftsmanship.
Whether for a garden entrance or a driveway, sturdy wood gates can enhance the aesthetics and security of the property. With the right tools and a step-by-step plan, constructing a wooden gate can be a rewarding DIY project. This article will provide a comprehensive guide on how to build wood gates.
From selecting the right lumber to installing the gate hardware, this guide will cover every aspect of the construction process. By following these instructions, you can create a custom wood gate that complements your property and serves its purpose effectively.
Choosing The Right Wood
Choosing the right wood is crucial when building a wood gate. The type of wood you select will impact the gate’s durability, appearance, and environmental impact. Consider these important factors before making your decision.
Durable Vs. Aesthetic Wood Types
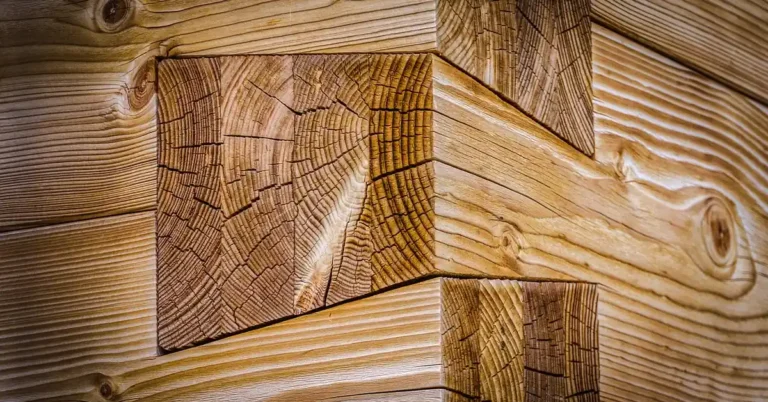
When selecting wood for your gate, it’s important to balance durability with aesthetic appeal. Some woods, such as cedar and redwood, are renowned for their natural resistance to rot and insects, making them ideal for outdoor structures like gates. On the other hand, woods like pine and fir offer a charming, rustic look but may require more maintenance to ensure longevity. Consider the climate and use of the gate when choosing between durable and aesthetic wood types.
Sustainability Considerations
Sustainability is a significant consideration when choosing wood for your gate. Look for wood that is sourced from sustainably managed forests or is certified by organizations such as the Forest Stewardship Council (FSC). This ensures that the wood is harvested in an environmentally responsible manner, promoting forest conservation and biodiversity. Be mindful of the environmental impact of your wood choice and opt for sustainable options whenever possible.
Designing Your Wood Gate
When it comes to designing your wood gate, there are various factors to consider that will contribute to the functionality and aesthetic appeal of your gate. Whether you prefer a traditional or modern style, it’s essential to customize your wood gate to suit your landscape and security needs.
Traditional Vs. Modern Styles
Traditional wood gates exude a classic charm with their intricate designs and timeless appeal. They are often characterized by sturdy vertical pickets or decorative lattice panels, creating a welcoming and warm addition to your property. On the other hand, modern wood gates embrace minimalism and clean lines, offering a sleek and contemporary look. They can feature geometric shapes, horizontal slats, or even a combination of wood and metal elements, providing a sophisticated entrance that complements modern architecture.
Customizing For Your Landscape
When customizing your wood gate for your landscape, it’s crucial to consider the existing elements in your outdoor space. Adapting the design to match the style of your home, the surrounding vegetation, and the overall ambiance of your property is essential. Coastal residences may benefit from a Nautical theme. For a rustic country setting, a Western or Farmhouse style may be more appropriate. Additionally, incorporating the natural color of the wood or painting it to blend with your surroundings can enhance the gate’s integration into your landscape.

Essential Tools And Materials
Building wood gates requires essential tools and materials to ensure a sturdy and functional final product.
Tools For Precise Measurements
- Tape measure
- Carpenter’s square
- Level
Quality Wood And Hardware
Wood: Choose durable and weather-resistant wood like cedar or redwood.
Hardware: Invest in heavy-duty hinges and secure latches for longevity.
Preparing Your Workspace
To successfully build wood gates, it is crucial to start with a clean and organized workspace. Proper preparation ensures safety, efficiency, and accuracy throughout the project. By setting up a safe work area and organizing your materials, you can minimize distractions and maximize productivity. Let’s dive into the essential steps you need to take before you embark on your wood gate building journey.
Setting Up A Safe Work Area
Creating a safe work area is paramount when working with tools and heavy materials. By taking the necessary precautions, you can prevent accidents and ensure a smooth building process. Here are some key steps to follow:
- Clear the work area of any obstructions or debris to create a clutter-free space.
- Securely fasten your workbench or table, ensuring stability during operation.
- Inspect and organize your tools, making sure they are in good working condition and easily accessible.
- Wear appropriate safety gear, including goggles, gloves, and ear protection, to safeguard yourself from potential hazards.
Organizing Materials
Organizing your materials is essential to maintain an efficient workflow and avoid unnecessary delays. Here’s how you can effectively manage your wood and other supplies:
- Arrange your wood boards in a neat stack, separated by size and type.
- Gather and organize all necessary hardware, such as hinges, screws, and latches, in labeled containers.
- Prepare your measurements and plans in advance, keeping them easily accessible for quick reference.
- Label any additional materials or equipment to ensure they are readily available when needed.
By setting up a safe work area and organizing your materials, you can optimize your wood gate building process and minimize the risk of accidents or errors. With the groundwork now complete, you’re ready to move on to the next steps in constructing your wood gate.
Constructing The Gate Frame
To construct a strong and durable wood gate, the first step is to carefully build the gate frame. This involves measuring and cutting the appropriate pieces of wood, and securely fastening them together to create a sturdy structure.
Building A Solid Frame Structure
Constructing a strong and sturdy gate frame is crucial for ensuring the durability and functionality of your wood gate. By following the steps outlined below, you can build a solid gate frame that will withstand the test of time.
Ensuring Proper Dimensions
Before you start building the gate frame, it is important to determine the right dimensions to ensure a proper fit. Measure the opening where the gate will be installed, taking into account any allowances for hinges and latch placement. Once you have these measurements, you can proceed with the next steps.
To create the gate frame, you will need vertical and horizontal members. The vertical members, also known as stiles, are the pieces that run along the height of the gate, while the horizontal members, known as rails, run across the width of the gate.
- Start by cutting the stiles to the desired length, making sure they are slightly longer than the gate opening to allow for adjustments during installation.
- Next, cut the rails to the appropriate length, ensuring they are shorter than the stiles to accommodate the width of the stiles.
- Align the stiles and rails on a flat surface, making sure they are square and level. Use clamps or brackets to hold them in place.
- Double-check the dimensions of the gate frame and adjust as necessary before proceeding.
Once you have the frame assembled and the dimensions verified, you can secure the stiles and rails together using wood glue and screws. Be sure to distribute the screws evenly and avoid using screws that are too long, as they may protrude through the other side of the frame.
Properly constructing the gate frame is the foundation for building a functional and long-lasting wood gate. With the right measurements and a solid frame structure, you’re on your way to creating a beautifully crafted gate that will enhance the appearance and security of your property.
Adding Finishing Touches
Learn how to add those essential finishing touches to your wooden gates with these helpful tips to make your project stand out and enhance the overall look. Improve your woodworking skills and create beautiful gates with the perfect final touches.
Installing Decorative Elements
Incorporate stylish elements like metal hinges or arched tops to enhance the gate’s aesthetics.
Choose ornamental designs that complement your existing outdoor decor for a cohesive look.
- Consider adding finials for a touch of elegance.
- Opt for scrollwork or carved details for a unique flair.
- Explore different materials such as wrought iron for a rustic feel.
Applying Protective Sealant
Coat the wood gate with a quality sealant to protect it from harsh weather conditions.
Ensure the gate is dry before applying the sealant to prevent damage.
- Use a brush or sprayer for an even application.
- Apply multiple coats for added durability.
- Choose a UV-resistant sealant to prevent fading.
Installing The Wood Gate
When it comes to installing the wood gate, it’s important to ensure proper alignment and securely place the gate to ensure its functionality and longevity.
Ensuring Proper Alignment
In order to ensure proper alignment of the wood gate, start by measuring and marking the intended location. It’s vital to make sure the posts are positioned at perfect right angles, which is achievable through the use of a level. Double-check the alignment to ensure a precise fit.
Securing The Gate In Place
After ensuring proper alignment, the next step is to secure the gate in place. Using heavy-duty screws or bolts, attach the hinges to the gate and the adjacent post or structure. Make sure to test the swing of the gate to verify smooth functionality. To prevent the gate from sagging over time, consider adding a drop rod or wheel to provide additional support at the bottom.
Maintenance And Troubleshooting
When it comes to building wood gates, maintenance and troubleshooting are crucial aspects that ensure the longevity and functionality of the gate. Regular inspections and addressing common issues are essential to keep the gate in optimal condition.
Regular Inspections And Upkeep
Regular inspections play a vital role in maintaining the quality of wood gates. Inspect the gate for any signs of wear, cracks, or damage. It’s essential to perform routine upkeep, such as applying a fresh coat of paint or sealant to prevent moisture absorption and weathering.
- Inspect for any signs of wear, cracks, or damage
- Apply a fresh coat of paint or sealant for protection
- Check hinges, latches, and bolts for proper functioning
- Ensure the gate is properly aligned and evenly balanced
Addressing Common Issues
Wood gates may encounter common issues that require prompt attention to prevent further damage. Address issues such as sagging, misalignment, or rot. Reinforce sagging areas and replace any rot-infested sections to maintain the gate’s structural integrity.
- Reinforce sagging areas to restore proper alignment
- Replace any sections affected by rot to prevent spreading
- Inspect for pest infestation and take appropriate measures
- Ensure the gate hardware is securely fastened
Frequently Asked Questions For How To Build Wood Gates
How Can I Build A Wood Gate That Is Sturdy And Durable?
To build a sturdy and durable wood gate, start by selecting high-quality lumber. Use strong joinery techniques like mortise and tenon or dowel joints. Be sure to reinforce the gate with diagonal bracing for added strength. Apply a weather-resistant finish to protect against the elements.
What Type Of Wood Is Best For Building Gates?
When it comes to building gates, hardwoods like cedar, redwood, or oak are the best choices. These woods are naturally rot-resistant and can withstand outdoor conditions. They are also strong and durable, making them ideal for gate construction.
How Do I Measure The Correct Size For My Wood Gate?
To determine the correct size for your wood gate, measure the opening it will cover. Leave a small gap for clearance and hinges, usually around 1/2 inch. Take into account the slope of the ground and ensure the gate height is suitable.
Double-check your measurements before starting construction.
Conclusion
To wrap up, building wood gates can enhance your property’s appeal. Remember, proper measurements and materials are key. Emphasize durability and aesthetics. With the steps outlined in this guide, you can create a functional and eye-catching wood gate. Start your project today!