How to Install Wood Wall Planks: A Step-by-Step Guide
To install wood wall planks, measure and mark the wall, apply adhesive to the back of each plank, and press them onto the wall in a staggered pattern. Wood wall planks are a popular and stylish choice for adding warmth and character to any room.
The installation process is relatively straightforward and can be accomplished by following a few simple steps. In this guide, we’ll take you through the process of installing wood wall planks, from measuring and marking the wall to applying adhesive and positioning the planks.
By the end, you’ll have a beautiful, customized wood wall that will transform the look of your space. So let’s dive in and get started on this fun and rewarding DIY project.

Credit: andorwillow.com
Choosing The Right Wall Planks
One of the most important decisions you’ll make when installing wood wall planks is choosing the right type of wood. With so many options available, it’s essential to understand the differences and select the best one for your project. In this guide, we’ll explore how to select the type of wood and calculate the quantity needed for a successful installation.
Selecting The Type Of Wood
When it comes to wood wall planks, there are several factors to consider when selecting the type of wood. Each wood species has its own unique characteristics and aesthetics, so it’s crucial to choose one that aligns with your desired look and feel.
Here are some popular wood species to consider:
- Oak: Known for its durability and beautiful grain patterns, oak is a timeless choice for wood wall planks. It comes in various finishes, shades, and widths, allowing for versatile design possibilities.
- Pine: If you’re looking for a more rustic or farmhouse-style aesthetic, pine could be the right choice. It has a distinct knotty appearance that adds character to any space.
- Walnut: Walnut wood features deep, dark tones that bring a touch of luxury to your walls. It’s known for its rich color and smooth texture, making it a popular choice for elegant interiors.
- Cedar: If you’re looking to incorporate natural wood scent and insect-repellent properties into your space, cedar is an excellent option. It has a warm, reddish hue and is resistant to decay and insect damage.
Consider your personal preferences and the overall style of your room when choosing the type of wood for your wall planks. Don’t hesitate to seek inspiration from interior design magazines or online resources to help you visualize the different wood species in various settings.
Calculating The Quantity Needed
Before making a purchase, it’s crucial to calculate the quantity of wood wall planks required for your project. This ensures that you order the correct amount and minimize any waste or additional costs.
To calculate the quantity needed, follow these steps:
- Measure the height and width of the wall(s) where you plan to install the wood planks.
- Multiply the height and width measurements to find the total square footage.
- Consider adding 10% to 15% to the total square footage to account for any cutting or fitting errors.
- Consult the packaging or product description of the wood planks to determine the coverage per package.
- Divide the total square footage by the coverage per package to calculate the number of packages needed.
By following these steps, you can accurately determine the quantity of wood planks needed for your project, ensuring a seamless installation process without any unexpected shortages.
Now that you know how to choose the right type of wood and calculate the quantity needed, you’re one step closer to transforming your space with beautiful wood wall planks. Stay tuned for our next guide, where we’ll dive into the installation process to help you achieve stunning results.
Preparing The Wall Surface
Preparing the wall surface is an essential step in ensuring a successful installation of wood wall planks. By properly cleaning the wall, measuring and marking the area, you can create a smooth and sturdy foundation for your wood planks. In this section, we will guide you through the necessary steps to prepare the wall surface for installing wood wall planks.
Cleaning The Wall
Before you start installing wood wall planks, it is crucial to clean the wall surface thoroughly. This step will remove any dirt, dust, or grease that may hinder the adhesion of the planks.
To clean the wall surface, follow these simple steps:
- Begin by removing any artwork, pictures, or decorations from the wall.
- Use a vacuum cleaner with a soft brush attachment to remove loose debris.
- Prepare a mild cleaning solution by mixing warm water and a gentle detergent.
- Dampen a clean sponge or cloth in the cleaning solution and wring out any excess moisture.
- Start at the top of the wall and gently wipe the surface in a horizontal motion, working your way down.
- Pay special attention to areas with stains or heavy dirt buildup, and gently scrub if necessary.
- Once you have cleaned the entire wall surface, use a clean, damp cloth to wipe away any residue from the cleaning solution.
- Allow the wall surface to dry completely before proceeding to the next step.
Measuring And Marking
Accurate measurements and marking are crucial for a precise and visually appealing installation of wood wall planks. Before you start installing the planks, follow these steps to ensure the correct measurements and markings:
- Using a measuring tape, measure the length and height of the wall surface where you will be installing the wood planks.
- Mark the center point of the wall horizontally and vertically to serve as a reference point.
- Divide the wall into equal sections, depending on the width of your wood planks.
- Starting from the center point, use a level and a pencil to draw a vertical line to indicate the starting point for your wood planks.
- Continue marking vertical lines at equal intervals along the wall, ensuring that they are parallel to the initial line.
- If your wood planks require horizontal staggering, measure and mark appropriate guidelines to indicate where each row of planks will be placed.
- Confirm all measurements and markings before proceeding to the installation.
By cleaning the wall surface and accurately measuring and marking, you are now ready to move on to the next step: installing the wood wall planks.
Installing The First Row
Installing the first row of wood wall planks is a crucial step in creating a stunning accent wall in your home. This initial row sets the foundation for the entire installation, so it’s essential to get it right. In this section, we’ll cover the key steps for installing the first row of wood wall planks, ensuring a flawless start to your project.
Starting At The Bottom
When installing the first row of wood wall planks, it’s important to begin at the bottom of the wall. This ensures a stable base for the rest of the planks to be stacked upon. Starting at the bottom also allows for easier alignment and more accurate positioning of the planks.
Securing The Planks
Once the first plank is positioned at the bottom of the wall, secure it in place using appropriate adhesive or nails. Ensure that the first plank is level and firmly anchored to the wall. As you proceed with installing the subsequent planks, verify that each one is securely fastened to prevent shifting and maintain a consistent appearance.
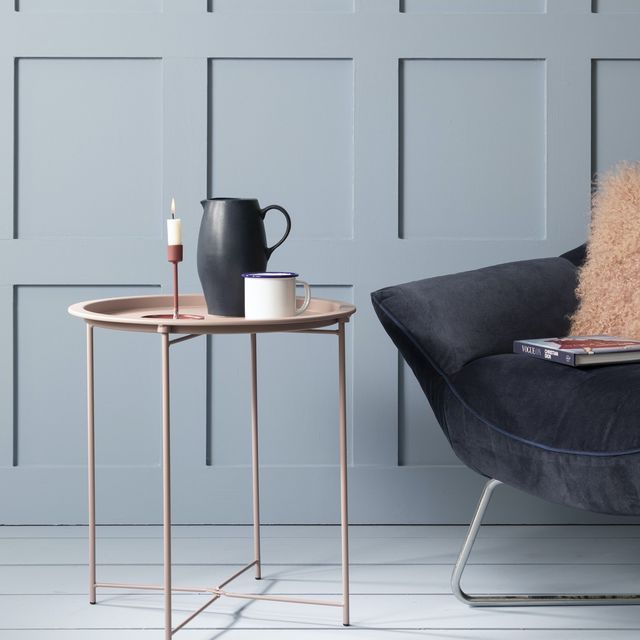
Credit: www.housebeautiful.com
Adding Subsequent Rows
Once you have successfully installed the first row of wood wall planks, it’s time to move on to adding subsequent rows. This process requires attention to detail and precision to ensure a seamless and professional-looking finish. In this section, we will discuss two important aspects of adding subsequent rows: Ensuring Horizontal Alignment and Making Necessary Cuts.
Ensuring Horizontal Alignment
Horizontal alignment is crucial for achieving a visually appealing result when installing wood wall planks. To ensure consistent alignment between rows, follow these steps:
- Start by placing a full-length plank at the beginning of the second row, making sure it aligns with the first row.
- Apply adhesive to the back of the plank, placing it firmly against the wall.
- Using a level, check that the plank is perfectly horizontal. Make any adjustments as necessary.
- Continue adding planks to the second row, following the same procedure to ensure horizontal alignment.
By carefully aligning each plank with the previous row, you will create a uniform and visually pleasing pattern on your wood wall.
Making Necessary Cuts
Inevitably, you will encounter areas where full-length planks won’t fit, such as corners or outlets. To address this, follow these guidelines:
- Using a tape measure, carefully measure the space where a cut is required.
- Transfer those measurements onto a plank, marking the cut line using a pencil or a marker.
- Securely clamp the plank to a stable work surface, ensuring it won’t move during the cutting process.
- With a cutting tool appropriate for wood, such as a miter saw or a circular saw, carefully cut along the marked line.
- Remove any rough edges or splinters using sandpaper or a sanding block.
- Fit the cut plank into place, ensuring it aligns seamlessly with the surrounding planks.
Remember to always prioritize safety when making cuts and follow the manufacturer’s instructions for the specific cutting tool you are using.
By following the steps above and paying close attention to horizontal alignment and making necessary cuts, you will be well on your way to successfully installing wood wall planks. Stay tuned for the next section, where we will discuss finishing touches and how to protect your newly installed wood wall from wear and tear.
Finishing Touches
Finishing touches are crucial when installing wood wall planks to ensure a polished and professional look. These final steps will elevate the overall appearance of your wood wall and provide added protection against wear and tear. In this section, we will cover two essential finishing touches: Filling Nail Holes and Applying Sealant or Finish.
Filling Nail Holes
To achieve a seamless finish, it’s important to fill any visible nail holes. This step is especially important if you’re going for a smooth and uniform appearance. Luckily, filling nail holes is a simple process that can be completed in a few easy steps:
- Begin by selecting a wood filler that matches the color of your wood wall planks. This will help to camouflage the filled holes seamlessly.
- Using a putty knife or a similar tool, apply a small amount of wood filler to each nail hole, ensuring it is level with the surface of the wood.
- Allow the filler to dry completely, as per the instructions provided by the manufacturer.
- Once dry, gently sand the filled areas using fine-grit sandpaper. This will ensure a smooth and flush finish.
- Finally, wipe away any excess dust and debris with a clean cloth, and your filled nail holes will be virtually invisible.
Applying Sealant Or Finish
Applying a sealant or finish not only enhances the beauty of your wood wall planks but also protects them from moisture, scratches, and other potential damages. Here is a straightforward process to apply a sealant or finish:
- Choose a suitable sealant or finish for your wood wall planks. Water-based options are generally recommended for indoor applications.
- Using a paintbrush or a foam brush, apply an even coat of the sealant or finish to the entire surface of the wood, working in the direction of the grain.
- Allow the first coat to dry completely, following the drying time specified on the product label.
- If necessary, apply additional coats of sealant or finish, waiting for each layer to dry before applying the next. This will help to build up a durable protective barrier.
- Once the final coat has dried, inspect the surface for any missed spots or uneven application. Touch up these areas as needed.
Remember, when it comes to finishing touches, taking your time and paying attention to detail will result in a beautiful and long-lasting wood wall installation. By following these steps for filling nail holes and applying sealant or finish, your wood wall planks will be ready to impress!
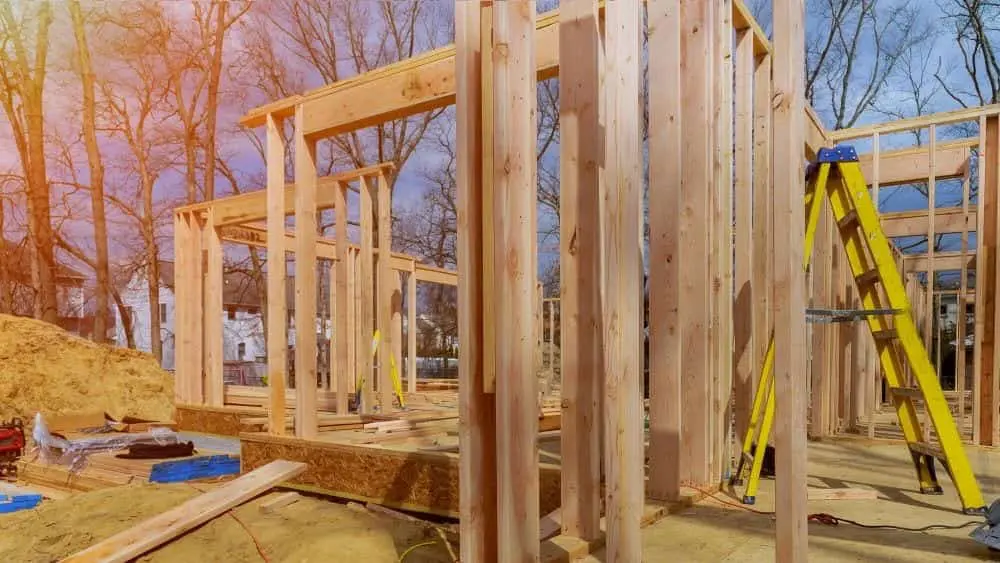
Credit: www.newhomesource.com
Frequently Asked Questions For How To Install Wood Wall Planks
How Do You Install Wood Planks On The Wall?
To install wood planks on the wall, first measure and mark the area. Then, apply adhesive to the back of each plank and firmly press it onto the wall. Use a level to ensure straight alignment. Secure the planks in place with nails or screws for added stability.
How Do You Stick Wood Planks To The Wall?
To stick wood planks to the wall, follow these steps:
1. Clean the wall surface thoroughly.
2. Measure and mark the desired placement of the planks.
3. Apply a strong adhesive or wood glue to the back of each plank.
4. Press the planks firmly onto the wall, ensuring proper alignment.
5. Use nails or screws for extra support, if needed.
How Do You Attach Wood Planks To A Wall Without Nails?
To attach wood planks to a wall without using nails, you can use adhesive, screws, or brackets. Adhesive like construction adhesive or liquid nails can securely bond the planks to the wall. Using screws or brackets can provide additional anchoring support.
How Do You Secure Planks To The Wall?
Secure planks to the wall by using screws or nails for a strong and secure hold. Pre-drilling pilot holes can help prevent splitting the wood. Use a level to ensure the planks are straight and evenly spaced. Consider using wall anchors for extra support if needed.
Conclusion
Installing wood wall planks is an achievable and impactful way to enhance a space. With the right tools and techniques, anyone can transform their walls with ease. Embracing the natural beauty and warmth of wood can bring character and charm to any room.
So, get ready to elevate your home with stunning wood wall planks!