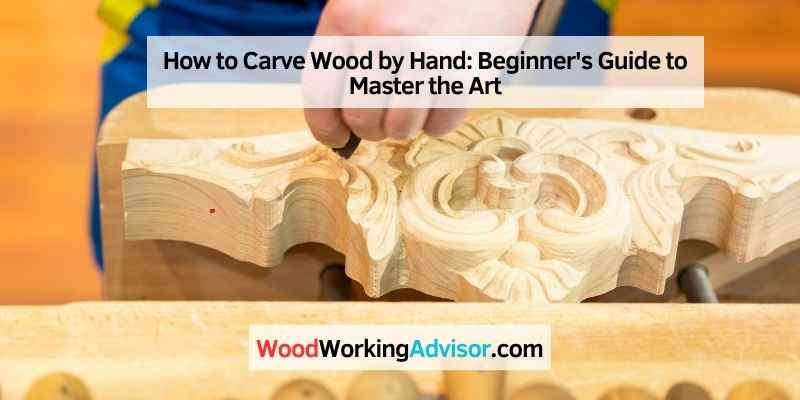
How to Carve Wood by Hand: Beginner’s Guide to Master the Art
To carve wood by hand, start with a bigger piece, work small, and follow the wood’s grain for smooth carving. Choosing the right wood and securing it in a vise are crucial steps in the process.
Using sharp tools and being patient are key to achieving the desired results. Beginners should focus on basic techniques like carving with the grain and making push and pull cuts before advancing to more complex designs. Simple projects such as wooden birds or cats are excellent starting points for those new to wood carving.
With practice and the right tools, anyone can develop their wood carving skills and create beautiful pieces of art.
Choosing The Right Wood And Tools
When it comes to hand carving, selecting the right wood and tools is crucial for a successful and fulfilling carving experience. The choice of wood and tools can greatly impact the outcome of your carving project. Let’s delve into the essential aspects of this decision-making process, exploring how to select the ideal wood for carving and the tools necessary to bring your vision to life.
Selecting The Ideal Wood For Carving
Before you start carving, it’s vital to choose the right type of wood. The ideal wood for carving should be both hard and close-grained, allowing for smooth and precise carving. Some popular choices for hand carving wood include basswood, butternut, and walnut due to their workability and fine finishing properties.
Here is a quick comparison of the characteristics of these wood types:
| Wood Type | Characteristics |
|---|---|
| Basswood | Soft, even grain, easy to work with, ideal for beginners |
| Butternut | Medium hardness, excellent finishing properties |
| Walnut | Hard, rich color, beautiful finish |
Essential Tools For Hand Carving
Equipping yourself with the right tools is essential for achieving precision and detail in your hand carving projects. We’ve compiled a list of the must-have tools:
- Carving Knives – essential for detailed carving and shaping
- Chisels – for making precise cuts and creating intricate designs
- Gouges – perfect for hollowing and shaping curved surfaces
- Mallet – aids in driving chisels and gouges into the wood
- Sharpening Stones – to keep your tools sharp for precise carving
By selecting the right wood and having the essential tools at your disposal, you’ll be well on your way to creating beautiful hand-carved masterpieces. Start carving and unleash your creativity!
Preparing The Work Surface
Before delving into the intricate art of hand wood carving, it is essential to prepare the work surface to ensure a smooth and efficient carving process. Proper preparation not only enhances the quality of your carving but also ensures safety.
Securing Wood In A Vise
- Choose a sturdy vise that can securely hold the wood in place.
- Position the wood in the vise with a firm grip to prevent any unwanted movement.
- Ensure the vise is tightened adequately to provide stability during carving.
Sharpening And Maintaining Carving Tools
- Regularly sharpen your carving tools using a sharpening stone or honing guide.
- Check for any nicks or dull edges that may affect the carving process.
- Proper maintenance of tools prolongs their lifespan and ensures precise cuts.
Basic Wood Carving Techniques
Wood carving is a beautiful art form that allows individuals to create intricate designs using just a few basic tools and their own creativity. Whether you are a beginner or an experienced woodworker, understanding the basic wood carving techniques is essential to master this craft. In this article, we will explore some fundamental techniques that will help you carve wood by hand with ease.
Understanding Wood Grain
Before you can start carving wood, it is crucial to have a good understanding of the grain. The grain refers to the direction in which the wood fibers run. By carving along the grain, you will be able to achieve smoother cuts and avoid tearing the wood. To determine the direction of the grain, closely examine the wood and look for the parallel lines or patterns.
Making Push And Pull Cuts
When it comes to carving wood, there are two primary types of cuts: push cuts and pull cuts. Push cuts involve applying pressure towards you while pushing the carving tool away from your body. On the other hand, pull cuts require pulling the tool towards you while applying pressure away from your body. Both cuts serve different purposes and can be used interchangeably to create different textures and shapes in your wood carving.
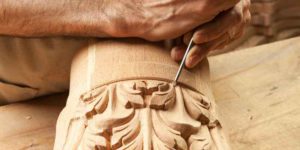
Creating Lines With V-gouge
The V-gouge is a versatile carving tool that allows you to create precise lines and details in your wood carving. It has a V-shaped cutting edge that can be used to make deep or shallow cuts, depending on the pressure applied. To create a line, position the V-gouge at the desired starting point and gently push or pull the tool along the wood, following the desired line. Experiment with different angles and depths to achieve different effects in your carving.
Carving In The Round
Carving in the round involves creating three-dimensional sculptures by removing wood from all sides. It allows you to create depth and dimension in your wood carving projects. Start by roughing out the basic shape using larger tools, then gradually refine the details using smaller tools. Remember to constantly rotate and view your work from different angles to ensure a balanced and proportioned carving.
Step-by-step Beginner Projects
Are you a beginner woodcarver looking to dive into the world of hand carving? If so, you’re in the right place! In this step-by-step guide, we’ll introduce you to some beginner-friendly wood carving projects that will help you develop your skills and create beautiful wooden masterpieces.
Wooden Bird Carving
One of the easiest things to carve from wood is a charming little bird. Start by choosing a softwood such as basswood or pine, which are perfect for beginners due to their ease of carving. Begin by sketching the bird’s outline and then slowly start removing the excess wood with gouges and knives, creating the shape of the bird. Pay attention to the grain as you carve, working with it to achieve smooth and precise cuts. Once you’ve finished carving, you can add intricate details with finer tools and finish with sandpaper, giving your wooden bird a lovely polished look.
Sleek Wooden Cat Sculpture
If you’re looking to challenge yourself a bit more, why not try carving a sleek wooden cat sculpture? This project will require a bit more precision and attention to detail. Begin by selecting a hardwood such as cherry or oak, which will give your cat sculpture a beautiful finish.
Start by roughing out the shape of the cat and then gradually refine it, paying close attention to the curves and proportions. As you refine the details, carve the facial features and add texture to the fur, bringing your wooden cat to life. After sanding and finishing, you’ll have an elegant wooden cat sculpture to proudly display.
Whittling A Golden Fish
Whittling is a popular wood carving technique that involves shaping and carving wood with just a knife. For beginners, a fun and relatively simple whittling project is carving a golden fish. Begin by selecting a piece of softwood such as basswood or butternut. Start by carving the basic shape of the fish, and then gradually add the details such as the fins, scales, and facial features.
The key here is to take your time and carve slowly, paying attention to the knife’s direction and working with the wood’s grain. Once you’re finished carving, you can paint your fish with golden hues, giving it a shimmering appearance.
Carving A Penguin Or Elephant
If you’re up for a challenge, you can try your hand at carving a penguin or elephant. These projects will require more intricate detailing and precision. Begin by selecting a dense hardwood like mahogany or walnut, as they hold intricate details well.
Start by roughing out the basic shape of the animal, and then gradually carve the body and limbs, paying close attention to achieving realistic proportions. Add texture to the skin or feathers, carve out the features like the eyes and beak, and bring the animal to life with your creative touches. Don’t forget to sand and finish your masterpiece for a polished look.
Advanced Wood Carving Patterns
Wood carving is an ancient craft that allows artists to express their creativity and skill through intricate designs and patterns. Advanced wood carving patterns require patience, precision, and a deep understanding of wood grain and carving techniques. Let’s delve into the world of advanced wood carving patterns and explore the techniques and templates that will elevate your carving skills to the next level.
Exploring Intricate Whittling Templates
Whittling templates are a fantastic starting point for woodcarvers looking to venture into more intricate designs. These templates provide a blueprint for creating detailed figures, ornaments, and patterns. The intricate nature of whittling templates requires steady hands and a keen eye for detail. From delicate floral motifs to ornate animal figures, whittling templates offer a wide array of designs to challenge and inspire woodcarvers.
Progressing To Complex Wood Carving Designs
As woodcarvers gain confidence and mastery in using whittling templates, they can progress to more complex wood carving designs. These designs encompass a diverse range of themes, including traditional motifs, mythical creatures, and intricate geometric patterns. Mastering complex wood carving designs involves a deep understanding of wood grain, advanced carving tools, and the ability to bring imagination to life through the medium of wood.
Mastering Hand Carving Techniques
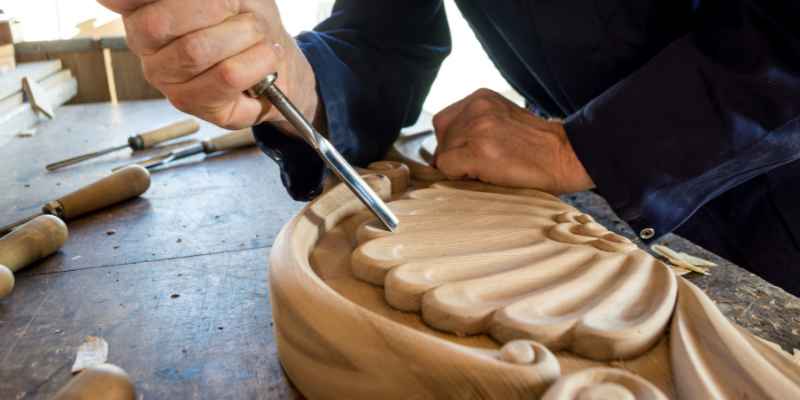
Hand carving wood is an age-old craft that requires precision and skill. To master the art of hand carving, one must focus on refining cutting and shaping skills, as well as learn tips for precision and detailing.
Refining Cutting And Shaping Skills
- Practice cutting against the grain for smooth finishes.
- Experiment with different carving tools to find the right fit.
- Refine shaping techniques by starting with larger pieces and gradually working towards smaller details.
Tips For Precision And Detailing
- Hold your carving tools with a steady grip for better control.
- Work patiently to achieve intricate details and fine lines.
- Use sharp tools to avoid splintering and create clean cuts.
Troubleshooting And Faqs
Looking to learn how to carve wood by hand? Check out these beginner-friendly tutorials on YouTube that cover everything from choosing the right wood to carving techniques and tools. With step-by-step instructions, you’ll be able to create your own wood sculptures in no time.
Ensuring Clean And Smooth Cuts
When it comes to carving wood by hand, achieving clean and smooth cuts is crucial for a professional finish. Here are some tips to ensure your cuts are precise:
- Ensure your carving tools are sharp and well-maintained. A dull tool can result in rough and uneven cuts.
- Work with the grain of the wood. Carving against the grain can cause tear-outs and splintering.
- Start with a bigger piece of wood and gradually work small. This allows for better control and precision.
- Use a light touch while carving. Applying too much pressure can lead to chipping or breaking the wood.
- Regularly check your progress by feeling the surface of the wood with your fingertips. Smooth out any rough areas using sandpaper or a carving knife.
Common Mistakes And How To Avoid Them
While carving wood by hand, it’s common to encounter certain mistakes. Here are some common mistakes and how to avoid them:
- Carving in the wrong direction: If you notice the wood tearing and your tools are sharp, you are likely carving in the wrong direction. Turn around and carve in the opposite direction to avoid tear-outs.
- Skipping proper planning: Before starting a carving project, it’s essential to plan and visualize the design. Skipping this step can lead to mistakes and rework. Create a rough sketch or use reference images for guidance.
- Not securing the workpiece: Failing to secure the wood properly can result in accidents and injuries. Always use clamps or a vise to securely hold the workpiece in place.
- Using the wrong tool: Each carving project requires specific tools. Using the wrong tool can make the carving process difficult and affect the final outcome. Invest in a variety of carving tools to ensure you have the right one for each project.
- Lack of patience: Wood carving is a skill that requires patience and practice. Rushing through the process can lead to mistakes and frustration. Take your time and enjoy the carving journey.
Essential Hand Carving Safety Measures
When carving wood by hand, it’s crucial to prioritize safety to avoid accidents or injuries. Here are some essential safety measures to follow:
- Always wear protective gloves to prevent cuts and splinters.
- Use proper eye protection, such as safety glasses or goggles, to shield your eyes from flying wood particles.
- Carve in a well-ventilated area to avoid inhaling wood dust.
- Keep your work area clean and organized to prevent tripping hazards.
- Use sharp tools for clean cuts and less effort. Dull tools can slip, leading to accidents.
- Carve away from your body to minimize the risk of accidents.
- Take regular breaks to avoid strain and fatigue, especially if you’re working on longer carving sessions.
Frequently Asked Questions On How To Carve Wood By Hand
What Is The Best Way To Hand Carve Wood?
For the best wood carving, start with a larger piece and carve small. Work with the grain and use sharp tools.
What Are The Beginner Wood Carving Techniques?
Beginner wood carving techniques involve carving with the grain, push and pull cuts, V-gouge lines, and round carving. Start with simple projects and progress to more complex designs. Use chisels for shaping wood and begin with easy projects like birds, cats, fish, penguins, or elephants.
What Is The Easiest Thing To Carve From Wood?
Wood carving experts often suggest that beginners start with simple shapes and smooth curves like wooden birds or cats. These projects are beginner-friendly and provide a good foundation for learning carving techniques.
What Tool Can I Use To Carve Wood?
You can use chisels for carving wood. They come in various shapes and sizes for different purposes, like cutting and shaping.
Conclusion
Mastering the art of hand wood carving requires patience and precision. Start with simple projects, understanding the grain, and working with the wood fibers. Remember, sharp tools are essential, and practice will improve your skills over time. Enjoy the journey of creating unique wood carvings!