How to Change a Blade on a Jigsaw
To change a blade on a jigsaw, follow these steps:
1. Turn off and unplug the jigsaw.
2. Locate the blade release lever and push it to release the old blade. Changing a blade on a jigsaw is a simple and necessary task for any DIY enthusiast or professional woodworker. Whether you need to replace a worn-out blade or switch to a different type for a specific cutting job, knowing how to properly change the blade will ensure optimal performance and safety.
In this guide, we will walk you through the step-by-step process of changing a blade on a jigsaw, allowing you to quickly and effortlessly switch blades whenever needed. With just a few simple actions, you’ll be ready to tackle your next woodworking project with a sharp and efficient jigsaw blade. Let’s get started!
The Basics Of Jigsaw Blades
Learn how to easily change a blade on a jigsaw with these simple steps. Firstly, unplug the jigsaw, release the blade, and then insert the new blade, ensuring it’s securely in place. Finally, tighten the blade clamp and you’re ready to go!
When it comes to using a jigsaw, one of the fundamental aspects to understand is the blade. The blade plays a crucial role in determining the quality and precision of your cuts. In this post, we will explore the basics of jigsaw blades, including the types of blades available and how to choose the right blade for your project.
Types Of Blades
Jigsaw blades come in various types, each designed for specific materials and cutting applications. Here are some common types of jigsaw blades:
- Metal-Cutting Blades: These blades have small, fine teeth and are ideal for cutting metal sheets or pipes, providing clean and accurate cuts.
- Wood-Cutting Blades: Wood-cutting blades have larger and fewer teeth, allowing for efficient and fast cutting through different types of wood.
- Laminate Blades: Laminate blades are designed with fine teeth and a downward cutting motion, making them perfect for cutting laminates without chipping or splintering.
- Ceramic Blades: Ceramic blades are specialized for cutting ceramic tiles, porcelain, and other similar materials. They have diamond-grit edges that ensure precise and clean cuts.
Understanding Teeth Per Inch (TPI)
Teeth per Inch (TPI) is an essential factor to consider when selecting a jigsaw blade. It refers to the number of teeth on the blade in one inch. The TPI determines the blade’s aggressiveness and the type of material it is suitable for.
A blade with a higher TPI, such as 10 or 12, will have smaller teeth and is ideal for cutting delicate materials like plastic or thin metal sheets. On the other hand, blades with lower TPI, such as 6 or 8, have larger teeth and can handle thicker and harder materials more effectively.
It is crucial to match the TPI of the blade to the material you are cutting to achieve the best results. Using the wrong TPI blade can result in rough cuts, overheating, or even blade breakage.
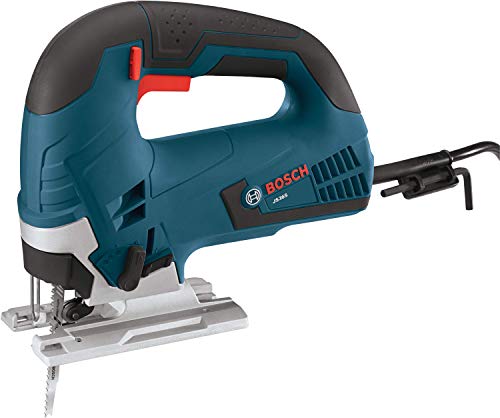
In conclusion, understanding the basics of jigsaw blades is essential for achieving precise, clean, and efficient cuts. By choosing the right type of blade for your material and considering the TPI, you can ensure optimal performance and extend the lifespan of your jigsaw blade. Now, let’s move on to the next step: How to Change a Blade on a Jigsaw.
Credit: www.homedepot.com
Essential Tools For Blade Change
Changing the blade on a jigsaw is a straightforward process that requires a few essential tools. Before starting the blade change, it is important to ensure your safety by wearing the necessary safety gear. Additionally, having the right equipment at hand will make the task easier and more efficient. In this section, we will explore the safety gear and necessary equipment you should have before changing the blade on your jigsaw. Let’s get started!
Safety Gear
Safety should always be the top priority when working with power tools. When changing the blade on a jigsaw, it is crucial to protect yourself from potential hazards. The following safety gear is essential for a safe blade change:
- Eyewear: Safety goggles or glasses will shield your eyes from debris and flying particles.
- Gloves: Wearing protective gloves will provide a better grip and protect your hands from sharp edges.
- Dust Mask: A dust mask will prevent you from inhaling sawdust and other airborne particles.
Necessary Equipment
To change the blade on your jigsaw efficiently, you will need a few necessary tools. These tools will help you complete the task effortlessly and ensure a smooth blade change process. The following equipment is crucial for changing the blade on a jigsaw:
| Tool | Description |
|---|---|
| Hex Key or Allen Wrench | This tool is used to loosen and tighten the blade clamp screw. |
| New Blade | Make sure you have a compatible blade that suits your jigsaw and the cutting task at hand. |
| Blade Clamp Screwdriver | A blade clamp screwdriver is designed specifically for easily and securely fastening the blade clamp screw. |
| Workbench or Stable Surface | Having a stable surface to work on will provide stability and allow you to change the blade more accurately. |
By having the necessary safety gear and equipment at hand, you are well-prepared to change the blade on your jigsaw. Remember to always prioritize your safety and follow the manufacturer’s instructions for your specific jigsaw model. Let’s move on to the step-by-step process of changing the blade!
Step-by-step Blade Change Process
When it comes to using a jigsaw, it’s vital to ensure that the blade is in optimal condition for cutting through various materials effectively. Changing a jigsaw blade may seem daunting at first, but with the correct steps and a little practice, it can be a straightforward process. This step-by-step guide will outline the necessary actions for safely and efficiently changing the blade on a jigsaw.
Switching Off And Unplugging
Before beginning the blade replacement process, ensure the jigsaw is switched off and unplugged from the power source. This is a critical safety measure to prevent any accidental start-ups while handling the blade.
Removing And Installing The Blade
To remove the existing blade, follow these steps:
- Locate the blade release button on the jigsaw and press it to release the blade tension.
- Using a suitable tool, carefully remove the old blade from the jigsaw.
Then, to install a new blade, proceed as follows:
- Select the appropriate blade for the material to be cut and ensure it is compatible with the jigsaw model.
- Insert the new blade into the blade holder, ensuring it is properly seated and aligned with the guide rollers.
- Release the blade release button, allowing the blade to be tensioned securely in place.

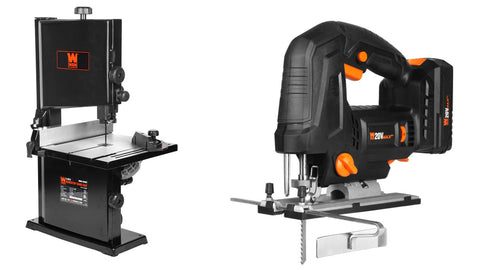
Credit: www.empireabrasives.com
Fine-tuning The Blade For Precision
Learn the art of changing a jigsaw blade with precision. Discover the step-by-step process for fine-tuning the blade, ensuring optimal performance every time.
Changing the blade on a jigsaw is a simple task, but to achieve precise and accurate cuts, it’s essential to fine-tune the blade. In this section, we will discuss two important aspects of blade fine-tuning: alignment adjustment and testing the new blade.
Alignment Adjustment
Proper alignment of the jigsaw blade is crucial in ensuring clean and precise cuts. Follow these steps to make sure your blade is aligned correctly:
1. Start by disconnecting the jigsaw from the power source for safety purposes.
2. Loosen the blade clamp using the provided Allen wrench or a compatible tool.
3. Insert the new blade into the blade clamp, making sure it is fully seated and secured.
4. Tighten the blade clamp securely, ensuring the blade is firmly held in place.
5. Check the alignment of the blade by visually inspecting its position. It should be parallel to the jigsaw’s base plate.
6. If the blade is misaligned, adjust it by slightly loosening the blade clamp and manually aligning the blade parallel to the base plate.
7. Once aligned, tighten the blade clamp again to secure the blade in the correct position.
8. Test the blade’s alignment by turning on the jigsaw and making a test cut on a scrap piece of material. The cut should be clean and straight.
Testing The New Blade
After aligning the blade, it’s crucial to test its performance before using it for your actual project. Here’s how you can test the new blade:
1. Choose a suitable piece of material for testing, preferably similar to the material you’ll be working with.
2. Secure the material firmly in place using clamps or a vice to ensure steady cutting.
3. Turn on the jigsaw and carefully make a test cut using slow and controlled movements.
4. Observe the quality of the cut. A well-aligned and sharp blade should produce a clean and precise cut without excessive vibration or deflection.
5. If the cut is not satisfactory, double-check the blade’s alignment and make any necessary adjustments following the steps mentioned earlier.
Remember, proper alignment and testing of the new blade play a vital role in achieving accurate cuts with a jigsaw. Take the time to fine-tune the blade for precision, and you’ll enjoy cleaner and more precise results in your woodworking projects.
Mastering Techniques For Smooth Cuts
When it comes to using a jigsaw, mastering the techniques for smooth cuts is essential in achieving professional-quality results. In this guide, we will focus on two key aspects that play a vital role in achieving smooth cuts – maintaining blade sharpness and optimizing speed and feed rate. Let’s dive in and explore these techniques in detail.
Maintaining Blade Sharpness
Ensuring that your jigsaw blade is sharp is crucial for achieving precise and smooth cuts. Blunt blades can cause jagged edges and tearing of the material, resulting in an unsightly finish. Here are a few tips to help you keep your jigsaw blade sharp:
- Regularly inspect your blade for any signs of wear or damage. Replace it immediately if you notice any chips, dull edges, or missing teeth.
- Invest in high-quality blades that are specifically designed for the type of material you’re cutting. Different blade types are available for wood, metal, and plastic, so choose the appropriate one for the best results.
- Use cutting lubricants or sprays to minimize friction and heat build-up, which can dull the blade quickly. These lubricants also help reduce the risk of the material melting or getting stuck to the blade.
Optimizing Speed And Feed Rate
Another important factor in achieving smooth cuts with a jigsaw is optimizing the speed and feed rate. Here’s how you can get the most out of your jigsaw:
- Start by adjusting the speed of your jigsaw to the appropriate level for the material you’re cutting. Higher speeds are generally used for softer materials like wood, while lower speeds are suitable for denser materials like metal.
- Keep a steady pace while cutting, avoiding rushing or hesitating. Applying consistent pressure and maintaining a smooth feed rate will help prevent the blade from binding or jerkiness that can result in uneven cuts.
By maintaining blade sharpness and optimizing your speed and feed rate, you’ll greatly improve your ability to achieve smooth, precise cuts with a jigsaw. Remember to always prioritize safety by wearing appropriate protective gear and following the manufacturer’s instructions. Now you’re ready to tackle your next woodworking or home improvement project with confidence!

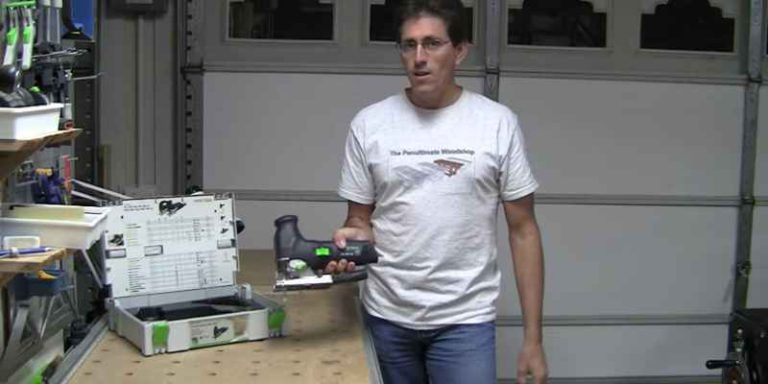
Credit: www.walmart.com
Frequently Asked Questions Of How To Change A Blade On A Jigsaw
How Do You Put A New Blade In A Jigsaw?
To put a new blade in a jigsaw, follow these steps:
1. Unplug the jigsaw for safety.
2. Locate the blade release lever or button.
3. Press and hold the lever or button to release the old blade.
4. Insert the new blade into the blade holder, making sure it is secure.
5. Release the lever or button. Ensure the blade is locked in place before using the jigsaw.
How Do You Change The Blade On A Black & Decker Jigsaw?
To change the blade on a Black & Decker jigsaw, disconnect the saw from the power source. Use the Allen wrench to loosen the screw, remove the old blade, and insert the new one. Tighten the screw securely and reattach the power source.
What Holds The Blade In Place On A Jigsaw?
A jigsaw blade is held in place by a blade clamp.
How Do You Change A Rigid Jigsaw Blade?
To change a rigid jigsaw blade, first turn off the power. Locate the blade release mechanism, usually a lever or screw. Hold the blade firmly and release the mechanism to remove the old blade. Insert the new blade, making sure it is securely in place.
Turn the power back on and you’re ready to go!
Conclusion
Changing a blade on a jigsaw is a simple and essential skill for DIY enthusiasts. By following the steps outlined, you can ensure safety and precision in your projects. Remember to wear protective gear and always unplug the tool before making any adjustments.
With practice, you’ll become a pro at swapping jigsaw blades in no time.