How to Change Blade on Ryobi Table Saw: Quick and Easy Blade Replacement Guide
To change the blade on a Ryobi table saw, first, unplug the saw and remove the blade guard. Then, use a wrench to loosen and remove the arbor nut and washer, and replace the blade before re-tightening the nut and washer.
Are you ready to upgrade your woodworking skills by changing the blade on your Ryobi table saw? This essential maintenance task can seem intimidating, but with the right tools and knowledge, it can be a straightforward process. In this guide, we’ll walk you through the steps to safely and efficiently change the blade on your Ryobi table saw, ensuring that your equipment is always in optimal working condition.
Whether you’re a seasoned woodworker or a DIY enthusiast, mastering this skill will keep your projects running smoothly and ensure consistent, high-quality results.
Preparing For Blade Replacement
When it’s time to change the blade on your Ryobi table saw, it’s essential to prepare properly. The blade replacement process requires careful attention to safety measures, the right tools, and a clean workspace. Before diving into the blade replacement, it’s crucial to focus on preparing for the task ahead. This section will guide you through the essential steps to make sure you’re ready to change the blade safely and efficiently.
Importance Of Safety First: Disconnecting Power
Safety should always be the top priority when preparing for a blade replacement on your Ryobi table saw. Before beginning any work, it’s important to disconnect the power supply to the saw to prevent any accidental start-ups. This may involve unplugging the saw from the power outlet or switching off the circuit breaker that supplies power to the saw. Double-check that the power is completely disconnected before proceeding to ensure a safe working environment.
Assembling The Right Tools
Having the correct tools on hand is essential for a successful blade replacement. To prepare for the blade change, gather the necessary tools, such as wrenches and blade-changing tools that may have come with your Ryobi table saw. Ensuring you have all the required tools ready before starting will help streamline the process and prevent any unnecessary delays.
Setting Up The Workspace
Creating a clean and organized workspace is key to a smooth blade replacement process. Clear a work area around the saw to allow for easy access to the blade and to prevent any obstacles during the replacement. Ensure proper lighting in the workspace to clearly see the components and avoid any mishaps. Keeping the workspace neat and tidy will also help in preventing misplacement of small parts during the blade replacement.
Identifying Ryobi Table Saw Model
If you want to change the blade on your Ryobi table saw, the first step is to identify the specific model of your saw. Understanding your saw’s model is crucial for ensuring that you choose the right blade and follow the correct procedure for a safe and effective blade change.
Locating The Model Number
Locating the model number of your Ryobi table saw is essential to proceed with the blade change process. The model number is usually located on the saw’s housing or base. It might also be found in the user manual or on the product packaging.
Understanding Specific Model Requirements For Blade Change
Each Ryobi table saw model may have specific requirements and considerations for a blade change. This could include the type and size of the blade, as well as any additional tools or accessories needed for the process. Consulting the user manual or contacting Ryobi customer support can provide valuable information regarding your specific model’s blade change requirements.
Blade Removal Process
The blade removal process on a Ryobi Table Saw may seem like a daunting task, but with the right steps and precautions, it can be a straightforward and safe process. In this guide, we’ll go through the step-by-step process of removing the blade from your Ryobi Table Saw, along with essential tips for handling the blade safely.
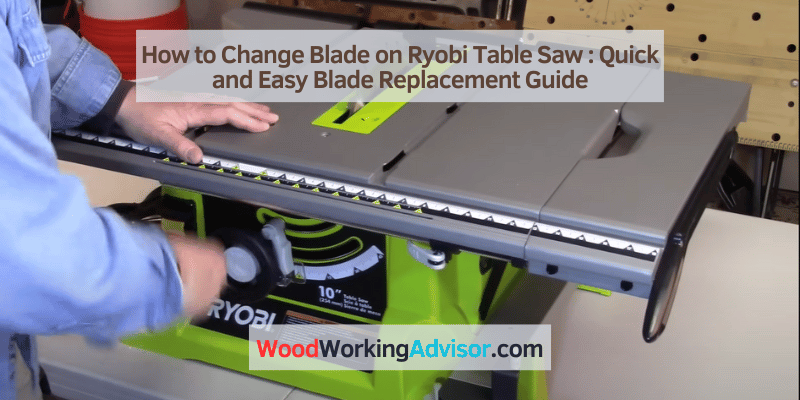
Step-by-step Guide To Blade Removal
When it’s time to change the blade on your Ryobi Table Saw, follow these steps to safely remove the old blade:
- Disconnect the saw from the power source to ensure safety during the blade removal process.
- Locate the blade arbor lock and engage it to prevent the blade from turning.
- Use the provided wrench to loosen the arbor nut in the direction indicated on the saw. Keep in mind that the direction may be reversed, so refer to the manual if needed.
- Once the arbor nut is loosened, remove it along with the outer washer.
- Carefully lift the blade guard and remove the old blade from the arbor, ensuring that you handle the blade with caution to avoid any mishaps.
Tips For Handling Blades Safely
When working with table saw blades, it’s crucial to prioritize safety. Utilize the following tips to ensure safe handling of blades:
- Use protective gear: Always wear gloves and eye protection when handling saw blades to prevent injuries.
- Inspect the blade: Before removal, inspect the blade for any signs of damage or wear that may require immediate replacement.
- Handle with care: When removing the blade, ensure that you handle it carefully to avoid any accidental cuts or scrapes.
- Secure storage: After removing the old blade, store it in a protective case or sheath to prevent accidental contact.
- Refer to the manual: Always consult the saw’s manual for specific instructions related to blade removal and replacement.
Quick And Easy Blade Replacement Guide
When it’s time to replace the blade on your Ryobi table saw, knowing how to do it quickly and easily can save you time and frustration. In this guide, we’ll walk you through the process step by step, so you can get back to your woodworking projects with minimal hassle. Let’s get started with the Quick and Easy Blade Replacement Guide for your Ryobi table saw.
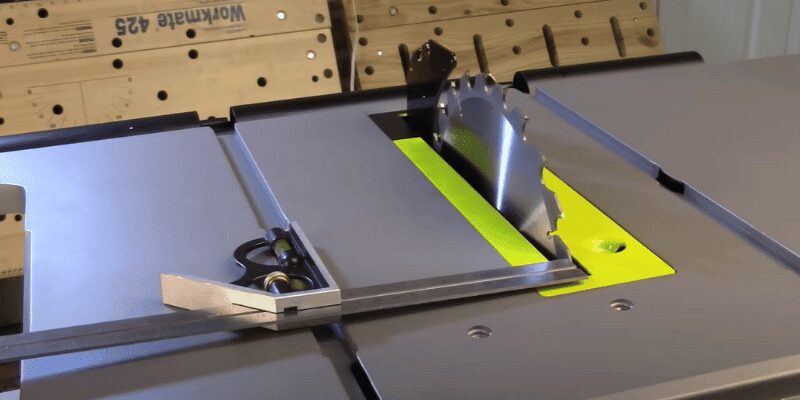
Aligning The New Blade
Before getting started with the actual blade replacement, it’s essential to ensure that the new blade is properly aligned. Improper alignment can lead to issues such as inaccurate cuts and potential safety hazards. To align the new blade:
- Detach the old blade and clean the arbor shaft thoroughly, removing any dirt or debris that may affect the alignment.
- Inspect the new blade for any defects or irregularities, ensuring it is free from damage or warping.
- Carefully place the new blade onto the arbor shaft, ensuring that it sits flush and does not wobble. Use the included blade wrench to securely tighten the arbor nut and lock the blade in place.
Securing The Blade With Precision
Once the new blade is aligned, securing it with precision is crucial for optimal performance and safety during operation. Follow these steps to securely fasten the blade:
- Insert the blade guard and spreader, ensuring that they are properly aligned and tightened to prevent any interference with the new blade.
- Double-check the tightness of the arbor nut using the blade wrench, making certain that the blade is securely fastened to the arbor shaft.
- Run a quick test by gently rotating the blade by hand to confirm that it spins freely and without any wobbling or wobbling noise.
Post-installation Checklist
After successfully changing the blade on your Ryobi table saw, it is crucial to carry out a comprehensive post-installation checklist. This will ensure that the saw is functioning optimally and is safe to use. Below are important checks to perform in the post-installation checklist.
Ensuring Proper Blade Alignment
Unaligned blades can lead to inaccurate cuts and safety hazards. To ensure proper alignment:
- Use a square to check that the blade is perpendicular to the table surface. Adjust the trunnion if necessary.
- Measure the distance between the blade and the miter slot. It should be consistent across the length of the blade.
- Verify that the blade is parallel to the rip fence. Make adjustments if needed.
Trial Run: Checking For Wobble Or Noise
Before putting the saw into regular use, conduct a trial run to ensure the blade is functioning smoothly:
- Turn on the saw and listen for any unusual noise that may indicate a problem.
- Observe the blade for any visible wobble or irregular movement.
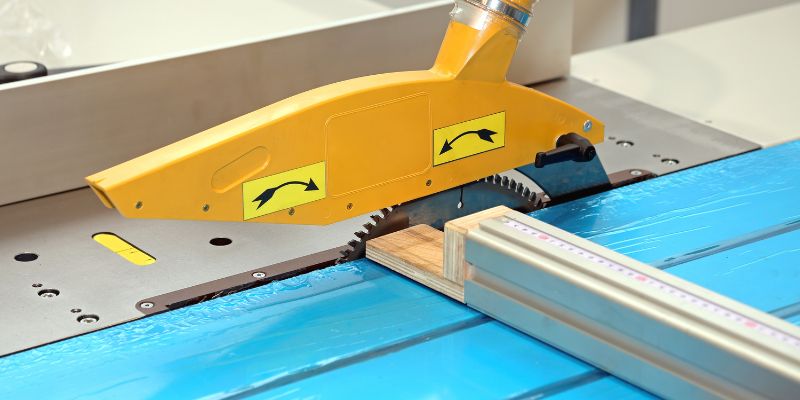
Table Saw Maintenance Tips
Table saw maintenance is crucial to ensure the tool operates effectively and safely. One important aspect of maintenance is understanding when and how to change the blade on a Ryobi table saw. Keeping the blade in good condition not only guarantees smoother and more accurate cuts but also extends the life of the saw. Here are some essential table saw maintenance tips, including routine cleaning procedures and recognizing signs of wear to know when to replace the blade.
Routine Cleaning Procedures
Regular cleaning is essential to maintain the functionality and safety of your Ryobi table saw. Follow these steps to ensure the saw blade and table are clean and free from debris:
- Turn off and unplug the table saw before cleaning to prevent accidents.
- Remove the blade guard and throat plate to access the blade and table surface.
- Use compressed air or a brush to remove sawdust and debris from the blade and table.
- Inspect the blade for any buildup or resin. If present, carefully clean it using a blade cleaning solution or a blade cleaning tool.
- Wipe down the table surface to remove any remaining dust or debris, ensuring a clean and smooth cutting surface.
- Reinstall the throat plate and blade guard before turning the table saw back on for use.
When To Replace The Blade: Recognizing Signs Of Wear
Recognizing the signs of wear on the blade is crucial to determine when it’s time for a replacement. Watch out for the following indications:
- Uneven cuts: If the saw blade is causing splintering, tear-out, or leaves burn marks on the wood, it may indicate a dull or damaged blade.
- Increased resistance: A blade that requires more force to make cuts or becomes significantly slower during operation could be worn down.
- Visible damage: Look for missing or chipped teeth, or any other visible damage to the blade edges.
- Excessive vibration: If the saw exhibits unusual vibration during operation, it may be due to blade wear causing imbalance.
By keeping an eye out for these signs of wear, you can ensure the blade is replaced at the right time, maintaining the quality of your cuts and the longevity of your Ryobi table saw.
Frequently Asked Questions On How To Change Blade On Ryobi Table Saw
How Often Should I Change The Blade On My Ryobi Table Saw?
You should change the blade on your Ryobi table saw when it gets dull or damaged. For regular use, consider replacing it every 6 to 12 months. Keeping a sharp blade ensures clean and precise cuts while also maintaining safety.
What Tools Do I Need To Change The Blade On A Ryobi Table Saw?
To change the blade on a Ryobi table saw, you will need a blade wrench, safety glasses, and possibly a screwdriver, depending on the model. These tools will allow you to safely and efficiently remove the old blade and install a new one.
Can I Use Any Blade With My Ryobi Table Saw?
It is important to use only blades that are compatible with your Ryobi table saw. Check the user manual or consult with a professional to ensure that the blade you choose is the correct size and type for your specific model.
Using the wrong blade can result in poor performance and potential safety hazards.
Conclusion
Changing the blade on a Ryobi table saw is a simple yet essential task for maintaining the tool’s efficiency and safety. With the step-by-step guide provided in this blog post, you can confidently handle this maintenance task on your own.
Regular blade changes will ensure smooth and precise cuts, enhancing your woodworking experience.