How to Create Fire With Sticks: Best Woods, 3 Methods
Friction fire is not two sticks rubbed together: you spin or slide one stick against a notched or grooved board until the contact point turns to charcoal dust that glows as a tiny ember. It works only with bone-dry, non-resinous wood. This guide compares the hand drill, bow drill, and fire plow, tallies which woods six sources name, and covers ember transfer and fire safety.
What You Need to Create Fire With Sticks
Best Backup Fire Starter Pick | |
 |
bayite 4-Inch Ferro Rod Fire Starter Kit, $10.59 Friction fire can take many practice sessions, so most people learn it with a dependable spark source in the pack. This kit pairs a 4 inch by 3/8 inch ferrocerium rod with a steel striker on 5 feet of paracord, and the listing says it works wet.
|
As an Amazon Associate we earn from qualifying purchases. | |
Every friction method uses the same short list of parts. Gather them before you start, because dry tinder left sitting on damp ground stops being dry.
- Spindle: a straight, dry stick. Spindle thickness runs from 8 to 12 mm for a hand drill per Sacred Hearth Friction Fire up to about thumb thick for a bow drill per Scouting magazine (Boy Scouts of America).
- Hearth board (also called fireboard or baseboard): a flat piece of soft, dry wood. Forest Fundamentals describes one about 2 cm thick and roughly 30 cm long.
- Bow, cord, and socket: bow drill only. The socket (bearing block) caps the spindle so it does not burn your palm; Scouting magazine (Boy Scouts of America) lists a rock with an indentation.
- Tinder bundle: fibrous dry material, shaped into a nest. Details below.
- Knife: to carve the spindle point and the notch. Learn safe carving from someone qualified, and have an adult supervise children.
For the full bow drill build, see our step-by-step guide to starting a fire with a bow drill. This page covers how the three methods compare, which woods to pick, and how to get from ember to flame.
How Friction Fire Actually Works: You Are Making a Coal
The spindle does not set the wood on fire directly. According to Wikipedia’s fire drill entry, rotation and pressure turn the wood at the contact point into charcoal, the friction grinds it to a powder, and the powder collects in the V-notch. Keep going and that charcoal dust ignites as a tiny ember, which you then move into a tinder bundle.
That mechanism explains most of the advice you will read. The wood has to be soft enough to wear into dust, dry enough that the dust can heat up instead of boiling off water, and free of the pitch that lubricates the contact point. It also explains the notch: the dust needs somewhere to pile up and stay hot. Sacred Hearth Friction Fire recommends a V-notch that flares outward for airflow, and Forest Fundamentals cuts a straight-sided V at roughly 45 degrees once the first divot is burned in.
The target is small. Scouting magazine (Boy Scouts of America) describes a glowing, ping-pong-ball-sized mass of dust as the goal before you transfer it.
Best Woods for Friction Fire: What Six Sources Agree On
Most pages list a handful of woods from memory. We read six: Scouting magazine (Boy Scouts of America), Wikipedia’s fire drill entry, Lifesong Adventures, Willow Haven Outdoor, Forest Fundamentals, and Sacred Hearth Friction Fire, then counted how many name each wood. The count below is our own tally of what those pages say, not a lab test of the woods.
| Wood | Named by (of 6 sources) | Notes from the sources |
|---|---|---|
| Willow | 5 | Wikipedia, Lifesong, Willow Haven, Forest Fundamentals, Sacred Hearth (spindle). Lifesong calls it one of the finest bow drill woods when conditions align. |
| Cedar | 4 | Scouting magazine, Wikipedia, Lifesong, Willow Haven. Lifesong says plentiful across the US and lists four species. |
| Basswood | 4 | Scouting magazine, Wikipedia, Lifesong, Willow Haven. Willow Haven ranks it first of the woods it lists. |
| Poplar | 4 | Scouting magazine, Forest Fundamentals, Sacred Hearth (hearth board), Willow Haven (tulip poplar, a different tree). |
| Aspen | 3 | Scouting magazine, Wikipedia, Willow Haven. |
| Yucca | 3 | Wikipedia, Lifesong, Willow Haven. A dry flower stalk, not a tree branch. |
| Cottonwood | 2 | Lifesong and Willow Haven. Lifesong calls it the best bow drill wood for ease of creating an ember. |
| Sycamore | 2 | Willow Haven and Forest Fundamentals. |
What the sources steer you away from is just as useful. Lifesong Adventures would not recommend pine to a beginner because of its pitch, and rules out oak as too hard, citing Janka hardness of 1,290 for red oak against 320 for cedar. It also treats Douglas fir as extremely difficult. Note that Wikipedia’s fire drill entry lists spruce, balsam, and tamarack among workable woods, so the real filter looks like resin and hardness, not softwood versus hardwood. We could not confirm that from a single test, so treat it as a reading of the sources.
Cedar has a Janka hardness of 320, against 1,290 for red oak, which is why oak fails as a friction fire wood. Source: Lifesong Adventures
Two quick tests and one drying method
Two guides give a simple hardness test. Willow Haven Outdoor says you should be able to dent the wood with a fingernail with little effort, and Forest Fundamentals uses a thumbnail for the hearth board. Both also want firm wood: not punky, rotted, knotted, or cracked.
Dryness matters more than species. As Willow Haven Outdoor puts it, “An ember can only be born in the near absence of moisture.” It recommends dead standing wood over wood from the ground, and for faster drying, wrist-thick branches at least 12 inches long, split in half and left on a south-facing windowsill for at least a week. Sacred Hearth Friction Fire adds that wetter climates call for dry seasoned material. If you are working with cedar offcuts, our cedar firewood guide and cottonwood firewood article cover those two woods as fuel, which is a different job from spindle wood.
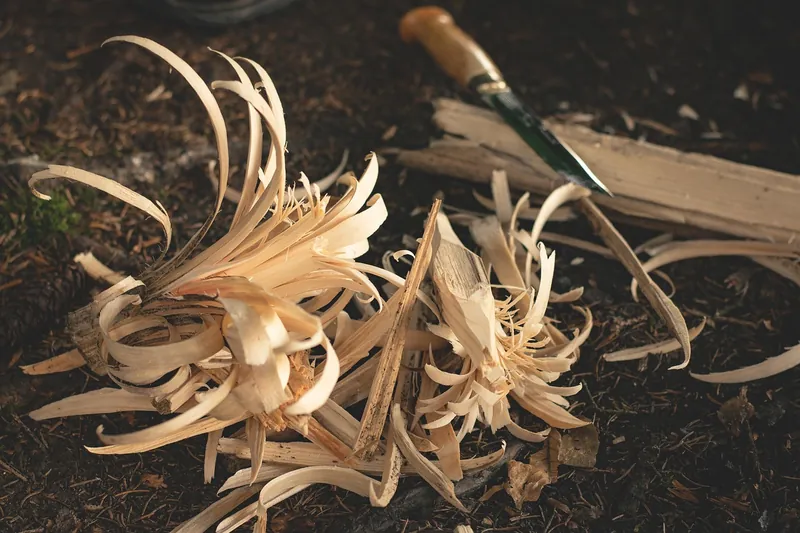
Hand Drill vs Bow Drill vs Fire Plow
The three methods share the same physics, but they trade effort for equipment. The figures below come from the sources named in each row.
| Method | Motion | Typical dimensions (sourced) | What the sources say |
|---|---|---|---|
| Hand drill | Spindle rolled between the palms | Spindle 8 to 12 mm thick (Sacred Hearth) | Pithy spindles like elder, mullein, and willow; needs bone-dry parts; Sacred Hearth reports a first ember on day 41 of daily practice |
| Bow drill | Bow and cord spin the spindle | Spindle about 8 in long and thumb thick (Scouting magazine); hearth board about 2 cm thick, 30 cm long (Forest Fundamentals) | Taught by Scouting magazine and Forest Fundamentals as the step-by-step method; needs cord, bow, and socket |
| Fire plow | Pointed stick slid along a groove | No measurements given by Wikipedia | Wikipedia describes a dull-pointed stick rubbed quickly through a groove to make hot dust that becomes a coal |
Spindle sizes disagree a little between sources. Wikipedia gives 1 to 2 cm for a spindle, which is roughly 3/8 to 3/4 inch by our own conversion, while Lifesong describes a 3/4 inch by 9 to 10 inch cottonwood bow drill spindle.
Hand drill
The hand drill is the same spindle and board with no bow. Sacred Hearth Friction Fire says kneeling or a bow drill-style stance allows more downward pressure than sitting, that you should build up dust before increasing speed, and that a polished divot loses grip, so scratch the surface or add grit.
Bow drill
The bow replaces your palms. Scouting magazine (Boy Scouts of America) advises a slow back-and-forth start with gentle pressure, then building speed and pressure while watching for thick white smoke and listening for the squeak to stop. It also describes lining up your shoulder, hand, spindle, and baseboard so the downward force stays straight. Our bow drill walkthrough goes through the build.
Fire plow
The fire plow slides one piece along a groove in another, with no spinning, so it needs no cord or socket. Wikipedia’s fire plough entry notes the method was traditionally used in Vanuatu and describes a split in the grooved piece that lets air reach the forming ember. We did not find a source we read that lists specific plow woods or dimensions, so we are not giving any. Use the soft, dry, non-resinous wood guidance above and test your pieces.
Realistic Expectations: How Long It Takes
Search results are full of claims that friction fire takes seconds. The sources we read do not back a single time. Sacred Hearth Friction Fire reports one person’s first hand drill ember on day 41 of daily practice, and Scouting magazine (Boy Scouts of America) notes that its photos show extreme scenarios and may not match standard procedure. We have not tested these methods ourselves and are not claiming a success rate.
Budget practice sessions, and keep a ferro rod or lighter in your kit so a failed session never leaves you without fire when you actually need one.
From Ember to Flame: Tinder Bundle and Transfer
An ember is not a fire. The transfer is where many good coals die, so build the bundle before you start drilling.
- Build the bundle first: Scouting magazine (Boy Scouts of America) says fibrous material like scraped cedar bark works best and describes a bundle at least the size of a five-pin bowling ball. Forest Fundamentals uses a softball-sized nest with a divot in the middle, compressed until light cannot pass through.
- Lift the board slowly: do not knock the dust pile apart. Tip the glowing coal into the center of the bundle.
- Close the bundle gently: cup the tinder around the ember without crushing it.
- Add air: Scouting magazine (Boy Scouts of America) says to blow slowly at first and then more vigorously from underneath. Forest Fundamentals suggests raising the bundle so smoke rises away from your face and blowing like you are blowing out birthday candles.
- Feed it in stages: once the bundle flames, move it into your prepared fire and add thin kindling before anything thick.
To make practice kindling, see how to split kindling and our guide to DIY fire starters from wood shavings.
Fire Safety When You Make Fire With Sticks
A friction ember is still an open fire. The points below come from Smokey Bear campfire safety guidance and the National Park Service, and should be double-checked against your local land manager.
- Check for fire restrictions and burn bans first, and do not build a fire if local rules prohibit it.
- Avoid hazardous, dry, or windy conditions, avoid open fields, and pick a spot without gusty wind.
- Keep the fire at least 15 feet from tents, vegetation, and low-hanging branches, with overhead clearance of at least three times the flame height.
- Clear a 10-foot diameter around the site; Smokey Bear advises digging a pit about a foot deep.
- Never leave the fire unattended, and supervise children and pets at all times.
- Many national parks do not allow collecting firewood or kindling, so check before you gather spindle wood.
- Put it out in four steps: drown, stir, drown again, then feel for heat with the back of your hand. The National Park Service warns that kicking dirt on coals can insulate them.
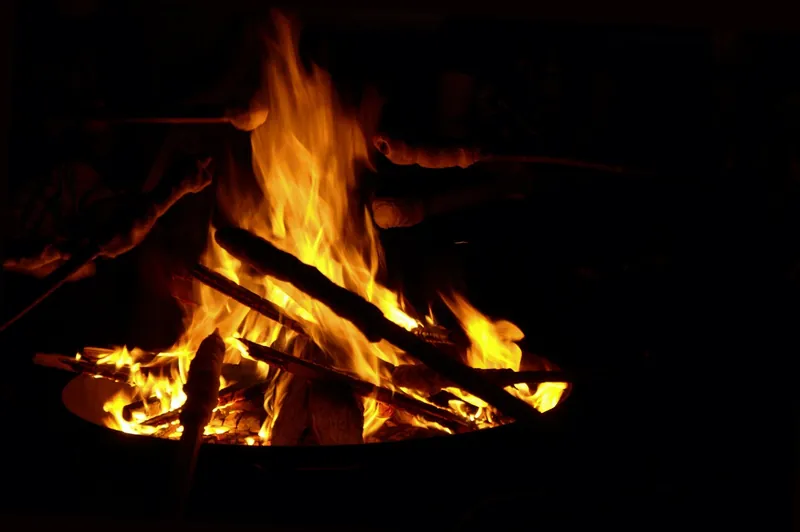
Keep water and a shovel within reach before you start drilling, not afterward. For general burning rules, see our guide to burning wood safely, and for what to keep nearby, see which fire extinguisher to use for wood fires.
Frequently Asked Questions
Can you really start a fire with just sticks?
Yes, but not by rubbing two sticks together. The methods described by Wikipedia and Scouting magazine spin or slide one stick against a notched or grooved board until the contact point turns to charcoal dust that glows as an ember. It needs dry, non-resinous wood and, for most people, a lot of practice.
What is the best wood for a friction fire?
No single wood wins, but the sources we read keep naming the same group: willow, cedar, basswood, poplar, aspen, cottonwood, and yucca. Willow appears in five of six sources and cedar and basswood in four. Pick whichever of those grows near you, and make sure it is bone dry.
Is the bow drill or the hand drill easier?
Scouting magazine and Forest Fundamentals teach the bow drill, where a bow spins the spindle so your hands only steer and press. The hand drill author at Sacred Hearth describes needing 41 days of daily practice for a first ember. The bow drill takes more gear, but the sources suggest it is the gentler place to start.
Can you make fire with sticks when it is wet?
Not with wet wood. Willow Haven Outdoor says an ember can only form in near absence of moisture, so wet spindles and boards will fail. Use dead standing wood, split it to reach the dry core, and dry it indoors first. Carry a ferro rod or other backup if you may need fire in damp weather.
How long does it take to make an ember with sticks?
The sources we read do not give a reliable time, so we will not either. Sacred Hearth reports one person’s first hand drill ember came on day 41 of daily practice, and recommends starting with 10 to 15 minutes a day. Plan for practice sessions, not a quick trick.
Is it legal to start a friction fire?
It depends where you are. The National Park Service says each park sets its own rules for when and where campfires are allowed, and Smokey Bear advises checking fire restrictions first. A friction fire is still an open fire, so a burn ban applies to it just as it does to a match.
Friction fire rewards patience over strength. Pick a dry, soft, non-resinous wood from the list, prepare your tinder before you drill, and practice with a backup spark source in your pack. Then check local fire rules before you light anything.
Sponsored / affiliate links. As an Amazon Associate I earn from qualifying purchases. I may earn additional commission from eligible campaigns.