
How to Expertly Achieve a 75 Degree Angle on Your Miter Saw
To cut a 75-degree angle on a miter saw, adjust the bevel angle of the saw to 15 degrees from the perpendicular position. Then, position the workpiece on the miter saw table with the desired angle against the fence, and make the cut.
Cutting precise angles on a miter saw can be a bit tricky, especially when you need to cut a specific angle such as 75 degrees. The miter saw is a versatile tool commonly used in woodworking projects to make accurate and clean angled cuts.
Whether you’re working on a DIY project or a professional woodworking job, knowing how to cut a 75-degree angle on a miter saw can greatly enhance your woodworking skills. We will guide you through the steps to achieve this precise cut, ensuring your project turns out perfectly. So, let’s get started and learn how to cut a 75-degree angle on a miter saw.
Choosing The Right Miter Saw
When considering how to cut a 75-degree angle on a miter saw, it’s crucial to select the right miter saw for the job. There are three main types: basic miter saws, compound miter saws, and sliding compound miter saws. Basic miter saws are ideal for simple woodcutting tasks, compound miter saws allow for bevel cuts in addition to miter cuts, and sliding compound miter saws have a sliding feature that enables users to cut wider boards. Each type has its own advantages, so it’s important to understand the specifics of your project and select the miter saw that best fits the requirements.
Features To Consider
When choosing a miter saw for cutting a 75-degree angle, several features should be taken into account. The blade size determines the maximum width of board that can be cut and should be suitable for your specific project. The positive stops on the miter saw allow for quick and accurate setting of common angles, including the 75-degree angle necessary for your project. Dust collection systems can help maintain a clean workspace, and electric brakes increase safety by quickly stopping the blade when the trigger is released. It’s also crucial to consider the power and speed of the saw, ensuring it can handle the demands of cutting at a 75-degree angle.
Setting Up Your Miter Saw
Setting up your miter saw properly is essential to achieve accurate and precise cuts. By following a few simple steps, you can ensure that your miter saw is correctly configured to cut a 75-degree angle. In this section, we will guide you through the necessary adjustments and placement to prepare your miter saw for cutting at this specific angle.
Proper Placement
Before adjusting the blade angle, it’s crucial to position your miter saw in the right location. Start by finding a sturdy and level workspace, ensuring that the saw’s base is securely placed on a flat surface. This stability is vital for maintaining safety and precision during the cutting process.
Make sure there is ample space around the saw for maneuvering long pieces of material. Keeping your work area clear will prevent any obstacles from interfering with your cuts and help you maintain full control over the saw.
Adjusting The Blade Angle
Once your miter saw is properly positioned, it’s time to adjust the blade angle to 75 degrees. Follow these steps to ensure accurate adjustment:
- Begin by loosening the bevel lock knob located at the back of the miter saw. This knob allows you to adjust the angle of the blade.
- Next, locate the bevel scale on the miter saw. This scale displays the degree markings against which you’ll make your adjustments.
- To set the blade angle to precisely 75 degrees, turn the bevel angle knob while keeping an eye on the bevel scale. Gradually rotate the knob until the indicator aligns perfectly with the 75-degree marking.
- After achieving the desired angle, tighten the bevel lock knob to secure the blade firmly in place.
Remember, it’s crucial to double-check the angle before making any cuts to ensure accuracy. Use a protractor or digital angle finder to verify the angle if necessary.
With your miter saw properly positioned and the blade angle adjusted to 75 degrees, you are now ready to make precise cuts for your project. Take your time, follow these steps diligently, and always prioritize safety when working with power tools.
Prepping The Material
Before cutting a 75-degree angle on your miter saw, it’s essential to properly prep the material. In this section, we will cover two crucial steps: measuring and marking the angle and securing the material to ensure a precise and safe cut.
Measuring And Marking
To be successful in cutting a 75-degree angle on your miter saw, accuracy is key. Start by measuring the length of the material you want to cut. Use a tape measure or ruler to ensure your measurements are precise.
Next, it’s time to mark the angle on the material. To do this, you’ll need a protractor or a dedicated angle finder tool. Place the protractor or angle finder on the edge of the material and align it with the desired 75-degree angle. Make sure the tool is secure and doesn’t move during the marking process.
Once aligned, use a pencil or marker to draw a clear line along the edge of the protractor or angle finder. This line will serve as a guide for your cut and ensure the accuracy of the desired angle.
Securing The Material
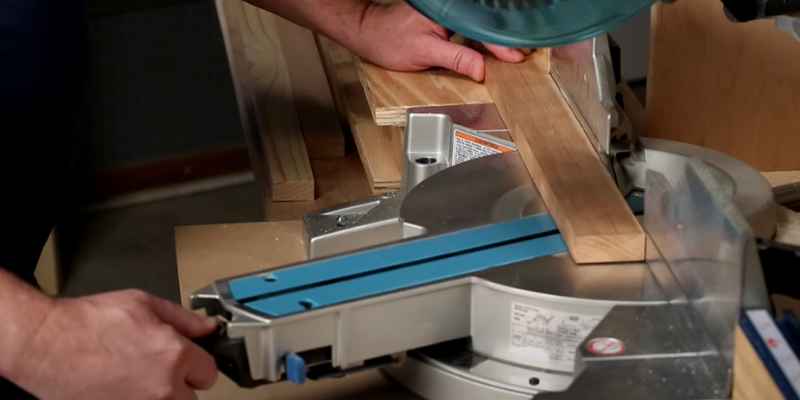
Now that you have marked the angle on the material, it’s important to securely fasten it to the miter saw. This step ensures stability and helps prevent any unwanted movements during the cutting process.
Start by placing the material on the miter saw base, making sure it rests against the fence. The fence provides support and helps maintain the material’s position throughout the cut. Align the marked line with the desired cutting point on the saw.
Once the material is correctly positioned, use any available clamps to secure it in place. Make sure the clamps are tightly fastened, ensuring the material remains stable during the cut.
Additionally, it’s essential to wear safety goggles and gloves to protect yourself while operating the miter saw. Safety should never be compromised, so ensure you are taking all necessary precautions.
With the material measured, marked, and secured, you are now ready to make a precise 75-degree angle cut on your miter saw. Move forward with confidence, and always remember to prioritize safety as you work with power tools.
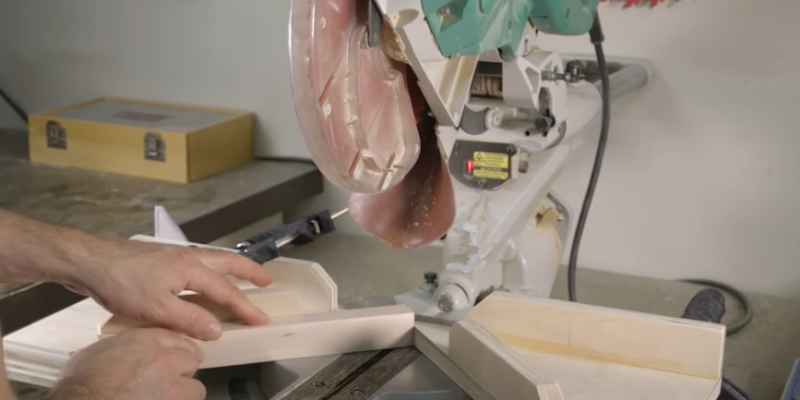
Making The Cut
When it comes to making a precise 75-degree angle cut on a miter saw, the process requires precision and the right tools. Making the cut at a 75-degree angle may seem challenging, but with the proper technique, it can be achieved effectively. In this section, we will discuss two methods to make the cut: using a miter gauge and using a bevel gauge, providing you with the steps needed to achieve accurate results.
Using A Miter Gauge
Using a miter gauge is one of the most common methods for making angled cuts on a miter saw. Here’s a step-by-step guide to cutting a precise 75-degree angle:
- Adjust the miter saw’s angle to 15 degrees, which is the complementary angle to 75 degrees.
- Secure the workpiece against the miter gauge, ensuring it is tightly held in place.
- Turn on the miter saw and carefully make the cut following the marked line, ensuring a steady and controlled motion.
- After the cut is complete, inspect the angle to ensure accuracy.
Using A Bevel Gauge
Another method for achieving a 75-degree angle cut on a miter saw is by using a bevel gauge. Here are the steps to accomplish this:
- Set the bevel gauge to 15 degrees, which is the complementary angle to 75 degrees.
- Secure the workpiece firmly to the miter saw’s fence, ensuring it is stable and will not move during the cut.
- Activate the miter saw and proceed to make the cut, maintaining a steady and controlled trajectory along the marked line.
- After completing the cut, inspect the angle to confirm its accuracy.
Checking And Adjusting The Angle
To cut a 75-degree angle on a miter saw, carefully check and adjust the angle using the saw’s built-in measurements and settings. Make precise cuts by following these steps.
Using A Protractor
To ensure accurate cuts on a miter saw, it’s crucial to check and adjust the angle before getting started. One useful tool for this task is a protractor, which allows you to measure and set precise angles. Here’s how you can use a protractor to cut a 75 degree angle on a miter saw:
1. Begin by marking the starting point of your cut on the piece of wood and secure it firmly in place on the miter saw.
2. Place the zero-degree line of the protractor against the saw’s base, aligning it with the blade’s path. Make sure the protractor is level and facing the correct direction.
3. Locate the 75-degree mark on the protractor and position the base of the protractor against the saw’s base. Adjust the wood until the 75-degree mark aligns with the saw blade’s path.
4. Once you have set the correct angle, double-check that the wood is securely clamped in place before proceeding with the cut.
Using a protractor provides a reliable method for setting accurate angles on your miter saw. By following these steps, you can ensure that your cuts are precise and meet your project requirements.
Fine-tuning With Test Cuts
While using a protractor is a great starting point, it’s always a good idea to fine-tune your angle using test cuts. Test cuts allow you to verify the accuracy of your angle settings and make any necessary adjustments. Here’s how you can fine-tune your 75 degree angle cut with test cuts:
1. Begin by making a test cut on a scrap piece of wood using the angle you set with the protractor. Use caution and follow appropriate safety measures while making the cut.
2. Inspect the test cut to determine if it matches the desired angle. If the angle is slightly off, you can make adjustments to the miter saw accordingly.
3. To adjust the angle, refer to your miter saw’s user manual for instructions specific to your model. Typically, adjustments can be made by loosening or tightening certain components of the miter saw.
4. After making adjustments, perform another test cut and continue this process until you achieve the desired 75-degree angle.
By fine-tuning your angle with test cuts, you can ensure the utmost precision in your miter saw’s cutting capabilities. Don’t underestimate the value of taking the time to make test cuts—they can save you from making inaccurate cuts on your actual project material.
Conclusion
Mastering the art of cutting a 75-degree angle on a miter saw is an invaluable skill for any woodworker. With this knowledge, you can create intricate and precise cuts for various projects. By following the steps outlined in this guide, you are equipped to elevate your woodworking capabilities and produce exceptional results.