How to Cut Angles With a Miter Saw: Mastering Precision and Efficiency
To cut angles with a miter saw, set the desired angle on the saw’s built-in angle gauge and securely place the workpiece against the fence, aligning the cutting line with the saw blade. Cutting angles with a miter saw is a straightforward process that allows you to achieve precise and clean cuts.
Whether you are working on woodworking projects or making accurate trimmings, knowing how to cut angles with a miter saw is essential. We will guide you on how to make angled cuts with a miter saw, providing you with step-by-step instructions.
By following these instructions, you will be able to accurately cut angles with a miter saw and achieve professional-looking results. So, let’s dive in and learn this valuable skill for your woodworking journey.
Understanding The Different Parts Of A Miter Saw
A miter saw consists of various parts that play a crucial role in cutting angles. By understanding these components, you can easily master the art of cutting precise angles with a miter saw. Learn how to navigate each part and make accurate cuts effortlessly.
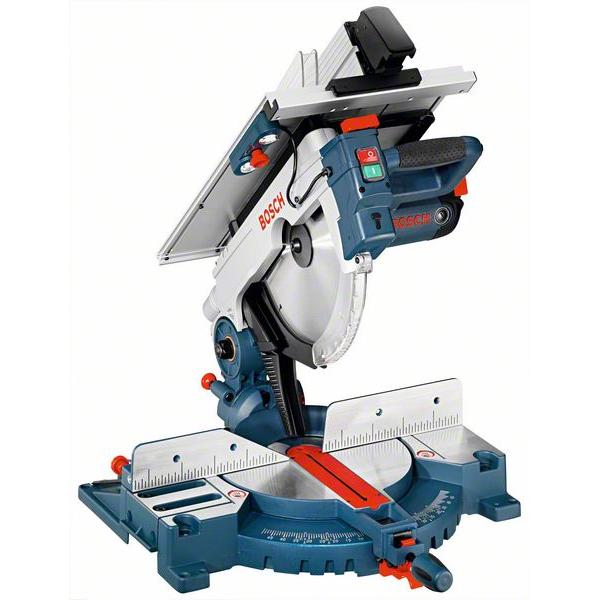
A miter saw is a versatile tool that allows you to make precise angle cuts in wood, metal, and other materials. To fully utilize this power tool, it’s essential to understand its different parts. In this section, we’ll explore the blade, miter gauge, bevel adjustment, and fence of a miter saw.
Blade:
The blade is the most crucial part of a miter saw as it determines the type of cuts you can make. Some key features of the blade are:
- Teeth: The blade’s teeth are responsible for cutting the material. Different types of blades have varying tooth configurations suitable for specific materials.
- Diameter: The size of the blade’s diameter determines the maximum cutting capacity of the saw. Smaller blades are ideal for delicate cuts, while larger blades are better for thicker materials.
- Material: Blades can be made of various materials, such as high-speed steel or carbide-tipped, which determines their durability and performance.
Miter Gauge:
The miter gauge is a guide that allows you to make accurate angled cuts. It is positioned on the base of the miter saw to provide stability during cutting operations. Here are some important aspects of the miter gauge:
- Angle Adjustment: The miter gauge can be adjusted to different angles ranging from 0 to 45 degrees. This versatility enables you to make bevel cuts and compound cuts.
- Locking Mechanism: The miter gauge usually features a locking mechanism that ensures the desired angle remains in place during cutting, preventing any accidental movement.
- Index Markings: A miter gauge often has index markings to help you set precise angles quickly and easily.
Bevel Adjustment:
Bevel adjustment refers to the ability to tilt the blade to make angled cuts along the material’s thickness. Here’s what you need to know:
- Bevel Range: Miter saws offer a specific range of bevel adjustments, typically up to 45 degrees in either direction. This allows for beveled cuts and compound miter cuts.
- Bevel Lock: The bevel adjustment mechanism is accompanied by a locking mechanism, which securely positions the blade at the desired angle for consistent and accurate cuts.
Fence:
The fence is a vital component that provides support and ensures straight cuts. Here’s what you should know about the fence:
- Alignment: The fence needs to be properly aligned with the blade to maintain accuracy. Ideally, it should be parallel to the blade and securely tightened to prevent movement during cutting.
- Length: The fence’s length varies among miter saw models, and a longer fence provides better support. It allows for improved stability when cutting longer stock materials.
- Auxiliary Fence: Some miter saws come with an auxiliary fence feature, allowing you to extend the existing fence for increased support when cutting wider or longer materials.
Understanding these different parts of a miter saw will empower you to make precise and efficient cuts. By familiarizing yourself with the blade, miter gauge, bevel adjustment, and fence, you’ll be equipped to tackle various projects with confidence.
Ensuring Accurate Angle Measurements
Learn how to ensure accurate angle measurements when cutting with a miter saw. Follow these steps to achieve precise cuts for your projects every time.
When it comes to cutting angles with a miter saw, accuracy is key. To ensure precise and reliable results, you need to pay attention to the angle measurements. In this section, we will discuss the steps you can take to ensure accurate angle measurements when using a miter saw.
From calibrating the miter gauge to testing for squareness and utilizing a protractor or angle finder, we’ve got you covered.
Calibrating The Miter Gauge:
- To begin, loosen the screws that hold the miter gauge in place.
- Set the miter saw to the 0-degree angle and align the gauge with the blade.
- Use a square to verify that the miter gauge is perfectly perpendicular to the blade.
- Tighten the screws back in place once the alignment has been verified.
Testing For Squareness:
- Place a square against the blade and the fence to ensure they are perfectly perpendicular.
- If the square does not align with both the blade and the fence, adjustments need to be made.
- Refer to your miter saw’s user manual for instructions on how to adjust the squareness of the blade and fence.
- Testing for squareness before each cut will help ensure accurate angle measurements.
Using A Protractor Or Angle Finder:
- Measure the desired angle using a protractor or angle finder.
- Set the miter saw to the corresponding angle indicated by the protractor or angle finder.
- Double-check the angle by using a square to verify that the blade is aligned correctly.
- Make necessary adjustments to the miter gauge or bevel if needed.
By following these steps, you can enhance the accuracy of your angle measurements when using a miter saw. Taking the time to calibrate the miter gauge, test for squareness, and utilize a protractor or angle finder will lead to more precise cuts and ultimately, better results.
So, let’s get started and make those perfect angle cuts!

Adjusting The Bevel For Beveled Cuts
Adjusting the bevel on a miter saw is crucial for achieving accurate beveled cuts. By following a few simple steps, you can easily cut angles with a miter saw and achieve the desired results.
When it comes to cutting angles with a miter saw, adjusting the bevel is crucial for achieving beveled cuts. Understanding how to adjust the bevel angle and lock it in place can make a significant difference in the precision and accuracy of your cuts.
In this section, we will explore the process of adjusting the bevel angle step by step.
Understanding Bevel Angles:
To begin with, it is important to have a good understanding of bevel angles and their significance in creating beveled cuts. Here are a few key points to keep in mind:
- Bevel angle: The bevel angle refers to the tilt of the miter saw blade in relation to the workpiece. It determines the degree of the bevel cut.
- Positive and negative angles: A positive angle tilts the blade to the right, while a negative angle tilts it to the left. Depending on the desired cut, you’ll need to adjust the bevel accordingly.
- Bevel scale: Most miter saws feature a bevel scale that indicates the angle of tilt. Pay attention to this scale when adjusting the bevel angle.
Making Fine Adjustments:
To achieve precise beveled cuts, it may be necessary to make fine adjustments to the bevel angle. Here’s how you can do it:
- Loosen the bevel lock: Start by releasing the bevel lock, which is usually located at the back of the miter saw. This allows you to adjust the bevel angle more easily.
- Gradual adjustments: Make small adjustments to the bevel angle, paying close attention to the bevel scale. Keep in mind that even a slight change in angle can have a significant impact on the cut.
- Test cuts: After each adjustment, it’s a good idea to perform a test cut on a scrap piece of wood. This will help you assess the accuracy of your adjustments and make any necessary refinements.
Locking The Bevel In Place:
Once you have adjusted the bevel angle to the desired setting, it’s essential to lock it in place to maintain consistency throughout your cuts. Here’s how you can do it:
- Tighten the bevel lock: Once you are satisfied with the bevel angle adjustment, secure it in place by tightening the bevel lock. This ensures that the angle remains unchanged during the cutting process.
- Double-check the angle: Before making any cuts, double-check the bevel angle to ensure it hasn’t shifted during the locking process. This step is crucial for maintaining accuracy.
By following these steps and understanding the importance of adjusting the bevel angle, you’ll be well-equipped to make precise beveled cuts using your miter saw. Practice and patience are key to mastering this technique, so feel free to experiment and fine-tune your skills.
Happy cutting!
Cutting 45-Degree Angles
Cutting 45-degree angles with a miter saw is made simple with these step-by-step instructions. Learn how to set up your saw and position the wood correctly for precise and accurate cuts every time, ensuring professional results for your projects.
Cutting 45-degree angles with a miter saw is a common technique used in woodworking and carpentry. Whether you’re working on a DIY project or a professional job, mastering this skill is essential for achieving precise and professional-looking results. In this section, we will guide you through the process of cutting 45-degree angles with a miter saw, covering everything from workpiece positioning to performing the cut.
Positioning The Workpiece
To ensure an accurate and clean cut, proper positioning of the workpiece is crucial. Follow these steps to position your workpiece correctly:
- Place the workpiece on the miter saw table, making sure it is firmly secured.
- Determine the direction in which you need to cut the angle – either left or right.
- Adjust the miter saw angle by unlocking the bevel and rotating it to 45 degrees in the desired direction.
Aligning The Blade
Aligning the blade of the miter saw correctly is essential for achieving precise 45-degree cuts. These steps will guide you through the process:
- Check the alignment of the blade by lowering it onto a scrap piece of wood at a 90-degree angle.
- Make adjustments if necessary to ensure the blade is perfectly aligned with the marked line on the wood.
- Lock the blade in place once it is properly aligned.
Performing The Cut
Now that you have positioned the workpiece and aligned the blade, it’s time to perform the cut. Follow these steps for a clean and accurate 45-degree angle cut:
- Hold the workpiece firmly against the miter saw fence and make sure it does not move during the cut.
- Activate the miter saw and allow the blade to reach full speed before moving it into the wood.
- Slowly bring the blade down onto the wood, ensuring a steady and controlled motion throughout the cut.
- Maintain steady pressure against the fence and guide the workpiece smoothly through the cut.
- Once the cut is complete, release the power trigger and allow the blade to come to a complete stop before lifting it from the wood.
Cutting 45-degree angles with a miter saw may take some practice to achieve perfect results. Remember to always prioritize safety by wearing protective gear and following proper operating procedures. With time and experience, you’ll master this essential woodworking technique and create beautiful angled cuts effortlessly.
Cutting Custom Angles
Learn how to effortlessly cut custom angles with a miter saw, making your woodworking projects a breeze. Master the technique today for precise and professional results.
Measuring And Marking The Desired Angle
When it comes to cutting custom angles with a miter saw, accuracy is key. Follow these steps to measure and mark the desired angle with precision:
- Start by determining the angle you want to cut. Use a protractor or angle finder tool to measure the angle accurately.
- Once you have the desired angle, mark it on your workpiece using a pencil or a marking knife. Make sure the mark is clear and visible.
- Take extra care to align the mark properly, as even a slight deviation can affect the final result. Use a straightedge or a square to ensure the mark is perpendicular or parallel to the desired angle.
Adjusting The Miter And Bevel Angles
To achieve the perfect cut, it’s essential to adjust the miter and bevel angles of your miter saw. Follow these steps to make the necessary adjustments:
- Start by loosening the miter angle locking mechanism, typically located at the front or back of the saw.
- Rotate the miter gauge, which controls the left or right tilt of the saw blade, to match the desired angle. Use the markings on the gauge to guide you.
- Once the miter angle is set, tighten the locking mechanism to secure the angle in place.
- To adjust the bevel angle of the saw blade, locate the bevel angle locking mechanism, usually found at the back or side of the saw.
- Loosen the bevel angle locking mechanism and tilt the saw blade to the desired angle. Refer to the bevel scale on your saw for accurate adjustments.
- Finally, tighten the locking mechanism to fix the bevel angle securely.
Making The Cut With Precision
Now that you’ve measured, marked, and adjusted the angles, it’s time to make the cut. Follow these steps for precise and accurate cutting:
- Position your workpiece securely against the fence of the miter saw. Hold it firmly to ensure stability during the cut.
- Activate the saw and slowly bring the blade down onto the workpiece, aligning it with the marked cutting line.
- Maintain a steady and controlled motion as you guide the saw through the cutting process. Do not force the blade or rush the cut, as it can lead to inaccuracies or potential accidents.
- Once the cut is complete, release the power trigger and allow the blade to come to a complete stop before removing the workpiece.
Remember to always wear appropriate safety gear, such as safety glasses and ear protection, when operating a miter saw. Double-check your measurements and markings before making any cuts to avoid mistakes. With proper technique and attention to detail, you can confidently cut custom angles with a miter saw like a pro.
Cutting Compound Angles
Cutting compound angles with a miter saw can seem daunting, but with these simple steps, you’ll be confidently making angled cuts in no time. Master this technique and open up a world of possibilities for your woodworking projects.
Understanding Compound Angles
Compound angles are a bit more complex than standard angles, as they involve both the miter angle and the bevel angle. These angles are commonly used when cutting crown molding, picture frames, and other decorative trim pieces. To successfully cut compound angles with a miter saw, it’s important to understand how these two angles work together to create the desired cut.
Here’s a breakdown of each component:
- Miter Angle: The miter angle refers to the horizontal angle at which the saw blade cuts through the material. It determines the angle of the cut when viewed from the front or back of the material.
- Bevel Angle: The bevel angle, on the other hand, is the vertical angle at which the saw blade tilts from a 90-degree position. It controls the angle of the cut when viewed from the side of the material.
Setting The Miter And Bevel Angles
To achieve the desired compound angle cut, you must properly set the miter and bevel angles on your miter saw. Here are the steps to follow:
- Measure and mark the desired miter angle on your material using a protractor or angle finder tool.
- Loosen the miter adjustment knob or lever on your miter saw to unlock the saw arm.
- Rotate the saw arm left or right to align the indicator on the miter scale with your marked angle.
- Tighten the miter adjustment knob or lever to secure the miter angle in place.
- Measure and mark the desired bevel angle on your material using a protractor or angle finder tool.
- Locate the bevel adjustment knob or lever on your miter saw and loosen it to unlock the bevel arm.
- Tilt the saw blade to the left or right to align the indicator on the bevel scale with your marked angle.
- Tighten the bevel adjustment knob or lever to lock the bevel angle in place.
Executing The Cut For Compound Angles
Once you have properly set the miter and bevel angles, you’re ready to make the cut. Follow these steps for precise compound angle cuts on your miter saw:
- Position the material securely against the fence of the miter saw, ensuring it’s properly aligned for the desired cut.
- Activate the saw, allowing the blade to reach full speed before making contact with the material.
- Slowly and steadily lower the blade onto the material, maintaining a firm grip on the handle and keeping your hands away from the blade.
- Move the blade through the material smoothly and steadily, following the marked cutting line.
- Once the cut is complete, release the power switch and allow the blade to come to a complete stop before raising it.
- Inspect the cut for accuracy and make any necessary adjustments to the angles if needed.
Compound angles may take a bit of practice to master, but with the right technique and understanding, you can achieve clean and precise cuts on your miter saw. Remember to always prioritize safety, wear appropriate protective gear, and work in a well-ventilated area for optimal results.
Happy cutting!
Using Clamps And Supports For Stability
Achieve stability and precision by using clamps and supports when cutting angles with a miter saw. Ensure accurate cuts and prevent any potential accidents for a smooth woodworking experience.
When it comes to cutting angles with a miter saw, stability is crucial to ensure accurate and safe cuts. Securing the workpiece with clamps and utilizing supports can greatly enhance the stability of the cutting process. In this section, we will explore how clamps and supports can be effectively used to achieve precise angled cuts.
Securing The Workpiece With Clamps:
- Position the workpiece securely on the miter saw’s base: To prevent any movement during the cutting process, make sure the workpiece is firmly positioned on the saw’s base.
- Use clamps to secure the workpiece: Clamp the workpiece securely to the saw’s base or against the fence to keep it from shifting or rotating during the cut. This will ensure a consistent and accurate angle.
- Place the clamps strategically: Position the clamps close to the area where the cut will be made, ensuring that they do not interfere with the path of the blade.
- Apply adequate pressure: Tighten the clamps firmly enough to hold the workpiece in place, but avoid over-tightening to prevent damage to the material.
Utilizing Supports To Prevent Vibrations:
- Set up a sturdy workbench or saw stand: Providing a stable foundation for the miter saw is essential. Place it on a solid workbench or saw stand to minimize vibrations that can affect the accuracy of the cut.
- Use auxiliary supports for long or heavy workpieces: Long or heavy materials may cause vibrations or sagging during cutting. To counteract this, use auxiliary supports such as sawhorses or rollers to provide additional stability and eliminate vibrations.
- Align the supports parallel to the cutting line: Position the supports in a way that they are aligned parallel to the cutting line. This will help prevent any inaccuracies caused by wobbling or shifting of the workpiece.
- Ensure the supports are at the same height as the miter saw’s base: The supports should be at the same height as the saw’s base to maintain a level work surface. This will enable smooth and precise cutting angles.
By using clamps to secure the workpiece and employing supports to prevent vibrations, you can achieve stability and accuracy when cutting angles with a miter saw. These simple techniques will help you maintain control over the workpiece and ensure precise cuts every time.
So, let’s get ready to make those perfectly angled cuts with confidence!
Cutting Angles On Long Workpieces
Learn how to cut angles on long workpieces with a miter saw. This step-by-step guide will help you achieve precise and accurate cuts for all your woodworking projects.
Cutting angles on long workpieces can be a challenging task, but with the right techniques and tools, you can achieve accurate and precise cuts every time. In this section, we will explore the steps you can follow to cut angles on long workpieces using a miter saw.
Extending Your Miter Saw Table:
To effectively cut angles on long workpieces, it is crucial to extend your miter saw table. This will provide the necessary support and stability for the workpiece, allowing you to make precise cuts. Here are some ways to extend your miter saw table:
- Use a roller stand: Set up a roller stand next to your miter saw and adjust its height to match the level of the miter saw table. This will provide a stable surface for the workpiece to rest on during the cutting process.
- Utilize sawhorses: Position sawhorses on either side of your miter saw, parallel to the table. Place a sturdy board across the sawhorses to create an extended surface for longer workpieces. Ensure that the board is level and securely fastened to the sawhorses.
Supporting The Workpiece Properly:
Proper support is essential when cutting angles on long workpieces to prevent wobbling or shifting during the cut. Follow these guidelines to support your workpiece effectively:
- Use clamps: Securely clamp the workpiece to the miter saw table or the extended surface created by the roller stand or sawhorses. This will minimize movement and ensure stability throughout the cutting process.
- Employ an additional support fence: For longer workpieces, attach a support fence to the miter saw’s fence. This support fence will provide extra stability and prevent the workpiece from sagging or shifting during the cut. Ensure that the support fence is securely fastened and aligned properly.
Making Multiple Cuts For Accuracy:
When cutting angles on long workpieces, achieving accuracy may require making multiple cuts. Here’s a step-by-step approach to ensure precise cuts:
- Measure and mark: Use a tape measure to determine the length and angle of the cut. Mark the workpiece accordingly with a pencil or a marking gauge.
- Make initial cuts: Begin by making initial cuts slightly outside the marked lines. This will allow for adjustment and fine-tuning.
- Test fit and adjust: After each cut, test fit the workpiece by aligning it with the desired angle. If necessary, make small adjustments by gradually trimming off additional material until the desired fit is achieved.
- Repeat as needed: Continue making slight adjustments and additional cuts until the workpiece fits perfectly with the desired angle.
Remember to always prioritize safety when working with power tools like a miter saw. Wear appropriate safety gear, such as goggles and ear protection, and follow the manufacturer’s instructions for operating the miter saw.
By following these techniques, you can confidently cut angles on long workpieces using a miter saw with precision and accuracy. Take your time, measure twice, and make gradual adjustments to achieve the desired results. Happy cutting!

Safety Precautions When Cutting Angles
Cutting angles with a miter saw requires safety precautions to prevent accidents. Ensure to wear protective gear, check the saw for any damages, secure the workpiece properly, and utilize the saw’s safety features.
Cutting angles with a miter saw can be a versatile and useful skill for any woodworker. However, it’s important to prioritize safety when working with power tools. Here are some essential safety precautions to keep in mind:
Wearing Protective Gear
- Safety glasses: Protect your eyes from any flying debris or wood particles.
- Ear protection: Invest in earplugs or earmuffs to prevent hearing damage caused by loud power tools.
- Dust mask: Minimize inhalation of sawdust by wearing a dust mask or respirator.
Using A Push Stick Or Block
- A push stick or push block is an essential tool to keep your hands a safe distance from the blade.
- Use the push stick or block to guide the material through the cut instead of using your hands directly.
- This ensures that your hands are away from the blade, reducing the risk of accidents or injuries.
Keeping Hands Clear Of The Blade
- Always keep your hands at a safe distance from the blade while operating the miter saw.
- Avoid reaching across the saw blade or placing your hands near the cutting area.
- Utilize clamps or a vise to secure the material being cut, ensuring a steady and controlled cut.
Remember, the key to safe angle cutting with a miter saw is to be aware of potential risks and take necessary precautions. Don’t rush the process and always prioritize safety above all else. By following these safety measures, you can enjoy working with your miter saw while keeping yourself protected from any possible harm.
Stay safe and happy woodworking!
Dealing With Blade Tearout
Cutting angles with a miter saw can result in blade tearout, but there are ways to deal with this issue. By using a sharp blade, securing the material, and making slow, controlled cuts, you can minimize tearout and achieve clean, precise angles.
When it comes to cutting angles with a miter saw, dealing with blade tearout can be a frustrating obstacle. Blade tearout refers to the splintering or chipping that can occur on the surface of the wood when making angled cuts.
However, there are several techniques you can employ to minimize or even eliminate blade tearout. In this section, we will delve into the importance of choosing the right blade, adjusting the blade height, and adding support to reduce tearout.
Choosing The Right Blade:
- Opt for a high-quality blade with a higher tooth count: A blade with more teeth will result in smoother cuts and minimize the chances of tearout.
- Select a blade with a lower hook angle: A lower hook angle means the blade’s cutting edge is less aggressive, resulting in cleaner cuts.
- Consider using a blade with a high alternate top bevel (ATB) configuration: This type of blade has angled cutting edges that shear through the wood, reducing tearout.
Adjusting The Blade Height:
- Ensure the blade height is properly adjusted: A blade that is set too high can result in increased tearout. Lower the blade height to minimize tearout.
- Make test cuts to determine the ideal height: Before making your actual angled cuts, test the blade height on a scrap piece of wood to find the sweet spot where tearout is minimized.
Adding Support To Reduce Tearout:
- Use a sacrificial backing board: Place a piece of scrap wood behind the workpiece to provide support and prevent tearout.
- Apply masking tape or painter’s tape: Before making the cut, apply tape along the cut line to help reduce splintering.
- Support the workpiece with auxiliary fences and clamps: Adding auxiliary fences on either side of the workpiece and securing them with clamps can provide additional support and stability, resulting in cleaner cuts.
Remember, minimizing blade tearout requires a combination of techniques. By choosing the right blade, adjusting the blade height, and adding support to reduce tearout, you can achieve smoother and cleaner angled cuts with your miter saw.
Correcting Angle Inaccuracies
Cutting accurate angles with a miter saw is essential, and luckily, correcting any inaccuracies is simple. With proper technique and attention to detail, you can achieve precise cuts and ensure your project turns out just right.
Cutting angles with a miter saw may seem straightforward, but sometimes you might encounter inaccuracies in your cuts. Whether it’s due to measurement errors or slight misalignments, correcting these angle inaccuracies is crucial to ensure precise cuts and achieve the desired results.
Here are some steps to help you correct angle inaccuracies effectively:
Rechecking Your Measurements
It’s important to double-check your measurements before making any adjustments. Even the slightest error can lead to significant angle discrepancies. Here’s how you can re-check your measurements:
- Use a reliable measuring tool, such as a tape measure or a measuring square.
- Measure multiple times to ensure accuracy.
- Take into account the angle and length needed for your specific project.
- Compare your measurements with the desired angle to identify any discrepancies.
Adjusting The Miter And Bevel Settings
Once you’ve identified an angle inaccuracy, you can adjust the miter and bevel settings on your miter saw to correct it. Keep the following in mind:
- Start by loosening the bevel lock and adjusting the bevel angle based on your measurement.
- Secure the bevel lock once you’ve set the desired angle.
- Next, use the miter lock to adjust the miter angle.
- Make small incremental adjustments rather than large ones to fine-tune the angle accurately.
Fine-Tuning With Trial Cuts
After making adjustments to the miter and bevel settings, it’s important to perform trial cuts to ensure the accuracy of your angle. Here’s how you can fine-tune your cuts:
- Use scrap pieces of wood to perform trial cuts.
- Evaluate the resulting angles and compare them with your desired measurements.
- Make small adjustments to the miter and bevel settings as needed.
- Repeat the trial cuts until you achieve precise angle cuts.
With these steps, you can effectively correct angle inaccuracies and achieve the desired results when cutting angles with a miter saw. Remember to recheck your measurements, make adjustments to the miter and bevel settings, and continuously fine-tune your cuts through trial and error.
Happy woodworking!
Credit: www.peterchild.co.uk
Fixing Alignment Problems
Learn how to cut angles effortlessly with a miter saw and fix alignment problems with precision. Master the technique with easy-to-follow steps for seamless results.
If you’re experiencing alignment issues with your miter saw, don’t worry! This section will guide you through the steps to fix these problems and ensure accurate cuts. By following these instructions, you’ll be able to check for blade runout, square the blade to the fence, and align the miter and bevel gauges.
Checking For Blade Runout:
- Place a straight piece of lumber on the miter saw table.
- Rotate the blade, observing if there’s any wobbling or deflection.
- If you notice irregular movement, the blade might be misaligned or damaged.
Squaring The Blade To The Fence:
- Loosen the screws holding the fence in place.
- Use a square to align the fence perpendicular to the blade.
- Tighten the screws securely, ensuring the fence remains square.
Aligning The Miter And Bevel Gauges:
- Set the miter gauge at the 0-degree mark.
- Rotate the bevel gauge to 0 degrees as well.
- Check if both gauges are aligned with the saw’s reference points.
By addressing these alignment problems, you’ll enhance the accuracy and precision of your miter saw cuts. Remember to perform these steps regularly to maintain optimal performance. Keep reading to learn more about other essential techniques for effectively using a miter saw.
Frequently Asked Questions On How To Cut Angles With A Miter Saw
How Do You Work Out The Angle Of A Cut On A Miter Saw?
To work out the angle of a cut on a miter saw, measure the desired angle with a protractor or use the saw’s built-in angle indicator.
How Do You Cut A 45 Degree Angle With A Miter Saw?
To cut a 45-degree angle with a miter saw, set the saw at a 45-degree angle, align the workpiece, and make the cut with caution.
Can A Mitre Saw Cut Any Angle?
Yes, a mitre saw can cut any angle. It is versatile and can make precise angle cuts.
How Do You Cut A 45 Degree Angle With A Cutter?
To cut a 45 degree angle with a cutter, measure and mark the desired angle, align the cutter blade with the mark, and carefully make the cut in a straight motion.
Conclusion
To sum up, cutting angles with a miter saw may seem daunting at first, but with the right techniques and practice, you can achieve precise and professional results. Remember to carefully measure and mark your workpiece, secure it firmly in place, and choose the correct angle setting on your miter saw.
Use smooth, controlled movements when making your cuts, and always prioritize safety by wearing protective gear and working in a well-ventilated area. Experiment with scrap pieces before tackling your actual project to gain confidence and improve your skills. With time, you’ll become proficient in cutting angles and be able to tackle more complex woodworking projects with ease.
Keep learning, practicing, and exploring new techniques, and soon you’ll be a master of the miter saw!