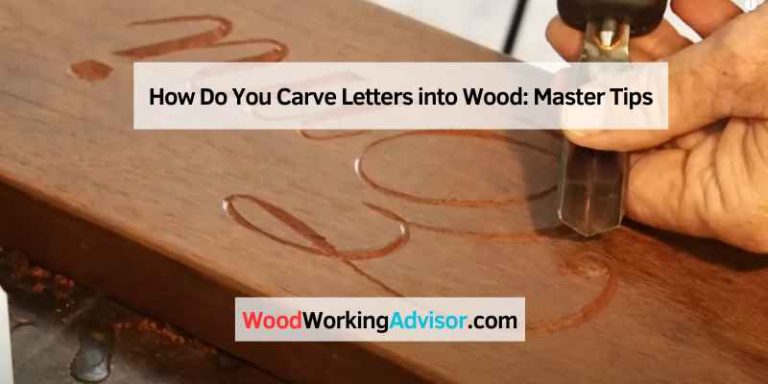
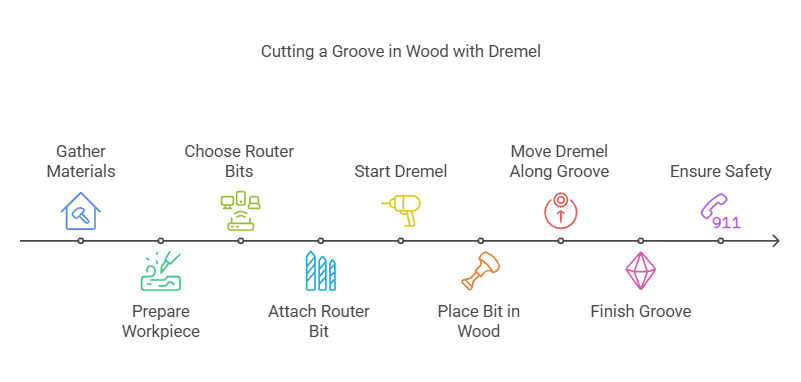
How to Cut a Groove in Wood With Dremel: A Step-by-Step Guide
To cut a groove in wood with a Dremel, insert the appropriate bit and then mark the wood before adjusting the groove cutting depth. You can use a rotary tool, but it’s more difficult to make long, straight lines with them.
Alternatively, a plunge router is the easiest tool to use for straight or curved grooves. Cutting a groove in wood is a necessary skill for anyone wanting to create furniture, cabinets, or any type of wooden construction. Dremel is a popular and versatile rotary tool that can be used for grooving wood.
If you don’t have access to a plunge router, or you prefer to use a more compact tool that can be held with one hand, Dremel could be the right choice for you. We will explore the steps to cut a groove in wood with a Dremel.
Materials Needed
To cut a groove in wood using a Dremel, you will need a rotary tool with a router attachment, such as mortising, roundover or V-groove bits. You will also need a piece of wood for practicing, safety glasses, and a clamp or vise to secure the wood in place while cutting.
Dremel
The Dremel is a handheld rotary tool that is perfect for cutting grooves into wood. It is a versatile tool that can be used for a variety of tasks, including sanding, grinding, and cutting. The Dremel is also portable, making it easy to work in tight spaces.
Router Bits
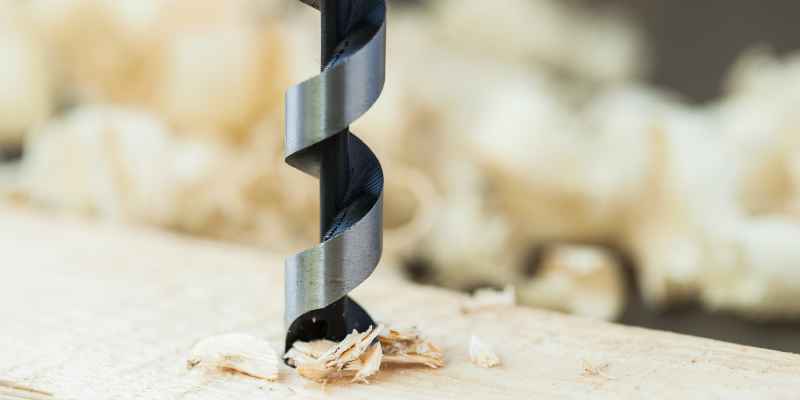
Router bits are the cutting tools that attach to the Dremel to create the groove in the wood. There are different types of router bits available, such as straight router bits, corner rounding bits, and plunge router bits. Before starting the project, choose the right type of router bit based on the desired width and depth of the groove.
Safety Equipment
It is important to wear appropriate safety equipment while cutting grooves with a Dremel. Safety goggles will protect the eyes from flying debris, gloves will protect the hands from cuts and scrapes, and a dust mask will protect the lungs from inhaling dust and wood particles.
To sum up, to cut a groove in wood with a Dremel, all that is needed are a Dremel, router bits, and safety equipment. With these materials, it is possible to create clean and precise grooves in wood without the need for expensive or bulky machinery. Always remember to prioritize safety when working with power tools.
Preparing The Workpiece
Before cutting a groove in wood with a Dremel, it is important to properly prepare the workpiece. This includes selecting the appropriate wood piece, cleaning it thoroughly, and marking the areas to be grooved with a pencil or tape measure.
It is also important to wear safety gear such as goggles and gloves to protect yourself from any dust or debris.
Measuring And Marking The Groove
Before cutting a groove in the wood with a Dremel, you need to determine the width and depth of the groove you want to make. Use a ruler or a measuring tape along with a pencil to mark the edges of the groove on the wood. Make sure to mark the wood accurately, as it will determine the final outcome of your project.
Securing The Workpiece
Once you have marked the grooves, it’s time to secure the wood in place. The wood can slip while you are working on it, leading to uneven cuts and damage to your project. To prevent this, secure the wood firmly to a worktable or clamp it with a vice. Make sure the wood is stable and will not move or wiggle while using the Dremel as this may lead to uneven cuts and damages to your project.
Cleaning The Work Area
Before starting the cutting process, it is essential to clean the work area. Debris or obstructions can make the groove-cutting process more difficult, potentially causing damage to your project or safety hazards. Clean the work area and remove any unwanted debris.
Choosing The Right Bit
Choosing the right bit is critical to getting the desired grooves in your project. Pick a Dremel bit based on the size and depth of the groove to make the cutting process less challenging. Different bits are available, such as round-over, core-box, mortising, and V-groove bits, each designed for specific tasks.
Conclusion
Preparing the workpiece is a crucial step in cutting grooves in wood with a Dremel. Accurate marking, securing to a stable surface, cleaning the work area, and selecting the right bit are the keys to success. By preparing the workpiece properly, you will have a better chance of achieving the desired results from your Dremel-cut grooves.
Choosing The Right Router Bits
Cutting a groove in wood with a Dremel can be achieved using a variety of router bits. It’s important to choose the right bit, such as a V-groove or a corebox bit, to match the desired shape and depth of the groove.
Make sure to practice on scrap wood first before making cuts on the final piece.
Cutting a groove in wood with a Dremel is easy and precise, but it’s essential to select the proper router bit for your task. Router bits for Dremel come in different shapes and sizes, which helps to create a distinct look that you desire. Here are the three types of router bits for cutting grooves in wood with a Dremel.
V-groove
The V-groove router bit features a triangular-shaped point that slices a distinctive V-shaped channel into the wood. This bit is perfect for etching lettering into a signboard or creating decorative designs in woodworking projects. V-groove bits are available in different angles and sizes, and the depth of the cut can be adjusted by changing the bit’s bit depth.
Straight Bit
The straight bit router is seemingly the most basic among router bits. It has a straight edge that can cut a small cove or intricate designs in the wood. These bits come in different sizes, so you can choose the size that fits the wood you’re working on thoroughly.
Roundover Bit
The roundover bit for Dremel machines creates a smooth finish on the edges of wood. This bit features a ball-bearing pilot that lets you follow the wood’s edge as you work. Additionally, the roundover bit’s radius refers to how much wood is removed from the edge, so you should choose the bits that correspond to the smoothness you want.
No matter the use case, choosing the right router bit is critical for creating a professional-looking groove in wood with a Dremel. Each type of router bit comes in various sizes, and choosing the right size and type helps to achieve precise and accurate cuts.
Attaching The Router Bit To The Dremel
To cut a groove in wood with a Dremel, you will need to attach a router bit to the tool. Choose a suitable bit, attach it to your Dremel and start cutting through the wood for a precise and professional-looking groove.
Watch DIY videos or read technical guides to familiarize yourself with the usage.
Inserting The Bit
The first step in attaching a router bit to your Dremel is to insert the bit into the collet. The collet is the metal piece that holds the router bit in place and is located at the end of the Dremel. To insert the bit, ensure that your Dremel is turned off and then loosen the collet nut by turning it counterclockwise. Once the collet nut is loose enough, slide the router bit into the collet and tighten the nut by turning it clockwise. Ensure that the bit is inserted all the way in and that it is centered in the collet.
Tightening The Collet
It is important to ensure that the collet is tightened properly to avoid any accidents or mishaps during routing. After inserting the bit, hold the shaft of the bit with one hand and with the other hand, use the collet wrench to tighten the collet nut. Ensure that the collet nut is tightened securely and that the bit is not loose. If the bit is loose, it may slip or even come out during routing, which can be dangerous.
In conclusion, attaching a router bit to your Dremel is an important step in cutting a groove in wood. Remember to insert the bit and tighten the collet properly to avoid any mishaps. With the right technique and practice, you can easily cut a groove in wood using your Dremel.
Cutting The Groove
Cutting a groove in wood using a Dremel tool can be a challenging task, but one that can be accomplished with the right technique and accessories. By using router bits, such as mortising bits or V-groove bits, you can create precise grooves and inlays in wood.
Make sure to have a steady hand and go slowly to achieve the desired results.
Starting The Dremel
To begin cutting a groove in wood with a Dremel, plug in the device and insert the appropriate bit. Begin by selecting a bit that suits the width and depth of the groove you want to cut. Put on safety goggles and hold the Dremel firmly, aligning it with the section of wood where you want to cut the groove.
Placing The Bit Into The Wood
As you start cutting the groove, adjust the bit so that it contacts the wood. Place the bit straight onto the wood’s surface and apply light pressure to it, making sure that it is at the right angle relative to the surface to produce the desired groove depth.
Moving The Dremel Along The Groove
Once the Dremel bit is properly positioned, move the device forward, pushing it along the groove you want to create. To make precise cuts, take your time and move the Dremel slowly and steadily. Be sure to remain focused on applying consistent pressure and keeping a straight line. Move the Dremel bit in the direction you want your groove to take. Pay special attention to the pressure and depth of each cut.
Remember, cutting a groove in wood with a Dremel requires patience, attention to detail, and caution. The process, when done correctly, can transform ordinary wood into finely crafted pieces.
Finishing The Groove
After cutting the groove in wood with a Dremel tool, you need to finish it cleanly. Here are the final steps to ensure that your groove looks neat and professional:
1. Cleaning Up Any Rough Edges
Using a small file or sandpaper, clean up any rough edges around the groove. This will make the groove more precise and attractive. Make sure to remove any burrs on both the inside and outside of the groove because they can affect the fit of the adjoining pieces of wood.
2. Sanding The Groove
After cleaning the groove, sand it to remove any remaining blemishes and to smoothen the surface. The Dremel tool may leave some rough patches or unevenness, which sandpaper can rectify. Using a sanding drum or sanding attachment, carefully sand along the groove’s edges until both sides and the bottom of the groove are smooth.
3. Applying A Finish (optional)
You may choose to add a finish to protect and enhance the look of the groove. A clear coat or wood stain can be used, depending on the type of wood you are working with. Ensure that the coat is evenly applied and allowed to dry completely before continuing with any further work on the groove.
Completing these steps will give you a nice-looking, clean groove that will show off your Dremel tool skills. Ensure you use proper protective gear, including gloves, goggles, and a mask to protect yourself from any dust while working.
Safety Precautions
When cutting a groove in wood with a Dremel, safety precautions are crucial. Always wear eye and ear protection, as the tool can create loud noise and flying debris. Secure the wood with clamps or a stable surface to avoid slips and ensure proper grip while using the Dremel.
Wearing Safety Glasses And A Mask
Safety should be your top priority when cutting a groove in wood with a Dremel. The process can produce small particles of wood that can fly into your eyes or nose, causing damage or irritation. Wearing safety glasses and a mask is necessary to protect your eyes and lungs. It is advisable to use a dust collector or a fan to minimize dust and debris in the air.
Using A Workbench
Using a workbench is essential for cutting a groove in wood with a Dremel. A stable and sturdy workbench will help you to keep the woodpiece steady and provide a good balance while you’re cutting. Make sure the bench is secured correctly to avoid any accidents. Also, make sure the Dremel is properly mounted and securely attached to the workbench to prevent it from moving or slipping.
Taking Breaks
Cutting a groove in wood with a Dremel can take a lot of time, and performing the task for an extended period can cause fatigue, leading to mistakes. To avoid mistakes and stay energized, it is essential to take frequent breaks. Stretch your arms, hands, and legs to keep your body active regularly. Take a few minutes to clear your mind and relax before resuming work.
Conclusion
Cutting a groove in wood with Dremel can be challenging but can produce excellent results if done correctly. Remember to keep safety in mind at all times by wearing safety glasses and a mask, using a workbench, and taking frequent breaks to avoid fatigue. With these safety precautions in mind, you can cut a groove in wood with Dremel quickly and efficiently.
Frequently Asked Questions Of How To Cut A Groove In Wood With Dremel
Can You Cut A Groove With A Dremel?
Yes, you can cut a groove with a Dremel using the appropriate router bit. Dremel router bits are ideal for routing, inlaying, and mortising in wood and other soft materials. They can be used for edging and grooving wood.
How Do You Notch Wood With A Dremel?
To notch wood with a Dremel, insert an appropriate router bit into the tool and adjust it to the desired depth and width of the notch. Then, slowly and carefully guide the Dremel along the wood to create the notch.
Dremel router bits are ideal for grooving and inlaying wood.
Can You Use A Dremel To Cut Through Wood?
Yes, you can use a Dremel to cut through wood. Dremel router bits are ideal for edging and grooving wood, routing, inlaying, and mortising in wood and other soft materials. A plunge router is the easiest tool to use for straight or curved grooves, but a rotary tool also works for cutting short channels.
What Tool Is Used To Make Grooves In Wood?
A plunge router is the best tool to use for straight or curved grooves in wood. If you prefer using a rotary tool, Dremel router bits can also be used to groove or edge wood.
Conclusion
Cutting grooves in wood can be done efficiently with a Dremel rotary tool and the right bits. The process involves selecting the appropriate drill bit, marking out the groove’s path on the wood, and then cutting slowly and steadily. By following these steps, you can easily create channels for your woodworking projects.
Additionally, you can use different types of router bits to add decorative effects and achieve a professional finish. With a bit of practice and patience, cutting grooves in wood with a Dremel can be a straightforward and satisfying task.