How to Cut Kitchen Countertop Like a Pro: Expert Tips & Tricks
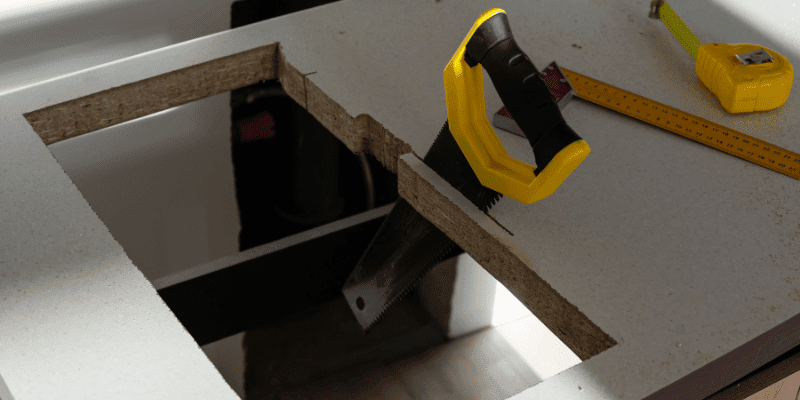
To cut a kitchen countertop, measure and mark the desired cut lines, use a circular saw with a diamond blade to make the cut, and smooth the edges with a file or sandpaper. A well-fitted and accurately cut kitchen countertop can transform the look and functionality of your kitchen.
Whether you’re replacing an old countertop or customizing a new one, knowing how to cut it properly is essential. By following a few simple steps, you can achieve a clean and precise cut. In this guide, we will explain the process of cutting a kitchen countertop, from measuring and marking the cut lines to using the right equipment and finishing the edges.
So, let’s dive in and learn how to cut a kitchen countertop like a pro.
:max_bytes(150000):strip_icc()/How-to-Organize-Your-Kitchen-Like-a-Pro-FT-BLOG0123-6eeb16a3fe804647a7d0a4d95450a275.jpg)
Credit: www.foodandwine.com
Understanding The Tools And Materials
Learn how to cut kitchen countertops easily with proper tools and materials. Enhance your understanding of the process to achieve precise and professional results.
Essential Tools For Cutting Kitchen Countertops:
- Circular saw: A circular saw with a diamond-tipped blade is essential for cutting through tough countertop materials such as granite or quartz. It allows for precise and smooth cuts.
- Jigsaw: A jigsaw is handy for cutting curves or irregular shapes on softer materials like laminate. It offers versatility and maneuverability.
- Router: If you need to create decorative edges on your countertop, a router is the go-to tool. It adds a professional touch to the finished product.
- Clamps: Clamps are crucial for securing the countertop in place during the cutting process. They help ensure accuracy and stability.
- Measuring tape: Accurate measurements are key to a successful countertop cut. A reliable measuring tape helps you get precise dimensions.
- Pencil: Marking the cutting line on the countertop is essential. Use a pencil to make clear and visible marks that guide your cutting.
Selecting The Right Type Of Countertop Material:
- Laminate: Laminate countertops are a popular choice due to their affordability and wide range of colors and patterns. They are relatively easy to cut and install.
- Granite: Granite offers a luxurious and natural look to your kitchen. It is a durable material but requires special tools and expertise for cutting.
- Quartz: Quartz countertops provide the beauty of natural stone combined with low maintenance. However, cutting quartz requires specific tools and precautions.
- Solid surface: Solid surface countertops, such as Corian, are versatile and easy to work with. They offer the option of seamless integrated sinks and are easy to cut and shape.
- Butcher block: Butcher block countertops bring warmth and character to any kitchen. They require careful cutting to ensure the integrity of the wood grain.
Measuring And Marking The Countertop For Cutting:
- Measure twice: Take accurate measurements of the area where the countertop will be installed. Double-check your measurements to avoid costly mistakes.
- Mark the cutting line: Using a straightedge or a template, mark the exact cutting line on the countertop surface. Ensure that the line is clear and visible.
- Consider overhangs: If you want an overhang of the countertop, measure and mark the desired distance from the edge to determine the cutting line accurately.
- Use masking tape: Applying masking tape directly on the cutting line not only protects the countertop surface but also prevents chipping during cutting.
- Double-check alignment: Before making any cuts, make sure the marked cutting line aligns with your measurements and desired design.
Remember, cutting kitchen countertops requires precision, the right tools, and safety precautions. Take your time, follow the instructions of the selected tools, and prioritize safety throughout the process.
Safety Precautions And Preparation
When cutting kitchen countertops, it’s crucial to prioritize safety and take proper precautions. By following these steps, you can ensure a smooth and accident-free process.
Importance Of Wearing Protective Gear:
Wearing protective gear is crucial to ensure your safety when cutting kitchen countertops. Here are some reasons why it is important:
- Eye protection: Use safety goggles to shield your eyes from flying debris and dust particles.
- Ear protection: Loud noises from power tools can damage your hearing, so wear earplugs or earmuffs.
- Respiratory protection: A dust mask or respirator can prevent inhalation of harmful dust and fumes.
- Hand protection: Gloves will safeguard your hands from sharp edges and potential injuries.
- Clothing protection: Wear long-sleeved shirts and long pants to protect your arms and legs from cuts and scratches.
Preparing The Workspace For Cutting:
Before you start cutting your kitchen countertop, it is essential to prepare your workspace properly. Follow these steps:
- Clear the area: Remove any objects, utensils, or clutter from the countertop to create a clean and organized workspace.
- Cover nearby surfaces: Use drop cloths or plastic sheets to protect adjacent surfaces from dust and debris.
- Ventilation: Ensure good airflow by opening windows or using fans to prevent the accumulation of dust and fumes.
- Adequate lighting: Use additional lighting or work in a well-lit area to enhance visibility while cutting.
- Cord management: Keep cords and electrical tools away from your cutting area to avoid accidents or tangling.
Securing The Countertop To Prevent Movement:
To ensure accuracy and safety, it is crucial to secure the countertop before cutting. Here’s how you can prevent movement:
- Clamps: Use clamps to secure the countertop to a stable surface, such as a workbench or sawhorses, to prevent it from shifting during cutting.
- Non-slip mats: Place non-slip mats or rubber grips underneath the countertop to provide additional stability and prevent movement.
- Adhesive tape: Apply adhesive tape along the cutting line to help stabilize the countertop and minimize vibrations while cutting.
- Weighted objects: If clamps or mats are not available, use weighted objects such as sandbags or heavy books to weigh down the countertop and prevent it from moving.
- Check stability: Before starting the cutting process, ensure that the countertop is securely fastened and does not move when pressure is applied.
Remember, taking necessary safety precautions and properly preparing your workspace are critical steps in ensuring a successful kitchen countertop cutting project. By wearing protective gear, preparing the workspace, and securing the countertop, you can minimize the risk of accidents and achieve accurate results.

Different Cutting Techniques
Learn the essential cutting techniques for kitchen countertops. Discover the best methods to achieve precise cuts and create a seamless finish for your countertop installation. Master the art of cutting and enhance the aesthetics of your kitchen.
Cutting kitchen countertops can be a challenging task, especially if you don’t have the right tools and techniques. Fortunately, there are different cutting methods that can help you achieve precise and clean results. In this section, we will explore three popular cutting techniques: straight cuts using a circular saw, cutting curves and angles with a jigsaw, and using a router for precise edging.
Straight Cuts Using A Circular Saw:
- Measure twice, cut once: Before making any cuts, ensure you measure the countertop accurately and mark the cutting line with a straightedge or a pencil.
- Set up your workspace: Find a sturdy work surface and secure the countertop firmly in place to prevent it from shifting during cutting.
- Choose the right blade: Select a circular saw blade specifically designed for cutting countertops or laminate materials to ensure clean and smooth cuts.
- Adjust the blade depth: Set the blade depth of your circular saw slightly deeper than the thickness of the countertop to avoid incomplete cuts.
- Start cutting: Align the saw blade with the marked cutting line and slowly guide the saw along the line, applying steady pressure. Maintain a firm grip on the saw and keep the countertop stable throughout the cutting process.
- Safety first: Wear protective gear, such as safety glasses and gloves, to safeguard yourself from any potential hazards.
Cutting Curves And Angles With A Jigsaw:
- Mark your cutting line: Use a pencil or a marker to trace the desired curve or angle on the countertop surface. Ensure the markings are clear and visible.
- Secure the countertop: Similar to straight cuts, make sure the countertop is securely positioned to prevent it from moving during cutting.
- Choose the right blade: Select a jigsaw blade designed for cutting laminate or countertop materials. Blades with fine teeth work well for precise cuts.
- Start cutting: Begin by drilling a starter hole on the marked line, large enough for the jigsaw blade to fit in. Insert the blade into the hole and carefully follow the marked line, maintaining a steady hand motion.
- Practice caution: Be patient and take your time when cutting curves and angles. Avoid rushing the process to prevent any mistakes or irregular cuts.
Using A Router For Precise Edging:
- Select the appropriate router bit: Depending on the desired edge profile, choose a router bit that matches your preference. There are various options available, such as straight bits, chamfer bits, and round-over bits.
- Secure the countertop: Ensure the countertop is securely fastened to prevent any movement during routing. You can use clamps or a sturdy work surface for stability.
- Set the router depth: Adjust the depth of the router bit to achieve the desired edge profile. It’s recommended to make multiple shallow passes rather than a single deep pass for better control.
- Start routing: With a firm grip on the router, guide it along the edge of the countertop, moving in the opposite direction of the rotation of the bit. Apply consistent pressure to achieve a smooth and even result.
- Finish with sanding: After routing, use sandpaper or a sanding block to smooth out any rough edges and achieve a polished finish.
By understanding these different cutting techniques, you can confidently tackle your kitchen countertop project. Remember to prioritize safety and take your time to achieve precise and satisfying results.
Step-By-Step Cutting Process
Learn how to cut a kitchen countertop with this step-by-step cutting process. Discover the essential guidelines and techniques to achieve precise and professional results.
Setting The Depth And Angle On The Saw:
Adjusting the depth and angle of the saw is vital to ensure a precise cut on your kitchen countertop. Here’s how to do it:
- Start by setting the desired depth on your circular saw. Measure the thickness of your countertop, and adjust the saw’s depth accordingly.
- Check the angle of the saw blade to ensure it is perpendicular to the countertop surface. This will guarantee a clean and straight cut.
- Make sure to wear safety goggles and gloves throughout the cutting process.
Making A Straight Cut With The Circular Saw:
Once you have set the depth and angle of the saw, it’s time to make a straight cut on your kitchen countertop. Follow these steps:
- Measure the desired length you want to cut on the countertop and mark it with a pencil or masking tape.
- Place the circular saw on the edge of the countertop, aligning it with the marked line.
- Hold the saw firmly with both hands and start the blade before making contact with the countertop.
- Glide the saw along the marked line, applying even pressure and keeping the saw straight.
- Take it slow and steady to avoid any mistakes or damage to the countertop.
If you need to cut corners or intricate shapes on your kitchen countertop, a jigsaw can come to the rescue. Follow these steps to achieve accurate cuts:
- Use a drill to create a starter hole on the inside corner or intricate shape you want to cut.
- Insert the jigsaw blade into the starter hole and secure it in place.
- Turn on the jigsaw and guide the blade along the marked line, using slow and controlled movements.
- Remember to take breaks if the blade gets too hot, to avoid any damage.
- Patience and steady hands are key when using a jigsaw for intricate cuts.
Creating Clean And Smooth Edges With A Router:
After completing the basic cutting process, it’s time to give your kitchen countertop clean and smooth edges. Follow these steps using a router:
- Choose a router bit suitable for your desired edge design, such as a roundover or bevel bit.
- Secure the countertop firmly in place to prevent any shifting or accidents.
- Adjust the router’s depth to ensure it removes material in small increments, creating a smooth edge.
- Starting from one end, run the router along the edge of the countertop with consistent pressure.
- Take your time and go slow to achieve precise and professional-looking edges.
Remember, safety should always be your top priority when working with power tools. Wear protective gear, have a clean and clutter-free workspace, and follow the manufacturer’s instructions for the tools you are using. With the right techniques and patience, you can successfully cut your kitchen countertop and achieve the desired result.

Tips For A Professional Finish
Discover expert tips for cutting kitchen countertops with precision and professionalism. From selecting the right tools to measuring accurately, this guide will help you achieve a flawless finish for your countertop project.
Sanding and smoothing the cut edges:
After cutting your kitchen countertop, the edges may appear rough and uneven. Here are some tips to achieve a professional finish:
- Start by using a coarse sandpaper (around 80-grit) to remove any noticeable imperfections and to smoothen the edges.
- Gradually move to finer sandpapers (around 120-grit and then 220-grit) to refine the surface and ensure a smooth finish.
- Make sure to sand in a consistent and even motion, applying light pressure to avoid uneven surfaces.
- Take your time during this process, as it will significantly impact the final appearance of your countertop.
Applying edge banding for a seamless look:
To achieve a seamless look and protect the exposed edges of your kitchen countertop, consider using edge banding. Here’s how to do it:
- Choose a suitable edge banding material, such as wood veneer or PVC, that matches your countertop’s design.
- Measure and cut the edge banding according to the length of each countertop edge, allowing a slight overlap at both ends.
- Apply heat to the edge banding using an iron or a heat gun, sticking it firmly to the countertop’s edge.
- Use a roller to apply pressure and ensure proper adhesion, eliminating any air bubbles or imperfections.
- Trim any excess edge banding using a utility knife and gently sand the edges to create a seamless transition from the countertop to the banding.
Properly sealing the countertop after cutting:
Sealing the countertop is crucial to protect it from stains, moisture, and everyday wear and tear. Follow these steps for proper sealing:
- Clean the entire countertop surface thoroughly, removing any dust or debris.
- Select a suitable countertop sealant, such as a water-based acrylic or a penetrating sealer, depending on the countertop material.
- Apply the sealant evenly using a foam brush or a lint-free cloth, following the manufacturer’s instructions for the specific product.
- Let the sealant dry completely, ensuring proper curing time as recommended by the manufacturer.
- Apply additional coats if necessary, allowing sufficient drying time between each layer.
- Once the sealant has fully cured, your kitchen countertop will be protected and ready for use.
Remember, following these tips will help you achieve a professional finish when cutting your kitchen countertop. Take your time, be meticulous, and enjoy the rewarding process of transforming your kitchen space.
Troubleshooting Common Issues
Having trouble cutting your kitchen countertop? Learn effective troubleshooting techniques for common issues in this comprehensive guide. Get step-by-step tips to make the process smoother and achieve professional results.
Preventing Chipping Or Splintering During The Cutting Process:
- Ensure you have the right tools for the job: Using a high-quality diamond blade or a carbide-tipped circular saw blade designed specifically for cutting countertops will minimize the risk of chipping or splintering.
- Take the necessary precautions: Before starting the cutting process, make sure to measure and mark the countertop accurately. Using a straight edge or a guide can help keep your cuts straight and prevent any accidental slips.
- Use masking tape: Applying masking tape along the cutting line will serve as a protective barrier, reducing the likelihood of chipping or splintering. The tape helps to stabilize the countertop surface and prevents the saw blade from tearing the material as it cuts through.
- Cut with care: Begin the cutting process slowly and steadily, allowing the blade to cut through the countertop material gradually. Avoid rushing or applying excessive pressure, as this can lead to chipping or splintering.
- Clear away debris: Remove any debris or dust that accumulates during the cutting process. This will help ensure a cleaner cut and reduce the risk of chipping or splintering.
Dealing With Uneven Cuts Or Mistakes:
- Assess the issue: If you encounter an uneven cut or make a mistake, take a step back and evaluate the situation. Identify the areas that need correction and determine the best course of action.
- Recut the countertop: If the unevenness or mistake is minor, you may be able to recut the affected area to achieve the desired result. Use the same cutting technique and precautions as before, making sure to match the angle and depth of the original cut.
- Sand the edges: If the unevenness or mistake cannot be resolved through recutting, consider using sandpaper or a sanding block to smooth out the edges. Start with a coarse-grit sandpaper and gradually move to finer-grit options until the surface is even and seamless.
- Fill gaps or imperfections: In some cases, you may need to fill gaps or imperfections caused by uneven cuts or mistakes. Choose a suitable filler material that matches the color and texture of your countertop and follow the manufacturer’s instructions for application.
Fixing Any Damage Or Imperfections Post-Cutting:
- Evaluate the damage: After completing the cutting process, carefully inspect the countertop for any visible damage or imperfections. This could include chips, cracks, or uneven edges.
- Repair minor damage: For minor chips or cracks, you can utilize epoxy or adhesive specifically designed for countertop repairs. Follow the instructions provided and apply the repair material to the damaged area, ensuring a smooth and even surface.
- Smooth out uneven edges: If your countertop has rough or uneven edges post-cutting, use sandpaper or a sanding block to smooth them down. Work your way from coarse to fine grit to achieve a polished and even finish.
- Seek professional help for major damage: In the event of significant damage or imperfections that you are unable to repair yourself, it is recommended to seek professional assistance. They will have the expertise and tools necessary to address more extensive damage effectively.
Remember, taking proper precautions, using the right tools, and being mindful during the cutting process can help minimize the likelihood of chipping, splintering, or creating uneven cuts. However, mistakes can happen, so it’s essential to have a plan in place to tackle any issues that may arise.

Maintenance And Care For Cut Countertops
Looking for tips on how to cut kitchen countertops? Find out the best practices for maintenance and care to ensure a successful countertop cutting process.
Before you start using your newly cut kitchen countertop, it is important to understand how to maintain and care for its cut edges. Proper maintenance will ensure the longevity and aesthetics of your countertop, allowing you to enjoy it for years to come.
Here are some essential tips for cleaning, inspecting, and addressing any issues with your cut countertop:
Cleaning And Maintaining The Cut Edges:
- Regularly wipe the cut edges of your countertop with a mild soap and water solution to remove any dirt, debris, or spills.
- Avoid using abrasive cleaners or scouring pads, as they may scratch or damage the surface of the countertop.
- Dry the cut edges thoroughly with a soft cloth to prevent any water spots or stains from forming.
- Apply a sealant specifically designed for your countertop material to protect the cut edges from moisture and staining. Follow the manufacturer’s instructions for application and reapplication.
- Avoid placing hot pots, pans, or utensils directly on the cut edges to prevent heat damage. Use trivets or hot pads as a protective barrier.
Regularly Inspecting For Any Signs Of Wear Or Damage:
- Carefully examine the cut edges of your countertop on a regular basis, looking for any cracks, chips, or signs of wear.
- Check for any discoloration or fading that may occur over time, especially in areas exposed to direct sunlight.
- Run your fingers along the cut edges to feel for any rough or uneven spots, which may indicate damage that requires attention.
Addressing Any Issues Promptly To Avoid Further Damage:
- If you notice any wear, damage, or signs of deterioration on your cut countertop edges, it is important to address them promptly to prevent further damage.
- Contact a professional countertop installer or fabricator to assess the issue and provide appropriate solutions or repairs.
- Follow the advice and recommendations provided by the professional to restore the integrity and appearance of your countertop.
- Delaying repairs may lead to more extensive damage and costly repairs in the future.
By following these maintenance and care practices, you can ensure that your cut countertop remains in excellent condition and retains its beauty for years to come. Regular cleaning, inspection, and prompt addressing of any issues will help extend the lifespan of your countertop, allowing you to enjoy a functional and visually appealing kitchen space.
Expert Insights And Recommendations
Discover expert insights and recommendations on how to effectively cut your kitchen countertop. Gain valuable tips and techniques to ensure a successful countertop cutting project. Improve your kitchen remodeling skills with these expert recommendations.
Have you been considering cutting your kitchen countertop but don’t know where to start? We have gathered expert insights and recommendations to help you achieve professional-looking results. From frequently asked questions to pro tips and tricks, as well as maintenance and care recommendations, this section covers all the essential information you need.
Faq: Frequently Asked Questions Regarding Countertop Cutting
Here are some common questions people have when it comes to cutting kitchen countertops:
What tools do I need for cutting a kitchen countertop?
Circular saw: Used to cut through the countertop material.
Jigsaw: Ideal for making intricate cuts or curved edges.
Clamps: Essential for securing the countertop while cutting.
Tape measure: Ensures accurate measurements for precise cuts.
Safety goggles and gloves: Protect yourself during the cutting process.
Which countertop materials can be cut?
Laminate: Commonly used material that is relatively easy to cut and shape.
Wood: Requires specific cutting techniques and tools.
Quartz: Harder and more challenging to cut accurately, often requiring professional assistance.
Granite: Similarly difficult to cut, and professional help is recommended.
How do I measure and mark the countertop for cutting?
Measure the space and transfer those measurements onto the countertop.
Use a straightedge or level to create precise cutting lines.
Double-check your measurements before making any cuts to avoid costly mistakes.
Pro Tips And Tricks For A Professional-Looking Result
Achieving a professional-looking result when cutting your kitchen countertop requires attention to detail and proper technique. Here are some pro tips and tricks to follow:
- Take accurate measurements: Measure twice, cut once! Double-check your measurements to ensure a precise fit.
- Use the right blade: Select the appropriate blade for your specific countertop material to minimize chipping and achieve clean cuts.
- Secure the countertop: Use clamps or a sturdy work surface to hold the countertop firmly in place during cutting.
- Start with a small incision: When making long cuts, start with a shallow incision and gradually deepen it to prevent splintering or chipping.
- Smooth the edges: After cutting, use sandpaper or a file to smooth any rough edges for a professional finish.
Maintenance And Care Recommendations From Industry Experts
Once your kitchen countertop is cut and installed, it’s crucial to provide proper maintenance and care to prolong its lifespan. Heed these recommendations from industry experts:
- Clean regularly: Wipe down your countertop with a mild cleanser and a non-abrasive cloth on a daily basis to prevent stains and maintain its appearance.
- Use cutting boards: Avoid cutting directly on your countertop to prevent scratches or damage. Always use a cutting board as a protective surface.
- Avoid excessive heat: Place hot pots and pans on trivets or hot pads to avoid heat damage to your countertop.
- Deal with spills promptly: Clean up spills immediately to prevent any potential staining or warping of the countertop material.
- Schedule regular inspections: Have your countertop inspected by a professional every few years to catch any potential issues early on and ensure its longevity.
By following these expert insights and recommendations, you can confidently embark on cutting your kitchen countertop while achieving professional-looking results. Remember to prioritize safety, accuracy in measurements, and proper maintenance to enjoy a beautiful and functional countertop for years to come.

Frequently Asked Questions Of How To Cut Kitchen Countertop
How Do You Measure And Mark The Countertop For Cutting?
To measure and mark the countertop for cutting, use a measuring tape to determine the desired length and width. Once measured, use a straightedge and a pencil to mark the dimensions on the countertop. Double-check the measurements before cutting.
What Tools Do You Need To Cut A Kitchen Countertop?
To cut a kitchen countertop, you will need a circular saw fitted with a fine-toothed blade, a straightedge or guide, clamps to hold the countertop in place, safety goggles, and ear protection. It’s also recommended to have a dust mask and a vacuum to clean up the dust afterward.
What Are The Best Practices For Cutting A Kitchen Countertop?
When cutting a kitchen countertop, be sure to use the proper safety precautions including wearing goggles, ear protection, and a dust mask. Start by marking the cut lines and securing the countertop in place. Begin cutting slowly and steadily along the marked lines, allowing the saw to do the work.
Take breaks if necessary, and always follow the manufacturer’s instructions for your specific saw.
Conclusion
Cutting kitchen countertops can be a challenging task, but with the right tools, techniques, and patience, it is definitely doable. Always prioritize safety by wearing protective gear and using proper tools for the job. Take accurate measurements and plan your cuts carefully to ensure a precise and well-fitted result.
Research different types of countertops and choose the appropriate cutting method accordingly. Whether you are working with laminate, granite, or any other material, following these step-by-step instructions will help you achieve professional-looking results. Remember to take your time and practice on scrap pieces before making any cuts on your actual countertop.
By following these guidelines, you will be able to successfully cut your kitchen countertop and transform your space to meet your desired needs and design aesthetic. Happy cutting!