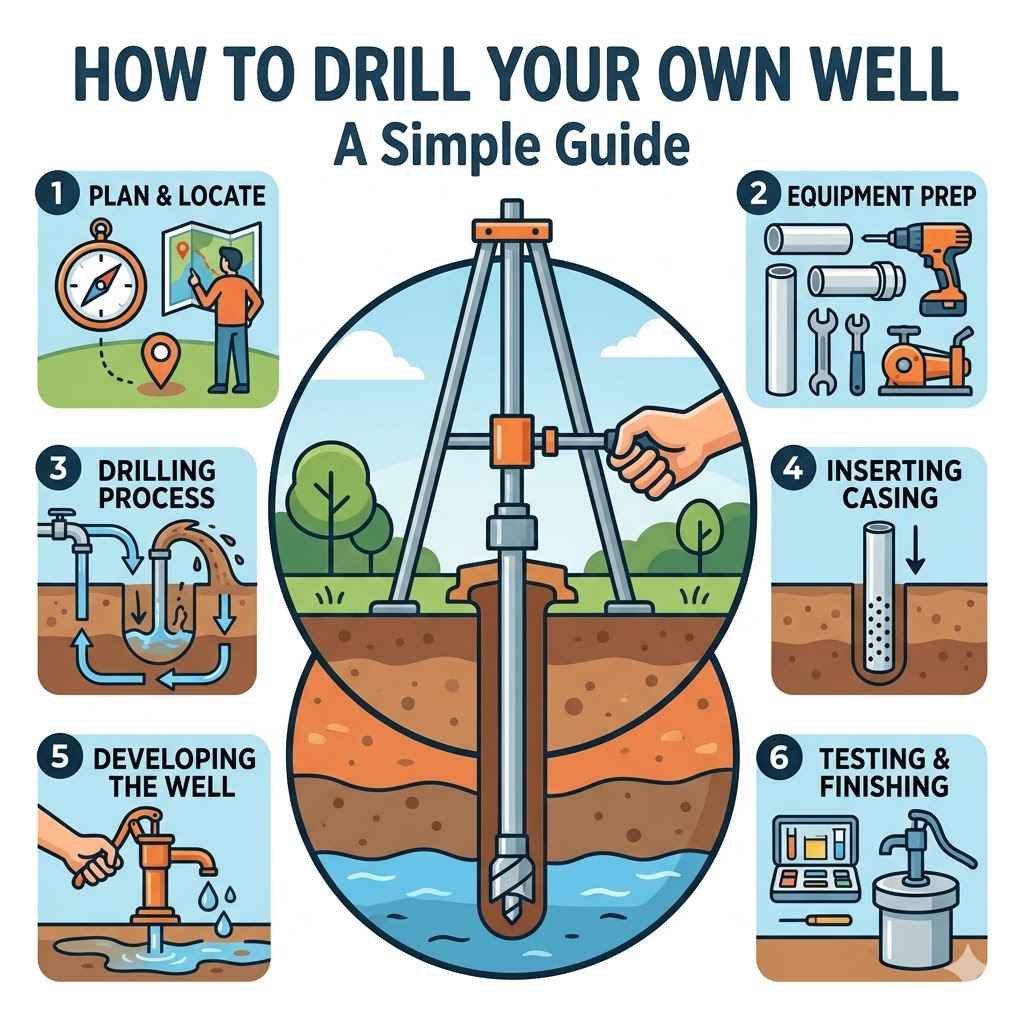
How to Drill Your Own Well: Step-by-Step Guide
Drilling your own well can seem like a big job. Many people wonder if they can really do it themselves. The truth is, with the right steps, How to Drill Your Own Well: Step-by-Step Guide becomes much easier.
We’re going to break down the whole process for you. Get ready to learn what you need to know to get your own water supply.
Planning Your Well Drilling Project
Before you even think about digging, careful planning is key. This section will walk you through the essential first steps. We cover everything from checking local rules to picking the best spot for your well.
Proper planning saves time, money, and avoids problems later on. It ensures your project moves forward smoothly and safely.
Local Regulations and Permits
Every area has rules about drilling wells. You must check what these are. Most places require a permit before you can start.
This is to make sure your well is safe and doesn’t harm others’ water. Getting this information upfront prevents big trouble. It could be fines or having to stop your work.
- Understand Local Water Laws: Many regions have strict laws about water usage and well drilling. These laws protect groundwater resources and prevent overuse. You need to know who owns the water rights in your area and if there are limits on how much you can draw. Some areas might also have restrictions on well depth or location to protect underground aquifers from contamination. Always contact your local environmental or water resource department for the most current and relevant regulations.
- Obtain Necessary Permits: Drilling a well without the correct permits is illegal. The permitting process usually involves submitting an application with details about your proposed well location, depth, and construction methods. Authorities will review your plan to ensure it meets safety and environmental standards. Obtaining permits can take time, so start this process early. Inspectors may also need to visit your site at different stages of the drilling to ensure compliance.
Choosing the Right Location
Where you put your well matters a lot. It needs to be close enough to your house for easy access. But it also needs to be far enough from things that could pollute your water.
Think about septic tanks, animal pens, and roads. A good spot ensures clean water for years.
- Distance from Contamination Sources: Wells must be located a safe distance from potential sources of pollution. This includes septic systems, animal waste areas, fuel storage tanks, and roads where salt or oil might run off. Local health codes specify these minimum distances to prevent contaminants from reaching your drinking water. For example, a septic tank might need to be at least 100 feet away from a well.
- Accessibility for Drilling Equipment: The chosen location must be accessible for heavy drilling equipment. Large trucks and drilling rigs need a clear path to reach the site. Consider overhead power lines, tree branches, and underground utilities that could obstruct access. If the site is hard to reach, it could increase drilling costs or even make drilling impossible.
- Proximity to Water Usage Points: While safety from contamination is crucial, you also want your well to be conveniently located. Drilling a well closer to your home or where you’ll use the most water reduces the length of the water pipes needed. Shorter pipes mean lower installation costs and less energy used to pump water over long distances.
Assessing Groundwater Availability
How much water is underground? That’s a big question. You might need to look at geological surveys or talk to local well drillers.
Knowing if there’s enough water is vital before you invest time and money. Some areas have plenty of water, while others have very little.
- Geological Surveys and Maps: Geological surveys provide valuable information about the subsurface rock formations and soil types in your area. These maps can indicate areas where groundwater is likely to be found and at what depth. Understanding the geology helps in predicting the ease of drilling and the potential yield of the well.
- Consulting Local Experts: Experienced local well drillers often have a deep understanding of groundwater conditions in their service area. They know which formations typically yield good water and what depths are common. They can offer insights based on years of observation and drilling in your specific region, saving you guesswork.
Essential Drilling Equipment and Tools
Drilling a well requires specific tools. You don’t need a giant industrial rig for a small well, but some specialized equipment is a must. This part covers the main tools you’ll need.
It also explains what they do. Having the right gear makes the job much safer and more efficient.
Types of Well Drilling Rigs
There are different kinds of drilling rigs. Some are big and powerful, used by professionals. Others are smaller, sometimes even portable, which are better for DIY projects.
The type you choose depends on your budget, the ground conditions, and how deep you need to go.
- Cable Tool Rigs: These older rigs work by repeatedly lifting and dropping a heavy bit. The impact breaks up rock and soil. They are slow but can handle very hard rock. They are also relatively simple to operate and maintain, making them a choice for DIYers if space allows.
- Rotary Rigs: These are more common today. They use a rotating drill bit to cut through the ground. Water or drilling fluid is pumped down to help flush out cuttings and cool the bit. Rotary rigs are faster than cable tool rigs and come in various sizes, including truck-mounted and smaller trailer-mounted units suitable for smaller projects or difficult access sites.
- Auger Rigs: These rigs use a large screw-like bit to bore into the ground. They are best for soft soils and shallow wells. They are often used for soil sampling or for drilling holes for foundation piers. They are generally not suitable for drilling through hard rock formations.
Drill Bits and Downhole Tools
The drill bit is what actually cuts into the earth. There are many types, each good for different kinds of ground. You also need tools to hold the drill string, lift the cuttings, and measure your progress.
- Drill Bits Explained: Bits come in various designs like roller cone, drag bits, and diamond bits. Roller cone bits are good for harder rock. Drag bits are better for softer formations. Diamond bits are very effective but costly and used for extremely hard materials. The choice of bit depends heavily on the expected geological conditions.
- Drill Pipe and Rods: These connect the drill bit to the rig’s motor. They transmit rotational and downward force. Drill pipe is typically threaded and comes in standard lengths. The weight and strength of the pipe are important for reaching significant depths.
- Stabilizers and Reamers: Stabilizers keep the drill bit centered in the borehole, preventing it from wandering and ensuring a straight well. Reamers are used to enlarge the borehole to a specific diameter, which is important for installing casing.
Water Swivels and Mud Pumps
If you use a rotary rig, you’ll need a water swivel. This lets water or drilling fluid flow down the drill pipe while it’s spinning. A mud pump circulates this fluid.
The fluid carries the rock and soil bits (cuttings) to the surface. This keeps the hole clear and helps cool the drill bit.
- Function of Water Swivels: A water swivel is a specialized coupling that attaches to the top of the drill string. It allows water or drilling mud to be injected into the drill pipe while the pipe is rotating. This fluid is essential for lubricating the drill bit, cooling it down, and flushing away drilled material.
- Role of Mud Pumps: Mud pumps are used to circulate the drilling fluid (often called drilling mud) through the drill string and back up the annulus (the space between the drill string and the borehole wall). The drilling mud helps to stabilize the borehole walls, prevent cave-ins, and carry cuttings to the surface for removal. Different types of mud pumps exist, from small electric ones to large diesel-powered units.
The Drilling Process Step-by-Step
Now we get to the actual drilling. This is the core of How to Drill Your Own Well: Step-by-Step Guide. We’ll explain each stage clearly.
It’s a process that requires patience and careful work. Following these steps will guide you toward success.
Site Preparation and Setup
Before drilling starts, the site needs to be ready. This involves clearing the area and setting up the drilling rig safely. You need a level surface for the rig to stand on.
Also, make sure you have a water source nearby for drilling fluids if needed.
- Clearing the Area: Remove any trees, bushes, rocks, or debris from the drilling site. This ensures a clear and safe workspace for the rig and personnel. The area should be large enough to accommodate the rig, support vehicles, and material storage.
- Leveling the Ground: Drilling rigs need a stable, level base to operate safely. Use heavy equipment or manual labor to level the ground where the rig will be positioned. This prevents the rig from tipping and ensures consistent drilling pressure.
- Setting Up the Rig: Position the rig precisely over the chosen drilling spot. Connect power sources (if electric) or fuel up the engine. Ensure all safety guards are in place and that the rig is properly anchored if required.
Spudding In the Well
Spudding in is the very first step of drilling. It’s when the drill bit first touches the ground. The rig starts slowly.
The goal is to create the initial entry point for the drill. This is a critical moment to get the hole started straight.
- Initial Penetration: This is the moment the drill bit makes contact with the earth. The rig starts slowly, applying downward pressure and rotation. The aim is to create a stable starting point for the borehole.
- Starting a Straight Hole: Ensuring the borehole starts perfectly vertical is crucial. If it starts crooked, it can cause problems with installing casing later and affect the well’s efficiency. Some techniques involve using a pilot hole or special starting bits to ensure straightness.
Drilling and Cuttings Removal
As you drill deeper, you remove the material (cuttings) brought up. How this is done depends on your rig. For rotary rigs, drilling fluid plays a big part.
It carries the cuttings up. For cable tool rigs, you use a bailer.
- Using Drilling Fluid (Mud Rotary): In rotary drilling, a mixture of water, clay, and additives (drilling mud) is pumped down the drill pipe. As the bit grinds the rock, the mud carries the cuttings up to the surface. The mud also helps to keep the borehole walls from collapsing. The consistency of the mud is carefully controlled to optimize cuttings removal and borehole stability.
- Bailing with Cable Tool Rigs: Cable tool rigs use a bailer. This is a long, hollow cylinder with a flap valve at the bottom. The bailer is repeatedly dropped into the borehole to scoop up the loose cuttings. It is then lifted out and emptied. This process is repeated as drilling progresses.
- Monitoring Cuttings: Observing the cuttings that come to the surface provides valuable information about the underground layers. Changes in the type, size, and color of cuttings can indicate shifts in soil or rock formations. This helps in estimating the depth to water and identifying potential drilling challenges.
Installing Well Casing
Once you reach the desired depth, you install the well casing. This is a pipe that lines the borehole. It keeps the hole from collapsing and prevents surface water from entering the well.
Steel, PVC, or concrete pipes are commonly used.
- Purpose of Casing: The well casing is a protective barrier that prevents the borehole from caving in. It also seals off undesirable shallow water zones, like those near the surface that might be contaminated. The casing ensures the integrity and longevity of the well.
- Types of Casing Materials: PVC (polyvinyl chloride) is common for its affordability and corrosion resistance. Steel casing is stronger and can be used in challenging geological conditions but is prone to rust. Concrete or fiberglass are other options, each with pros and cons related to cost, strength, and durability.
- The Installation Process: The casing is lowered into the borehole. It needs to be sealed at the bottom and often grouted in place in the annular space between the casing and the borehole wall. This grouting process is critical for preventing surface contaminants from migrating down the outside of the casing into the aquifer.
Well Development and Testing
After casing is in, you need to develop the well. This means cleaning out any remaining drilling mud or fine particles. Then, you test the flow rate.
This ensures the well can supply enough water. It also checks the water quality.
- Cleaning the Well: Well development is about removing drilling fluids and fine sediments from the borehole walls and screen. This can involve surging (forcing water in and out rapidly), jetting, or pumping. The goal is to allow water to flow freely into the well from the aquifer.
- Flow Rate Testing (Pumping Test): A pumping test involves running the well pump at a specific rate for a set period. This measures how much water the well can reliably produce. It helps determine the pump size needed and the aquifer’s capacity.
- Water Quality Testing: It’s crucial to test the water for safety and quality. This includes checking for bacteria, nitrates, heavy metals, and other contaminants. Local health departments can provide guidance on testing procedures and laboratories.
Post-Drilling Steps and Maintenance
The drilling is done, but the job isn’t quite over. This final part of How to Drill Your Own Well: Step-by-Step Guide covers what comes next. Setting up the pump and keeping your well in good shape are important.
Proper care ensures you have clean water for years.
Installing a Submersible Pump
Most modern wells use a submersible pump. This pump sits down inside the well casing, below the water level. It’s quiet and efficient for lifting water to the surface.
Choosing the right pump is vital for your water needs.
- Pump Selection Criteria: The pump’s horsepower and capacity must match your well’s depth and your water usage needs. Consider the well’s yield and the distance water needs to be pumped to your house.
- Installation Process: The pump is attached to a drop pipe and electrical cable. It’s then lowered into the well casing to a specific depth. The system includes a pressure tank and controls to regulate water flow and pressure.
- Safety Precautions: Electrical connections must be made by a qualified electrician. Proper sealing of the wellhead is also essential to prevent contamination.
Connecting to Your Home’s Plumbing
Once the pump is in, you need to connect it to your home’s water system. This involves running pipes from the well to your house. You’ll also need a pressure tank and potentially a pressure switch to control the pump.
- Piping and Fittings: Use appropriate piping materials rated for potable water. Ensure all connections are secure and leak-proof. Burying pipes below the frost line is important in colder climates.
- Pressure Tank and Switch: The pressure tank stores water and helps maintain consistent water pressure. The pressure switch turns the pump on and off based on pressure levels in the tank.
Regular Maintenance and Water Testing
Your well needs ongoing care. This includes regular checks and periodic water testing. These steps help catch problems early and ensure your water stays safe to drink.
- Wellhead Inspection: Periodically inspect the wellhead to ensure it’s sealed and protected from damage or contamination. Check for any cracks or loose parts.
- Pump Performance Checks: Listen for unusual noises from the pump. Monitor water pressure and flow rates for any changes.
- Annual Water Testing: It’s recommended to test your well water at least once a year for bacteria and nitrates. More frequent testing might be needed if you suspect contamination or if local health authorities advise it.
Troubleshooting Common Well Issues
Sometimes wells have problems. Water might be cloudy, pressure could drop, or the pump might not run. Knowing common issues can help you fix them or know when to call a professional.
- Low Water Pressure: This could be due to a failing pump, a leak in the system, a clogged pressure tank, or a drop in the aquifer’s water level.
- Cloudy or Discolored Water: Sediment from the aquifer, iron bacteria, or issues with the well casing can cause this. Proper well development and filtration might be needed.
- Pump Not Running: This could be an electrical issue, a problem with the pressure switch, or a pump failure.
Real-Life Example of DIY Well Drilling Success
The Miller family in rural Ohio decided to drill their own well. They were tired of high municipal water bills and wanted more control over their water source. After researching How to Drill Your Own Well: Step-by-Step Guide, they rented a smaller, truck-mounted rotary drill rig.
They carefully followed all local permit requirements and identified a spot on their property away from their septic system. The drilling took about three days. They encountered some shale layers that slowed them down, but their chosen drill bit handled it.
They successfully installed a 4-inch PVC casing and then a submersible pump. Their total cost was under $3,000, significantly less than professional drilling which was estimated at $8,000-$10,000. Their water tested clean and they’ve enjoyed a reliable, cost-effective water supply ever since.
This shows that with planning and effort, DIY well drilling is achievable.
Frequently Asked Questions
Question: How deep do I need to drill my well?
Answer: The depth of your well depends on how deep the local water table is. You’ll need to research your area’s typical well depths or consult with local drilling experts.
Question: What are the main risks of drilling your own well?
Answer: Risks include hitting underground utilities, encountering unstable soil that causes cave-ins, drilling dry holes, or contaminating the water source if not done correctly.
Question: How long does it take to drill a well?
Answer: A DIY well can take anywhere from a few days to a week or more, depending on the depth, ground conditions, and the type of drilling rig you use.
Question: Can I use a rented drilling rig for my project?
Answer: Yes, renting a smaller, specialized rig is a common option for DIY well drilling. Make sure you understand how to operate it safely and effectively.
Question: What if I can’t find water?
Answer: It’s possible to drill a dry hole. If this happens, you may need to reposition your drilling site and try again, or consider alternative water sources.
Wrap Up
You’ve learned the essential steps for How to Drill Your Own Well: Step-by-Step Guide. From planning and permits to drilling and maintenance, each phase is important. Taking on this project yourself can provide a sustainable, independent water source.
With careful preparation and execution, you can achieve a successful well.