How To Dry Wood Slices: A Step-By-Step Guide
To dry wood slices, start by placing them in a single layer on a flat surface in a well-ventilated area until moisture evaporates and slices become dry. Wood slices can be a versatile and aesthetically pleasing addition to your home decor or craft projects.
Whether you are using them for centerpieces, ornaments, or other creative purposes, properly drying the wood slices is crucial to avoid cracking or warping. We will guide you through the process of drying wood slices effectively. By following these steps, you can ensure that the wood slices dry thoroughly and maintain their shape and quality.
Let’s dive in and explore how to dry wood slices efficiently.
Choosing The Right Wood
Choosing the right wood is essential when it comes to drying wood slices effectively. Different types of wood have different properties, such as density and moisture content, which can affect the drying process. Factors to consider include the type of wood, its moisture content, and the desired outcome of the drying process.
Types Of Wood For Drying
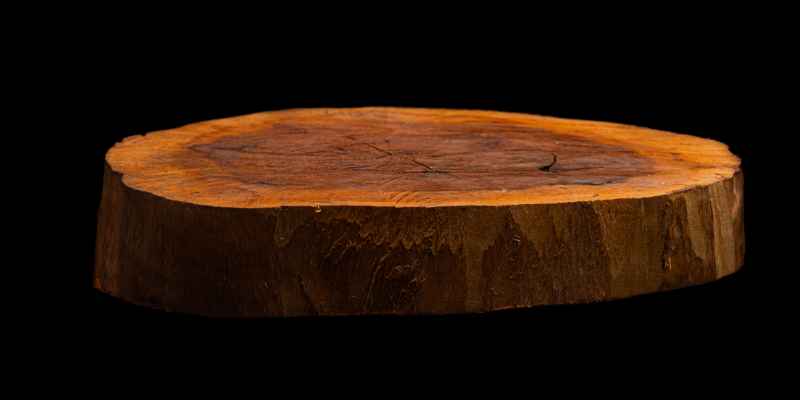
There are several types of wood that are commonly used for drying wood slices. Each type of wood has its own unique characteristics that make it suitable for specific purposes.
Some popular types of wood for drying include:
- Hardwoods: Hardwoods such as oak, maple, and cherry are known for their durability and resistance to warping, making them ideal for drying wood slices.
- Softwoods: Softwoods like pine and cedar are lightweight and easy to work with, making them a popular choice for drying smaller wood slices.
- Exotic woods: Exotic woods such as teak and mahogany offer a unique and beautiful appearance, making them a popular choice for decorative purposes.
Factors To Consider
When choosing wood for drying, there are several factors to consider to ensure the best results.
- Moisture content: The moisture content of the wood is an important factor to consider when drying wood slices. Wood with higher moisture content will take longer to dry and may be more prone to warping or cracking.
- Thickness: Thicker wood slices will take longer to dry compared to thinner ones. It is important to choose wood slices of a thickness that allows for efficient drying.
- Desired outcome: Consider the desired outcome of the drying process. If you are looking for a rustic, natural look, you may prefer wood slices that retain some of their natural texture and bark.
- End use: Consider how the dried wood slices will be used. If the end product requires a certain level of durability, you may want to choose a hardwood like oak or maple.
By carefully considering these factors, you can choose the right wood for drying wood slices, ensuring the best results for your project.
Preparing The Wood Slices
When it comes to crafting with wood slices, proper preparation is the key to success. In this guide, we will walk you through the essential steps of cutting the wood, removing the bark, and sanding the surface.
Cutting The Wood
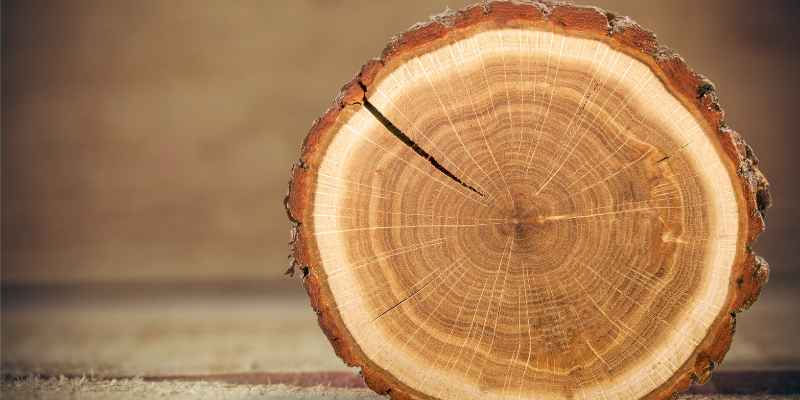
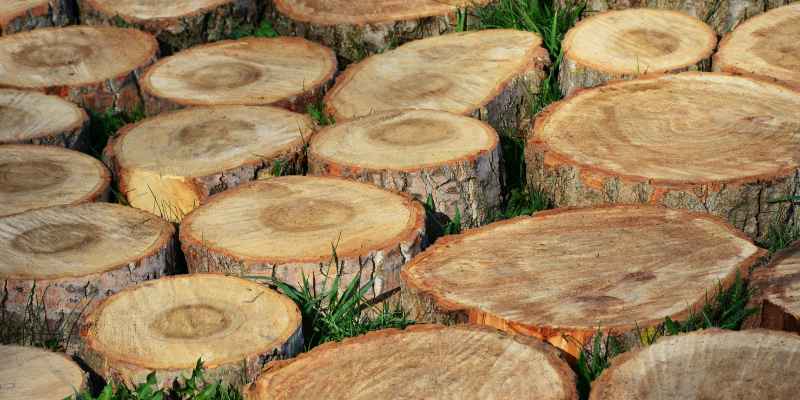
Before you can begin drying your wood slices, you need to make sure they are cut to the desired thickness. Start by selecting a suitable log and measuring the thickness you want for your slices. You can use a handsaw or a chainsaw to carefully cut the log into individual slices.
Removing The Bark
Once you have cut the wood slices, the next step is to remove the bark. The bark can be gently peeled off using a chisel or a knife. Make sure to take your time and be cautious, as the bark can be stubborn and may require some effort to remove completely. Removing the bark not only enhances the overall appearance of the wood slice but also allows for better drying and sanding.
Sanding The Surface
After the bark has been removed, it is essential to sand the surface of the wood slices. Sanding helps to smooth out any rough edges and imperfections, giving the slices a polished and professional look. Start by using coarse sandpaper to remove any remaining bark residue or rough spots. Gradually move on to finer sandpaper to achieve a smooth finish. Remember to sand in the direction of the wood grain to avoid any damage or scratches.
Methods Of Drying
When it comes to drying wood slices, there are several methods you can use. Each method has its own advantages and considerations, so it’s important to choose the one that best suits your needs. In this article, we will explore three popular methods of drying wood slices: air drying, oven drying, and microwave drying.
Air Drying
Air drying is the most traditional and cost-effective method of drying wood slices. It involves exposing the wood slices to air and allowing them to dry naturally over time. This method is suitable for small to medium-sized wood slices.
To air dry wood slices, follow these steps:
- Find a well-ventilated area, such as a covered porch or garage, where you can place the wood slices.
- Ensure the wood slices are placed on a raised surface to promote airflow underneath.
- Arrange the wood slices in a single layer, without any overlapping.
- Regularly turn the wood slices to ensure even drying and prevent warping.
- Depending on the thickness of the wood slices and the humidity levels of your area, air drying can take several weeks or even months. Patience is key!
Oven Drying
Oven drying is a faster method of drying wood slices, making it suitable for those who need quick results. However, this method requires caution and close monitoring to prevent the wood from overheating or catching fire.
To oven dry wood slices, follow these steps:
- Preheat your oven to a low temperature, around 200°F (93°C).
- Place the wood slices on a baking tray lined with parchment paper.
- Make sure the wood slices are not touching each other to promote even drying.
- Insert the baking tray into the oven, leaving the oven door slightly open to allow moisture to escape.
- Bake the wood slices for a few hours, checking them regularly to avoid overheating. The drying time may vary depending on the thickness of the wood slices.
- Remove the wood slices from the oven once they are completely dry, crisp, and lightweight.
Microwave Drying
Microwave drying is the quickest method of drying wood slices, but it requires careful attention to prevent overheating and damage to the wood.
To microwave dry wood slices, follow these steps:
- Place the wood slices on a microwave-safe plate, making sure they are not touching each other.
- Place a microwave-safe cup of water in the microwave alongside the wood slices. This helps to maintain the moisture balance and prevent the wood from drying too quickly.
- Set the microwave to the lowest power setting to avoid overheating the wood.
- Microwave the wood slices in short intervals, around 30 seconds at a time, until they are dry. Be sure to check the wood slices after each interval to prevent overheating.
- Allow the wood slices to cool before handling.
Monitoring The Drying Process
Drying wood slices is a vital step to ensure their durability and prevent any potential damage from occurring. Monitoring the drying process is crucial to ensure the wood slices dry evenly and are ready for use. By employing effective techniques such as checking moisture content and rotating the slices, you can achieve optimal results. Let’s explore these methods further.
Checking Moisture Content
One of the key factors to consider when drying wood slices is their moisture content. To accurately monitor this, it is essential to use a moisture meter. This handy tool enables you to measure the moisture levels within the wood, preventing any potential issues that may arise from drying it too quickly or slowly. Simply insert the moisture meter’s pins into the wood slice, and it will provide you with an instant reading.
As you monitor the moisture content, keep in mind that the optimum level for most wood projects is around 6-8%. Anything higher than this may indicate that the drying process is not yet complete. If the moisture content is much lower, it could signify that the wood has become too dry, which may result in cracks or warping. Regularly checking the moisture content will ensure that you achieve the desired balance.
Rotating The Slices
Another effective technique to monitor the drying process is by regularly rotating the wood slices. This ensures that each slice receives equal exposure to air, preventing any moisture retention and promoting even drying. By turning the slices every few days, you can avoid the formation of mold or uneven drying, resulting in a uniform and high-quality end product.
To help you keep track of which slices have been rotated, you can mark them with a small number or symbol. This simple labeling system will make it easier to ensure that each slice receives equal attention and prevents any confusion during the drying process. Remember, consistency is key for achieving optimal drying results.
Finishing And Sealing
After successfully drying your wood slices, the next step is to finish and seal them to enhance their durability and showcase their natural beauty. Applying a wood finish helps protect the slices from moisture, dirt, and other external elements, while sealing the wood ensures longevity and prevents cracking or splitting.
Applying A Wood Finish
When it comes to applying a wood finish to your dried wood slices, there are several options to choose from. Each type of wood finish offers its own unique benefits and can give your slices a distinct look. Here are a few popular choices:
- Clear or natural wood finish: This type of finish enhances the natural color and grain pattern of the wood slices, giving them a timeless and organic look.
- Stain: Using a wood stain allows you to change the color of the wood slices while still preserving their natural texture. Choose a stain that complements your desired aesthetic.
- Polyurethane: Polyurethane provides a protective coating that adds a glossy or satin finish to your wood slices. It helps prevent scratches and maintains the wood’s appearance over time.
To apply the wood finish, start by sanding the dried wood slices to create a smooth surface. Then, using a brush or a cloth, apply an even coat of your chosen finish. Allow it to dry completely before applying additional coats if desired. Sand lightly between coats to achieve a professional-looking finish.
Sealing The Wood Slices
Sealing the wood slices is an important step to protect them from moisture and other potential damages. The right sealer forms a barrier that prevents the wood from absorbing excessive moisture, which can lead to warping or rotting. Here’s a simple guide to sealing your wood slices:
- Choose the right sealer: Look for a sealer specifically designed for wood surfaces. Consider options such as varnish, shellac, or epoxy resin. Each sealer has its advantages, so select the one that suits your preferences.
- Clean the wood: Before applying the sealer, make sure the wood slices are clean and free from any dust or debris. You can use compressed air or a soft cloth to gently remove any particles.
- Apply the sealer: Use a brush or a cloth to evenly apply the sealer to all surfaces of the wood slices. Pay special attention to the edges and any cracks or imperfections. Allow the sealer to dry according to the manufacturer’s instructions.
- Sand and apply subsequent coats: After the first coat is dry, lightly sand the wood slices to smooth out any rough spots. Apply additional coats of sealer as needed, following the same application method.
- Final touches: Once the sealer is dry, inspect the wood slices for any missed spots or imperfections. Touch up any areas if necessary.
By finishing and sealing your wood slices properly, you can ensure their longevity and preserve their natural beauty for years to come. Don’t skip these essential steps to make the most out of your wood slice crafts!
Frequently Asked Questions Of How To Dry Wood Slices
How Long Does It Take For Wood Slices To Dry?
Wood slices typically take several months to fully dry, depending on the thickness. Thinner slices may dry in a few weeks, while thicker ones can take up to a year. Proper air circulation and moisture control are essential for successful drying.
How Do You Dry Wood Slices Without Cracking Them?
To dry wood slices without cracking them, follow these steps:
1. Start by sealing the cut ends with wax to prevent moisture loss.
2. Place the slices in a well-ventilated area with low humidity.
3. Use a fan or dehumidifier to speed up the drying process.
4. Turn the slices regularly to ensure uniform drying.
5. Allow the wood slices to dry slowly for several weeks or months, depending on the thickness.
What Is The Best Way To Dry Fresh Cut Wood?
The best way to dry fresh cut wood is to store it in a well-ventilated area, preferably outdoors, for at least six months to a year. This allows the moisture in the wood to naturally evaporate, resulting in properly dried wood that is ready for use in various applications.
Can You Dry Wood Slices In The Oven?
Yes, you can dry wood slices in the oven. Place them on a baking sheet at a low temperature (around 200°F) for several hours until they are dry. Make sure to flip them occasionally for even drying.
Conclusion
Drying wood slices is a simple process that requires patience and careful consideration of the environmental factors. By following the steps mentioned you can effectively dry your wood slices and prevent them from warping or cracking. Remember to choose the right method and take necessary precautions to ensure the best results.
Happy wood drying!