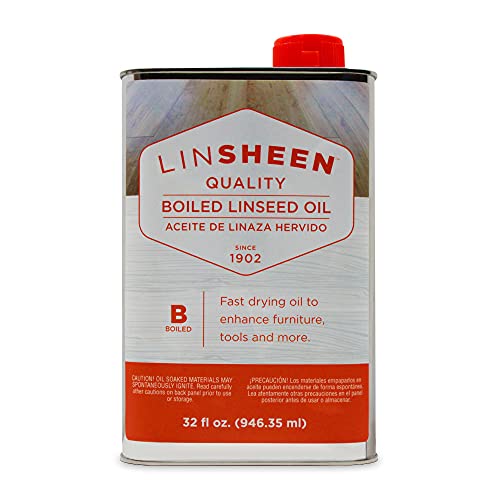
How to Finish Teak Wood: Oil, Sealer or Varnish by Use
Teak needs less finish than almost any furniture wood, so the right choice depends on where the piece lives: oil or wiping varnish indoors, a sealer (or no finish at all) outdoors, and marine varnish only for boat-style brightwork. Whichever you pick, the step that decides how long it lasts is degreasing the sanded surface, because teak’s own oils stop many finishes from bonding. This guide covers the best finish for each use, a six-step method, topcoating rules, and the fire risks of oily rags and solvents.
Best Finish for Teak Wood: Oil, Sealer, Varnish or Nothing
Best Outdoor Teak Sealer Pick | |
 |
Star Brite Teak Sealer, 16 oz, Classic Teak, $27.73 A sealer is the route this guide recommends for teak that lives outside, where oil residue can feed mildew. Use it after the clean, sand and degrease steps below, not instead of them.
|
| View Our Pick on Amazon | |
As an Amazon Associate we earn from qualifying purchases.
Start with a clearer picture of what you are buying. Teak oil is a manufactured product, not oil pressed from the teak tree. Most are a drying oil such as linseed or tung, thinned with mineral spirits or naphtha, and many also contain a resin or varnish, which makes them closer to a thin wiping varnish than a pure oil. That is why one brand of teak oil leaves a soft satin glow while another builds a faint film, and why you should always read the label before topcoating.
| Finish | Best use | Look | Main catch |
|---|---|---|---|
| Teak oil (oil and resin blend) | Indoor furniture, tabletops, trim | Warm, satin, enhances grain | Needs refreshing as it dries out; oily rags are a fire risk |
| Teak sealer | Outdoor furniture you want to keep golden | Tinted or clear, low sheen | Must go on clean, degreased wood; fades with sun |
| Bare teak, cleaned yearly | Outdoor furniture, any climate | Silver-gray patina | Color change is permanent unless you sand and restore |
| Wiping varnish or marine varnish | Indoor tabletops, boat brightwork | Glossy film, deepest color | Film can crack and peel outdoors; refinishing means sanding |
| Hardwax oil or Danish oil | Indoor pieces that see spills and hands | Natural, low sheen | Slow to fully cure; follow the can for recoat times |
For the outdoor row, many boat-care and furniture brands steer teak toward sealers because oil residue can feed mildew in damp, shaded spots. If you are still deciding whether teak is the right wood at all, see our acacia vs teak comparison and the outdoor furniture species ranking.
What You Need Before You Start
- Dish soap, a bucket and a soft nylon brush for the first wash
- Teak cleaner or brightener (only for gray, weathered pieces)
- Sandpaper in 120 and 220 grit, plus a sanding block
- Acetone and clean cotton rags for the degreasing wipe
- Your finish: teak oil, sealer or varnish, plus a natural-bristle brush or foam pad
- Nitrile gloves, safety glasses and an organic-vapor respirator for solvents and sanding dust
- A metal can with a lid, or a bucket of water, for used rags (see the fire section below)
How to Finish Teak Wood in 6 Steps
- Wash the surface: scrub with warm water, a few drops of dish soap and a soft nylon brush, working along the grain. Rinse with clear water and let the wood dry fully, at least a day indoors and longer if it was soaked.
- Restore gray wood only if needed: if the piece has weathered silver, apply a teak cleaner or brightener exactly as the label directs, scrub, and rinse thoroughly. Never mix cleaners, and wear gloves and eye protection because many are acidic or caustic.
- Sand with the grain: use 120-grit only as far as needed to remove raised grain and stains, then finish with 220-grit. Going finer than 220 can burnish the surface so an oil penetrates less. Vacuum or wipe off the dust.
- Degrease with acetone: wipe the bare wood with a rag dampened with acetone, turning to a clean face of the rag after every stroke so you lift oil instead of smearing it. Let it evaporate, then apply your finish soon after, before the oils rise back to the surface.
- Apply thin coats: brush or wipe on a thin, even coat, working with the grain. For oil, wipe off all excess after the time printed on the can. For sealer or varnish, follow the label for coat thickness and keep a wet edge.
- Let it cure, then recoat: allow the recommended time between coats, lightly scuff with 220-grit between varnish coats, and apply two to three coats in total. Keep the piece clean and dry while it cures, because dry to the touch is not the same as fully cured.
Why the acetone step matters. Teak is naturally oily and resinous, so a finish applied straight after sanding can sit on a greasy surface and fail to bond or dry. Wiping with a strong solvent just before finishing is a standard prep for oily woods. For the same reason, glue joints on teak need prep too, which we cover in how to glue oily woods like teak. If your goal is color rather than clear protection, read can you stain teak wood first.
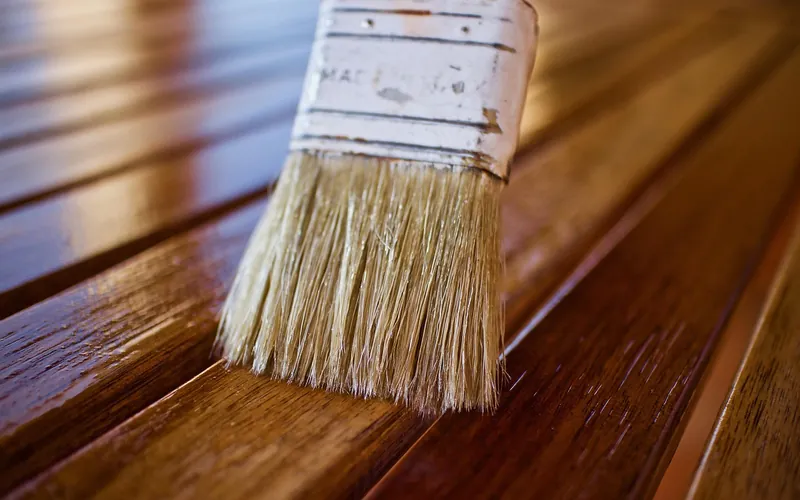
Acetone is a stronger cleaner of resinous wood oils than naphtha or denatured alcohol. Source: Popular Woodworking, Bob Flexner, Acetone in the Woodshop
Can You Put Varnish or Sealer Over Teak Oil?
This is the most common follow-up question, and the honest answer is that it depends on the product and on cure time. Because many teak oils contain resin, they can accept a topcoat, but only after they have fully cured. Feeling dry takes hours; curing can take days or weeks in cool, damp air. A topcoat over oil that is still soft can wrinkle, stay tacky or never harden.
- Read the can first: some teak oils say not to topcoat; others list a minimum wait before varnish or sealer.
- Wait generously: a week is a safer minimum than a day for thick or humid-weather applications.
- Scuff and clean: sand lightly with 220-grit, remove dust, and wipe with a solvent the topcoat manufacturer approves.
- Test first: try the topcoat on an underside or hidden spot and give it a full cure before committing.
- If it fails: sand back to bare wood, degrease again and start over. Stripping is slower than waiting.
For a broader look at how oil and film finishes behave together, see our Danish oil vs polyurethane guide and the wood finishing guide with cure times.
Outdoor Teak: Keep It Golden or Let It Gray
Gray teak is cosmetic. The surface color changes with sun and rain, but the wood underneath stays sound, as we explain in is teak water resistant and what color teak turns over time. You have two sensible paths.
Path 1: Let It Weather
Do nothing except wash it once or twice a year with soap, water and a soft brush to remove dirt and mildew. The silver-gray that develops is even if the furniture is washed regularly, and uneven if it is left dirty in some spots and shaded in others. This is the lowest-cost option and needs no solvents.
Path 2: Hold the Golden Color
Clean, sand, degrease and apply a sealer, then reapply when water stops beading or the color fades. Expect to repeat this more than once a year in full sun. Oil is the weaker choice outdoors, because the residue left on the surface can feed mildew and then needs scrubbing off before the next coat. Our sealer versus oil comparison for ipe decking shows the same trade-off on another dense, oily hardwood, and how to protect untreated wood outside covers the design and upkeep side.

Fire and Safety: Oily Rags and Acetone
Oily rags can start fires on their own. Rags soaked with boiled linseed oil, tung oil and many oil-based teak oils generate heat as the oil cures, and a crumpled pile can reach ignition temperature without any outside flame. Never leave them balled up in a bin, a pocket or a corner of the garage. Lay them flat to dry outdoors on a non-combustible surface such as concrete, away from buildings, until they are stiff, then dispose of them as your local rules require. Or submerge them in water inside a sealed metal container.
Acetone is extremely flammable. Its vapors travel and ignite from pilot lights, sparks and cigarettes, so work outdoors or with strong cross-ventilation, keep the can closed between wipes, and let solvent-damp rags evaporate in the open air, not in a pile. Use gloves rated for the solvent you choose, because thin disposable gloves can break down quickly, and wear a respirator suited to organic vapors. Check the safety data sheet on each product, and keep the finish, solvents and rags away from children and pets.
Common Teak Finishing Mistakes
- Skipping the degrease: the number-one reason a finish stays tacky or peels on teak.
- Applying oil too thickly: excess oil that is not wiped off cures into a sticky, uneven film.
- Oiling outdoor teak and leaving it damp: mildew spots show up as black speckles that must be scrubbed off before refinishing.
- Sanding too aggressively: teak’s soft early growth sands faster than the hard rings, so heavy sanding can leave a ridged surface.
- Using food oils: olive, coconut and similar oils do not cure and can turn rancid, so skip them.
- Throwing rags in a heap: see the fire section above.
Teak Finishing FAQ
What is the best finish for teak wood?
It depends on where the piece lives. For indoor furniture, a teak oil or a wiping varnish gives the warm look most people want. For outdoor furniture, a teak sealer holds color with less mildew risk than oil, and leaving the wood bare is the lowest-maintenance option if you accept silver-gray. Marine varnish suits boat-style brightwork only.
How many coats of teak oil does teak need?
Two to three thin coats cover most indoor teak, wiping off the excess after the time on the can (often 10 to 30 minutes) so nothing stays wet on the surface. Dry teak that has been stripped and sanded may soak up a fourth coat. A thick coat that never fully dries is the usual cause of a tacky, blotchy finish.
Can you put varnish over teak oil?
Sometimes. Most teak oils are oil and resin blends, so the film can accept varnish once it has fully cured, which can take days or weeks in cool or humid air, not just the few hours it takes to feel dry. Scuff with 220-grit, wipe off dust, and test a hidden spot first. If the varnish stays soft or wrinkles, sand back to bare wood.
Does teak need to be sealed or finished at all?
No. Teak’s natural oils and rubbery resin make it one of the most rot-resistant woods, so bare teak outdoors lasts for decades and simply weathers to silver-gray. A finish is about looks and spill resistance, not survival. Indoors, an unfinished tabletop stains easily, so a thin oil or varnish coat is worth it.
How do you keep teak golden instead of letting it turn gray?
Clean it, sand off any gray, degrease, and apply a tinted sealer or oil, then refresh it when the color starts to fade. UV exposure is what grays teak, and no finish stops that permanently. A sealer with UV filters slows it, and storing or covering furniture in winter helps more than any extra coat.
Is it safe to pressure wash teak?
Use caution. A narrow, high-pressure jet can raise and scour the soft grain between the harder growth rings, leaving a rough, ridged surface that needs sanding. A garden hose, soft brush and mild soap clean teak without that damage. If you do use a pressure washer, keep it on a wide fan, low pressure setting and keep it moving along the grain.
Bottom Line
Clean, sand to 220, degrease with acetone, then choose by location: teak oil or wiping varnish indoors, a sealer or bare weathering outdoors. Thin coats, full cure times and safe rag disposal matter more than the brand on the can. For related care, see our guide to spotting real Danish teak.
Sponsored / affiliate links. As an Amazon Associate I earn from qualifying purchases. I may earn additional commission from eligible campaigns.