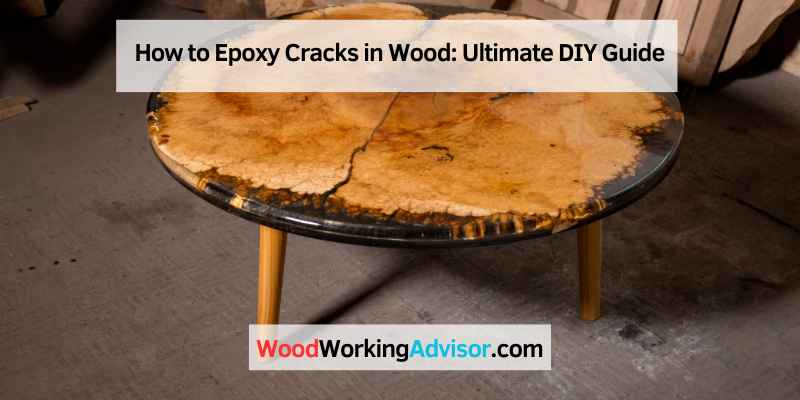
How to Epoxy Cracks in Wood: Ultimate DIY Guide
To epoxy cracks in wood, clean the area, mix epoxy resin, apply it, and let it cure. Epoxy is a versatile and durable solution for repairing cracks in wooden surfaces.
It provides a strong bond and helps prevent further damage, ensuring the longevity of the wood. By following simple steps, you can effectively repair cracks in wood using epoxy, saving both time and money. Whether you are a seasoned DIY enthusiast or a beginner, epoxy crack repair can be a straightforward and effective way to restore the integrity of your wooden furniture, floors, or other wooden items.
Introduction To Epoxy And Wood Repair
When it comes to repairing cracks in wood, epoxy resin is a popular and effective solution. Epoxy is a versatile and durable material that can be used to fill, reinforce, and bond wood, making it an ideal choice for wood repair projects. In this guide, we’ll explore the benefits of using epoxy for wood cracks and the different types of epoxy resin available for wood repair.
Why Epoxy Is Ideal For Wood Cracks
Epoxy is ideal for repairing wood cracks due to its strong adhesive properties and ability to withstand environmental stressors. It provides a long-lasting and durable solution for filling and reinforcing cracks, ensuring the structural integrity of the wood is restored.
Types Of Epoxy Resin
There are various types of epoxy resin suitable for wood repair, each with specific characteristics and applications. Some common types include:
- Epoxy Putty: A moldable and easy-to-use epoxy that can be shaped to fill and repair cracks in wood.
- Clear Epoxy: Transparent epoxy resin that is suitable for filling and sealing fine cracks in wood, providing a seamless finish.
- Structural Epoxy: High-strength epoxy designed for structural repairs, capable of bonding and reinforcing wood effectively.
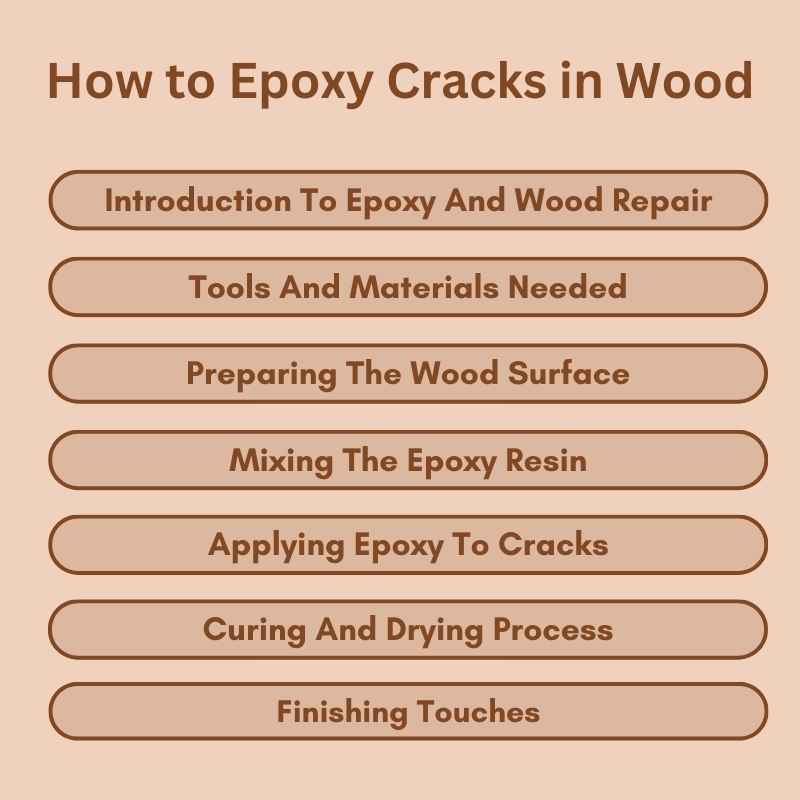
Tools And Materials Needed
When it comes to repairing wood, epoxy is a versatile and durable solution for filling cracks and restoring the structural integrity of the wood. Before beginning the epoxy application, it’s important to gather the necessary tools and materials to ensure a successful repair. Here’s a breakdown of the tools and materials needed to epoxy cracks in wood.
List Of Essential Tools
Before starting the epoxy repair process, it’s crucial to have the right tools on hand. Here’s a list of essential tools for epoxy crack repair in wood:
- Putty knife
- Sandpaper (various grits)
- Painter’s tape
- Disposable gloves
- Protective eyewear
- Heat gun or hair dryer
- Clamps or weights (for securing wood during repair)
- Small mixing cups and stirring sticks
- Level (for ensuring even application)
Choosing The Right Epoxy Resin
When selecting an epoxy resin for wood repair, it’s essential to consider the specific needs of the project. Here are key factors to keep in mind:
- Viscosity: Choose a resin with the appropriate viscosity for the size and depth of the cracks.
- Curing Time: Select a resin that offers a suitable curing time for the project at hand.
- Color: Ensure the epoxy resin’s color matches the wood for a seamless finish.
- UV Resistance: If the wood will be exposed to sunlight, opt for a UV-resistant epoxy resin to prevent discoloration and degradation.
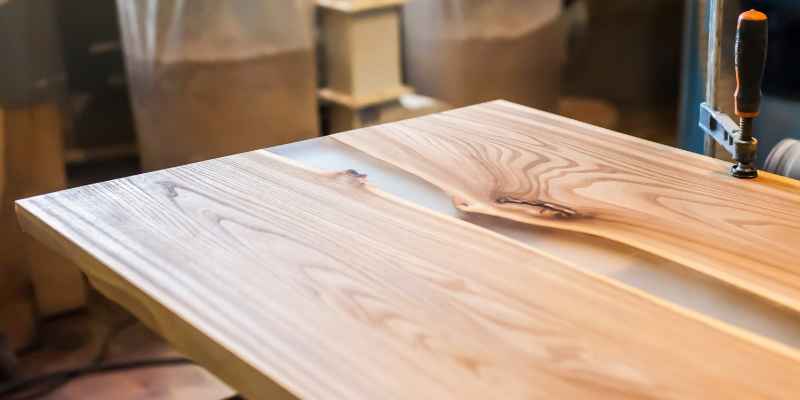
Preparing The Wood Surface
Preparing the wood surface is crucial before epoxying cracks to ensure a strong bond and a smooth finish.
Cleaning The Crack
Clean the crack using a brush and mild detergent to remove dirt and debris.
Rinse the crack with water and allow it to dry completely before proceeding.
Sanding For A Smooth Finish
Sand the area around the crack gently to create a smooth surface for the epoxy to adhere to.
Use fine-grit sandpaper and work in the direction of the wood grain for best results.
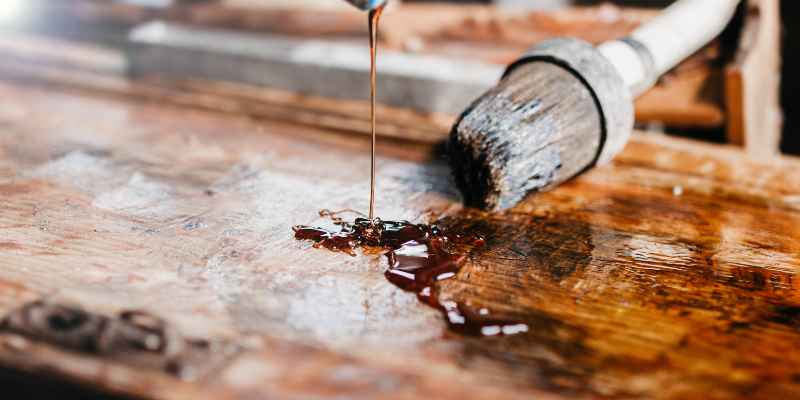
Mixing The Epoxy Resin
Once you have prepared the wood surface and identified the cracks, the next step is to mix the epoxy resin. Epoxy resin is a two-part adhesive that consists of a hardener and a resin. Mixing these components together creates a chemical reaction that hardens the adhesive and bonds the wood together. Here is a step-by-step guide to mixing epoxy resin for wood crack repair:
Safety Measures
Before you start mixing the epoxy resin, it is important to take some safety measures to protect yourself from the harmful effects of the chemicals. Here are some safety tips to follow:
- Wear protective gloves and safety glasses to avoid skin and eye contact with the epoxy resin.
- Work in a well-ventilated area to avoid inhaling the fumes.
- Keep children and pets away from the work area.
Step-by-step Mixing Guide
Here is a step-by-step guide to mixing epoxy resin for wood crack repair:
- Read the instructions on the epoxy resin package carefully before starting the mixing process.
- Measure equal parts of the hardener and resin using a measuring cup or scale.
- Pour the measured hardener and resin into a mixing container.
- Mix the hardener and resin thoroughly for about 2-3 minutes using a stir stick or a mixing tool. Make sure to scrape the sides and bottom of the container to ensure even mixing.
- Once the mixture is thoroughly mixed, let it sit for a few minutes to allow any air bubbles to rise to the surface.
Now that you have mixed the epoxy resin, you are ready to apply it to the cracks in the wood. In the next section, we will discuss how to apply the epoxy resin to the cracks.
Applying Epoxy To Cracks
Repairing wood cracks with epoxy involves cleaning the area, mixing the epoxy resin, and applying it to the crack. Smooth the surface after drying for a seamless finish. This method ensures a durable and long-lasting solution for cracked wood surfaces.
Epoxy is an excellent material for repairing cracks in wood. It’s strong, durable, and can be sanded and painted to match the surrounding wood. However, applying epoxy to cracks requires some technique to ensure a level and seamless repair. In this section, we will discuss the filling techniques and how to ensure a level fill.
Filling Techniques
There are two main techniques for filling cracks with epoxy: pouring and using a putty knife. Pouring is best for deep and wide cracks, while using a putty knife is best for shallow and narrow cracks.
When pouring epoxy, mix the two-part epoxy according to the manufacturer’s instructions. Then, slowly pour the mixed epoxy into the crack, making sure to fill it completely. Use a plastic spreader to spread the epoxy evenly and remove any air bubbles. Let the epoxy cure according to the manufacturer’s instructions.
For shallow and narrow cracks, use a putty knife to apply the epoxy. Mix the two-part epoxy and use the putty knife to apply it to the crack. Make sure to push the epoxy into the crack and remove any excess. Let the epoxy cure according to the manufacturer’s instructions.
Ensuring A Level Fill
To ensure a level fill, it’s important to apply the epoxy in thin layers. Apply the first layer and let it cure. Then, apply subsequent layers until the crack is filled. Sand each layer before applying the next to ensure a level surface.
If the crack is deep, you may need to use a filler material such as sawdust to help fill the crack. Mix the sawdust with the epoxy and apply it to the crack. Let the epoxy cure and sand it down to a level surface.
In conclusion, applying epoxy to cracks in wood requires some technique to ensure a level and seamless repair. By using the right filling techniques and ensuring a level fill, you can repair cracks in wood and restore its beauty and strength.
Curing And Drying Process
When it comes to epoxying cracks in wood, understanding the curing and drying process is crucial to achieving a successful repair. This phase ensures the epoxy hardens properly for lasting strength and stability.
Ideal Conditions For Curing
Maintain a temperature between 70-80°F for optimal curing. Ensure low humidity levels to prevent moisture interference. Allow ample ventilation to aid in the curing process.
How Long To Wait
Wait at least 24 hours before handling the repaired wood. To achieve full strength, let the epoxy cure for 3-7 days. Avoid exposing the epoxy to stress during this period.
Finishing Touches
Once you have successfully epoxyed the cracks in your wood, it’s time to add the finishing touches to achieve a seamless and polished look. This final step involves sanding the cured epoxy and applying a finish that will blend in with the surrounding wood. Follow the steps below to ensure a professional and flawless result.
Sanding The Cured Epoxy
To achieve a smooth and even surface, it is important to sand the cured epoxy. This process will not only remove any excess epoxy but also help to level the surface and prepare it for the finishing coat. Here’s how you can sand the cured epoxy:
- Start by using a coarse-grit sandpaper, such as 80 or 120 grit, to remove the bulk of the excess epoxy. Sand in a circular motion, applying even pressure.
- Once the bulk of the epoxy is removed, switch to a finer-grit sandpaper, such as 220 or 320 grit. Continue sanding in a circular motion until the surface feels smooth to the touch.
- Make sure to sand the surrounding wood as well, blending it with the sanded epoxy surface for a seamless look.
- After sanding, use a clean cloth to remove any dust or debris from the surface.
Applying Finish For A Seamless Look
To achieve a seamless and professional finish, it is crucial to apply a suitable finish that matches the surrounding wood. This will not only enhance the appearance of the repaired area but also provide protection against moisture and other environmental factors. Follow these steps to apply the finish:
- Choose a finish that matches the type of wood you are working with, such as a clear varnish, polyurethane, or wood stain.
- Using a brush or a clean cloth, apply a thin and even coat of the chosen finish to the sanded epoxy surface. Make sure to follow the manufacturer’s instructions for application and drying times.
- Allow the first coat to dry completely, and then lightly sand the surface with a fine-grit sandpaper, such as 400 grit, to remove any imperfections.
- Apply additional coats of finish as needed, following the same process of allowing each coat to dry and sanding in between.
- Once the final coat is applied and dried, inspect the repaired area to ensure a seamless and blended look. Make any necessary touch-ups or additional sanding if required.
By following these steps and paying attention to the finishing touches, you can successfully epoxy cracks in wood and achieve a professional and seamless result. Remember to take your time, be patient, and enjoy the process of restoring and beautifying your wooden pieces.
Maintenance And Care
To epoxy cracks in wood, start by cleaning the area thoroughly. Then, fill the cracks with a two-part epoxy wood filler, following the manufacturer’s instructions. Sand the surface smooth and finish with a wood stain or sealant for protection. Regular maintenance and care of the wood will help prevent future cracks.
Regular Check-ups
To ensure the longevity and durability of your wooden surfaces treated with epoxy, regular check-ups are essential. By inspecting the wood periodically, you can catch any potential cracks or damages early on and take the necessary steps to prevent further deterioration. These check-ups should be carried out at least once every few months or more frequently, depending on the level of wear and tear the wood is subjected to.
During these check-ups, examine the epoxy-coated wood for any signs of cracks, peeling, or chipping. Use your fingers to feel the surface and pay attention to any abnormalities. If you notice any issues, address them promptly to avoid more extensive damage. Remember, early intervention is key to maintaining the integrity of your wooden surfaces.
Dealing with Future Cracks
Despite your best efforts, it is possible for cracks to appear in the epoxy coating over time. When this happens, it is important to address the cracks promptly to prevent further damage. Here are some steps you can take to deal with future cracks effectively:
1. Clean the Surface: Before attempting any repairs, ensure that the surface is clean and free from dirt, debris, or any loose epoxy. Use a mild detergent and water to gently clean the affected area. Avoid using harsh chemicals or abrasive materials that could damage the epoxy or wood.
2. Fill the Cracks: Once the surface is clean and dry, you can proceed to fill the cracks. Choose an epoxy filler specifically designed for wood repairs. Apply the filler according to the manufacturer’s instructions, making sure to fill the cracks completely. Use a putty knife or a similar tool to level the filler with the surrounding surface.
3. Sand and Smooth: After the filler has dried, use fine-grit sandpaper to sand down the repaired area. This will help blend the filler with the rest of the surface, creating a seamless finish. Sand in gentle, circular motions until the repaired area feels smooth to the touch.
4. Reapply Epoxy: To ensure a uniform appearance, reapply a thin layer of epoxy over the repaired area. Follow the manufacturer’s instructions for mixing and applying the epoxy. Use a brush or roller to evenly coat the surface, feathering the edges to blend with the surrounding epoxy.
By following these steps and staying proactive with regular check-ups, you can effectively maintain and care for your epoxy-coated wood surfaces. Taking the time to address any cracks or damages promptly will not only preserve the aesthetic appeal but also extend the lifespan of your wooden structures. Keep your wooden surfaces looking their best with proper maintenance and care.
Frequently Asked Questions
How Do You Epoxy Cracks In Wood?
To epoxy cracks in wood, start by cleaning the cracked area with a brush and vacuuming any loose debris. Mix the epoxy according to the manufacturer’s instructions and fill the crack with the mixture using a putty knife. Allow it to cure completely before sanding and finishing the wood surface.
Conclusion
Epoxy is a versatile solution for fixing cracks in wood. By following the steps outlined in this guide, you can successfully repair and reinforce damaged wood surfaces. Epoxy provides a durable and long-lasting fix, ensuring that your wood furniture or structures remain strong and sturdy for years to come.