How to Fill Screw Holes in Wood: Easy & Effective Tips
To fill screw holes in wood, use wood filler or putty. Press the filler into the hole, let it dry, then sand it smooth.
Filling screw holes in wood is a simple process that can restore the appearance and integrity of your wooden surfaces. Whether you’re repairing furniture, cabinets, or other wooden items, learning how to effectively fill screw holes can help you achieve a seamless finish.
By following the right techniques and using the appropriate materials, you can ensure a professional-looking result that enhances the overall aesthetics of your woodwork. We’ll explore the step-by-step process of filling screw holes in wood, along with tips for achieving a flawless finish.
Introduction To Filling Screw Holes In Wood
Filling screw holes in wood is an essential skill for anyone working with wood. Whether you’re a DIY enthusiast or a professional woodworker, knowing how to properly fill screw holes can enhance the appearance and durability of your wood projects. In this guide, we’ll explore why filling screw holes is necessary, common challenges associated with this task, and effective techniques for achieving a seamless finish.
Why It’s Necessary
Ensuring that screw holes are properly filled in wood is crucial for maintaining the structural integrity of the material. By filling these holes, you prevent moisture and debris from seeping into the wood, reducing the risk of rot and decay. Moreover, filled screw holes create a smooth surface, enhancing the overall aesthetic appeal of the wood.
Common Challenges
One of the common challenges when filling screw holes in wood is selecting the appropriate filler material. Additionally, achieving a seamless finish can be tricky, especially when working with different types of wood. It’s important to address these challenges effectively to achieve a professional-looking result.
Types Of Wood Fillers
Wood fillers come in various types and are an effective solution for filling screw holes in wood. These fillers, such as epoxy, putty, or wax, can seamlessly blend with the wood surface, creating a smooth and professional finish.
When it comes to woodworking, filling screw holes is an essential part of the process. It’s important to choose the right type of filler to ensure a strong and long-lasting bond. There are three main types of
: water-based fillers, solvent-based fillers, and epoxy fillers.
Water-based Fillers
Water-based fillers are easy to use and clean up with water. They are ideal for small repairs and filling small screw holes. They are also non-toxic and have a low odor, making them a great option for indoor use. However, they may not be as durable as other types of fillers and may shrink over time.
Solvent-based Fillers
Solvent-based fillers are more durable than water-based fillers and can be used for larger repairs and filling larger screw holes. They dry quickly and are resistant to shrinking and cracking. However, they have a strong odor and are flammable, so it’s important to use them in a well-ventilated area.
Epoxy Fillers
Epoxy fillers are the strongest and most durable of all the types of fillers. They are ideal for large repairs and filling large screw holes. They are also resistant to shrinking, cracking, and water damage. However, they require mixing and may take longer to dry than other types of fillers.
In conclusion, choosing the right type of wood filler depends on the size of the repair and the desired level of durability. Whether you choose a water-based, solvent-based, or epoxy filler, make sure to follow the instructions carefully for the best results.
Preparation Before Filling
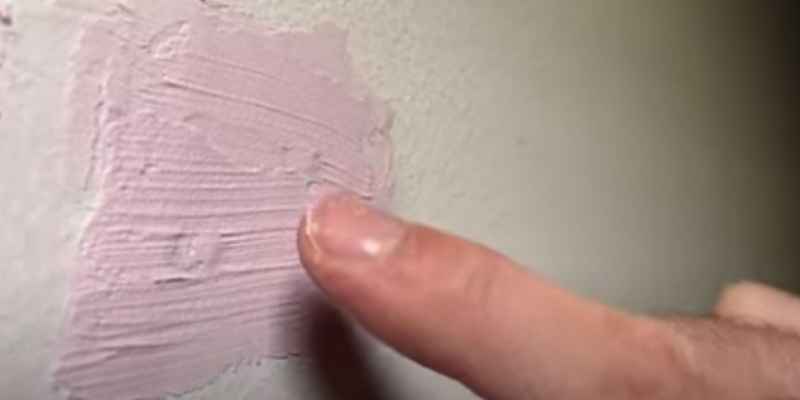
Before filling screw holes in wood, it’s important to prepare the surface properly. Sand the area around the hole to create a clean and smooth surface for the filler to adhere to. Then, use a filler that matches the color of the wood to fill the hole, and sand again once the filler is dry to achieve a seamless finish.
Cleaning The Area
Before filling the screw holes in wood, ensure the area is clean and free from debris.
Selecting The Right Tools
Choose the appropriate tools such as sandpaper, putty knife, wood filler, and a damp cloth.
Step-by-step Guide To Filling Screw Holes
Discover the simple way to fill screw holes in wood with this step-by-step guide. Follow easy instructions for a seamless finish every time. Transform your woodworking projects with this essential technique.
Applying The Filler
Using a putty knife, apply wood filler into the screw hole until it’s slightly overfilled.
Smoothing The Surface
With the putty knife, smooth the filler over the hole, ensuring it’s level with the wood surface.
Drying Time
Allow the filler to dry completely, usually for 24 hours, before sanding it down for a seamless finish.
Sanding For A Smooth Finish
Achieving a smooth finish when filling screw holes in wood involves sanding meticulously to blend the patch seamlessly with the surface. Use fine-grit sandpaper in circular motions for a flawless result. This technique ensures a professional and polished appearance for your woodworking projects.
After filling the screw holes in your wood, sanding is the next step to achieve a smooth finish. Sanding will not only remove any excess filler but also prepare your wood for staining or painting. It’s crucial to use the right sandpaper and technique to achieve a professional finish.
Choosing The Right Sandpaper
Choosing the right sandpaper is essential for achieving a smooth finish. The grit of the sandpaper is determined by the number of abrasive particles per square inch. The higher the grit number, the finer the sandpaper. For wood, it’s recommended to start with a coarse grit, such as 80 or 100, and work your way up to a finer grit, such as 220.
Technique Matters
The technique you use for sanding can make all the difference in achieving a smooth finish. Sand in the direction of the wood grain, using even and consistent pressure. Avoid using too much pressure as it can cause uneven sanding and damage the wood. Sanding blocks or sanding sponges can help you achieve a more consistent sanding pattern and prevent over-sanding in one area.
Summary
Sanding is a critical step in achieving a smooth finish after filling screw holes in your wood. Choosing the right sandpaper and using the correct technique will make all the difference in achieving a professional finish. Remember to sand in the direction of the wood grain and use even and consistent pressure for the best results.
Color Matching Techniques
Color matching techniques can be crucial when filling screw holes in wood. To achieve the best results, use a wood filler that closely matches the color and grain of the wood. Additionally, consider using a stain or paint to further blend the filler with the surrounding wood.
Staining Wood Fillers
When it comes to filling screw holes in wood, one important aspect to consider is color matching. After all, you want the filled holes to seamlessly blend in with the surrounding wood surface. Staining wood fillers can be an effective technique to achieve a close color match.
Using a wood stain that matches the color of the wood, apply a small amount to the filler using a brush or a cloth. Start with a lighter shade and gradually build up the color until it matches the surrounding wood. Allow the stain to dry completely before proceeding to the next step.
Using Tinted Fillers
Another technique to achieve color matching is by using tinted fillers. Tinted fillers are pre-mixed with pigments that closely resemble popular wood tones. This makes it easier to find a filler color that matches your specific wood type.
To use tinted fillers, simply apply the filler directly into the screw hole, ensuring it is slightly overfilled. Use a putty knife or a similar tool to level the filler with the surface of the wood. The tinted filler will blend in with the surrounding wood, providing a seamless appearance.
It’s important to note that when using tinted fillers, it’s best to start with a small amount and gradually add more until you achieve the desired color match. This way, you can avoid overfilling the screw hole and creating an uneven surface.
In conclusion, color matching techniques such as staining wood fillers and using tinted fillers can help you achieve a professional-looking finish when filling screw holes in wood. By carefully selecting the right color and applying the filler with precision, you can ensure that the filled holes seamlessly blend in with the rest of the wood surface.
Sealing And Protecting The Repaired Area
Sealing and protecting the repaired area is crucial to ensuring the longevity and durability of your wood surface. By applying the right sealant, you can safeguard the repaired screw holes and prevent further damage. Let’s explore the process of sealing and the benefits it offers.
Applying Sealant
Once the screw holes in the wood have been filled and sanded, it’s essential to apply a suitable sealant to the repaired area. This will create a protective barrier against moisture, dirt, and other external elements that could compromise the integrity of the repair. Be sure to choose a sealant that is compatible with the type of wood you are working with and follow the manufacturer’s instructions for application.
Benefits Of Sealing
- Protection: Sealing the repaired area provides a protective layer that helps prevent water damage and rot.
- Enhanced Aesthetics: A properly sealed repair seamlessly blends in with the surrounding wood, maintaining the overall visual appeal.
- Longevity: The sealant helps to extend the lifespan of the repair by shielding it from wear and tear.
- Prevention of Expansion: By sealing the screw holes, you can minimize the risk of the wood expanding due to moisture absorption.
Troubleshooting Common Issues

When filling screw holes in wood, you may encounter some common issues that can affect the final appearance and durability of the repair. By troubleshooting these issues, you can achieve a seamless and professional finish.
Filler Shrinkage
Sometimes, the filler material used to fill screw holes may shrink as it dries, leaving a depression around the filled area. This can affect the overall smoothness of the surface and may require additional filling to achieve the desired level. To address this issue, consider using a filler with minimal shrinkage properties or apply multiple layers of filler, allowing each layer to dry completely before adding more. Ensure the filler is packed firmly into the hole to minimize shrinkage.
Color Mismatch
One common problem when filling screw holes is a noticeable difference in color between the filler and the surrounding wood. This can be particularly evident when working with stained or varnished wood surfaces. To mitigate this issue, select a filler that closely matches the color of the wood. Test the filler on a small inconspicuous area first to ensure a seamless blend. If necessary, mix different shades of filler to achieve a closer match to the wood color.
Uneven Surfaces
Uneven surfaces around the filled screw holes can detract from the overall appearance of the wood. This issue can occur if the filler is not applied and leveled properly. Ensure that the filler is spread evenly and slightly overfilled to account for any potential shrinkage. Once the filler is dry, use sandpaper to carefully level the surface, ensuring a smooth and flush finish with the surrounding wood.
Frequently Asked Questions
How Do You Fill Screw Holes In Wood?
To fill screw holes in wood, start by removing any debris or loose material from the hole. Then, use a wood filler or putty that matches the color of the wood. Apply the filler to the hole, ensuring it is level with the surface.
Allow it to dry, then sand it smooth. Finally, finish with paint or stain to match the surrounding wood.
What Is The Best Wood Filler For Screw Holes?
When choosing a wood filler for screw holes, look for one that is specifically designed for use on wood. Some popular options include epoxy-based fillers, wood putty, or wood filler sticks. Make sure to select a filler that matches the color of the wood and is easy to work with.
Can You Reuse Screw Holes In Wood?
Yes, it is possible to reuse screw holes in wood. However, it is important to ensure that the hole is still structurally sound and the wood is not damaged. If the hole is stripped or the wood is weakened, it is recommended to fill the hole and create a new one nearby for the screw to hold securely.
Conclusion
In a nutshell, repairing screw holes in wood is a simple yet effective DIY task. By following the right steps and using the appropriate materials, you can seamlessly restore the look of your wooden surfaces. Remember to choose the right filler and finish for a professional result.
Happy woodworking!