How to Fill Wood Joint Gaps: Indoor & Outdoor Fixes
To fill wood joint gaps, use wood filler or putty to achieve a seamless finish. Sand the area for a smooth surface.
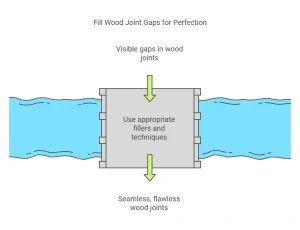
Wood joint gaps can be unsightly and compromise the overall look of your project. By properly filling these gaps, you can ensure a professional and polished final result. Whether you are working on furniture, trim, or flooring, addressing these gaps is crucial for both aesthetics and functionality.
With the right techniques and materials, you can easily fill wood joint gaps and create a flawless finish that enhances the beauty of your woodworking projects. Let’s explore the steps involved in filling wood joint gaps to achieve a seamless and cohesive appearance.
Introduction To Wood Joint Gaps
Wood joint gaps can be a common occurrence in furniture and structures made of wood. These gaps refer to the spaces or openings that can form between the joints of wooden pieces. In this article, we will explore the reasons behind why wood joint gaps occur, as well as the potential impact they can have on furniture and structures.
Why They Occur
Wood joint gaps can arise due to various factors:
- Wood Movement: Wood is a natural material that expands and contracts with changes in temperature and humidity. This movement can cause gaps to develop over time.
- Seasonal Changes: Different seasons bring different levels of humidity, which can cause the wood to expand or contract, leading to the formation of gaps.
- Improper Joinery: If the joints are not properly constructed or the pieces are not accurately cut, it can result in uneven surfaces and gaps.
- Settling: Over time, furniture and structures can settle, causing gaps to appear between the joints.
Impact On Furniture And Structures
Wood joint gaps can have several consequences:
- Weakness: Gaps in wood joints can compromise the overall strength and stability of furniture and structures, making them more susceptible to damage or collapse.
- Aesthetics: Gaps can affect the visual appeal of wooden pieces, detracting from their appearance and potentially reducing their value.
- Dust and Moisture: Gaps can provide entry points for dust, dirt, and moisture, which can lead to further damage, such as rot or mold growth.
- Noise: Loose joints can result in creaking or squeaking noises when pressure is applied, impacting the usability and comfort of furniture.
Understanding why wood joint gaps occur and their potential impact is crucial for proper maintenance and repair. In the next sections, we will delve into different methods for filling wood joint gaps, providing you with practical solutions to address this common issue.
Types Of Wood Joint Gaps
When working with wood, it’s essential to understand the different types of wood joint gaps that may occur. These gaps can result from various factors, including seasonal movement, poor craftsmanship, and material shrinkage.
Seasonal Movement
Seasonal movement can cause wood joint gaps due to changes in humidity and temperature. Wood naturally expands and contracts with the seasons, leading to gaps in the joints.
Poor Craftsmanship
Poor craftsmanship can result in ill-fitting joints, leading to unsightly gaps. Inaccurate measurements and improper assembly techniques contribute to this issue.
Material Shrinkage
Material shrinkage occurs when the wood dries out, leading to gaps in the joints. This can happen over time as the wood loses moisture, creating gaps between the jointed pieces.
Preparation For Gap Filling
Before filling wood joint gaps, it’s crucial to prepare the area to ensure a successful and long-lasting result. This preparation involves cleaning the area, assessing the gap size, and selecting the right tools for the job.
Cleaning The Area
Begin by clearing the area around the wood joint using a soft brush or vacuum to remove any dust, debris, or loose particles. Use a damp cloth to wipe the surface clean, ensuring there is no dirt or residue that could interfere with the gap-filling process.
Assessing The Gap Size
Measure the width and depth of the gap using a tape measure or a caliper. This step is important in determining the amount of filler needed to effectively fill the gap without under or overfilling it.
Selecting The Right Tools
Choose the appropriate filler material based on the size and location of the gap. For small gaps, wood putty or filler sticks are suitable, while larger gaps may require wood strips or epoxy filler. Ensure that the selected filler material matches the color and type of the wood for a seamless finish.
Choosing The Right Filler Material
Selecting the right filler material for wood joint gaps is crucial for a seamless finish. Consider factors like wood type and gap size to ensure a durable and aesthetically pleasing result. Opt for wood putty, epoxy resin, or wood glue for effective gap filling.
Wood Filler
Wood filler is a popular choice for filling wood joint gaps due to its ease of use and versatility. It is a putty-like substance that can be applied directly to the gaps and then sanded down for a smooth finish.
Wood fillers come in different colors to match the shade of the wood, making it easier to achieve a seamless blend. They can be water-based or solvent-based, with the latter being more durable and suitable for outdoor applications.
When using wood filler, it is important to choose a high-quality product that is specifically designed for wood repairs. This ensures long-lasting results and prevents the filler from cracking or shrinking over time.
Epoxy
Epoxy is a strong and durable filler material that is ideal for larger gaps or joints that require extra strength. It consists of two components – a resin and a hardener – that are mixed together to create a chemical reaction and form a hard, solid substance.
Epoxy fillers are highly adhesive and resistant to moisture, making them suitable for both interior and exterior applications. They can be used on a variety of wood types and can be sanded and painted to match the surrounding surface.
It is important to follow the manufacturer’s instructions when working with epoxy fillers, as the mixing ratios and application methods may vary. Proper ventilation and protective gear should also be used when handling epoxy due to its strong odor and potential skin irritations.
Sawdust And Glue Mixture
A budget-friendly option for filling wood joint gaps is to create a mixture of sawdust and glue. This method involves collecting sawdust from the same type of wood and mixing it with wood glue to create a paste-like consistency.
The sawdust and glue mixture can be pressed into the gaps and then smoothed down with a putty knife or sandpaper. This method provides a natural-looking finish as the sawdust blends seamlessly with the surrounding wood.
It is important to ensure that the sawdust and glue mixture is thoroughly mixed to achieve a homogeneous consistency. Additionally, excess mixture should be wiped away before it dries to avoid any unevenness or clumps.
 Abatron WoodEpox 2-Part Structural Filler Kit
Abatron WoodEpox, 2-Part Structural Filler Kit
A 2-part epoxy filler that bonds structurally to wood, sands and stains like real wood, and works on both interior and exterior joints.
- Best for: larger joint gaps that need real structural strength, not just cosmetic fill
- Why we picked it: won’t shrink or crack out like single-part fillers on bigger gaps
- Main drawback: mixing two parts and a shorter working time make it less beginner-friendly than a tube filler
 3M Bondo Wood Filler 3M Bondo Wood Filler |
3M Bondo Wood Filler — two-part formula for interior and exterior gaps, faster cure than epoxy | Check Price |
 DAP Weatherproof Patching Compound DAP Weatherproof Patching Compound |
DAP Weatherproof Patching Compound — single-part, budget option for smaller outdoor gaps | Check Price |
As an Amazon Associate, we earn from qualifying purchases.
Step-by-step Gap Filling Process
When it comes to woodworking, filling gaps in wood joints is a crucial step to achieve a flawless finish. Whether you’re working on furniture, cabinets, or other wood projects, mastering the gap filling process is essential for a professional-looking result. In this guide, we’ll walk you through the step-by-step process of filling wood joint gaps, from mixing the filler to sanding for a smooth finish.
Mixing The Filler
Before you begin filling the gaps, it’s important to prepare the filler. Start by selecting a high-quality wood filler that matches the color and grain of the wood you’re working with. Follow the manufacturer’s instructions to mix the filler to the desired consistency. Ensure that the filler is thoroughly mixed to achieve a smooth and uniform texture.
Application Techniques
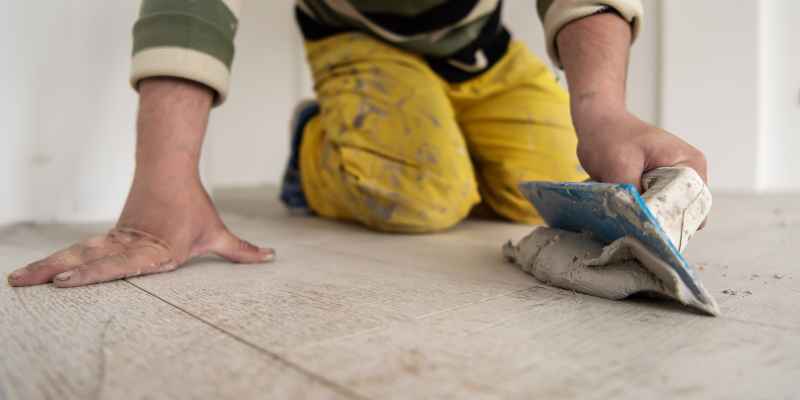
When applying the filler to the gaps, use a putty knife or a similar tool to press the filler firmly into the joint. Be sure to overfill the gaps slightly to account for any shrinkage during drying. Smooth out the excess filler using the putty knife, working with the grain of the wood to achieve a seamless blend with the surrounding surface.
Sanding For A Smooth Finish
Once the filler has dried according to the manufacturer’s recommendations, it’s time to sand the filled joints to achieve a smooth finish. Begin by using a fine-grit sandpaper to level the filler with the surrounding wood. Gradually progress to a finer grit to ensure a seamless transition between the filled areas and the natural wood grain. Finally, apply a coat of finish or paint to complete the process and enhance the overall appearance of the wood joints.
Tips For A Flawless Finish
Achieving a flawless finish when filling wood joint gaps requires attention to detail. Start by thoroughly cleaning the surface and choosing the right filler. Apply the filler generously, ensuring it fills the gaps completely. Sand the area smooth, and finish with a coat of paint or stain for a seamless look.
Matching The Wood Color
Before filling wood joint gaps, ensure the filler matches the wood color.
Testing The Filler
Always test the filler on a small area to check compatibility.
Applying A Finish
Apply a finish to seal the filler and blend it with the wood.
Preventing Future Wood Joint Gaps
Prevent future wood joint gaps by filling them properly. Use a wood filler or putty to fill the gaps, ensuring a seamless finish. Sand and stain the filled joints for a professional look.
Proper wood selection, controlled environment, and regular maintenance are key factors in preventing future wood joint gaps.
Proper Wood Selection
Choose high-quality wood with minimal imperfections to reduce the likelihood of gaps.
Controlled Environment
Maintain a consistent humidity level to prevent wood from expanding and contracting excessively.
Regular Maintenance
Inspect wood joints periodically and address any emerging gaps promptly to prevent further damage.
Filling Gaps in Outdoor Tongue-and-Groove Joints
Outdoor tongue-and-groove boards (decking, siding, porch ceilings) open up gaps as the wood moves with humidity and temperature — and unlike an indoor tabletop, those gaps are also entry points for rain. The fix depends on gap size:
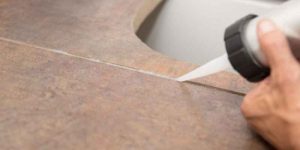
- Gaps under 3mm (about 1/8″): a flexible waterproof sealant or spray coating applied to a clean, dry surface is usually enough — no sanding needed.
- Larger gaps or cracks: fill first with an exterior-rated wood filler for shallow gaps, or a joint backer rod for deeper ones, then sand flush once cured.
- Product picks: Dap 543 is weatherproof and dries fast; Cabot High-Performance Exterior Wood Filler is built specifically for decks, fences, and porches.
Always clean the joint first (loose debris, old sealant, dirt) before filling — adhesion fails fast on outdoor wood if the surface isn’t prepped, regardless of which filler you choose. A gap that looks fine right after filling but reopens within a season is almost always a prep issue, not a bad filler.
Case Studies: Before And After
Residential Furniture
Filling wood joint gaps in residential furniture can significantly improve aesthetics.
Before treatment, gaps can make furniture look worn and neglected.
After filling gaps, furniture appears rejuvenated and well-maintained.
Commercial Projects
Wood joint gaps in commercial projects can create a negative impression.
Before filling, the gaps may detract from the overall professional look.
After filling, the woodwork looks seamless and enhances the business environment.
Historical Restorations
Restoring historical woodwork requires meticulous attention to detail.
Before restoration, visible gaps can compromise the authenticity.
After filling the gaps, the historical woodwork appears preserved and authentic.
Frequently Asked Questions
How Do You Fill Wood Joint Gaps?
To fill wood joint gaps, start by cleaning the gaps with a vacuum or brush. Then, fill the gaps with wood filler or epoxy. Allow the filler to dry, then sand it down until it’s smooth. Lastly, apply a wood stain or paint to match the surrounding wood.
What Is The Best Wood Filler For Gaps?
The best wood filler for gaps depends on the size of the gap. For small gaps, use a water-based wood filler. For larger gaps, use an epoxy filler. Make sure the filler you choose is compatible with the type of wood you’re working with.
How Do You Prevent Wood Joint Gaps?
To prevent wood joint gaps, make sure the wood is dry and acclimated to the environment before installation. Use the correct type of wood for the project and avoid using green or wet wood. Additionally, use proper installation techniques and avoid overloading the joint.
Conclusion
To sum up, filling wood joint gaps is an important part of any woodworking project. By following the steps outlined in this post, you can ensure a seamless and professional-looking finish. Remember to choose the right filler for your project, sand and clean the area thoroughly, and apply the filler carefully for the best results.
With these tips in mind, you’ll be able to tackle any wood joint gap with confidence. Happy woodworking!