How to Find Studs Behind Wood Paneling (Furring Strip Trick)
Wood paneling is usually nailed to 1×2 or 1×3 furring strips over the studs, not glued straight to drywall — which is why cheap stud finders and simple tapping often miss. Mount a shelf or TV bracket into a furring strip instead of the stud behind it, and it can pull loose under load. This guide covers the furring-strip trick, a step-by-step stud finder method, and 3 no-tool backup techniques.
Quick Answer
To find studs behind wood paneling, use an electronic stud finder set to deep-scan mode, or tap the paneling and listen for a solid (not hollow) sound. Because paneling often sits on furring strips over the studs rather than directly on them, confirm any reading by checking for a vertical seam or nail line every 16 or 24 inches before you drill.
Why Wood Paneling Confuses Stud Finders (Furring Strips Explained)
Best Stud Finder Pick
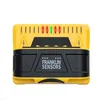
Franklin Sensors ProSensor M210 Stud Finder
Auto-adjusts for material, texture, and depth up to 1.7 inches — built for exactly the false-reading problem wood paneling causes.
- Best for: Wood paneling and thicker wall assemblies
- Why we picked it: Always-on deep scan reduces the furring-strip false positive problem
- Main drawback: Pricier than basic single-sensor models
Compare more stud finder options
 Option 1 DEWALT DW0100 Stud Finder
|
 Option 2 Franklin Sensors ProSensor M150 Stud Finder
|
 Option 3 PREXISO 2-in-1 Stud Finder with Laser Level
|
As an Amazon Associate we earn from qualifying purchases.
Furring strips are thin wood strips — usually 1×2 or 1×3 lumber — nailed horizontally across the wall studs before the paneling goes up. Builders used them to create a flat, level surface for paneling to attach to, and to leave a small air gap behind it. If your home was paneled before the 1990s, there is a good chance furring strips, not bare studs, are the first solid wood your stud finder or fingernail actually hits.
That extra layer is exactly what throws off cheap electronic stud finders: the sensor reads the density change at the furring strip and reports a “stud” that is actually 3/4 inch of solid wood with an air pocket behind it, not framing. Drive a screw there expecting stud-strength holding power and a shelf loaded with books or a wall-mounted TV can pull the furring strip clean off the studs.
📊 Furring strips are typically 1×2 or 1×3 nominal lumber (3/4 in. thick), installed directly over the stud line at 16 or 24 in. on-center — Source: Furring construction standards, common U.S. residential framing practice.
The fix is simple once you know to look for it: locate the furring strip first with a stud finder or by tapping, then check whether it runs directly over a stud by driving a thin finish nail through the paneling and furring strip at a low-visibility spot. If the nail meets solid resistance past the furring strip’s 3/4-inch depth, you have found the stud behind it. If it pushes through into open cavity, slide over 16 inches and try again — that is the standard stud spacing on either side.
Understanding the Importance of Locating Studs
The Role of Studs in Supporting Wood Paneling
Studs are the structural framework the paneling is fastened to, whether directly or through furring strips. Without a solid connection to a stud, paneling can bow, sag, or separate at the seams over time, and anything hung on it has nothing but the panel itself for support.
Impact of Accurate Stud Location on Hanging Objects Securely
Anchoring shelves, artwork, or wall-mounted fixtures into a real stud keeps the weight on framing instead of the paneling surface. Missing the stud is the most common reason a “securely mounted” shelf ends up pulling loose weeks later — the screw is only holding onto thin paneling or a furring strip, not the wall’s actual structure.
Tools and Equipment for Stud Detection
If you are planning to hang heavy items on your wood paneling, it’s crucial to locate the studs for secure anchoring. Several tools handle this job, each with different strengths depending on how your wood paneling was installed — for more techniques like this, browse our full woodworking tips library.
Electronic Stud Finders
Electronic stud finders sense changes in density behind the wall. On bare drywall they are close to foolproof; on wood paneling, the wood-on-wood reading is weaker and noisier, so use a model with a dedicated deep-scan or wood mode and calibrate it on a section of wall you already know has no stud.
Magnetic Stud Finders
Magnetic stud finders detect the metal nails or screws holding the paneling and furring strips in place rather than the wood itself. This works well on nailed paneling but will not find anything on paneling installed entirely with construction adhesive, since there is no metal fastener to attract the magnet.
Manual Stud Detection Methods
Tapping and visual inspection remain reliable backups when you don’t have a stud finder on hand. A tap over a stud (or furring strip) sounds solid and short; a tap over open wall cavity sounds hollow and resonant. It takes a few tries to hear the difference, but it works on virtually any wall material.
Why Does My Stud Finder Give False Readings on Wood Paneling?
Most false readings on wood paneling come from one of two causes: the sensor is picking up the furring strip instead of the actual stud, or it was calibrated directly over a stud instead of on a clear section of wall. Recalibrate on an area you’re confident is stud-free, switch to deep-scan mode if your model has one, and cross-check any reading with the tapping method before you drill.
| Method | Works Through Paneling? | Best For |
|---|---|---|
| Electronic (deep-scan) | Yes, most accurate | Any paneling thickness, first pass |
| Magnetic | Only if paneling is nailed, not glued | Confirming a fastener location |
| Tapping | Yes, any material | No-tool backup, narrowing a search area |
| Finish nail / wire probe | Yes, most reliable confirmation | Verifying furring strip vs. actual stud |
Step-by-Step: How to Find a Stud Behind Wood Paneling
Follow these steps in order — skipping the calibration step is the single most common reason electronic stud finders give false readings on paneling.
- Clear the wall: Remove any art, decorations, or furniture blocking the section of paneling you’re working on, and wipe it down so the stud finder sits flush against the surface.
- Calibrate on a stud-free section: Place an electronic stud finder flat on an area you’re confident has no stud — near the middle of a panel, away from outlets or corners — and calibrate per the manufacturer’s instructions before scanning.
- Scan horizontally in deep-scan mode: Move the stud finder slowly and steadily along the wall. If your model has a deep-scan or wood setting, use it — standard mode is tuned for drywall thickness and can misread through paneling and furring strips.
- Mark and confirm with a finish nail: Mark the first reading with a pencil, then drive a thin finish nail through the paneling at that spot. Solid resistance past about 3/4 inch confirms a stud or furring strip; if it pushes through, you found a furring strip only — slide 16 inches over and check again.
- Measure out remaining studs: Once one stud is confirmed, measure 16 inches (or 24 inches in some newer construction) in each direction to locate the rest along the same wall.
Expert Tips for Successful Stud Location
Understanding common stud placement patterns, working around paneling-specific detection issues, and confirming your reading before you drill are what separate a secure mount from a callback repair.
Understanding Common Stud Placement Patterns
Studs are typically spaced 16 inches apart, sometimes 24 inches in newer construction, and are doubled up on either side of window and door openings. Older or custom-built homes can deviate from this pattern, so treat the standard spacing as a strong starting guess, not a guarantee.
📊 Standard residential stud spacing is 16 in. on-center, with 24 in. on-center allowed in some newer, engineered framing — Source: Common U.S. residential framing convention (IRC-based practice).
Overcoming Challenges in Detecting Studs
Thick or multi-layer paneling is the most common reason detection fails. A deep-scan stud finder helps, and so does identifying the seams between panels — furring strips and studs are almost always centered under a panel, not at the seam itself, since seams typically fall between framing members.
Ensuring Accuracy in Stud Detection
Cross-check any single reading with a second method — starting the search from an electrical outlet (outlets are almost always fastened to a stud) or verifying with a small finish nail before you commit to a large screw or lag bolt.
Ensuring Secure Object Hanging on Wood Paneling
Once you’ve confirmed a stud location, securing objects properly keeps them from pulling loose and damaging the paneling around them.
Securing Objects to Located Studs
Securing objects to the studs behind wood paneling is the most reliable way to ensure the items are held securely:
- Use a stud finder (in deep-scan mode) to locate the studs behind the wood paneling.
- Mark the stud locations with a pencil, and confirm at least one with a finish nail per the steps above.
- Choose hanging hardware sized to the load — see how to build shelves between wall studs for weight guidelines on shelving specifically.
- Align the hanging hardware with the marked stud locations and secure the object to the studs, not the furring strip alone.
Alternatives for Hanging in Non-Stud Areas
If you need to hang objects in areas without studs, consider these alternatives:
- Install wall anchors rated for the paneling thickness to provide additional support for hanging objects.
- Use heavy-duty adhesive hooks designed to hold significant weight without damaging the paneling finish.
- Use tension rods for lightweight items such as curtains or small decorations.
Final Checks for Wall Integrity After Hanging Objects
- Inspect the paneling for any signs of stress or separation around the mounted object.
- Confirm the hanging hardware is fully seated and not just biting into the furring strip.
- If using wall anchors, verify they’re firmly set and rated for the object’s weight.
Common Mistakes When Searching for Studs Behind Wood Paneling
- Calibrating the stud finder over a stud instead of open wall — this skews every reading that follows; always calibrate on a section you know is clear.
- Mistaking a furring strip for the stud — confirm with a finish nail or wire probe before loading real weight onto the spot.
- Trusting a magnetic stud finder on glued paneling — if there’s no metal fastener to detect, switch to an electronic model and check for wiring before drilling.
- Skipping the standard-spacing check — if a reading doesn’t land roughly 16 or 24 inches from a confirmed stud, re-test it before drilling.
Frequently Asked Questions About Finding Studs Behind Wood Paneling
Does a stud finder work on wood?
Yes. Electronic stud finders read density changes behind a surface, and wood studs are dense enough to trigger a reading through thin wood paneling. Accuracy drops on paneling thicker than about 3/4 inch, so switch the finder to deep-scan mode if your model has one.
How do you mount a TV on paneling?
Locate the studs (not just the furring strips) with a stud finder or the tapping method, mark their centers, then attach the mounting bracket with lag screws driven into the stud itself. Never rely on the paneling or a furring strip alone to hold a TV bracket — the weight needs to hang from solid framing.
Can a stud finder find studs through plywood?
Yes, as long as the plywood is standard 1/4 to 3/4 inch paneling thickness. Thicker plywood or plywood layered over drywall can push past a basic stud finder’s range, so a deep-scan or multi-mode model reads more reliably through it.
How do you hang heavy items on paneling?
Use wall anchors or toggle bolts for light-to-medium loads on the paneling itself, but for anything over about 20 pounds, find the wall studs and drive screws or lag bolts directly into them. Pre-drill pilot holes so the paneling does not split, and always check the manufacturer’s weight rating for the hardware you use.
Is wood paneling nailed to studs or furring strips?
In most homes built before the 1990s, wood paneling is nailed to 1×2 or 1×3 furring strips that run horizontally across the studs, not glued or nailed straight to the studs themselves. The furring strips are usually installed directly over the stud line, so finding a furring strip gets you close, but the actual stud is what you need for real holding power.
Can I hang a shelf directly into a furring strip instead of a stud?
For light items under about 5 pounds, a furring strip alone can hold, since it is typically solid 3/4-inch wood. For anything heavier — shelving with books, a TV bracket, a mirror — drive the screw through the furring strip and into the stud behind it so the load is carried by the framing, not the strip.
Conclusion
Finding a stud behind wood paneling comes down to one extra step most guides skip: accounting for the furring strip layer between the panel and the framing. Calibrate your stud finder correctly, confirm readings with a finish nail, and you’ll mount shelves, brackets, and TVs into real structural support instead of a strip that only looks solid.
Sponsored / affiliate links. As an Amazon Associate I earn from qualifying purchases. I may earn additional commission from eligible campaigns.