How to Finish Plywood: Best Finishes for Shelves, Cabinets & Countertops (2026)
To finish plywood, sand through 80→120→220 grit, apply a sanding sealer or shellac to lock down the grain, then topcoat with polyurethane (most durable), paint (most coverage), or stain + varnish (natural look). Edges need separate treatment — iron-on edge banding or wood filler — because bare plywood edges absorb finish unevenly and look rough without prep.
⚡ Quick Answer: Best Finish for Plywood by Application
| Use | Best Finish | Steps |
|---|---|---|
| Shelves | Water-based polyurethane | Sand → sealer → 2 coats poly |
| Cabinets | Primer + latex paint | Sand → filler → prime → 2 coats paint |
| Countertop | Epoxy resin or oil-based poly | Sand → 3+ coats epoxy/poly, sand between |
| Walls | Primer + interior latex paint | Fill gaps → prime → 2 coats paint |
| Floors | Oil-based polyurethane | Sand → sealer → 3 coats oil-based poly |
| Outdoor / Exterior | Exterior oil-based stain + sealer | Sand → prime → exterior stain/sealer, reapply yearly |
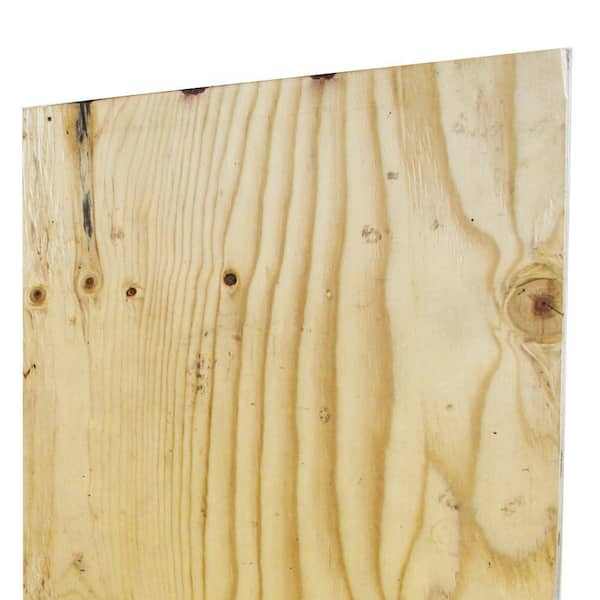
Choosing The Right Plywood For Finishing
Choosing the right plywood for finishing is crucial for achieving the desired result. Learn how to finish plywood effectively and enhance its appearance with these expert tips.
Plywood offers versatility and durability, making it a popular choice for various woodworking projects. However, not all plywood is suitable for finishing. To achieve a smooth and polished surface, it is crucial to choose the right type of plywood for your project.
Consider the following factors when selecting plywood for finishing:
Plywood Grades and their Suitability for Finishing:
Different plywood grades have varying characteristics that affect their suitability for finishing. Here are some common grades and their recommended uses:
- A-grade plywood: Ideal for visible surfaces, as it has a smooth and consistent appearance with minimal imperfections.
- B-grade plywood: Suitable for applications that do not require a flawless finish, as it may have some knots and irregularities.
- C-grade plywood: Best for structural purposes and hidden areas, as it may have visible knots and patches.
- D-grade plywood: Primarily used for structural applications where aesthetics are less important, as it can have noticeable flaws.
Choosing the Appropriate Thickness for Your Project:
Selecting the right thickness is essential to ensure your plywood can withstand the finishing process without warping or bending. Consider the following guidelines:
- Thicker plywood (3/4 inch or more) is suitable for heavy-duty applications like cabinets or furniture.
- Thinner plywood (1/4 inch to 1/2 inch) works well for lighter projects such as shelves or decorative pieces.
Prep Work before Finishing Plywood:
Proper preparation is crucial to achieve a smooth finish. Before applying any finish, make sure to:
- Clean the plywood surface thoroughly to remove any dust or debris.
- Use a wood conditioner to enhance the plywood’s ability to absorb the finish evenly.
Sanding the Plywood Surface:
Sanding is vital to create a level and polished surface for the finish to adhere to. Follow these steps for effective sanding:
- Start with a coarse-grit sandpaper (80-120 grit) to remove any roughness or imperfections.
- Progressively move to finer-grit sandpaper (180-220 grit) for a smoother finish.
- Sand in the direction of the wood grain to avoid scratches.
Filling Imperfections with Wood Filler:
Even high-quality plywood may have slight imperfections that require filling before finishing. Follow these steps for using wood filler effectively:
- Apply the wood filler over any visible gaps, cracks, or holes in the plywood surface.
- Smooth out the filler with a putty knife and let it dry completely.
- Sand the filled areas to ensure a seamless finish with the rest of the plywood.
By considering these factors and following the recommended steps, you can choose the right plywood and prepare it adequately for finishing. Remember, a well-finished plywood surface adds both aesthetic appeal and durability to your woodworking projects.

Types Of Finishes For Plywood
Plywood can be finished in various ways to enhance its appearance and protect it from damage. Some common types of finishes include staining, painting, varnishing, lacquering, and applying a clear coat. These finishes not only add a beautiful touch to plywood but also help to prolong its lifespan.
Exploring Different Finish Options:
When it comes to finishing plywood, there are several options to consider. The type of finish you choose will ultimately depend on the desired look and level of protection you want for your plywood project. Here, we’ll explore the different types of finishes commonly used with plywood:
Clear finishes for a natural look:
- Varnish: A popular choice for plywood, varnish provides a clear, glossy finish that enhances the natural beauty of the wood. It offers good protection against moisture and UV rays, making it suitable for both indoor and outdoor applications.
- Lacquer: Lacquer is another clear finish option that provides a smooth and durable coating. It dries quickly and offers excellent clarity, allowing the natural grain of the plywood to shine through.
- Shellac: Shellac is derived from the resin secreted by the female lac bug. It is a traditional finish that enhances the wood’s color and grain while providing good protection against moisture. Shellac dries quickly but may not be as durable as varnish or lacquer.
Stains and dyes for adding color:
- Wood Stain: Wood stains are available in a variety of colors and can be used to add depth and richness to plywood. They penetrate the wood fibers, highlighting its natural grain pattern. Stains can be either oil-based or water-based.
- Dye: Dyes are another way to add color to plywood. Unlike stains, dyes are transparent and allow the wood’s natural grain to show through. They offer a wider range of color options and can be mixed to achieve custom shades.
Paints for a solid finish:
- Acrylic Paint: Acrylic paints provide a solid, opaque finish and are available in a wide range of colors. They are easy to apply, dry quickly, and offer good durability. Acrylic paints are suitable for both indoor and outdoor applications.
- Oil-based Paint: Oil-based paints offer a durable and smooth finish but require longer drying times. They are suitable for plywood projects that require a strong, long-lasting coating.
Pros and cons of each type of finish:
Clear finishes:
Pros: Enhances the natural beauty of the plywood, offers protection against moisture and UV rays.
Cons: May require multiple coats for optimal results, may not provide the same level of color variation as stains or paints.
Stains and dyes:
Pros: Highlights the natural grain of plywood, offers a wide range of color options.
Cons: Can be tricky to achieve consistent results, may require a topcoat for added protection.
Paints:
Pros: Provides a solid, opaque finish, offers good durability.
Cons: Hides the natural grain of plywood, may require more time and effort for application.
Considerations for the intended use of the plywood:
When selecting a finish for your plywood, it’s essential to consider the intended use of the final product. Here are a few factors to keep in mind:
- Indoor or outdoor use: If your plywood project will be exposed to the elements, choosing a finish with good moisture and UV resistance is crucial.
- Durability: Consider the level of wear and tear your plywood project will endure. Opt for finishes that offer good durability and protection accordingly.
- Desired look: Determine whether you want a clear, natural look or prefer to add color to your plywood project.
By taking these factors into account, you can select the most suitable finish for your plywood project, ensuring it looks great and provides the necessary protection.
Applying The Finish
Achieving a flawless finish for plywood is a meticulous process that requires attention to detail and proper technique. By following the right steps, including sanding, applying a primer, and choosing the right finishing product, you can enhance the natural beauty of plywood while protecting it from damage.
Once you have prepared the plywood surface for finishing, it’s time to apply the finish. This step will not only protect the plywood but also enhance its appearance. Depending on the desired outcome, you can choose from various techniques, including brushing, spraying, or wiping on the finish.
Here’s a guide on how to apply the finish to achieve the best results:
Preparing The Plywood Surface For Finishing:
Before applying the finish, it’s crucial to ensure that the plywood surface is properly prepared. Here’s how you can do it:
- Clean the plywood: Ensure that the surface is free from dust, dirt, and any debris. Use a soft brush or vacuum cleaner to remove any loose particles.
- Apply a sealer or primer: Depending on the type of plywood and finish you plan to use, applying a sealer or primer may be necessary. This will help create a smooth and even base for the finish.
Techniques For Applying The Finish:
Now that you have prepared the plywood surface, let’s explore different techniques for applying the finish:
- Brushing the finish on: Brushing is a common and versatile method for applying the finish. Use a high-quality brush and apply thin, even coats. Brush in the direction of the wood grain to achieve a smooth and professional-looking finish.
- Spraying the finish for a smooth coat: If you want a flawless and professional finish, consider spraying the finish using a paint sprayer. This technique allows for a more even distribution of the finish, resulting in a smoother coat.
- Wiping on a finish for a hand-rubbed look: For a more rustic and hand-rubbed appearance, you can choose to wipe on the finish. Apply the finish using a lint-free cloth, rubbing it into the wood in circular motions. This technique adds depth and character to the plywood surface.
Tips For Achieving A Smooth And Even Finish:
To ensure the desired outcome and avoid common pitfalls, here are some helpful tips for achieving a smooth and even finish:
- Sand between coats: After each coat of finish has dried, lightly sand the surface using fine-grit sandpaper. This will help remove any imperfections and create a smooth finish.
- Use thin coats: Instead of applying a thick layer of finish, opt for multiple thin coats. This allows the finish to dry more evenly and reduces the risk of drips and streaks.
- Follow the manufacturer’s instructions: Different finishes have specific application instructions. Always read and follow the manufacturer’s guidelines to achieve the best results.
- Allow sufficient drying time: Patience is key when applying the finish. Allow each coat to dry completely before applying the next one. Rushing the process can lead to uneven finishes or damage to the plywood.
By following these techniques and tips, you’ll be able to finish plywood effectively and achieve the desired look and protection. Whether you choose to brush, spray, or wipe on the finish, remember to take your time and enjoy the process of transforming plain plywood into a beautifully finished surface.

Finishing Plywood Edges
Learn how to finish plywood edges with these simple steps. Achieve a smooth and polished look for your plywood projects with a few easy techniques.
Addressing The Challenges Of
When it comes to finishing plywood, one of the most challenging parts is dealing with the edges. Plywood edges are typically rough and uneven, making it difficult to achieve a clean and professional-looking finish. However, there are several methods you can use to address these challenges and create smooth and attractive plywood edges.
- Sanding the edges: Start by sanding the edges of the plywood to remove any roughness or splinters. Use a medium-grit sandpaper and sand in a circular motion until the edges are smooth to the touch.
- Applying veneer tape: Veneer tape, also known as edge banding, is a thin strip of wood veneer that can be applied to the plywood edges. This tape not only hides the rough edges but also adds a decorative touch to the finished piece. Simply cut the veneer tape to the appropriate length, apply a thin layer of wood glue to the plywood edges, and press the tape onto the glue. Use a roller or a clamp to ensure proper adhesion.
- Using wood filler: Another option for creating smooth edges is to use wood filler. Wood filler is a putty-like substance that can be applied to the plywood edges to fill in any gaps or imperfections. Apply the wood filler using a putty knife, making sure to spread it evenly across the edges. Once the filler is dry, sand it down until it is flush with the plywood surface.
Different Methods For Treating The Edges
When it comes to treating plywood edges, there are various methods you can choose from. Each method has its own advantages and considerations, depending on the desired result and the specific project requirements. Here are a few different methods to consider:
- Edge sealing: Applying a sealant to the plywood edges helps to prevent moisture absorption and protects the edges from damage. Use a clear sealant or primer to seal the edges, ensuring even coverage for maximum protection.
- Edge painting: If you prefer a uniform color or want to match the plywood surface, painting the edges is an excellent option. Choose a paint color that complements the overall design and apply it evenly using a brush or roller.
- Edge staining: Staining the plywood edges can enhance the natural beauty of the wood and create a cohesive look. Choose a stain color that complements the plywood and apply it evenly using a brush or cloth. Ensure proper ventilation and follow the manufacturer’s instructions for drying and sealing the stained edges.
Applying Edge Banding
One popular method for finishing plywood edges is applying edge banding. Edge banding is a decorative strip of material that is applied to the exposed edges of plywood. It not only covers the rough edges but also provides a clean and finished look.
Here’s how to apply edge banding to plywood edges:
- Measure the length of the plywood edge that needs to be covered with edge banding.
- Cut the edge banding strip to the measured length, ensuring a slight overhang on each end for trimming later.
- Apply a thin layer of wood adhesive or hot melt glue to the plywood edge.
- Press the edge banding strip onto the glued edge, ensuring it is aligned correctly and adheres firmly.
- Use a roller or a block of wood to press down on the edge banding, ensuring good adhesion and eliminating any air bubbles.
- Allow the adhesive to dry as per the manufacturer’s instructions.
- Once the adhesive is dry, trim off the excess edge banding using a sharp utility knife or a flush trim router bit.
- After trimming, use a fine-grit sandpaper to smooth the edge banding and create a seamless transition between the banding and the plywood surface.
Using Wood Filler To Create A Smooth Edge
Wood filler is a versatile product that can be used to create smooth edges on plywood. It fills in gaps, cracks, and imperfections, providing a seamless transition between the plywood surface and the edges. Here’s how to use wood filler to achieve a smooth edge:
- Clean the plywood edges to remove any dust or debris.
- Apply the wood filler to the edges using a putty knife, ensuring an even and smooth application.
- Use the putty knife to scrape off any excess filler, leaving a thin layer on the edges.
- Allow the wood filler to dry completely as per the manufacturer’s instructions.
- Once dry, sand the edges using fine-grit sandpaper until they are smooth and flush with the plywood surface.
- Repeat the process if necessary to achieve the desired smoothness.
Ensuring Consistency Between Plywood Surface And Edges
To achieve a professional and cohesive look, it is crucial to ensure consistency between the plywood surface and the edges. Here are a few tips to maintain consistency in your plywood finishing:
- Use the same finishing technique: Choose a finishing technique that you will use for both the plywood surface and the edges. Whether it’s painting, staining, or varnishing, keeping the same method will create a harmonious appearance.
- Apply finish uniformly: Ensure that the finish is applied uniformly on both the plywood surface and the edges. This will help to achieve a consistent color and texture throughout the piece.
- Pay attention to detail: Take the time to inspect the edges and make any necessary touch-ups or adjustments. It’s the small details that make the finished plywood look polished and professional.
By following these techniques and methods, you can overcome the challenges of finishing plywood edges and achieve outstanding results. Whether you choose to apply edge banding or use wood filler, remember to prioritize consistency to create a finished piece that stands out with its smooth and visually appealing edges.
Sanding And Buffing The Finished Plywood
Achieve a smooth and flawless finish on plywood by sanding and buffing. This essential process removes imperfections and enhances the wood’s appearance.
Sanding Between Coats Of Finish:
- Sanding between coats of finish is an essential step in achieving a smooth and professional-looking surface on your plywood.
- Start by using a fine-grit sandpaper, such as 220-grit, to lightly sand the plywood after the first coat of finish has fully dried. This helps to remove any imperfections, dust particles, or raised wood fibers.
- After sanding, wipe the plywood with a clean, damp cloth to remove any sanding residue and allow it to dry completely before applying the next coat of finish.
- Repeat the sanding process between each subsequent coat of finish. This ensures that each layer adheres properly and helps to create a uniform and flawless finish.
Buffing The Finish To Achieve A Polished Surface:
- Buffing is the final step in finishing plywood and can significantly enhance its appearance by creating a smooth and glossy surface.
- Once the final coat of finish has fully dried, use a fine abrasive pad or a buffing cloth to gently rub the plywood in a circular motion.
- This buffing action helps to remove any minor imperfections, such as small scratches or dull spots, and brings out the natural shine of the finish.
- Be careful not to apply too much pressure while buffing as it may damage the finish. Keep a light touch and let the abrasive pad or cloth do the work.
- Once you have finished buffing, use a clean, soft cloth to remove any residue and give the plywood a final polish.
Tips For Avoiding Common Sanding And Buffing Mistakes:
- Use the correct grit sandpaper for each sanding process. Starting with a low-grit sandpaper can cause excessive material removal and leave visible scratches. Gradually progress to higher grits for a smoother finish.
- Always sand with the grain of the plywood to avoid cross-grain scratches that can be difficult to remove.
- Take your time and apply even pressure when sanding to avoid creating uneven surfaces or accidentally sanding through the plywood veneer.
- Clean the plywood thoroughly between sanding and buffing to remove any dust or debris that could mar the finish.
- When buffing, avoid using excessive force or speed, as this can generate heat and potentially damage the finish.
- Regularly inspect the plywood during the sanding and buffing process to ensure you are achieving the desired results.
- Practice on a scrap piece of plywood or do a test patch before working on the final project to familiarize yourself with the sanding and buffing techniques and avoid costly mistakes.
Remember, sanding and buffing require patience and attention to detail. By following these tips, you can achieve a beautifully finished plywood surface that enhances the overall appearance of your project.
Maintenance And Care For Finished Plywood
Proper maintenance and care for finished plywood is essential to ensure its longevity. By following the right steps, such as cleaning with a mild soap and water solution, avoiding direct sunlight, and using protective coatings, you can keep your finished plywood looking and performing its best for years to come.
Proper Cleaning And Maintenance Techniques:
Maintaining and caring for finished plywood is essential to prolong its lifespan and preserve its appearance. By following these proper cleaning and maintenance techniques, you can ensure that your finished plywood remains in optimal condition:
- Regularly dust the surface of the plywood using a soft, lint-free cloth or feather duster.
- Gently wipe down the plywood with a clean, damp cloth to remove any dirt or grime.
- Avoid using abrasive cleaners or harsh chemicals, as they can damage the finish of the plywood.
- To remove tougher stains, mix a mild soap or detergent with warm water and use a soft cloth to gently scrub the affected area. Rinse with clean water and dry thoroughly.
- Protect the plywood from prolonged exposure to direct sunlight, as this can cause fading and discoloration over time.
- Place coasters or mats under hot or wet objects, such as cups or flower pots, to prevent moisture damage and heat marks.
- Avoid dragging or sliding heavy objects across the plywood surface, as this can scratch or dent the finish.
Remember, regular maintenance and gentle cleaning will help to extend the life and beauty of your finished plywood.
Protecting The Finished Plywood From Damage:
To ensure the longevity of your finished plywood, it’s important to take precautionary measures to protect it from potential damage. Here are some tips to safeguard the finished plywood:
- Apply a protective coating or sealant to the plywood surface to guard against water damage, scratches, and stains. Be sure to choose a product that is suitable for the type of finish applied.
- Use furniture pads or felt protectors under furniture legs to prevent them from scratching or denting the plywood.
- Avoid placing sharp or abrasive objects directly on the plywood surface to prevent scratches or gouges.
- Consider using tablecloths, placemats, or coasters to shield the plywood from spills, heat, and stains.
- Keep the plywood away from high humidity areas, such as bathrooms and kitchens, to minimize the risk of warping or swelling.
- Regularly inspect the plywood for any signs of damage or wear and address them promptly to prevent further deterioration.
- Avoid exposing the plywood to extreme temperature fluctuations, as this can cause expansion and contraction, leading to potential damage.
By taking the necessary precautions, you can protect your finished plywood and maintain its appearance for years to come.
How To Repair And Touch Up The Finish As Needed:
Over time, the finish on plywood may experience wear and tear or minor damage. Knowing how to repair and touch up the finish when needed can help restore its original beauty. Follow these simple steps to repair and touch up the finish:
- Start by cleaning the damaged area with a mild soap and water solution, ensuring that it is free from dirt and debris.
- Gently sand the damaged area using fine-grit sandpaper in the direction of the wood grain. This helps to create a smooth surface for the touch-up.
- Wipe away any dust from sanding with a clean, damp cloth, and allow the plywood to dry completely.
- Apply a small amount of a matching finish or clear coat to the damaged area using a fine artist’s brush or cotton swab. Allow it to dry according to the manufacturer’s instructions.
- If necessary, repeat the application of the finish until the damaged area blends seamlessly with the surrounding surface.
- Once the touch-up is complete, inspect the repaired area to ensure a smooth and even finish.
- To maintain a consistent appearance, consider applying a light coat of finish or sealant over the entire plywood surface, following the manufacturer’s recommendations.
By following these steps, you can repair and touch up the finish as needed, ensuring that your plywood retains its beauty and integrity for years to come.

Frequently Asked Questions For How To Finish Plywood
How Do I Finish Plywood For A Smooth Surface?
To achieve a smooth surface on plywood, start by sanding the surface with sandpaper. Apply a coat of wood filler to fill any gaps or imperfections. Once dry, sand again and apply a sanding sealer, followed by a primer. Finish with multiple coats of paint or varnish, sanding between each coat for a smooth finish.
Can I Stain Plywood To Enhance Its Appearance?
Yes, plywood can be stained to enhance its natural beauty. Start by sanding the plywood to remove any imperfections. Next, apply a wood conditioner to the surface before staining to ensure an even color. Apply the stain in thin coats, allowing each coat to dry before applying the next.
Finish with a clear topcoat for added protection.
Is It Necessary To Seal Plywood After Finishing?
Sealing plywood after finishing is highly recommended to protect it from moisture and other elements. A clear sealer or varnish can be applied to seal the surface and prevent warping or damage. Ensure the plywood is clean and dry before applying the sealer, and follow the manufacturer’s instructions for proper application and drying times.
How to Finish Plywood for Different Applications
Best Finish for Plywood Shelves
For plywood shelves that need to hold weight and resist surface scuffs, water-based polyurethane is the top choice. It dries clear, doesn’t yellow over time, and provides a durable hard shell that handles everyday items well. Apply two to three coats, sanding lightly with 320-grit between coats for a smooth, professional result.
Process: Sand to 220 grit → apply a shellac sanding sealer (Zinsser Bulls Eye Shellac) → sand to 320 → apply 2–3 coats water-based polyurethane (Minwax Polycrylic or General Finishes High Performance). Treat edges with iron-on edge banding before finishing to prevent the laminate layers from showing through.
How to Finish Plywood for Cabinets
Cabinet-grade plywood (birch or maple veneer) responds best to primer + paint for a factory-smooth finish. The key step most DIYers skip is using a grain filler or high-build primer first — without it, the open grain of the plywood face telegraphs through even multiple paint coats.
- Sand to 180 grit. Fill any voids with Bondo wood filler and re-sand.
- Apply a high-build primer (Zinsser Bulls Eye 1-2-3 or Sherwin-Williams Extreme Bond). Let dry 4 hours.
- Sand primer with 220-grit. Wipe clean.
- Apply 2 coats of a cabinet-grade latex paint (Benjamin Moore Advance or Sherwin-Williams Emerald Urethane) using a foam roller for a smooth, brush-mark-free surface.
- Lightly sand between coats with 320-grit for a level finish.
How to Finish Plywood Countertops
Plywood countertops need a waterproof, hard-wearing finish that can handle daily contact with water, food prep, and cleaning products. Epoxy resin or oil-based polyurethane are the two reliable options.
Epoxy finish: Apply 2–3 poured coats of bar-top epoxy (Total Boat, TotalBoat, or Pro Marine Supplies). Each coat self-levels to a glass-smooth surface. Allow 24 hours between coats. Final result is extremely hard and waterproof.
Oil-based polyurethane finish: Apply 4–6 coats of oil-based polyurethane, sanding to 320-grit between each coat. The build-up creates a thick, water-resistant film. Less expensive than epoxy but requires more coats to achieve comparable protection.
Finishing Plywood Walls
Plywood paneling on interior walls needs primer and paint to look polished. The challenge is the V-grooves and panel seams — these must be caulked and filled before painting or they’ll remain visible through any number of topcoats.
- Fill V-grooves and seams with paintable caulk. Smooth with a damp finger. Let dry fully.
- Sand the face of the panels with 120-grit to remove any mill glaze, then 180-grit to smooth.
- Apply a stain-blocking primer (Zinsser BIN or Bulls Eye 1-2-3). This prevents tannins from bleeding through the paint.
- Apply 2 coats of interior latex paint with a roller. Use a small brush to cut in around edges and into any grooves.
Best Products for Finishing Plywood
These products cover every plywood finishing scenario — from interior shelves to outdoor furniture.
Best Plywood Finish

Minwax Polycrylic Water-Based Protective Finish
Crystal-clear water-based finish that dries fast and won’t yellow over light-colored plywood. Ideal for shelves, cabinets, and furniture. Cleans up with water and produces a hard, durable topcoat.
- Best for: Interior plywood shelves, cabinets, and painted or light-wood surfaces
- Why we picked it: Fast-drying, non-yellowing, water cleanup, excellent hardness for high-use surfaces
- Main drawback: Not suitable for outdoor use; can raise grain if plywood isn’t pre-sanded well
Compare more plywood finish options
|
Option 1 Zinsser Bulls Eye Shellac Sanding Sealer
|
Option 2 Varathane Oil-Based Polyurethane
|
Option 3 Danish Oil Penetrating Finish
|
As an Amazon Associate we earn from qualifying purchases.