How To Fix A Bad Polyurethane Job: Expert Tips & Proven Solutions
To fix a bad polyurethane job, sand down the surface to remove imperfections and recoat it with a fresh layer of polyurethane for a smooth finish. If you have recently applied polyurethane and are not satisfied with the results, don’t worry.
There are simple steps you can take to fix the problem and achieve a flawless finish. We will discuss how to fix a bad polyurethane job and restore the beauty of your woodwork or furniture. By following these steps, you can correct any imperfections and bring out the true potential of your project.
So let’s dive in and learn how to make your polyurethane job look professional and impressive.
Identifying A Bad Polyurethane Job
When it comes to maintaining the beauty and durability of your wooden floors or furniture, a proper polyurethane finish is essential. However, sometimes even the most experienced DIYers or professional contractors can end up with a bad polyurethane job. To ensure you catch and fix any issues early on, it is important to know how to identify a bad polyurethane job. In this article, we will discuss some common visible imperfections, an uneven coating, and peeling or flaking that can occur with a bad polyurethane job.
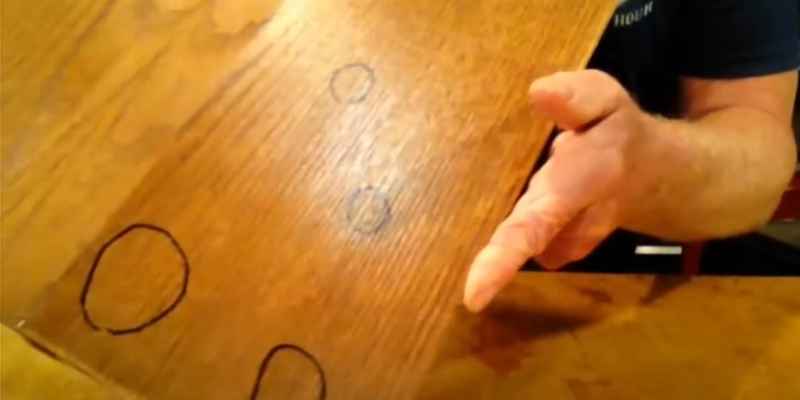
Visible Imperfections
One of the easiest ways to identify a bad polyurethane job is by spotting visible imperfections on the surface. These imperfections can include dust particles, bubbles, brush strokes, or uneven application. They not only compromise the aesthetics of your wood surface but also indicate a lack of attention to detail during the application process.
Visible imperfections can be easily visible under good lighting conditions and can ruin the overall appearance of your wood surface. To identify them, take some time to carefully examine the polyurethane-coated area. Look for any bumps, irregularities, or inconsistencies in the finish. If you notice any of these visual flaws, it’s a clear indication that there is room for improvement.
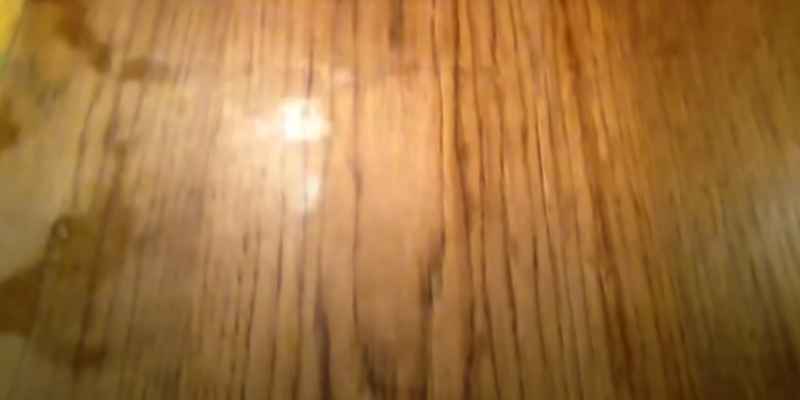
Uneven Coating
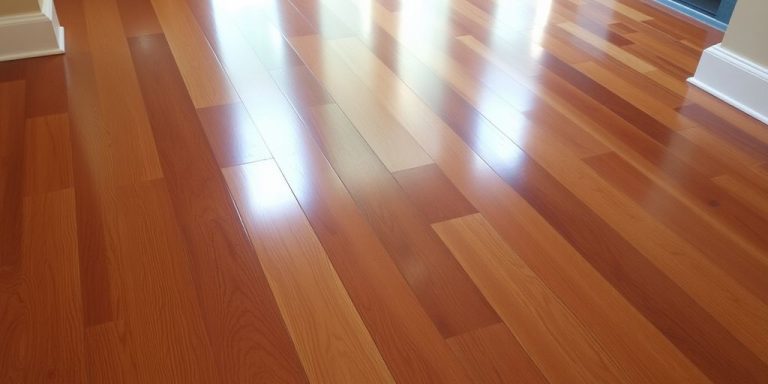
An uneven coating is another telltale sign of a bad polyurethane job. This occurs when the polyurethane is not applied evenly across the surface, resulting in patches of thicker or thinner coating. An uneven coating can create a visually unappealing appearance, making your wood surface look blotchy or discolored.
To check for an uneven coating, run your hand gently across the surface of the polyurethane. If you can feel rough or uneven areas, it indicates an uneven application. Additionally, observe the reflection of light on the surface. If you notice areas that appear glossier or duller than others, it suggests an inconsistent coating.
Peeling Or Flaking
Peeling or flaking of the polyurethane finish is a clear sign of a bad job. This issue usually occurs when the adhesion between the wood surface and the polyurethane is weak. It can be caused by improper surface preparation, insufficient drying time between coats, or using incompatible products.
To identify peeling or flaking, gently scrape your fingernail or a plastic utensil across the surface. If you notice any flakes or peels coming off easily, it indicates that the polyurethane is not properly adhering to the wood. Examine the affected areas closely for any signs of detachment or lifting of the finish.
In conclusion, by paying close attention to visible imperfections, an uneven coating, and peeling or flaking, you can easily identify a bad polyurethane job. Identifying these issues early on allows you to take the necessary steps to fix the problem and achieve the beautiful, durable finish your wooden surfaces deserve.
Preparing For The Fix
Looking to fix a bad polyurethane job? Follow these step-by-step guidelines to effectively prepare for the fix and restore your project to perfection.
Assessing The Damage
Before you can begin fixing a bad polyurethane job, it’s important to assess the extent of the damage. Take a close look at the surface to identify any imperfections such as bubbles, streaks, or areas with an uneven finish. By understanding the specific issues you need to address, you can better prepare for the fix. Don’t worry, with a little patience and attention to detail, you’ll be able to restore the beauty and durability of your polyurethane finish in no time.
Gathering The Tools And Materials
Once you’ve assessed the damage, the next step is to gather the necessary tools and materials for the fix. Here’s a handy list of what you’ll need:
Having all these items ready before you start will help ensure a smooth and efficient repair process. Now that you have everything you need, let’s move on to the next steps to fix that bad polyurethane job.
Fixing Visible Imperfections
Having a bad polyurethane job can be frustrating, especially when you can see visible imperfections on your finished surface. But don’t worry – there are simple steps you can take to fix these issues and achieve a smooth, flawless result. In this section, we will explore two effective methods to address visible imperfections: Sanding and Smoothing, and Filling Holes and Gaps.
Sanding And Smoothing
If you notice rough areas, bumps, or uneven textures on your polyurethane finish, sanding and smoothing can be the perfect solution. Follow these steps to fix these imperfections:
- Start by assessing the severity of the imperfections. Determine whether a light sanding or more extensive smoothing is required.
- Prepare the necessary tools and materials, including sandpaper with varying grits (ranging from coarse to fine), a sanding block, and a clean cloth.
- Begin sanding the affected areas gently using a back-and-forth motion to gradually remove the rough patches. Make sure to sand in the direction of the wood grain for a seamless finish.
- Gradually progress to finer grit sandpaper, aiming to achieve a smooth surface without visible sanding marks.
- Once the imperfections have been smoothed out, wipe away any dust with a clean cloth.
- If necessary, repeat the sanding process until you are satisfied with the results.
Filling Holes And Gaps
Unsightly holes and gaps can significantly affect the appearance of your polyurethane finish. Here’s how you can effectively fill them:
- Inspect the area for any holes or gaps that need to be addressed. These could be small punctures, cracks, or even gaps between floorboards.
- Gather the required materials, such as wood filler, putty knife, sandpaper, and a clean cloth.
- Apply the wood filler generously to the affected areas using a putty knife, ensuring it fills the gaps completely.
- Smooth out the excess filler with the putty knife, creating a flat and even surface.
- Allow the filler to dry according to the manufacturer’s instructions.
- Once dried, carefully sand the filled areas until they are flush with the surrounding surface.
- Wipe away any remaining dust with a clean cloth before applying another coat of polyurethane.
By following these simple yet effective methods of sanding and smoothing, as well as filling holes and gaps, you can rectify visible imperfections in your polyurethane job. With a bit of patience and attention to detail, you’ll be able to achieve a flawless finish that enhances the overall beauty of your project.
Correcting An Uneven Coating
Learn how to fix a bad polyurethane job by correcting an uneven coating. With easy-to-follow steps, you can achieve a smooth and professional finish for your project.
If you’ve recently applied polyurethane to your wooden surface and ended up with an uneven coating, not to worry! There are simple yet effective steps you can take to fix it. One of the first things you’ll need to do is strip the surface of the existing polyurethane. This will prepare the wood for a fresh application and help ensure a smooth and even finish.
Stripping The Surface
To begin the process of correcting an uneven coating, start by stripping the surface of the wood. This can be done using a chemical stripper that is suitable for removing polyurethane. Be sure to carefully follow the manufacturer’s instructions during this step.
1. Start by protecting yourself with gloves, safety glasses, and a well-ventilated area.
2. Apply the chemical stripper evenly across the affected area using a brush or a sponge.
3. Allow the stripper to sit for the recommended amount of time stated on the product label.
4. Use a scraper to gently remove the softened polyurethane, working in the direction of the wood grain.
5. Once the majority of the old coating is removed, use a fine-grade steel wool to remove any remaining residue.
6. Thoroughly clean the surface with a wood cleaner to remove any stripper residue and prepare it for reapplication.
Reapplying Polyurethane
Now that the surface is stripped and clean, it’s time to reapply the polyurethane to achieve a smooth and even coating.
1. Begin by choosing the right type of polyurethane for your project. Consider factors such as the level of gloss you desire and whether you prefer a water-based or oil-based product.
2. Stir the polyurethane well to ensure an even consistency. Avoid shaking the container, as this can introduce air bubbles.
3. Apply a thin and even coat of polyurethane using a brush or a foam applicator. Work in long, smooth strokes, following the wood grain.
4. Allow the first coat to dry completely according to the manufacturer’s instructions. This typically takes several hours.
5. Lightly sand the first coat using fine-grade sandpaper. This will help smooth out any imperfections and create a better surface for subsequent coats.
6. Apply additional coats of polyurethane, repeating the sanding process between each coat, until you achieve the desired level of smoothness and durability.
Remember, proper ventilation is essential during these steps. Additionally, ensure you provide ample drying time between coats for optimal results. By following these techniques for correcting an uneven coating, you’ll be well on your way to achieving a beautifully finished wooden surface with a flawless polyurethane job.
Addressing Peeling Or Flaking
Fixing a bad polyurethane job? Address peeling or flaking with these easy steps. Ensure a smooth, durable finish by following our expert advice and techniques.
Peeling or flaking polyurethane can be frustrating, but don’t worry! There are solutions to fix this common issue and restore the beauty of your wood surfaces. In this section, we will explore two essential steps you need to follow – removing the damaged layers and applying a fresh coat. Let’s get started!
Removing The Damaged Layers
To fix a bad polyurethane job with peeling or flaking, the first step is to remove the damaged layers. Here’s how you can do it:
- Begin by gently sanding the affected area using a fine-grit sandpaper. The goal is to remove the loose or peeling polyurethane without damaging the underlying wood.
- After sanding, carefully wipe away any dust or debris with a clean, damp cloth. This will ensure a clean surface for the subsequent steps.
- Next, apply a polyurethane stripper according to the manufacturer’s instructions. Make sure to choose a stripper that is safe to use on your particular wood surface.
- Allow the stripper to sit for the recommended amount of time, usually anywhere from 15 minutes to an hour, depending on the product.
- Once the stripper has done its job, use a scraper or a putty knife to gently remove the softened polyurethane. Work in the direction of the wood grain to avoid causing further damage.
- Repeat the stripping process if necessary, until all the damaged layers have been successfully removed.
Applying A Fresh Coat
After successfully removing the damaged layers, it’s time to apply a fresh coat of polyurethane. Follow these steps for a seamless finish:
- Start by ensuring the surface is clean and free from any leftover stripper or residue. A clean, dust-free surface will allow the new polyurethane to adhere properly.
- If there are any uneven spots or imperfections on the wood, use a wood filler to fill them in. Allow the filler to dry completely, and then sand it down until it’s smooth.
- Next, stir the polyurethane thoroughly to ensure an even consistency. It’s important to follow the manufacturer’s instructions for mixing and application.
- Using a high-quality brush or a foam applicator, apply a thin and even coat of polyurethane to the wood surface. Work in the direction of the wood grain, and avoid over-brushing, as it can lead to bubbles or streaks.
- Allow the first coat to dry completely, following the recommended drying time on the product label. This usually takes a few hours.
- Once the first coat is dry, lightly sand the surface with a fine-grit sandpaper to create a smooth and even finish. Remember to wipe away any dust with a clean cloth.
- Apply additional coats of polyurethane following the same process as before, allowing each coat to dry completely and sanding between coats if necessary. Two to three coats are typically recommended for optimal durability and protection.
By following these steps to address peeling or flaking polyurethane, you can fix a bad job and achieve a beautifully restored wood surface. Remember to take your time, work patiently, and ensure proper ventilation during the process. Good luck!
Conclusion
Fixing a bad polyurethane job may seem daunting, but with the right approach, you can restore your project to its former beauty. Remember to assess the problem, research solutions, and carefully follow the necessary steps for a successful repair. By taking the time to understand the issue and implement the correct techniques, you can achieve a professional-looking finish.
Don’t let a bad polyurethane job discourage you – embrace the opportunity to learn and improve your skills. Keep practicing, and soon you’ll be achieving flawless results every time.