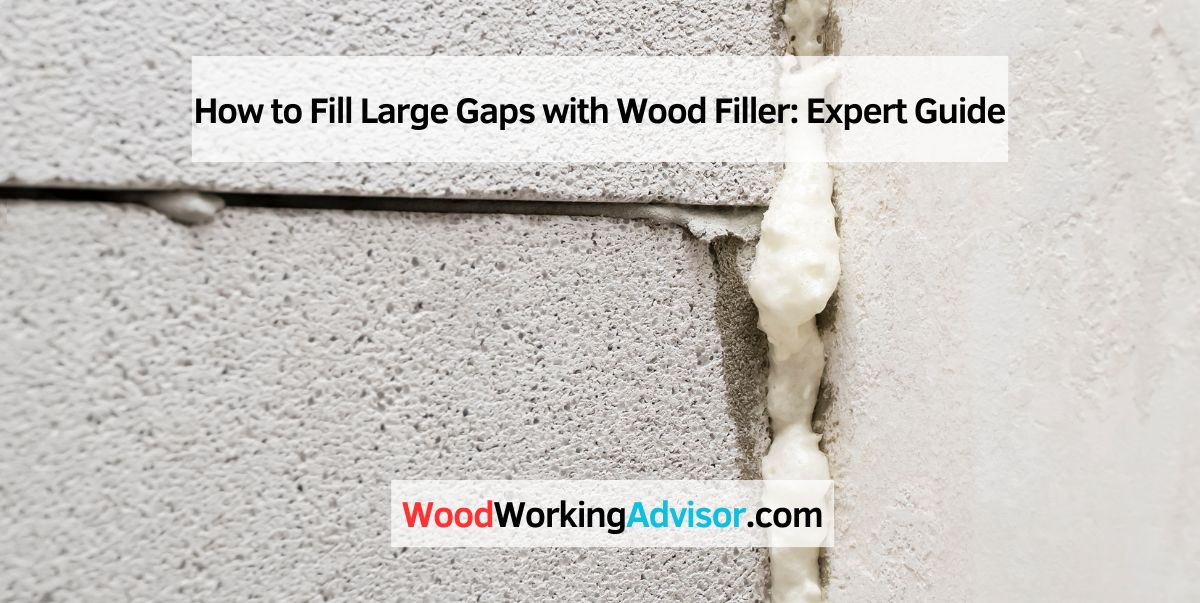
How to Fill Large Gaps in Wood (Furniture & Floors)
To use wood filler for large gaps, apply the filler directly into the gap, ensuring it is level with the surface.
Choosing The Right Wood Filler
When it comes to filling large gaps in wood, choosing the right wood filler is crucial for achieving a seamless and professional-looking finish. Different types of wood fillers offer varying properties and benefits, so it’s important to understand your options before making a decision. In this section, we will explore the different types of wood fillers available and consider factors such as color and texture to help you make an informed choice.
Understanding Different Types
Wood fillers can be broadly categorized into two types: solvent-based and water-based fillers. Solvent-based fillers, as the name suggests, are made with solvents such as acetone or mineral spirits. These fillers tend to dry and cure more quickly, making them ideal for situations where you need a fast fix.
On the other hand, water-based fillers are made with water and offer several advantages. They are non-toxic and environmentally friendly, making them a popular choice for those concerned about their health and the impact on the environment. Water-based fillers also have a longer shelf life and can be easily cleaned up with water, making them convenient to work with.
| Solvent-based Fillers | Water-based Fillers |
|---|---|
| Dry and cure quickly | Non-toxic and environmentally friendly |
| May contain harmful chemicals | Longer shelf life |
| Strong odor | Easy cleanup with water |
Considering Color And Texture
When choosing a wood filler, it’s important to consider the color and texture of the filler to ensure a seamless blend with the existing wood surface. Most wood fillers come in multiple color options, ranging from light to dark shades, allowing you to choose the best match for your project. Take into account the color of the wood you are working with, as well as any stains or finishes that will be applied to the wood.
Texture is another aspect to consider when selecting a wood filler. Some wood fillers have a smooth texture, while others have a grainier consistency to mimic natural wood. It’s important to choose a wood filler with a texture that matches the surrounding wood to create a uniform and natural-looking finish.
Pro Tip: When in doubt about the color or texture, it’s always a good idea to test the wood filler on a small, inconspicuous area of the wood before applying it to the larger gaps.
To sum up, choosing the right wood filler involves understanding the different types available and considering factors such as color and texture. By making an informed decision, you can ensure a seamless and professional result for your woodworking project.
Filling Gaps In Hardwood Floors (Before Painting Or Refinishing)
Floorboard gaps behave differently than gaps in furniture or trim, because a floor expands and contracts with the seasons. A rigid solvent-based filler can pop back out or crack along the seam once the wood shrinks again in a dry season. For gaps under about 1/4 inch, a flexible wood floor filler or a color-matched latex-based filler designed to move with the wood holds up far better long-term than a hard epoxy-style filler.
For gaps wider than 1/4 inch, rope caulk (a pliable caulking cord pressed into the gap) is the traditional fix used by flooring professionals, since it stays flexible through seasonal movement instead of cracking out. If you’re filling gaps specifically to prepare for painting rather than a clear finish, any of these options can be sanded flush and painted over once fully cured — just confirm the product is paintable before you buy it.
Preparation And Cleaning
For large gaps, preparation and cleaning are crucial before using wood filler. Begin by cleaning the area with a damp cloth to remove any dust or debris. Then, apply a primer to help the wood filler adhere better. Finally, fill the gap with the wood filler, smooth it out, and let it dry before sanding.
Cleaning The Gap Area
Before using wood filler for large gaps, it’s important to thoroughly clean the gap area to ensure proper adhesion and a smooth finish. Cleaning the gap area involves removing any debris, dust, or loose wood particles that may hinder the filler’s effectiveness. To clean the gap area:
- Wipe the area with a clean, dry cloth to remove surface dirt and dust.
- Use a vacuum with a brush attachment to eliminate any remaining loose particles and debris.
- If necessary, gently scrape the edges of the gap with a putty knife to remove old paint or varnish that may interfere with the filler’s adhesion. Be cautious not to damage the surrounding wood.
- For stubborn residue, use a cleaning agent specifically designed for wood surfaces, following the manufacturer’s instructions. Apply the cleaner to a cloth and gently rub the gap area until it is clean.
Preparing The Surface
Preparing the surface before applying wood filler is crucial for achieving a seamless and long-lasting result. Follow these steps to properly prepare the surface:
- Sand the surrounding area of the gap with fine-grit sandpaper to smooth out any rough edges and create an even surface. This will help the filler blend seamlessly with the rest of the wood.
- Remove the sanding dust with a clean, dry cloth or use a vacuum to ensure no particles are left behind.
- If the gap is deep or wider than 1/4 inch, it’s advisable to use a backer rod or foam rope before applying the filler. Insert the backer rod or foam rope into the gap so that it sits approximately 1/8 inch below the surface. This will provide support and prevent the filler from sinking or cracking over time.
- For best results, it’s recommended to apply a primer or wood sealer on the surrounding wood before filling the gap. This will promote better adhesion and prevent the filler from absorbing too much moisture from the wood.
By thoroughly cleaning the gap area and properly preparing the surface, you’ll set the foundation for successful wood filler application. These important steps will help ensure a smooth and durable finish, making your repaired woodwork look as good as new.
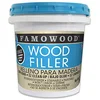
FamoWood Latex Wood Filler
A water-based, non-toxic filler that sands, stains, and paints well — a solid all-purpose choice for large gaps in furniture, trim, or general woodworking.
- Best for: furniture and trim gaps that won’t see seasonal wood movement
- Why we picked it: easy water cleanup and low odor compared to solvent-based fillers
- Main drawback: not flexible enough for floorboard gaps that expand and contract seasonally


As an Amazon Associate we earn from qualifying purchases.
Filling The Gap
Filling large gaps with wood filler is an essential step in any woodworking project. Whether you are filling gaps in a hardwood floor, door frame, or furniture piece, using the right technique to fill the gap with wood filler ensures a professional, seamless finish. In this guide, we’ll walk you through the process of filling large gaps with wood filler, from applying the filler to smoothing and leveling the surface.
Applying The Wood Filler
When it comes to filling large gaps in wood, it’s crucial to choose the right type of wood filler. For large voids, opt for an epoxy-based filler, as it provides a strong and durable bond. Begin by cleaning the gap thoroughly to remove any debris or dust. Then, using a putty knife, press the wood filler firmly into the gap, ensuring it completely fills the space. Work in small sections to avoid the filler drying out before it’s properly applied.
Smoothing And Leveling
Once the wood filler is applied and has dried, it’s time to smooth and level the surface. Use a sanding block or sandpaper to gently sand the filled area until it is flush with the surrounding wood. Be sure to sand in the direction of the wood grain to achieve a seamless blend. Check the levelness by running your hand over the filled area to detect any uneven spots, and continue sanding as needed until the surface is smooth and level.
Drying And Sanding
Once you have filled in the large gaps in your wood project with wood filler, the next crucial step is to ensure proper drying and sanding for a flawless finish. Taking the time to allow the wood filler to dry completely and then sanding it down will help you achieve a smooth and seamless surface that is ready for painting or staining.
Allowing Sufficient Drying Time
Properly drying the wood filler is essential to avoid any potential issues in the future. Depending on the type of wood filler you are using, the drying time may vary. It is vital to carefully read the manufacturer’s instructions regarding drying time to ensure that you allow sufficient time for the wood filler to dry completely. Failure to do so may result in a subpar finish or possible damage to the repaired area.
Sanding To Perfection
After the wood filler has dried, the next step is sanding. Sanding the filled gaps will not only help smoothen the surface but also blend the repaired areas with the surrounding wood for a seamless appearance. Start with a coarse-grit sandpaper to remove any excess filler and level it flush with the surrounding wood. As you progress, gradually work your way up to finer-grit sandpaper to achieve a smoother finish. Remember to sand in the direction of the wood grain to prevent any visible scratches or marks.
Finishing Touches
Discover how to effectively use wood filler for fixing large gaps in your woodworking projects. Get step-by-step instructions and expert tips to achieve flawless finishing touches. Improve your craftsmanship with this essential technique.
Staining Or Painting
Now that you have successfully filled the large gaps in your wood with filler, it’s time to move on to the next step: finishing touches. One important decision you’ll need to make is whether to stain or paint the filled gap to ensure a seamless integration with the rest of the wood surface. Both options have their advantages and it largely depends on your personal preference and the look you want to achieve for your project.
Sealing The Filled Gap
Once you have decided on staining or painting, it’s crucial to properly seal the filled gap to protect it from moisture, dirt, and other potential damages. This step not only helps in extending the lifespan of your wood surface but also ensures a professional and finished appearance. Here are a few steps to follow when sealing the filled gap:
1. Clean the area: Before applying any sealant, make sure the filled gap is clean and free from any dust or debris. Use a damp cloth or vacuum to remove any loose particles.
2. Choose the right sealant: Select a sealant that is compatible with your chosen finishing method. There are various options available such as wood sealer, clear coat, or polyurethane. Consult with your local hardware store or follow the manufacturer’s instructions to choose the best sealant for your project.
3. Apply the sealant: Using a brush or a sponge, evenly apply the sealant over the filled gap. Make sure to cover the entire area, including the edges of the wood filler. Work in smooth and even strokes to ensure a consistent finish.
4. Allow it to dry: Follow the recommended drying time mentioned on the sealant product. Keep in mind that drying times may vary depending on the type and brand of sealant used. It’s important not to rush this step to avoid any potential damage to the filled gap.
5. Sand and repeat: Once the first coat is dry, lightly sand the sealed area using fine-grit sandpaper. This will ensure a smooth and even surface for the next coat. Apply additional coats of sealant as needed, following the same application and drying process.
Remember, a well-sealed filled gap not only enhances the overall appearance of your wood surface but also protects it for years to come. Take your time during this final step to ensure a flawless result that will leave your project looking professional and polished.
Frequently Asked Questions On How To Use Wood Filler For Large Gaps
How Big Of A Gap Can You Fill With Wood Filler?
Wood filler can fill gaps of various sizes, depending on the specific product. However, it is typically recommended for small to medium-sized gaps up to ⅛ inch wide. Always follow the manufacturer’s instructions for best results.
What Is The Best Filler For Large Gaps In Wood?
The best filler for large gaps in wood is epoxy wood filler. It is durable and versatile, suitable for both interior and exterior use. Epoxy filler provides a strong bond and can be sanded and painted for a seamless finish.
How Do You Fill Deep Gaps In Wood?
To fill deep gaps in wood, follow these steps:
1. Clean the gap thoroughly, removing any debris or old fillers.
2. Apply a wood filler that matches the color of the wood.
3. Press the filler into the gap using a putty knife.
4. Smooth the surface and let it dry.
5. Sand the area to achieve a smooth finish.
How Do You Fill A 2 Inch Hole In Wood?
To fill a 2-inch hole in wood, follow these steps:
1. Clean the hole to remove any debris or loose wood particles.
2. Apply wood filler to the hole, ensuring it’s level with the surface.
3. Smooth the filler using a putty knife or a similar tool.
4. Let it dry as per the product instructions.
5. Sand the filled area until it’s smooth, and then finish with paint or stain if desired.
Conclusion
Using wood filler for large gaps is a practical and effective solution for restoring the appearance and functionality of wooden surfaces. By following the step-by-step process and selecting the appropriate filler, you can seamlessly repair and enhance your woodwork. Embrace the versatility of wood filler and watch your projects come to life with smooth, professional results.