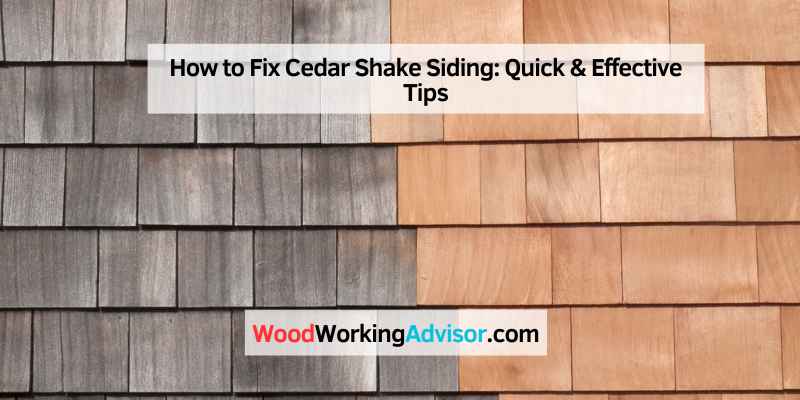
How to Fix Cedar Shake Siding: Quick & Effective Tips
To fix cedar shake siding, replace damaged shakes and secure loose ones with galvanized nails. Seal any gaps with exterior wood filler.
Cedar shake siding adds rustic charm to homes but requires proper maintenance. Over time, weather and wear can cause damage. Regular inspection helps identify issues like cracks, warping, or loose shakes. Fixing these problems early prevents further deterioration and costly repairs.
Use high-quality materials and tools for a durable fix. Proper sealing and painting protect the wood from moisture and pests. With attention to detail and timely repairs, cedar shake siding can last for many years. Regular upkeep ensures your home remains attractive and well-protected.
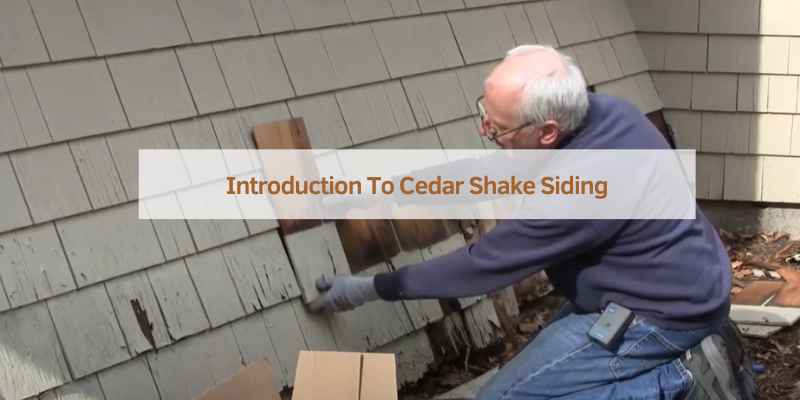
Introduction To Cedar Shake Siding
Cedar shake siding brings a natural look to homes. The wood offers a rustic and charming feel. It blends well with nature and surroundings. This siding type is also durable and long-lasting. Homeowners love its unique, weathered appearance. Cedar shakes also provide good insulation. This helps keep homes warmer in winter and cooler in summer. The wood’s natural oils make it resistant to decay and insects.
Cedar shakes can face some common issues. Cracking is a problem due to weather changes. Warping happens when the wood gets wet and dries repeatedly. Rot can occur if the shakes stay wet for long periods. Insect damage is possible, even though cedar is resistant. Discoloration can happen due to sun exposure. Moss and algae can grow on the shakes in damp areas. Regular maintenance helps in preventing these issues.
Assessing The Damage
Look for cracks and splits in the cedar shakes. These can allow water to seep in. Check for signs of rot and mold. These are usually dark spots or soft wood. Notice any loose or missing shakes. These gaps need fixing. Inspect the edges and corners for wear and tear. These areas often get damaged first.
Repair small cracks and splits to prevent further damage. Use wood filler for this job. Replace shakes with extensive rot. These cannot be fixed. Loose shakes can be re-nailed. Make sure they are secure. Replace missing shakes immediately to protect your home. New shakes should match the old ones.
Preparation For Repairs
Preparing for repairs involves gathering essential tools and materials. Inspect the cedar shake siding for damage and remove any loose or broken pieces. Ensure the area is clean and dry before starting the repairs.
Tools And Materials Needed
You need a pry bar to remove old cedar shakes. A hammer is required to install new shakes. Galvanized nails will hold the shakes in place. A utility knife helps in cutting the shakes. Wood sealant protects the shakes. Safety glasses are important for eye protection.
Safety Precautions
Wear safety glasses to protect your eyes. Gloves will keep your hands safe. Ensure the ladder is stable before climbing. Clear the area of any debris. Work in pairs if possible to ensure safety. Check the weather to avoid working in rain or strong winds.
Cleaning Cedar Shakes
Cedar shakes often get dirty and mildewed. Use a soft brush to scrub away dirt. Mix water and mild detergent to clean the surface. Rinse with clean water to remove soap. For mildew, mix one part bleach with three parts water. Apply the solution and let it sit for 15 minutes. Rinse thoroughly with water. Always wear protective gloves and goggles. Keep children and pets away during cleaning.
Some cleaning solutions work better than others. Oxygen bleach is safe for the environment. It removes stains and mildew effectively. White vinegar is another good choice. It is natural and safe for cedar. Hydrogen peroxide also works well. It cleans without damaging the wood. Always test a small area first. This ensures the solution does not harm the wood. Follow instructions on product labels for best results.
Repairing Cracks And Splits
Clean the crack area with a brush. Make sure there is no dust. Apply a quality sealant to the crack. Use a caulking gun for better control. Smooth the sealant with a putty knife. Let it dry for at least 24 hours. Check the sealant after drying to ensure it has filled the crack.
For larger splits, use wood glue. Apply the glue to the split area. Press the split sides together. Use clamps to hold the sides in place. Let the glue dry for 24 hours. After drying, remove the clamps. Sand the area gently to smooth out any rough edges. Check the repair for stability before finishing.
Replacing Damaged Shakes
Start by locating the damaged shakes. Use a hammer and chisel to remove them. Take care not to damage nearby shakes. Pry the old shake out carefully. If needed, cut the nails holding it in place. Remove all fragments of the old shake.
Measure the space for the new shake. Cut the new shake to fit. Slide the new shake into place. Align it with the other shakes. Secure the new shake with galvanized nails. Make sure the nails are flush with the shake. Apply wood preservative to the new shake. This helps it last longer.
Preventative Measures
Regular inspections and timely repairs help maintain cedar shake siding. Replace damaged shakes and clean debris to prevent deterioration.
Regular Maintenance Tips
Inspect the cedar shake siding often. Look for cracks, splits, or mold. Clean the siding twice a year. Use a garden hose and a soft brush. Trim trees and bushes near the siding. This keeps moisture away. Check for loose or missing shakes. Replace them quickly. Keep gutters clean. This stops water from running onto the siding. Paint or stain the siding. This protects it from the weather.
Protective Treatments And Sealants
Use a high-quality wood sealant. It protects the cedar from rain and sun. Apply the sealant every few years. Choose a sealant with UV protection. This stops the wood from fading. Some sealants also have mildew and mold inhibitors. These keep the siding looking fresh. Follow the manufacturer’s instructions when applying any treatment. Use a brush or sprayer. Let the sealant dry completely.
Finishing Touches
Enhance your home’s appeal by fixing cedar shake siding with ease. Replace damaged shakes, seal gaps, and ensure proper weatherproofing for lasting beauty and protection.
Staining To Match
Stain the cedar shake siding to match the existing color. Use a high-quality stain for best results. Apply the stain evenly with a brush. Let the stain dry completely. Check for any missed spots and touch up as needed. Make sure the stain color blends well with the rest. This will give your siding a uniform look.
Ensuring Longevity And Aesthetics
Seal the cedar shake siding to protect it. Use a clear or tinted sealant. This helps the wood last longer. Inspect the siding regularly for damage. Replace any damaged shakes quickly. Keep the siding clean by washing it yearly. Avoid using harsh chemicals that can harm the wood. Regular maintenance keeps your siding looking great for years.
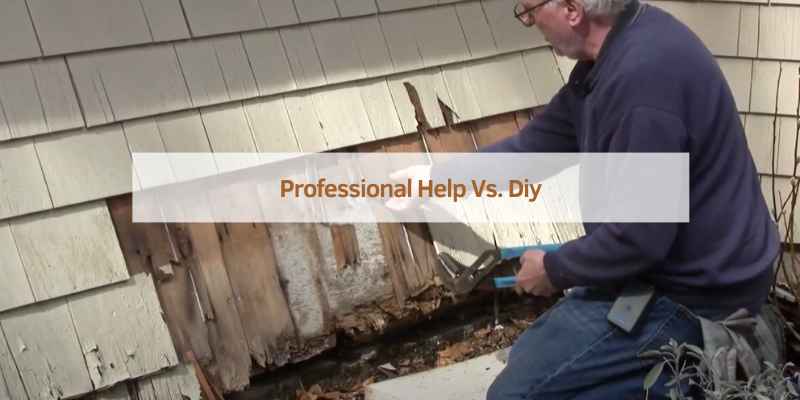
Professional Help Vs. DIY
Some repairs need expert help. Large areas of damage are tough to fix. Water damage can be tricky. Experts know how to handle it. Mold and rot need special care. Safety is a big concern. Experts have the right tools. They also know the best methods. This saves you time and stress. Hiring a pro can be worth the cost.
Professional repair offers many benefits. They do the job right the first time. This means fewer problems later. Professionals use quality materials. They also have good training. This ensures your siding lasts long. They can spot hidden issues. These might be missed by a DIY fix. Hiring a pro can add value to your home.
Frequently Asked Questions
Can You Replace Individual Cedar Shingles?
Yes, you can replace individual cedar shingles. Carefully remove the damaged shingle. Install a new one in its place. Ensure proper alignment and secure it with nails. Regular maintenance helps preserve cedar shingles’ longevity.
How To Restore Old Cedar Shake Siding?
To restore old cedar shake siding, clean with a soft brush and mild detergent. Rinse thoroughly with water. Repair any damaged shakes. Apply a wood preservative or stain to protect and rejuvenate the siding. Regular maintenance ensures longevity and appearance.
What Is The Best Tool For Removing Cedar Shakes?
The best tool for removing cedar shakes is a roofing tear-off shovel. It efficiently lifts and removes shingles.
Can You Put Siding Over Cedar Shakes?
Yes, you can put siding over cedar shakes. Ensure the existing shakes are in good condition. Properly prepare and install the new siding for best results.
Conclusion
Repairing cedar shake siding enhances your home’s appearance and longevity. Follow these steps for a durable and attractive finish. Proper maintenance saves you time and money in the long run. Keep your cedar shakes in top condition to protect your investment.
Happy renovating!