Peeling Polyurethane Floor? Sand, Clean and Recoat It Right
Quick Answer
Polyurethane peels on hardwood floors mainly because of poor surface prep (wax, silicone, or dust contamination), moisture trapped under the coat, or a recoat applied without screening the old finish. Scrape and sand back to bare wood in the affected area, clean thoroughly, then apply 2-3 fresh coats of polyurethane. Small spots can often be spot-repaired; widespread peeling usually needs a full sand-and-refinish.
If your hardwood floor has peeling polyurethane, it’s worth 5 minutes to figure out why before you grab a scraper — the cause determines whether you need a quick spot-repair or a full refinish.
To fix peeling polyurethane on hardwood floors, remove the peeling areas, sand the surface, clean it thoroughly, apply new polyurethane coats, and allow ample drying time between each coat. Proper surface preparation and using high-quality polyurethane are crucial for a successful repair.
In this guide, we cover the root causes flooring pros actually look for, how to decide between a spot-repair and a full refinish, the 10-step repair process, and how to keep polyurethane from peeling again.
Why Is Polyurethane Peeling? Root-Cause Diagnosis
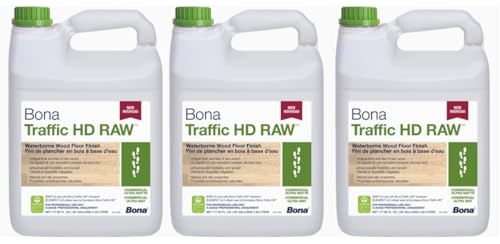
Recommended Recoat Finish
Bona Traffic HD Water-Based Floor Finish
Two-component, commercial-grade waterborne polyurethane with very low VOCs (under 125) and a roughly 2-3 hour dry time between coats — a solid step up from single-component finishes for a repaired area that needs to match a durable, high-traffic floor.
Check Price on AmazonPeeling is a symptom, not the actual problem — the National Wood Flooring Association (NWFA) and professional refinishers point to three underlying causes almost every time:
| Root Cause | Tell-Tale Sign | What It Means For The Fix |
|---|---|---|
| Surface contamination (wax, silicone, oily residue, or sanding dust) before the previous application | Peeling in patches with no clear pattern; finish lifts in sheets rather than flaking as dust | The old finish never bonded — you must sand back to bare wood in that area, not just scuff-sand |
| Moisture trapped under the coat (spills, wet mopping, humidity swings, or a damp subfloor) | Blistering or bubbling before it peels, often near kitchens, entryways, or exterior doors | Let the area dry fully and check with a moisture meter before recoating, or peeling will return |
| Recoating over an old finish without screening/scuff-sanding first | Peeling concentrated at the edges of the most recent coat, with older layers still intact underneath | Only the newest coat needs to be removed and reapplied — a good candidate for spot-repair |
The NWFA also recommends keeping indoor relative humidity between roughly 35-55% year-round; hardwood finishes cure and bond poorly outside that range, which is why peeling often shows up first near humid kitchens or dry, forced-air heated rooms in winter.
Spot-Repair vs. Full Refinish: How to Decide
- Spot-repair if peeling covers less than roughly 10-15% of the floor, is limited to one or two isolated areas (a doorway, under a rug, one plank run), and the surrounding finish is otherwise sound and well-bonded.
- Full sand-and-refinish if peeling appears in multiple rooms or in a scattered pattern, if you find blistering/bubbling (a moisture sign) alongside the peeling, or if scraping reveals bare, discolored, or water-stained wood underneath.
- Get a moisture reading first if the peeling is near a kitchen, bathroom, or exterior door — recoating over a still-damp subfloor is the single most common reason a “fixed” spot peels again within months.
10 Steps To Fix Peeling Polyurethane on Hardwood: A Step-by-step Guide
Fixing a damaged polyurethane on the hardwood has to be done carefully to avoid damage to the floor and get the expected result. To achieve that, you must trust the process.
Here is a step-by-guide explaining the sequence and procedure to fix the layer and floor.
Step 1: Assessing the Damage
Inspect the peeling areas to determine the extent of the damage. Identify any underlying issues, such as water damage or poor adhesion, using the root-cause table above.
Step 2: Preparing the Work Area
Clear the floor of furniture, rugs, and debris. Ventilate the room by opening windows or using fans. Use plastic sheets or drop cloths to protect adjacent areas from dust and debris.
Step 3: Removing the Peeling Polyurethane
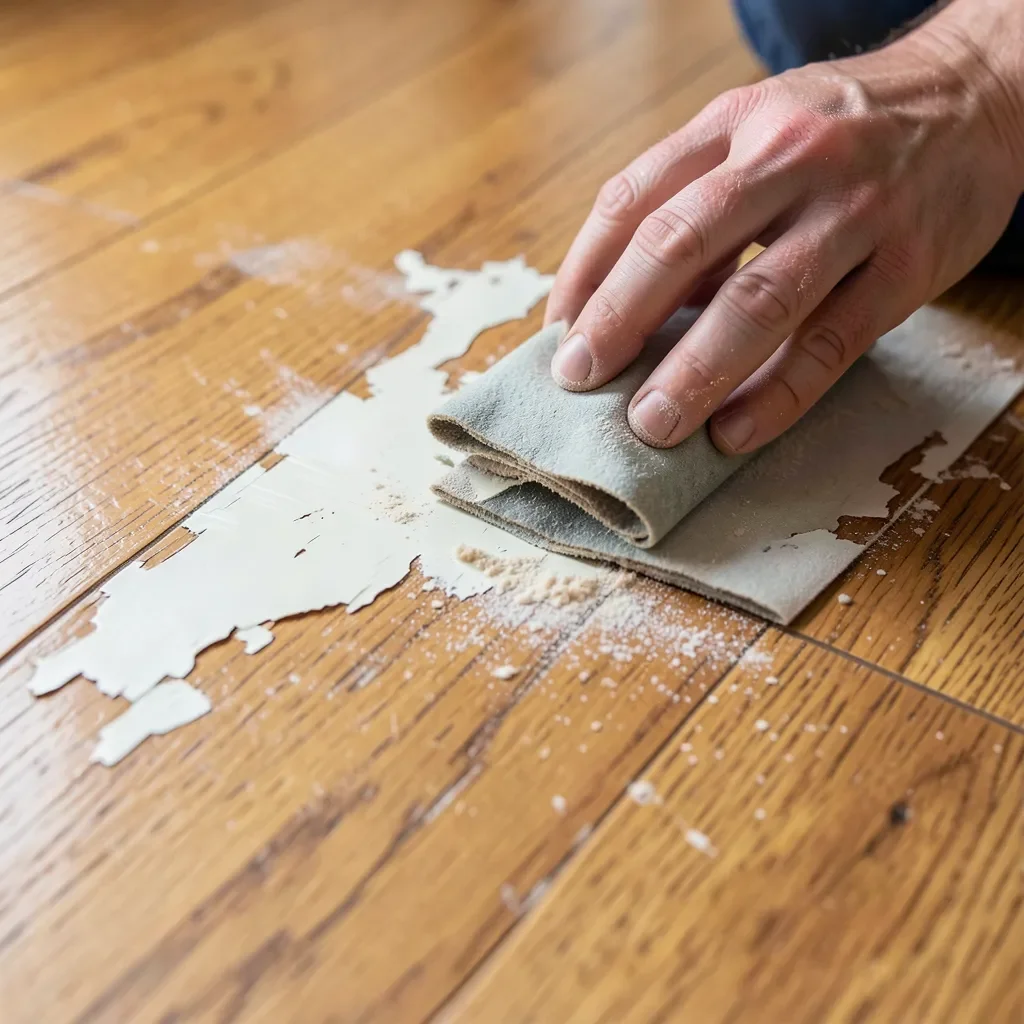
Put on protective gloves and a dust mask. Use a paint scraper or putty knife to gently scrape off the peeling polyurethane. Be careful not to damage the wood surface. If necessary, use a chemical stripper following the manufacturer’s instructions, or see our guide on how to remove polyurethane from wood floors for a full strip.
Step 4: Sanding the Surface
Attach medium-grit sandpaper (around 120-grit) to a sanding block or orbital sander. Sand the entire floor surface to remove any remaining polyurethane and smooth out imperfections. Follow the wood grain and avoid applying excessive pressure.
Step 5: Cleaning the Surface
Use a vacuum cleaner or broom to remove sanding dust and debris. Wipe the floor with a damp cloth or mop to ensure it’s clean and free of dust — any leftover dust or residue is exactly the kind of contamination that causes peeling in the first place.
Step 6: Applying New Polyurethane
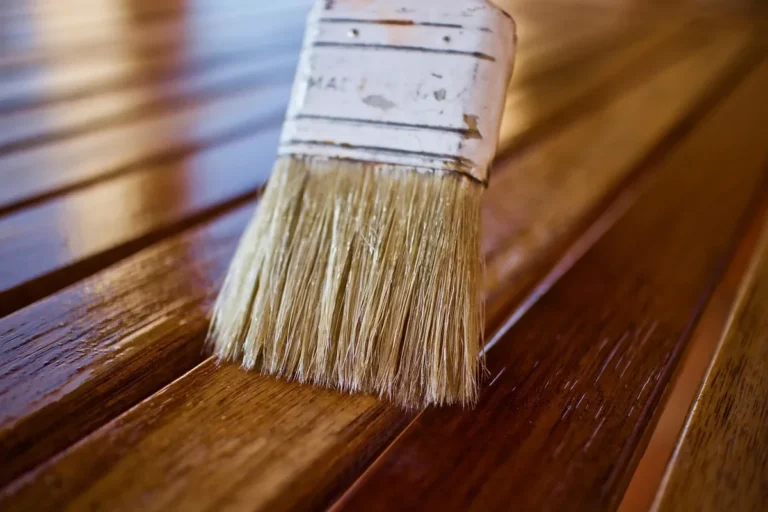
Choose a high-quality polyurethane specifically formulated for hardwood floors — see our guide to the best polyurethane for hardwood floors if you’re unsure which to buy. Stir the polyurethane gently to avoid creating bubbles. Apply the first coat using a brush or lambswool applicator, following the manufacturer’s instructions for drying time and coverage.
Step 7: Sanding between Coats
Once the first coat is dry, lightly sand the surface with fine-grit sandpaper (around 220-grit). Wipe away any dust using a damp cloth or tack cloth. This step promotes adhesion and smoothness for subsequent coats — skipping it is one of the top causes of a recoat peeling again.
Step 8: Applying Additional Coats
Apply additional coats of polyurethane following the same process as in Step 6. Generally, two to three coats are recommended for optimal durability and appearance — see how many coats of polyurethane on hardwood floors for guidance by traffic level. Sand lightly between coats for a smoother finish.
Step 9: Drying and Curing Time
Allow the final coat of polyurethane to dry completely, following the manufacturer’s instructions. Provide ample drying time before allowing foot traffic or placing furniture on the floor. Keep the room well-ventilated during the drying process.
Step 10: Buffing and Polishing
Once the polyurethane is cured, use a floor buffer or a soft cloth to buff the surface and bring out the shine. Apply a hardwood floor polish, if desired, to enhance the appearance. And it’s time to protect the finish.
Maintenance: How to Stop Polyurethane From Peeling Again
Prevention is easier than another repair. Since contamination and moisture are the two real causes of peeling, most maintenance comes down to controlling those two things.
- Clean without contaminating the finish: use a hardwood-safe cleaner and a soft mop or cloth — never wax-based products, oil soaps, or excessive water, all of which leave a residue that keeps future coats from bonding and can damage the polyurethane finish.
- Control moisture: wipe up spills immediately, avoid wet-mopping, and keep indoor humidity in the NWFA’s recommended 35-55% range with a humidifier or dehumidifier as needed.
- Protect the surface physically: use non-slip mats in entryways and high-traffic areas, and felt or rubber pads under furniture legs, to prevent the scratches and dents that let moisture and dirt work under the coat.
- Inspect and recoat proactively: check periodically for early flaking or dullness, and plan on professional screening/recoating every few years so a worn topcoat never gets contaminated enough to peel outright.
“Most finish failures on wood floors trace back to two things: something on the wood that shouldn’t be there when the finish went down, or moisture that got trapped underneath it.” — consistent with National Wood Flooring Association (NWFA) guidance on floor finish adhesion and recommended 35-55% indoor humidity for hardwood finishing.
FAQs
Can I Fix Small Areas Of Peeling Polyurethane Without Refinishing The Entire Floor?
Yes, it is possible to fix small areas of peeling polyurethane without refinishing the entire floor. You can scrape off the peeling polyurethane, sand the area, and apply a new coat of polyurethane specifically to those affected spots. However, keep in mind that achieving a seamless blend with the existing finish may be challenging.
How Can I Determine If The Polyurethane On My Hardwood Floor Is Peeling?
The easiest way to find the damage is to look for visible signs of peeling, such as flaking, bubbling, or uneven patches on the floor’s surface. If not sure, run your hand over the floor to feel for any rough or lifted areas.
Can I Simply Apply New Polyurethane Over The Peeling Areas?
No, it is essential to remove the peeling polyurethane and properly prepare the surface before applying new coats. Applying new polyurethane over peeling areas will not provide a durable or seamless finish.
What Tools Do I Need To Fix Peeling Polyurethane On Hardwood Floors?
You need quite a number of tools.
- Paint scraper or putty knife for removing the peeling polyurethane.
- Sanding block or orbital sander with medium and fine-grit sandpaper for sanding the surface.
- Vacuum cleaner or broom for cleaning up dust and debris.
- Brush or lambswool applicator for applying new polyurethane.
How Many Coats Of Polyurethane Should I Apply To Fix The Peeling Issue?
Generally, two to three coats of polyurethane are recommended for optimal durability and appearance. Follow the manufacturer’s instructions for drying time and reapplication.
How Long Does The Polyurethane Need To Dry Between Coats?
Drying times vary depending on the specific polyurethane product. Follow the manufacturer’s instructions for the recommended drying time. Typically, it can take anywhere from a few hours to a full day.
What Humidity Level Keeps Polyurethane From Peeling?
The NWFA recommends keeping indoor relative humidity between roughly 35% and 55% year-round. Outside that range, wood expands or contracts enough to stress the finish, which is a common contributor to peeling and blistering over time.
How Long Does Polyurethane Typically Last On Hardwood Floors Before It Starts To Peel?
The lifespan of polyurethane on hardwood floors can vary depending on various factors, including the quality of the initial application, maintenance practices, and the level of foot traffic the floor experiences. Generally, polyurethane can last anywhere from 5 to 10 years or more before it may begin to show signs of wear and start to peel.
Conclusion
Peeling polyurethane on hardwood floors almost always comes down to contamination, trapped moisture, or a skipped prep step — find out which one you’re dealing with, then choose a spot-repair or full refinish accordingly. By assessing the damage, preparing the work area, removing the peeling polyurethane, sanding the surface, and applying new coats of polyurethane, you can achieve a smooth and seamless finish.
While the process may take time and effort, addressing peeling polyurethane promptly — and keeping humidity and cleaning habits in check afterward — will ensure your hardwood floors regain their luster and remain resilient for years to come.
Sponsored / affiliate links. As an Amazon Associate I earn from qualifying purchases. I may earn additional commission from eligible campaigns.